

The Impact Driver Cocktail (and Mocktail!)

At the DIY Awards Bash this year we’ll be serving up a signature cocktail to our attendees, but if you’re tuning in at home and unable to be at the event IRL, you can still treat yourself to the same bev, and we even have a non-alcoholic version as well!
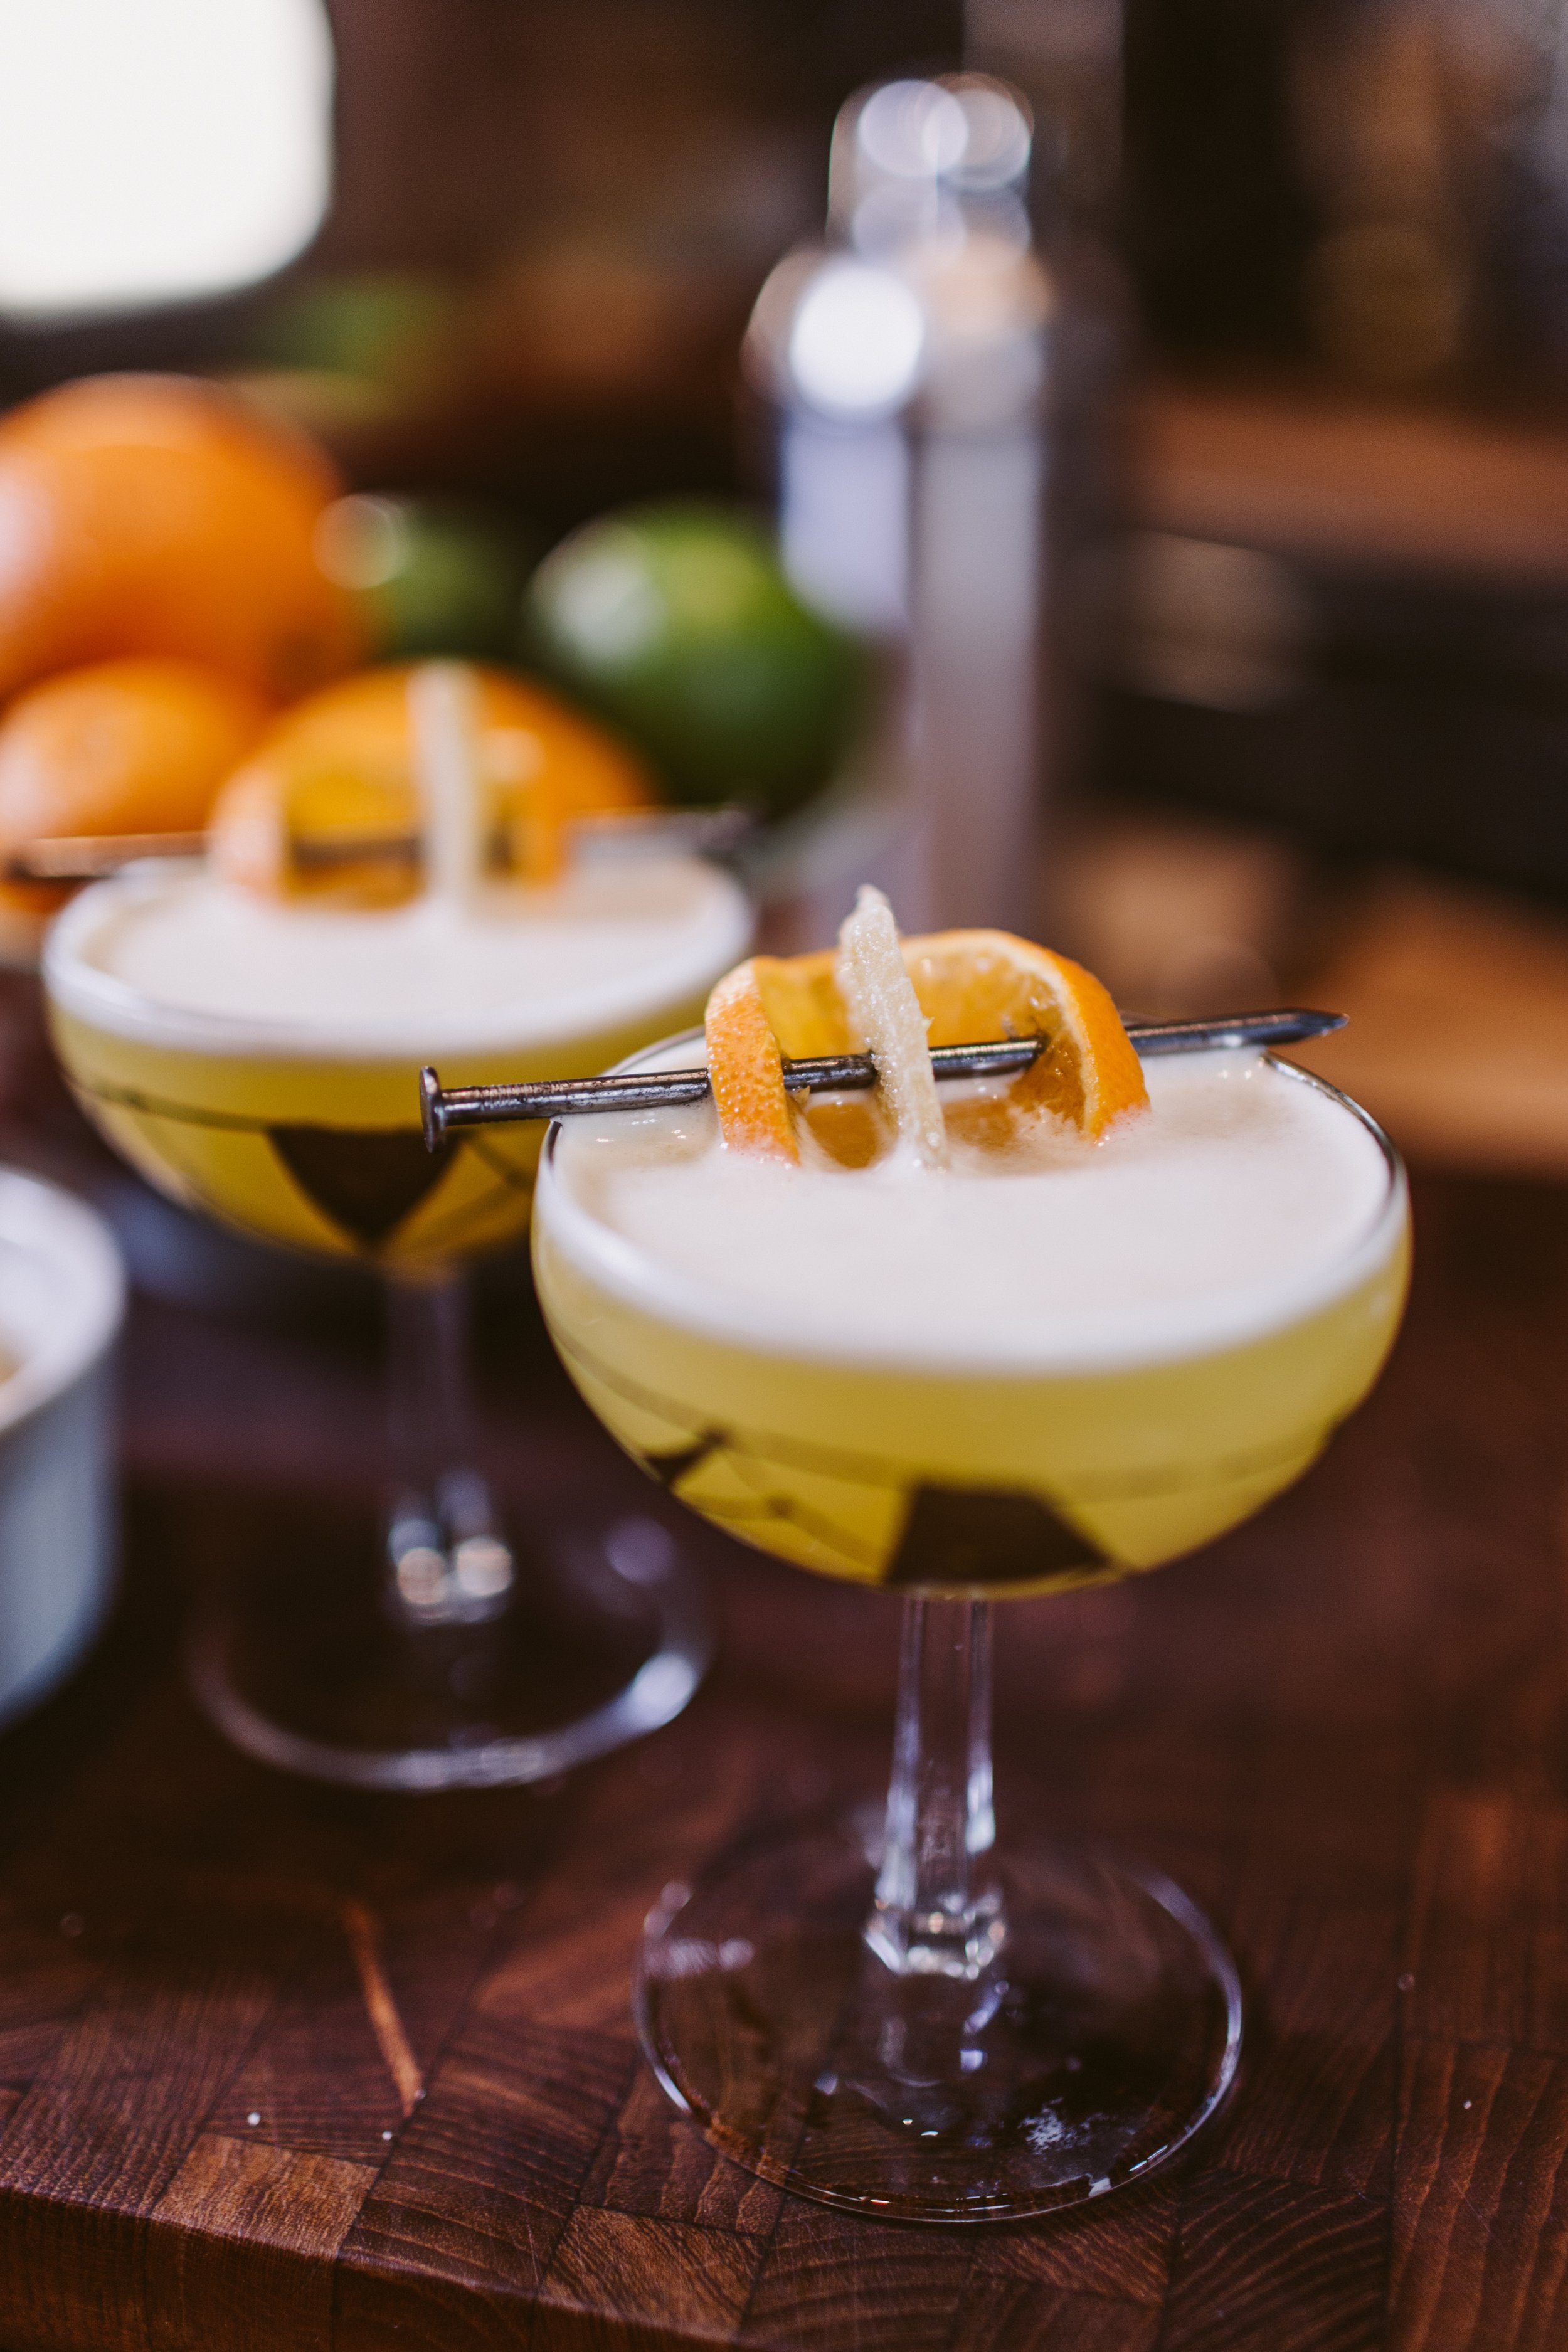
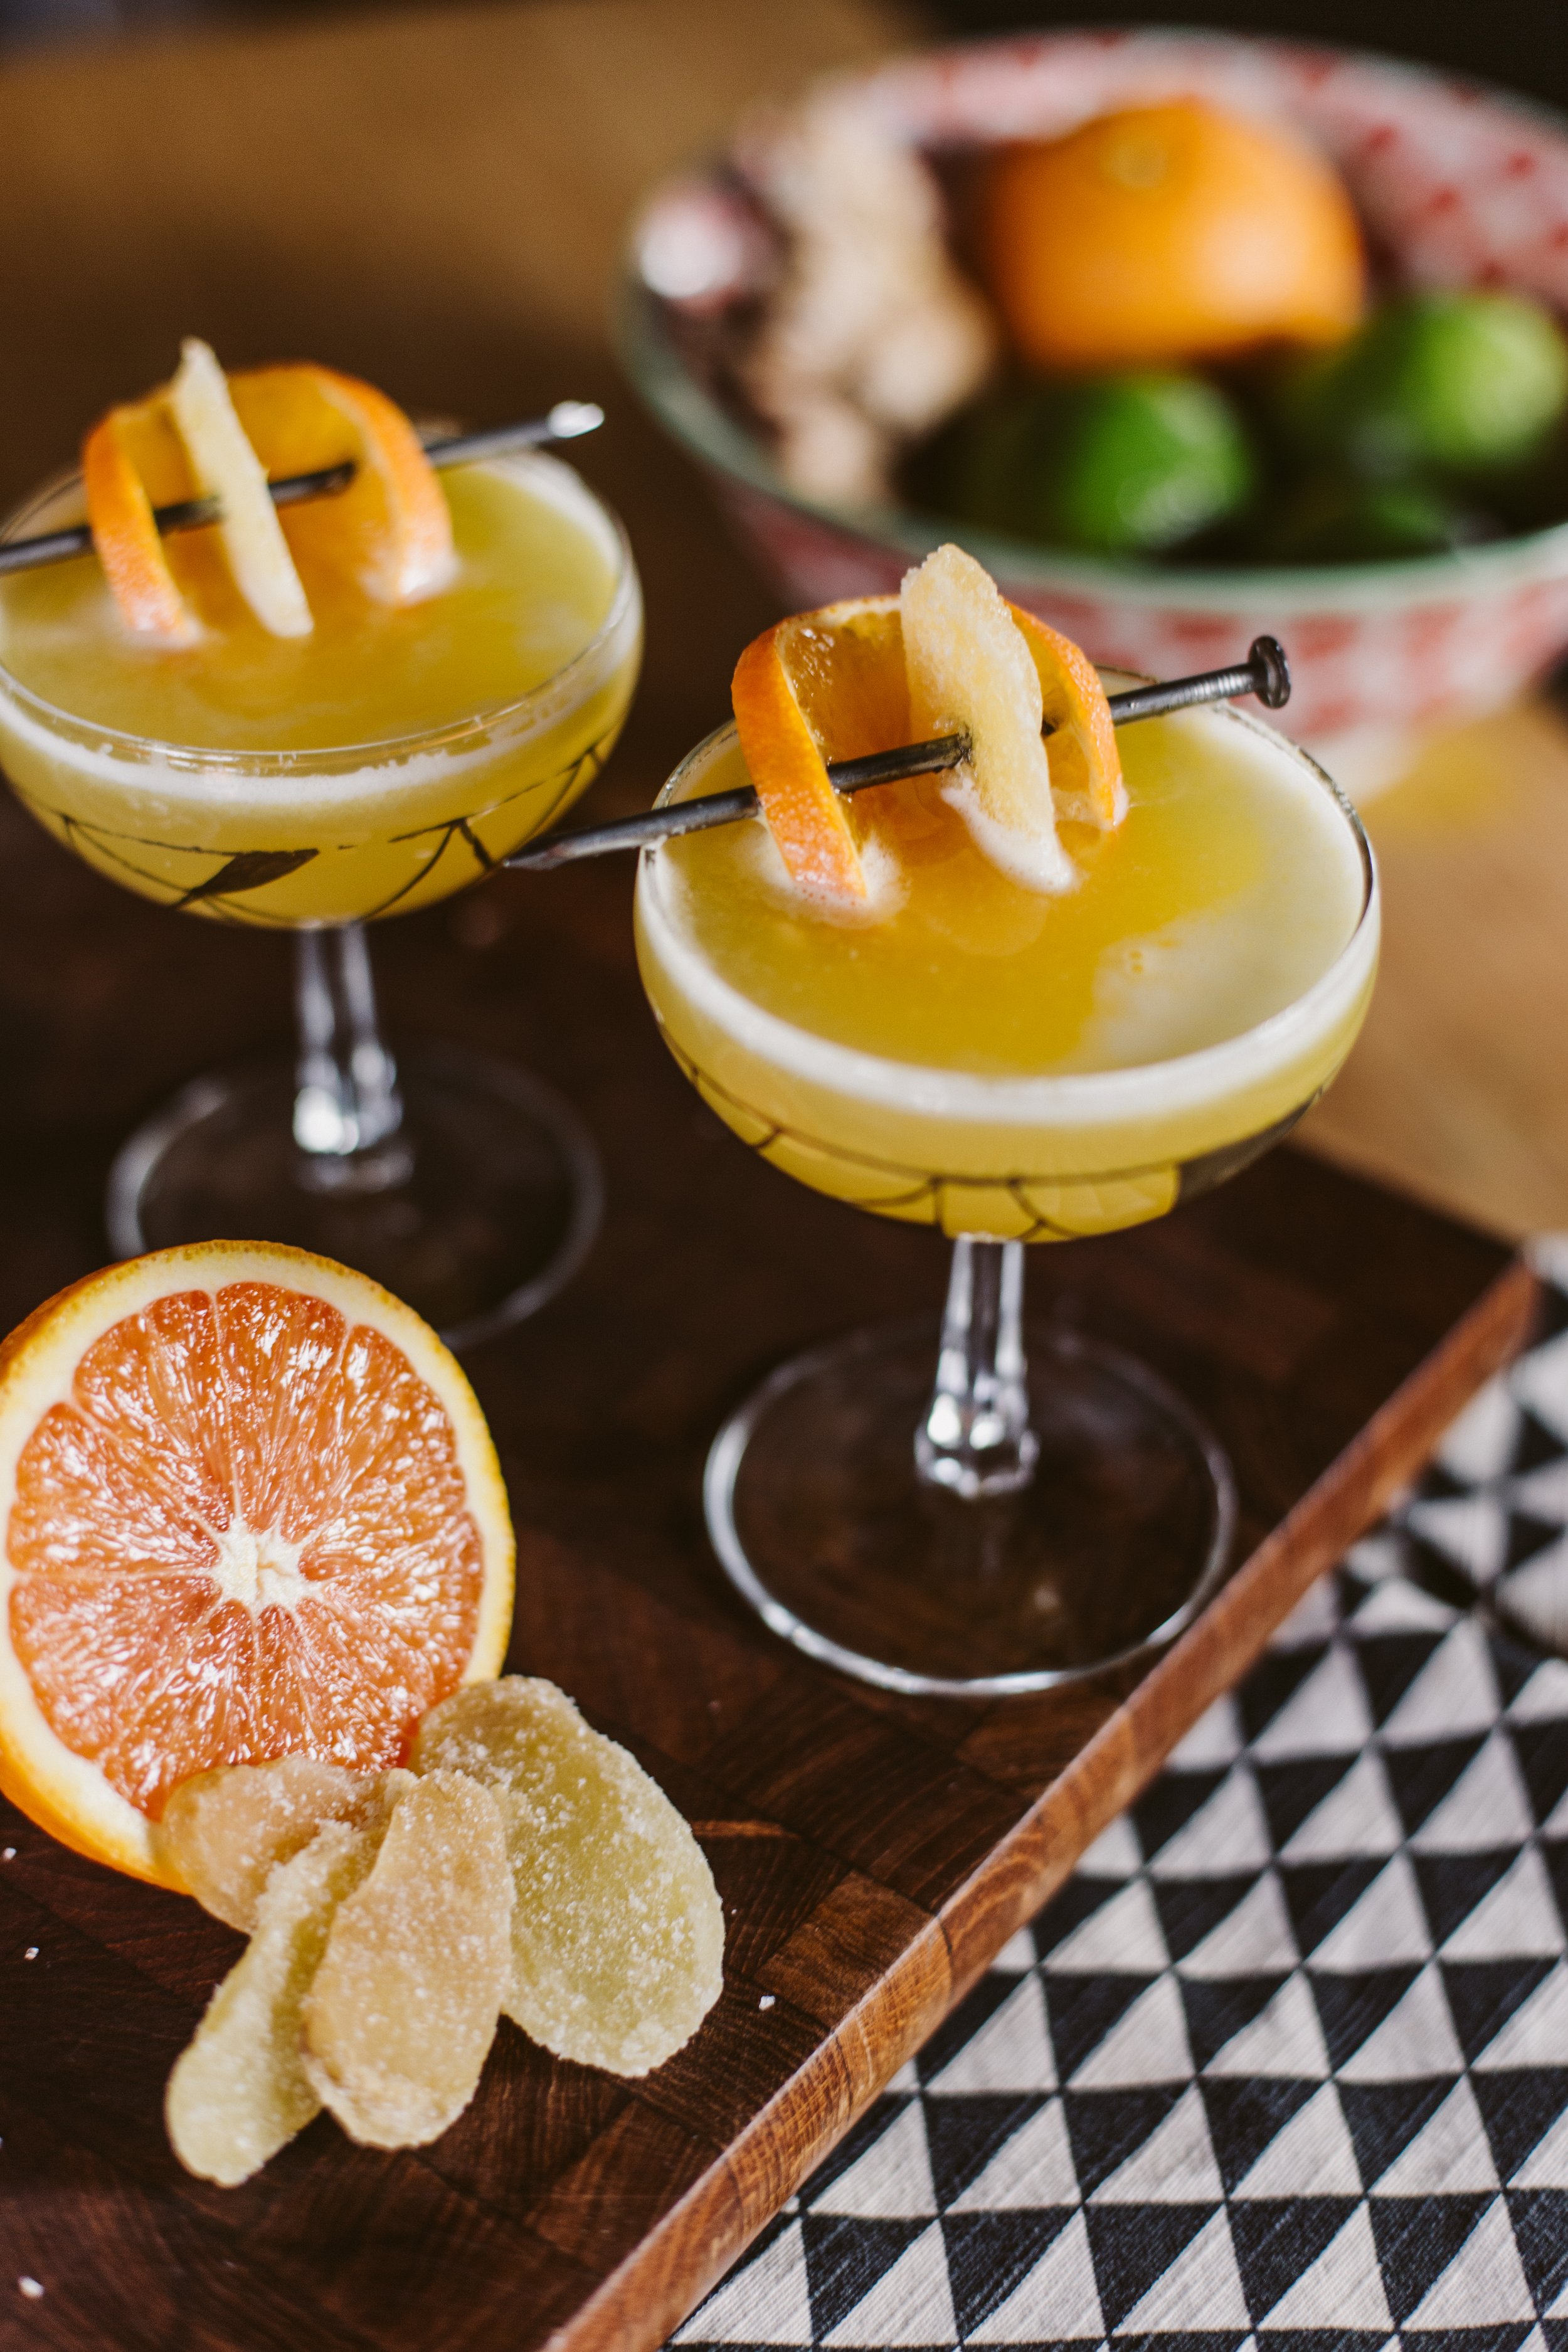
Since this is the DIY Awards signature cocktail, going with a screwdriver was an obvious choice, but TBH I think a screwdriver is a somewhat gross cocktail. So instead, I decided to come up with something with a bit more kick to it, while still maintaining its OJ and Vodka roots. We punched things up by adding some ginger and pumped up the orange with Cointreau.
Because not all of you are drinkers, I put together a mocktail version too, which gives you that orange and ginger flavor with none of the alcohol!
Peep the videos below for the tutorial!
Impact Driver Cocktail
What you’ll need (makes 2 drinks):
1.5 Tbsp Fresh Ginger - chopped
2 oz Simple Syrup
2 oz Vodka
2 oz Cointreau or Triple Sec
3 oz fresh squeeze Orange Juice
1 egg white (optional)
Cocktail shaker
Muddler
Ice
Candied Ginger
Orange Slice
Skewer
Coupe glass
1/ Muddle the fresh ginger in the bottom of the cocktail shaker
2/ Add your simple syrup, vodka, Cointreau, Orange Juice, and egg white. Add ice and shake!
3/ Divide equally between two coupe glasses
4/ Garnish with a skewered orange slice and candied ginger


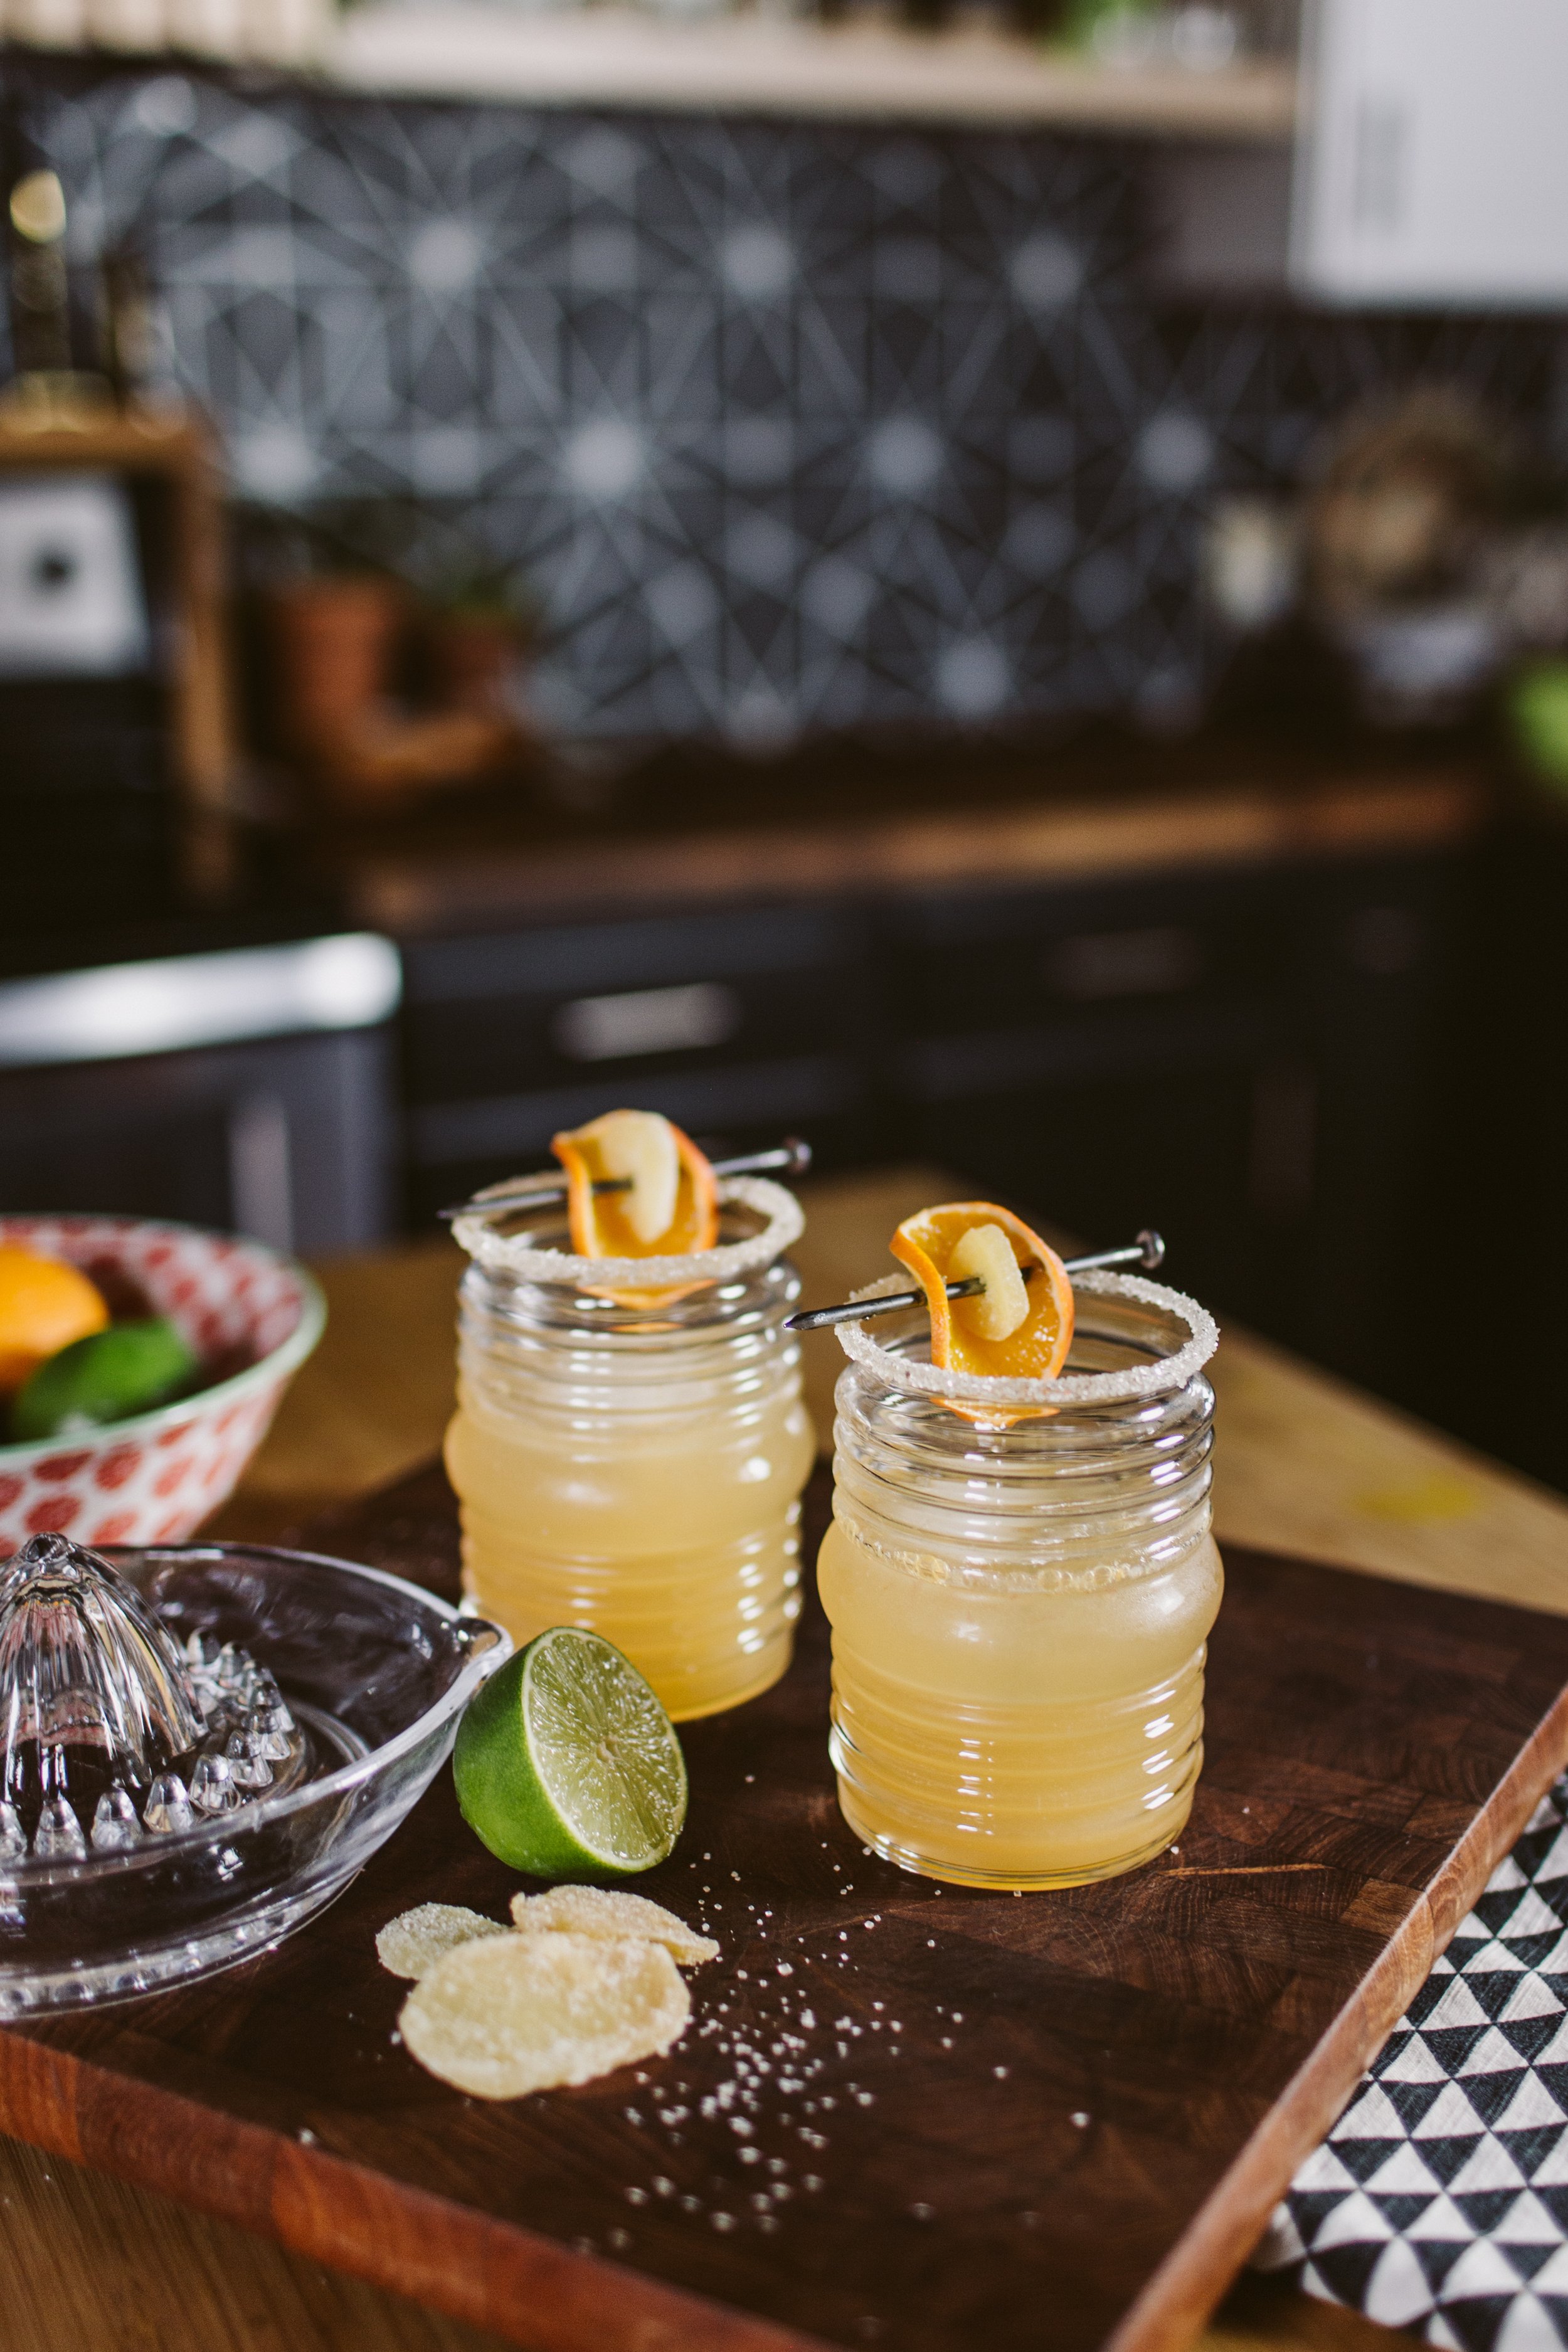
Impact Driver Mocktail
What you’ll need (makes 1 drink):
1 oz Orgeat Syrup
1 oz Lime Juice
1 oz fresh squeeze Orange Juice
Ginger Beer
Big Ice
Lowball glass
1/ Rub the rim of your glass with an orange slice, then dip it in cane sugar for the sugar rim
2/ Add the big ice to the glass (a few cubes of regular ice work too!). Pour in your orange and lime juice as well as the Orgeat Syrup. Give it a spin to mix.
3/ Top with Ginger beer (we used 1/2 bottle of Cock + Bull Ginger Beer for each drink)
4/ If you’d like, you can add the same skewer garnish as the cocktail version!
Enjoy!


I'm... giving up DIY
I've spent my entire life DIYing nearly everything. Does my DIY impulse have any limits? I don't know, I once removed my own stitches to avoid having to go back to the doctor, soooo…
But this year has revealed to me that by insisting on doing literally everything myself has totally overloaded my bandwidth and is ultimately unhealthy. So, the past few months I've been working on implementing things that can make my life a little easier, take things off my plate, and handle the things that I cannot do.
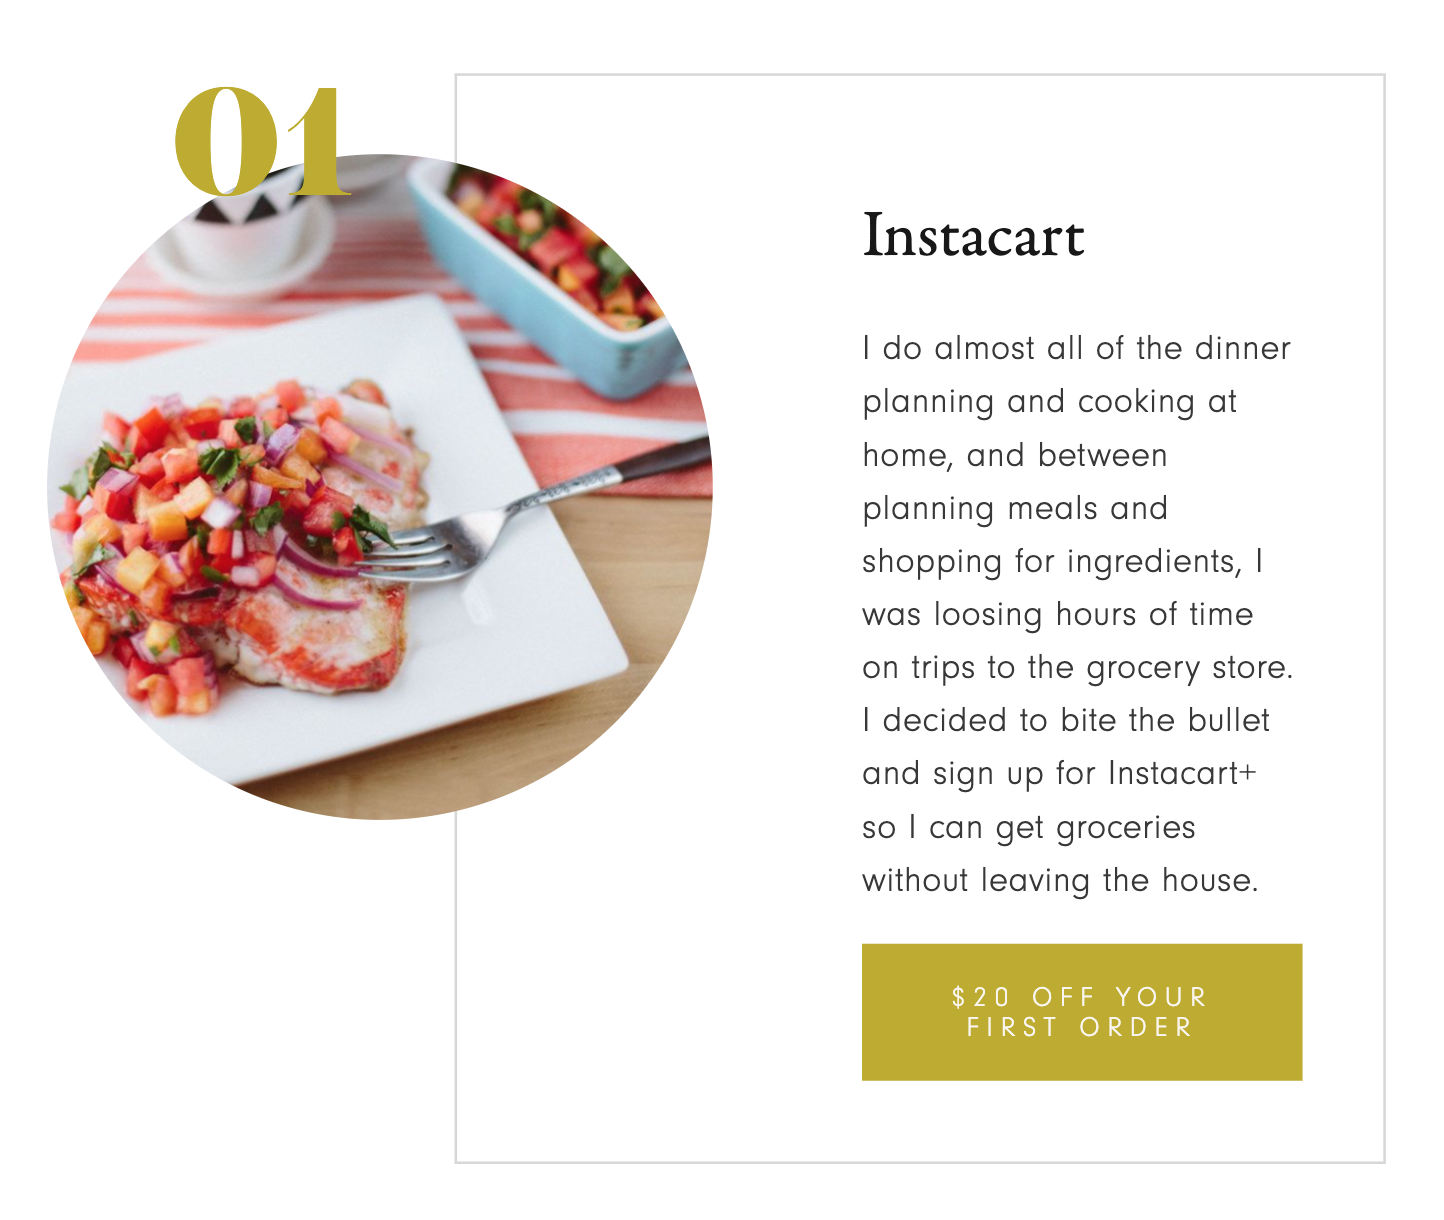
I do a lot of things. On top of the full-time gig of creating content that revolves around home renovation (which sometimes feels like 2 full-time jobs), I also take on a lot of the full-time responsibilities of being a mom and homemaker. “Liz… that sounds like… a lot? How do you do it all?” Oh, how nice of you to ask! Well, my previous method was to just grind until I burned out, which didn't seem like a great cycle to keep churning out, so here are a few things I'm doing to take more off my plate, help me manage my household, and take care of myself.
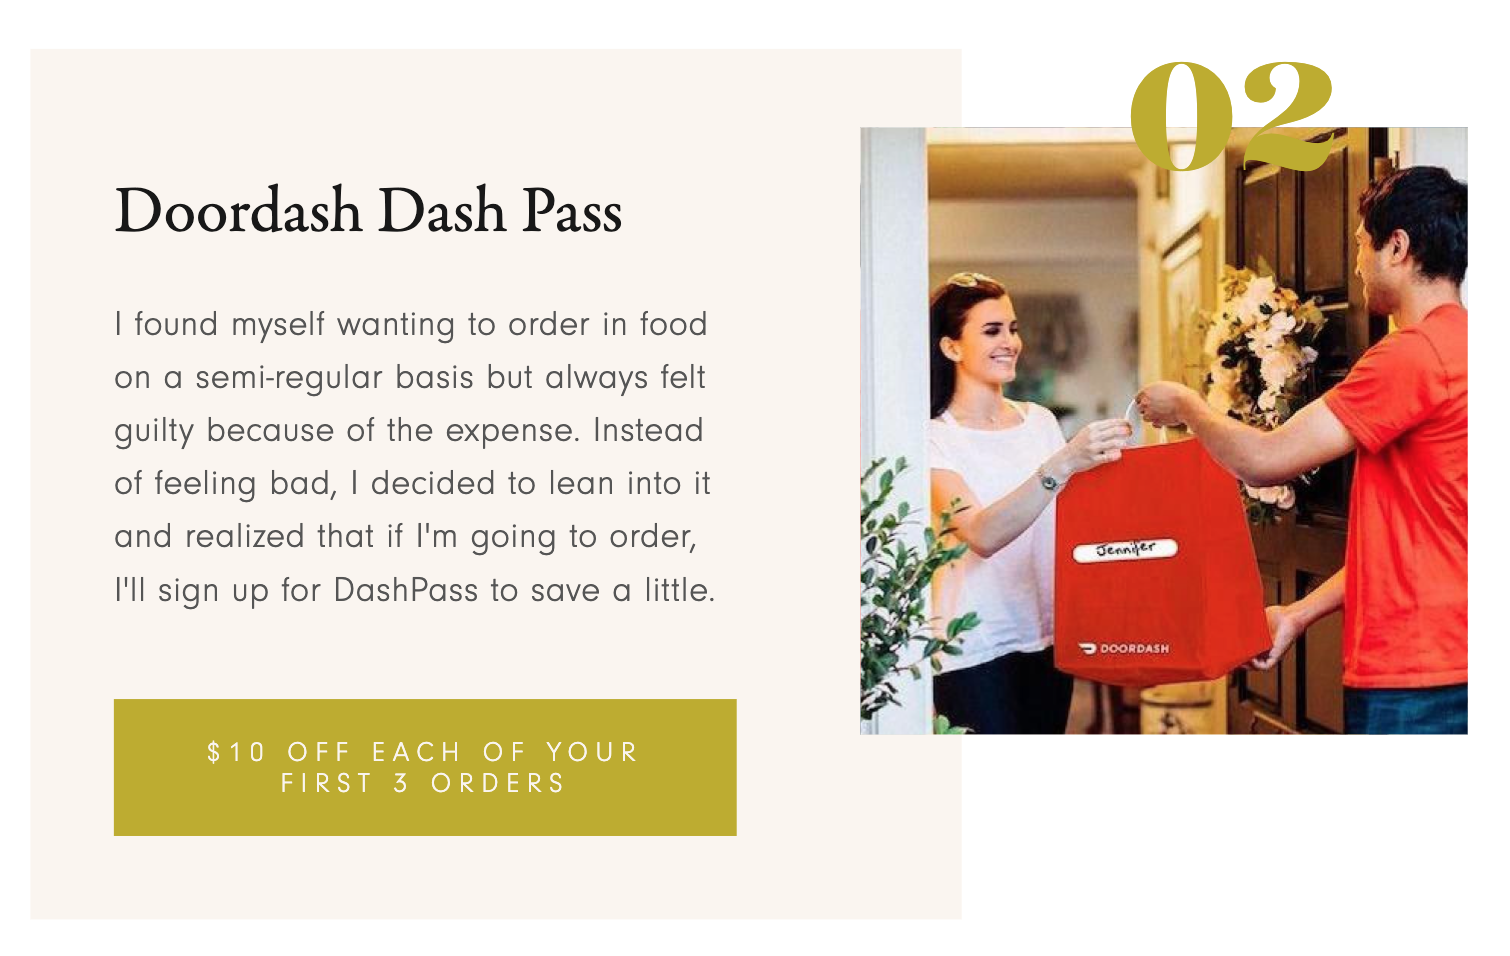


Will I be DIYing stuff on my house? Absolutely. But the reality is, there just isn't enough ME to DIY EVERYTHING. And I've been trying (and failing) for way too long. Something's gotta give, and it has. I don't take care of my mental or physical health because I'm too busy DIYing every nook and cranny of my life. It's too much, it's not working, and it's not healthy. So, in 2023, we're not DIYing everything anymore. We're creating healthy balance, we're outsourcing, we're able to focus more on the areas of life that we're excellent at and love doing and bringing in HELP (what a novel concept) in the areas that don't fit that bill.
We can do anything, but not everything.
We can do anything, but not everything.
Okay, let's do this

The 2022 DIY Awards

It's time! The third annual DIY awards, celebrating the amazing women in DIY that inspire us all, is HERE!
Having a community of fellow women out there totally killin’ it shows us what's possible, keeps us inspired, motivated, and excited to keep turning our houses into dream homes, one DIY at a time.
WAIT... WHAT THE HECK ARE THE DIY AWARDS?
The DIY Awards is an annual event celebrating women who have been rocking the DIY space over the past year.
It's a community-based event, with all of the nominees being submitted by DIY creators and enthusiasts across Instagram, in a variety of categories like Best DIYer on a Budget, Best Paint Transformation, Best Rental DIYer, and more.
The top 10 creators in each category move on to the semifinal voting, then the top 5 go to the finals.
It all culminates in a live Awards Ceremony to present the winners with their trophies!
YOU ARE INVITED
〰️
YOU ARE INVITED 〰️
YES, YOU!!
I don't care if you have an instagram dedicated to your DIY projects or full of daily life and your kiddos. I don't care if you have a garage full of power tools, or a single hammer. YOU are invited to the 2022 DIY Award Ceremony Bash!
Okay, what even is that?
The past two years the awards ceremony, where we announce the winners of each award, has been online via Instagram Live. But here's the thing: having a reason to get together and celebrate IRL? That's where it's at.
I want to be clear that this event is NOT exclusive to influencers. This event is for anyone who loves DIY, loves being a part of the DIY community online, and wants to come celebrate.
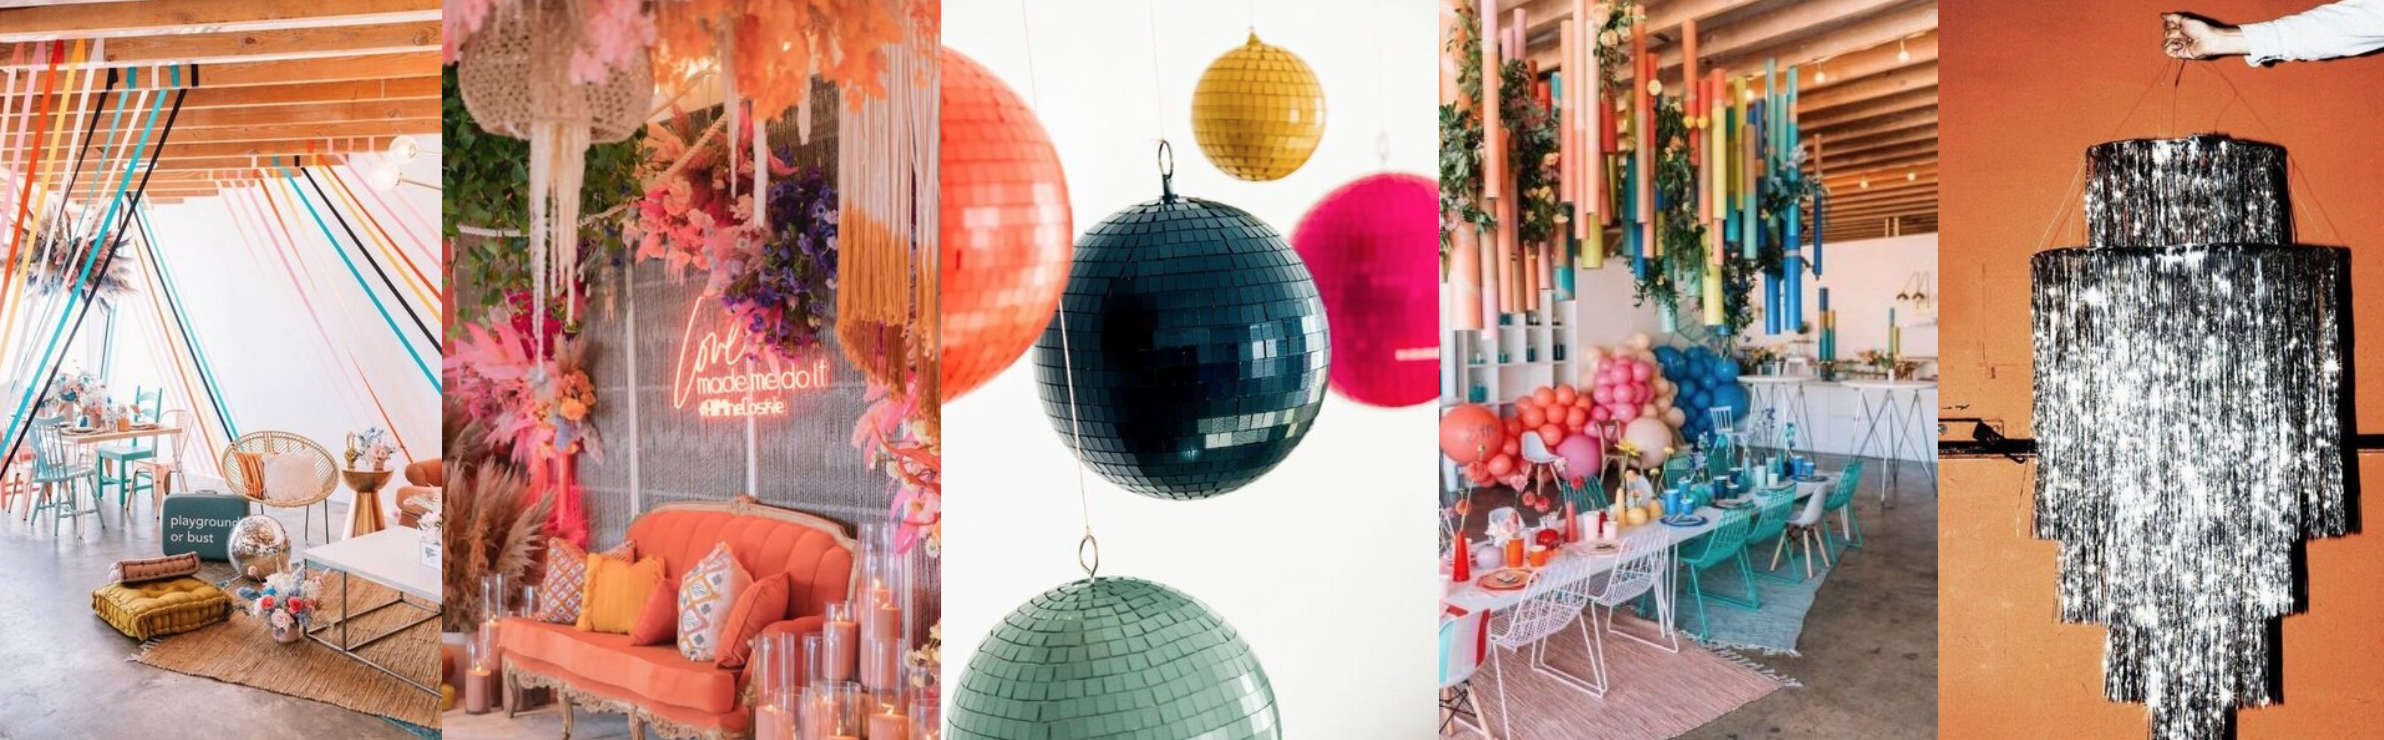
We'll have a DIY Dress-making competition, red carpet so you can feel like a DIY celeb, DIY themed cocktails, photobooth, mini tattoo station, brand activity booths, the Awards trophy presentation (obvi), sweet swag bags full of stuff you actually want, and dancing
DIY AWARDS BASH
JANUARY 28, 2023 | TACOMA, WA


Halloween Party Time!

In early October Jack begged me to have a halloween party and being one who loves putting a party together I said “of course!” and then as October 31st approached I was like ehhhhhhhhh. And then a couple days before Halloween my friends were like, “hey, didn’t you say you were having a Halloween party? We were planning on coming!” and so then I pulled a party together in two days.
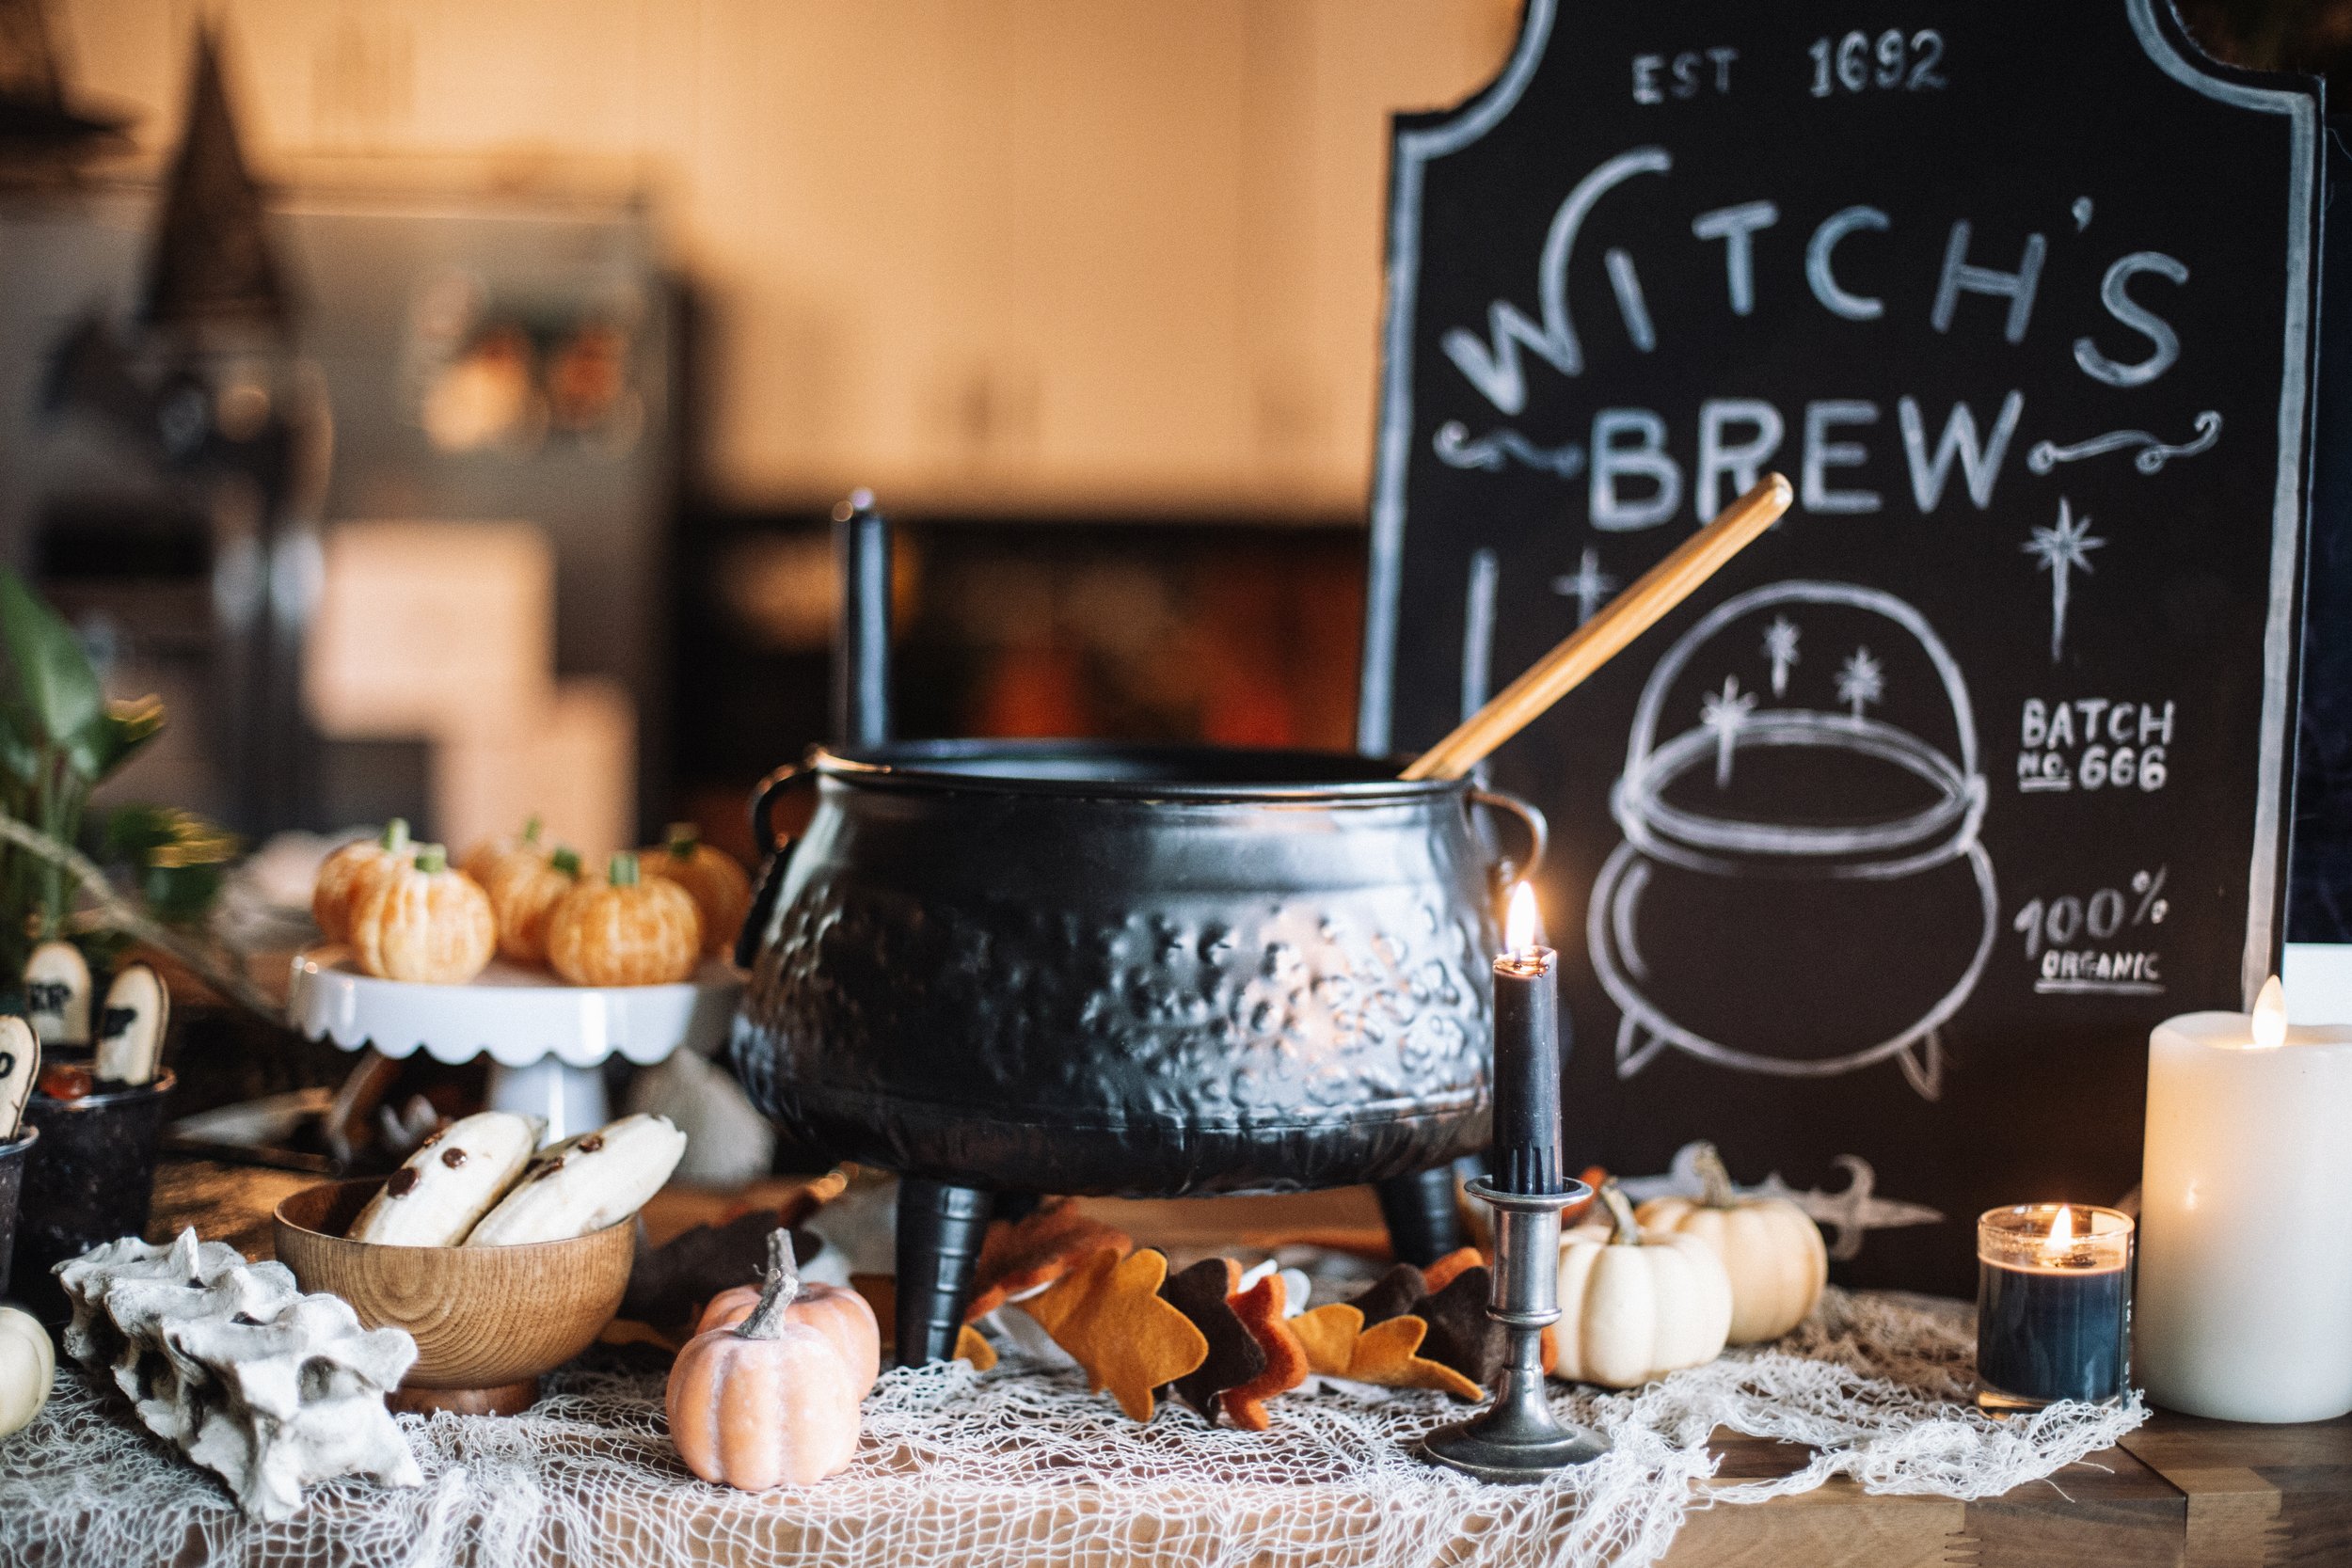


A few of these snack ideas I’d had pinned for close to a decade, so it was fun to finally make them! I have appx 20 ghost bananas leftover so I think banana bread and banana smoothies are in my future, lol. I still can’t get over how cute the tangerine/celery pumpkins are. I think pretty much all of these snacks are over on my Autumn Pinterest board so if you want those details head over there!


DIY pergola build with LINX Pergola
Thanks to LINX Pergola for sponsoring this post

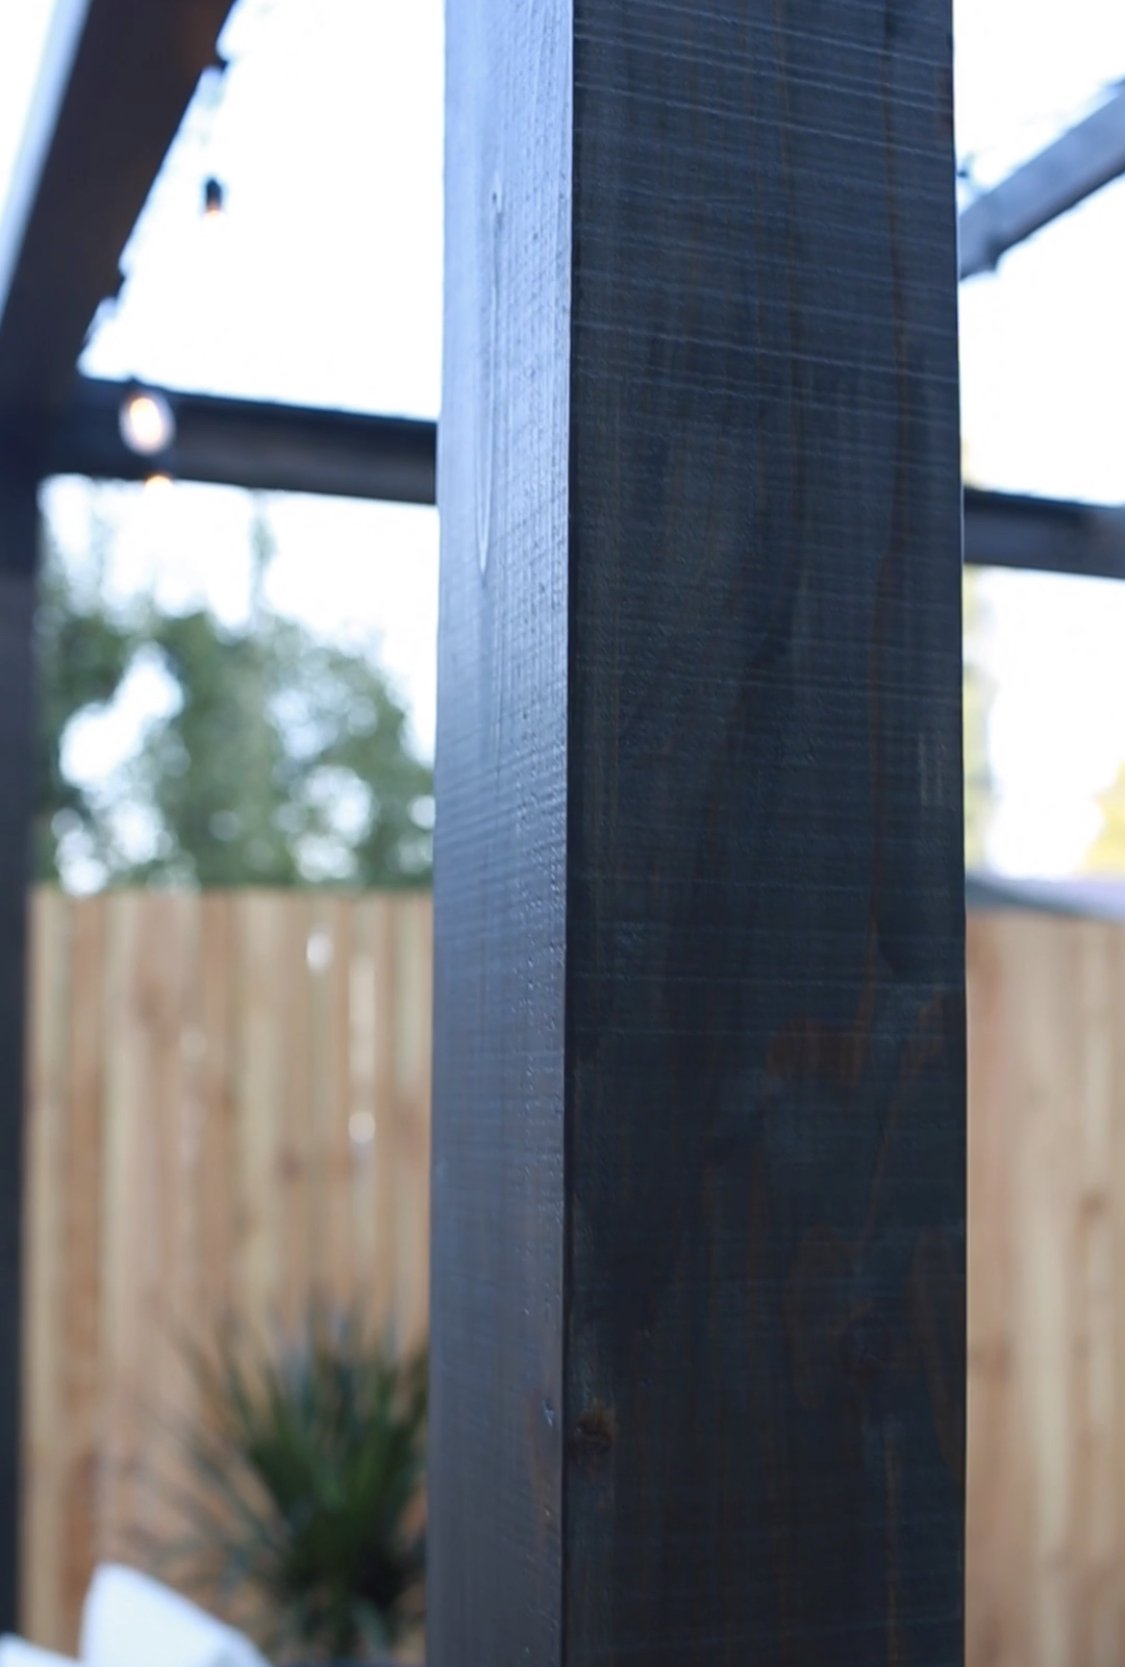
The perfect DIY pergola system doesn’t exi— just kidding, I totally found it, y’all. The most important part of this build was finding the right bracket system. I knew I wanted something simple, modern, and DIY friendly and when I came across LINX Pergola, I was immediately intrigued. Not only did LINX have the brackets that fit my vision, they also had their STIX engineered hollow timbers. They work perfectly with the brackets, are lighter than standard lumber, and can be used to hide cords for lighting.
Using LINX took a ton of guesswork out of building a pergola, the instructions were easy to understand and follow, and it was also super easy to create something totally custom because of how versatile all their different brackets are.
Lets go through how I designed and built my pergola.
Materials + Tools:
4 LINX UNIFIT base brackets
4 LINX TRIFIT corner brackets
2 12ft STIX 6x6 timbers
6 8ft STIX 6x6 timbers
1 gal Behr semi-transparent stain in Slate
4 36x96in Wild Hog fence panels
2 6ft Wild Hog Hog Tracks kits
3 8ft cedar 2x4s
6 2x4 joist hanger brackets
16 1/4 x 4 1/2in concrete expansion anchors
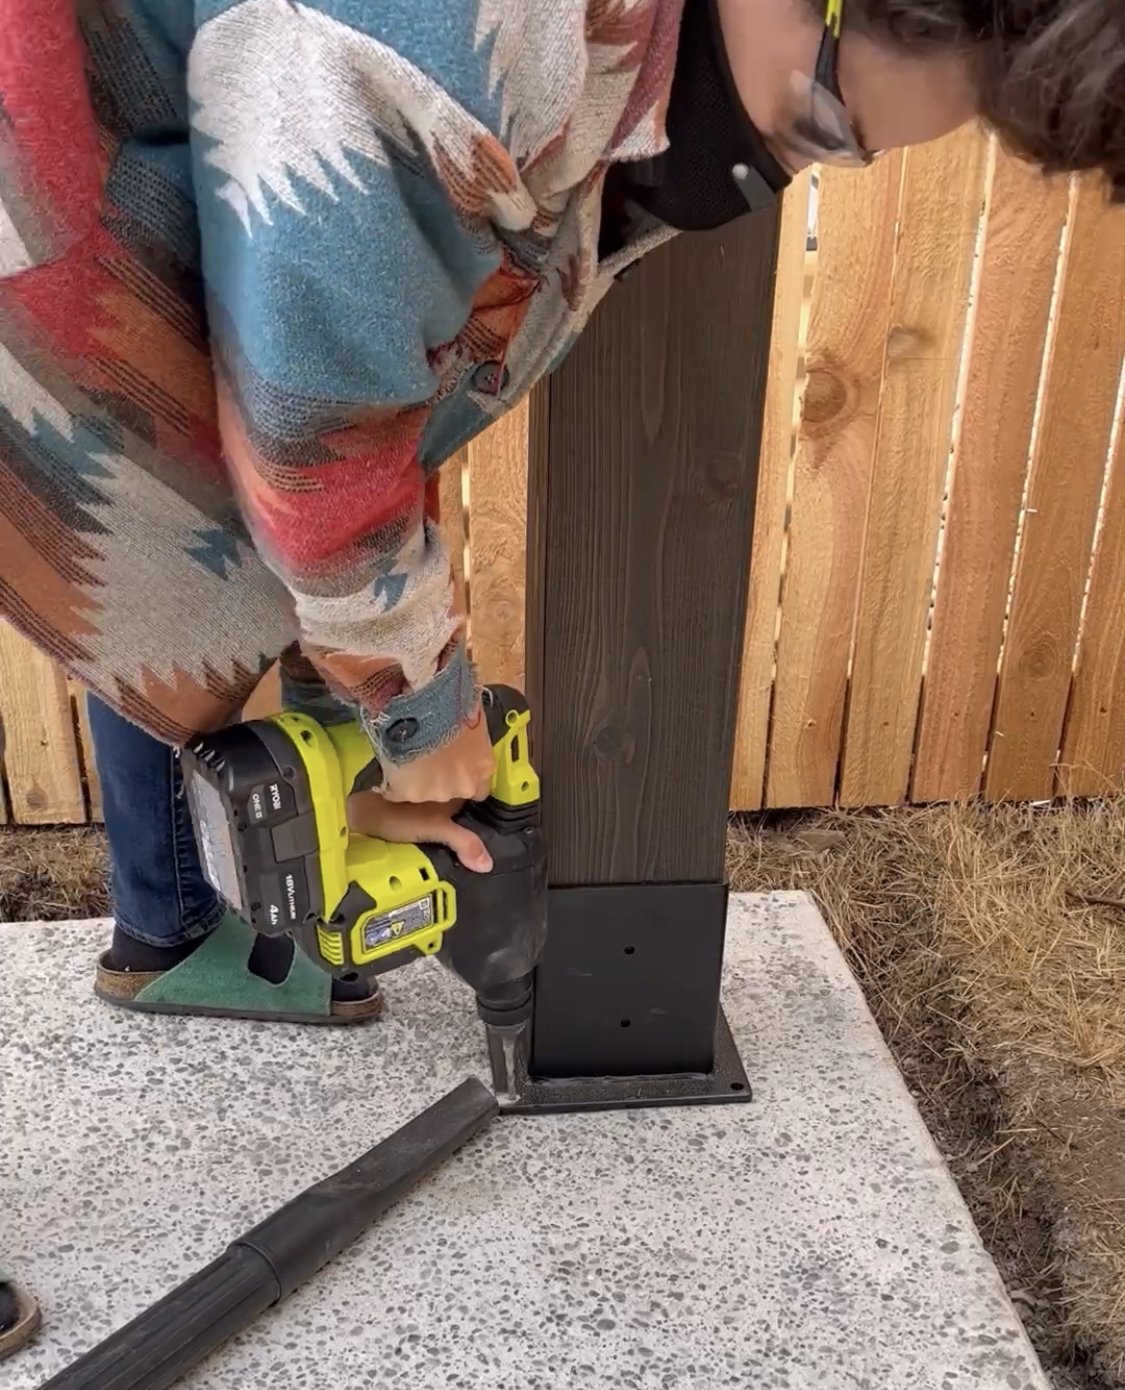
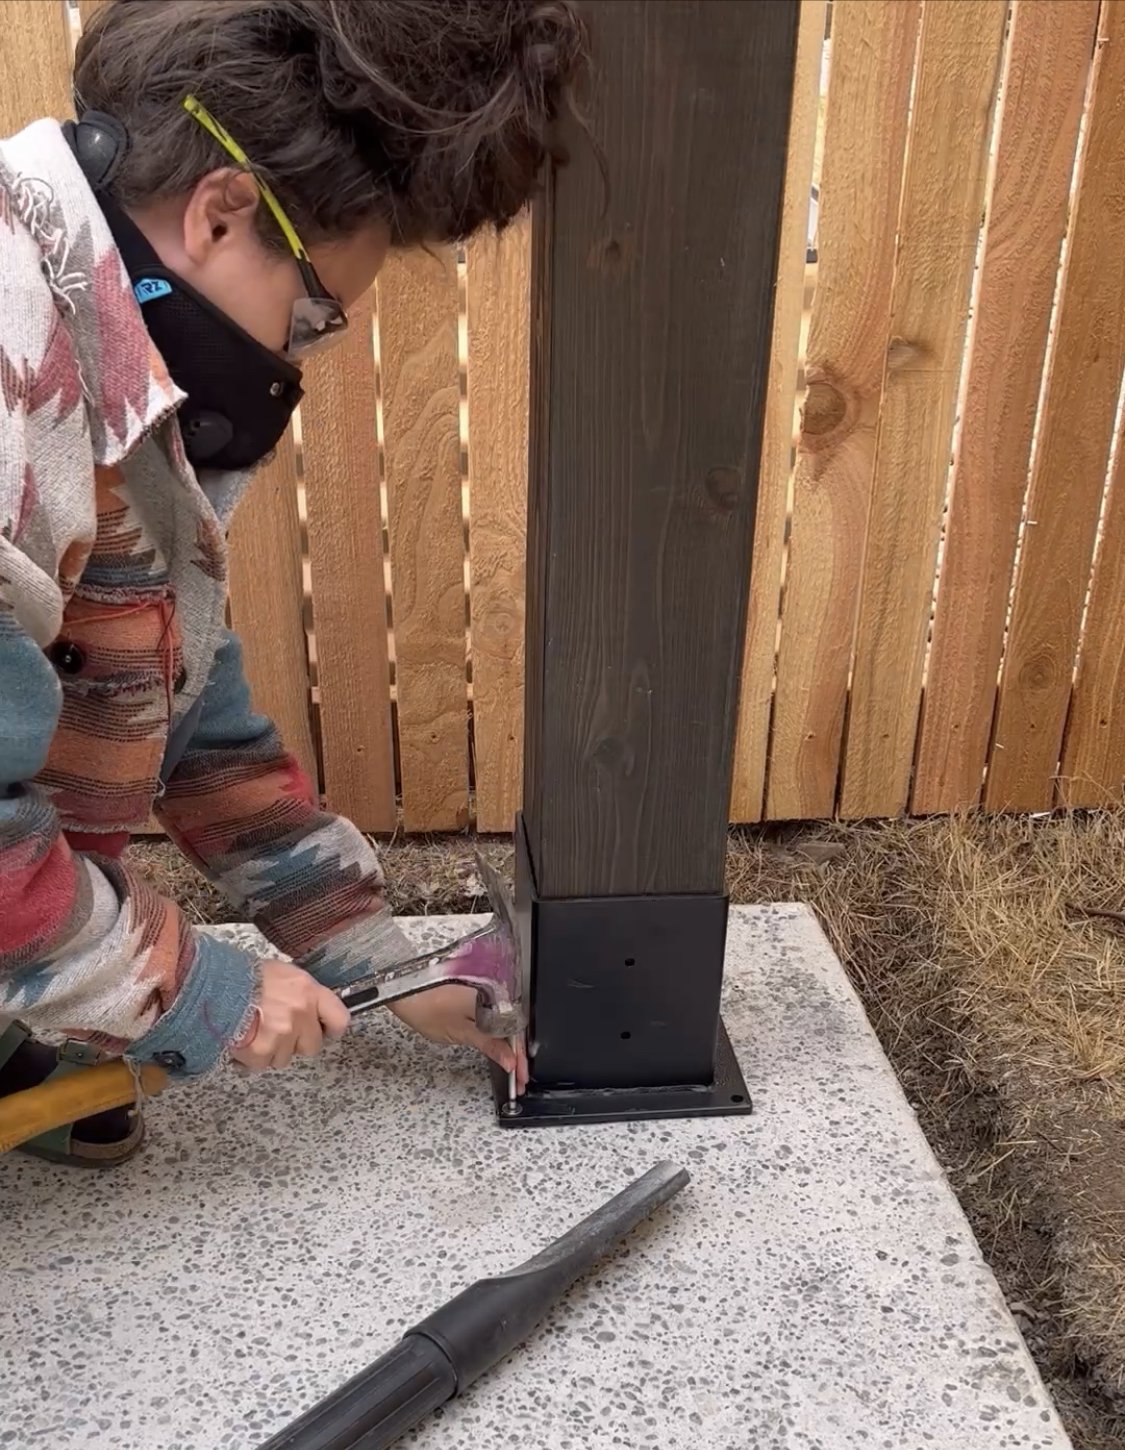
Impact Driver
Rotary Hammer
I knew I wanted enough space for a sectional and some lounge chairs on our patio, so I wanted a pergola that was about 8ft by 12ft. Because the posts are 6x6, that added 1ft to the total length and width of the pergola, and when we poured our concrete patio, we made it an additional foot larger to give 6 inches of space on the outside of the pergola.
With the fencing and furniture having a lot of very warm wood tones, I didn’t want the pergola to disappear into the background, so I stained the timbers an off black color, the color Slate in Behr’s semi-transparent deck stain, to complete the modern look.
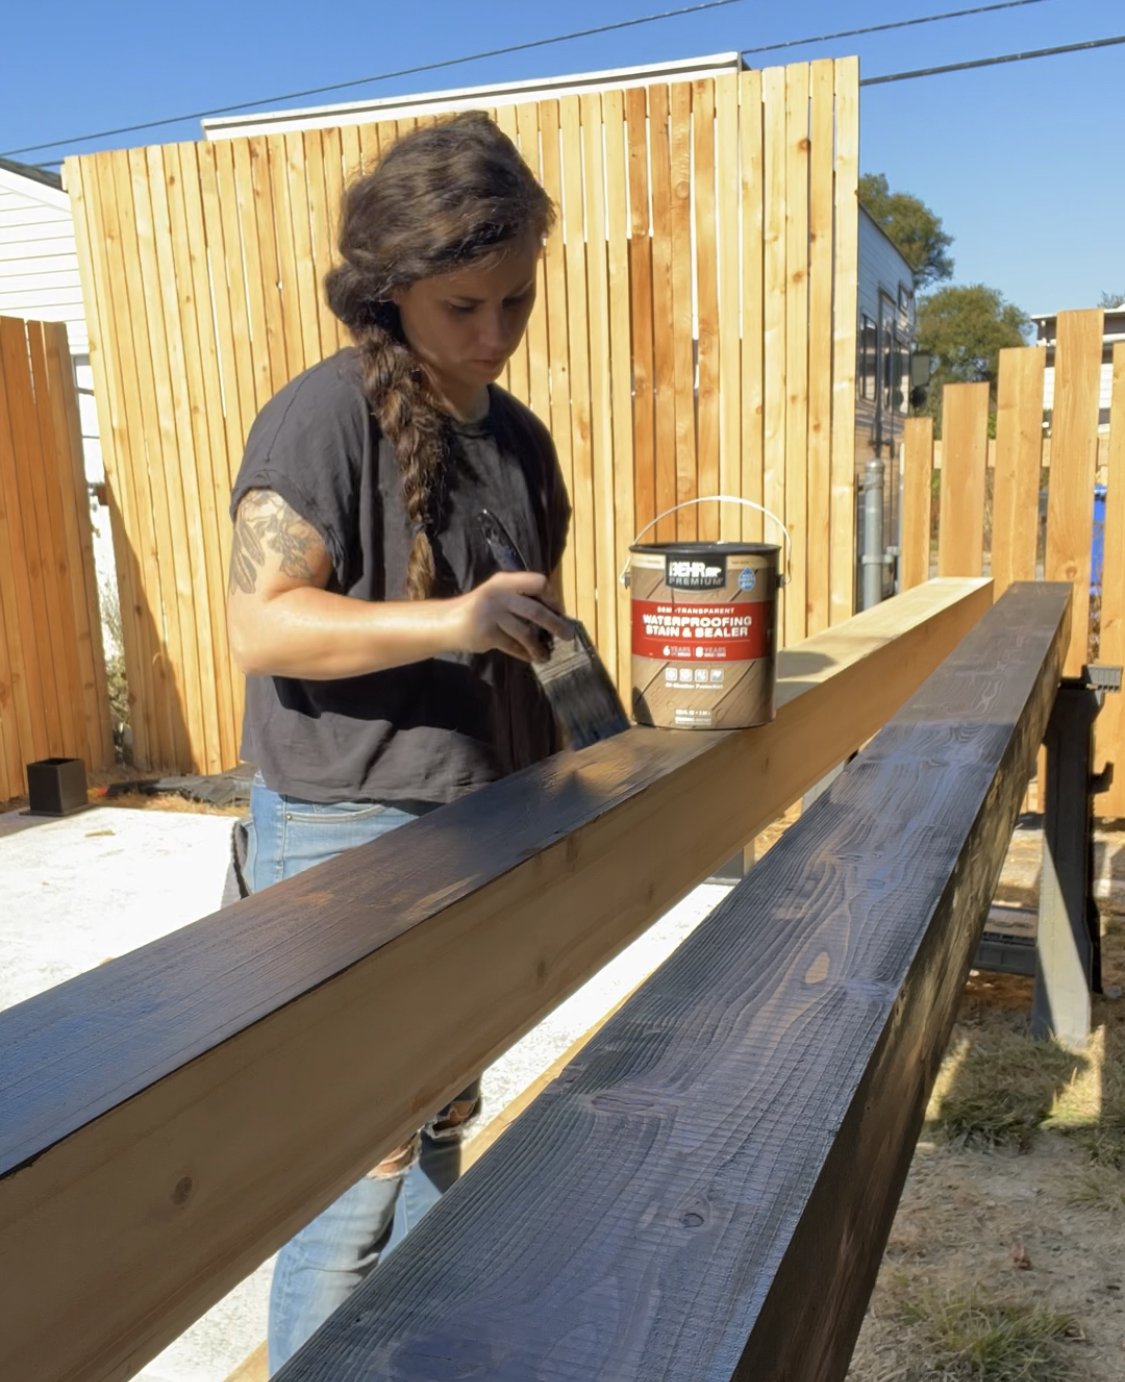
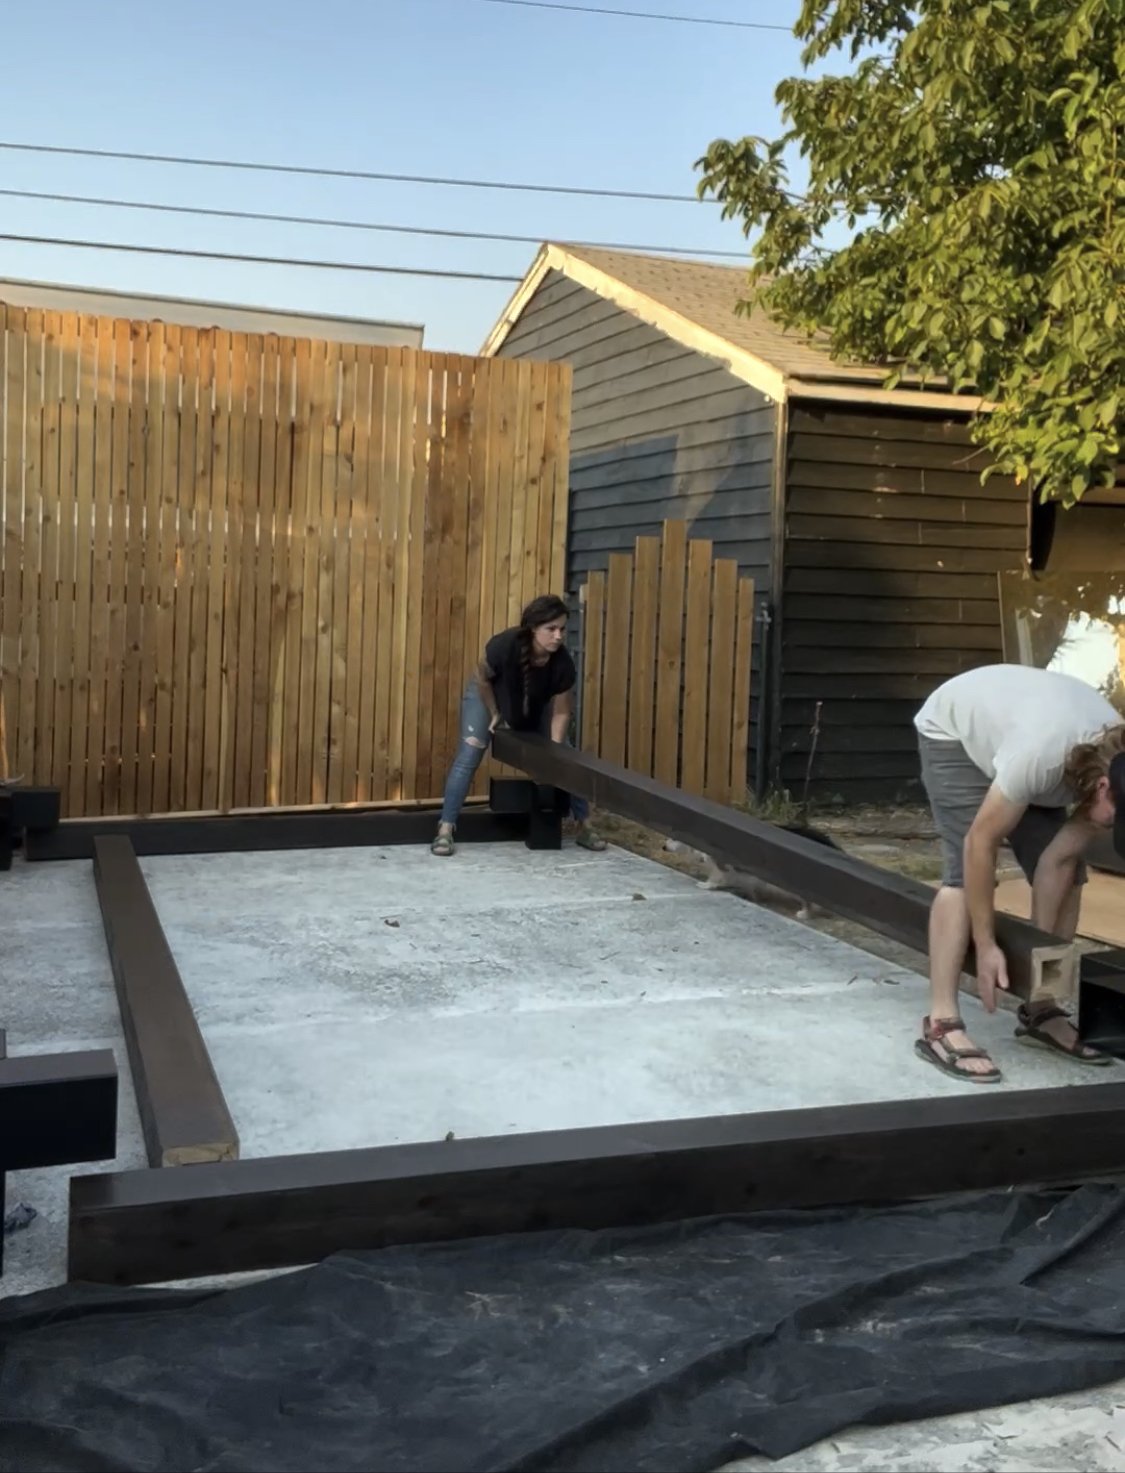
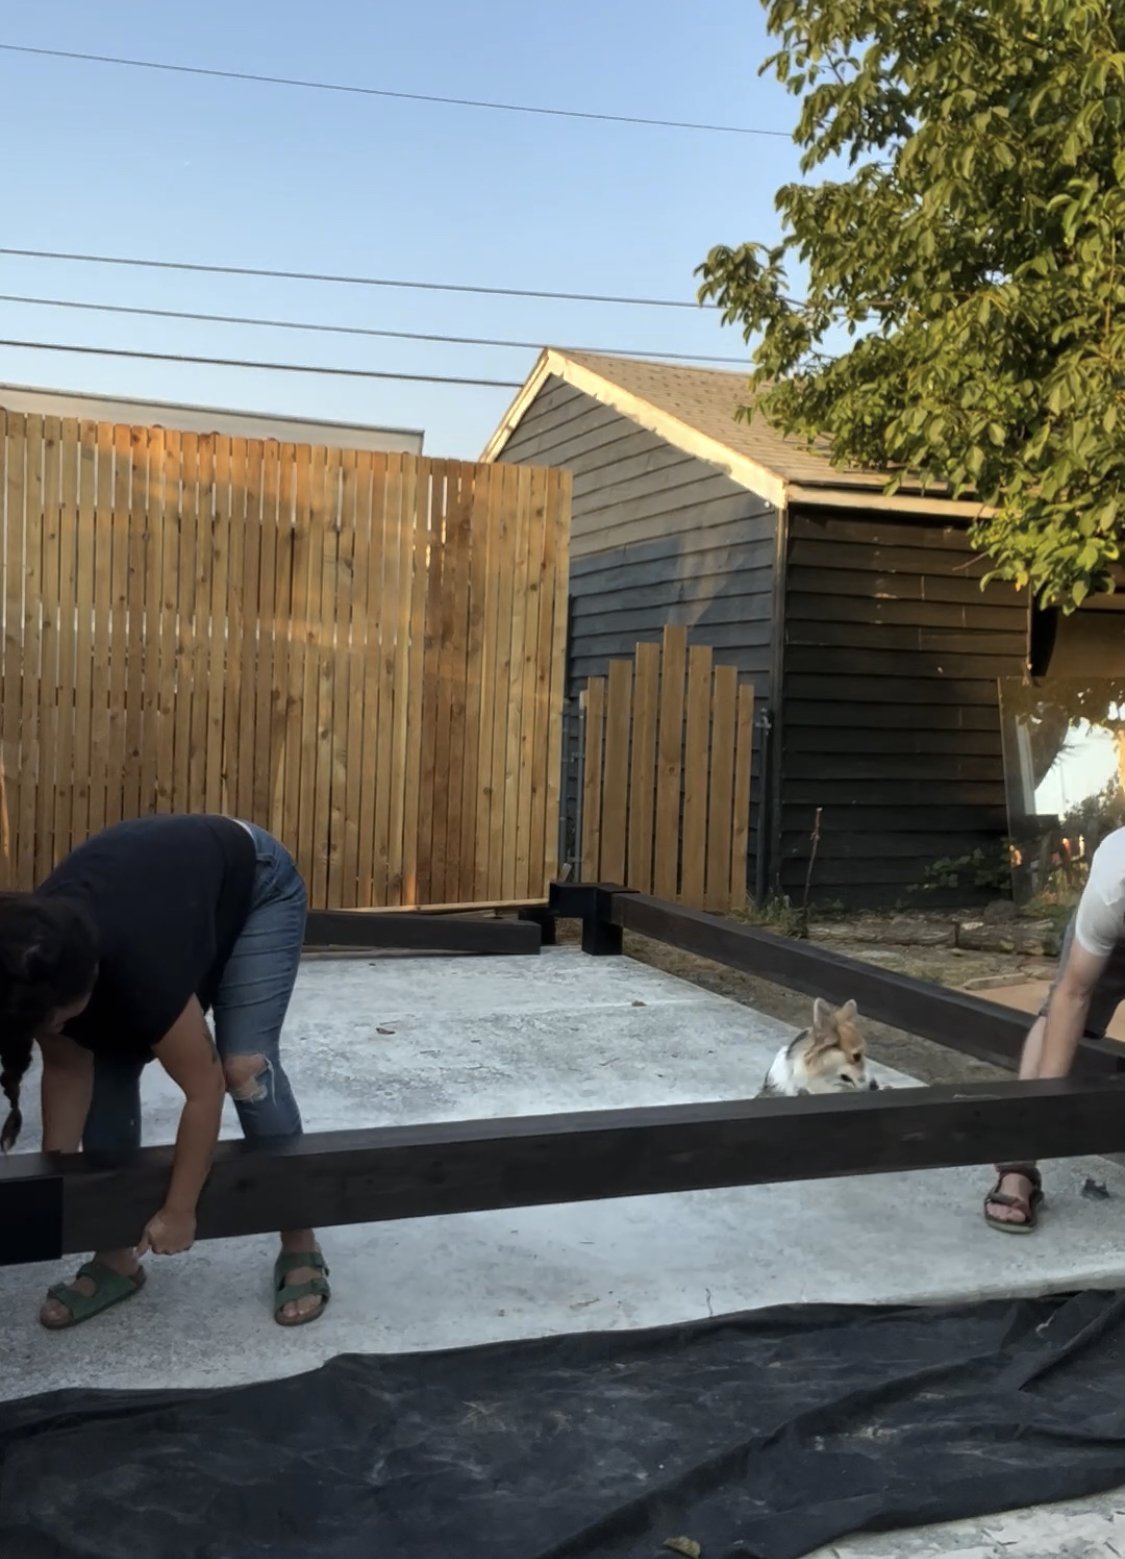
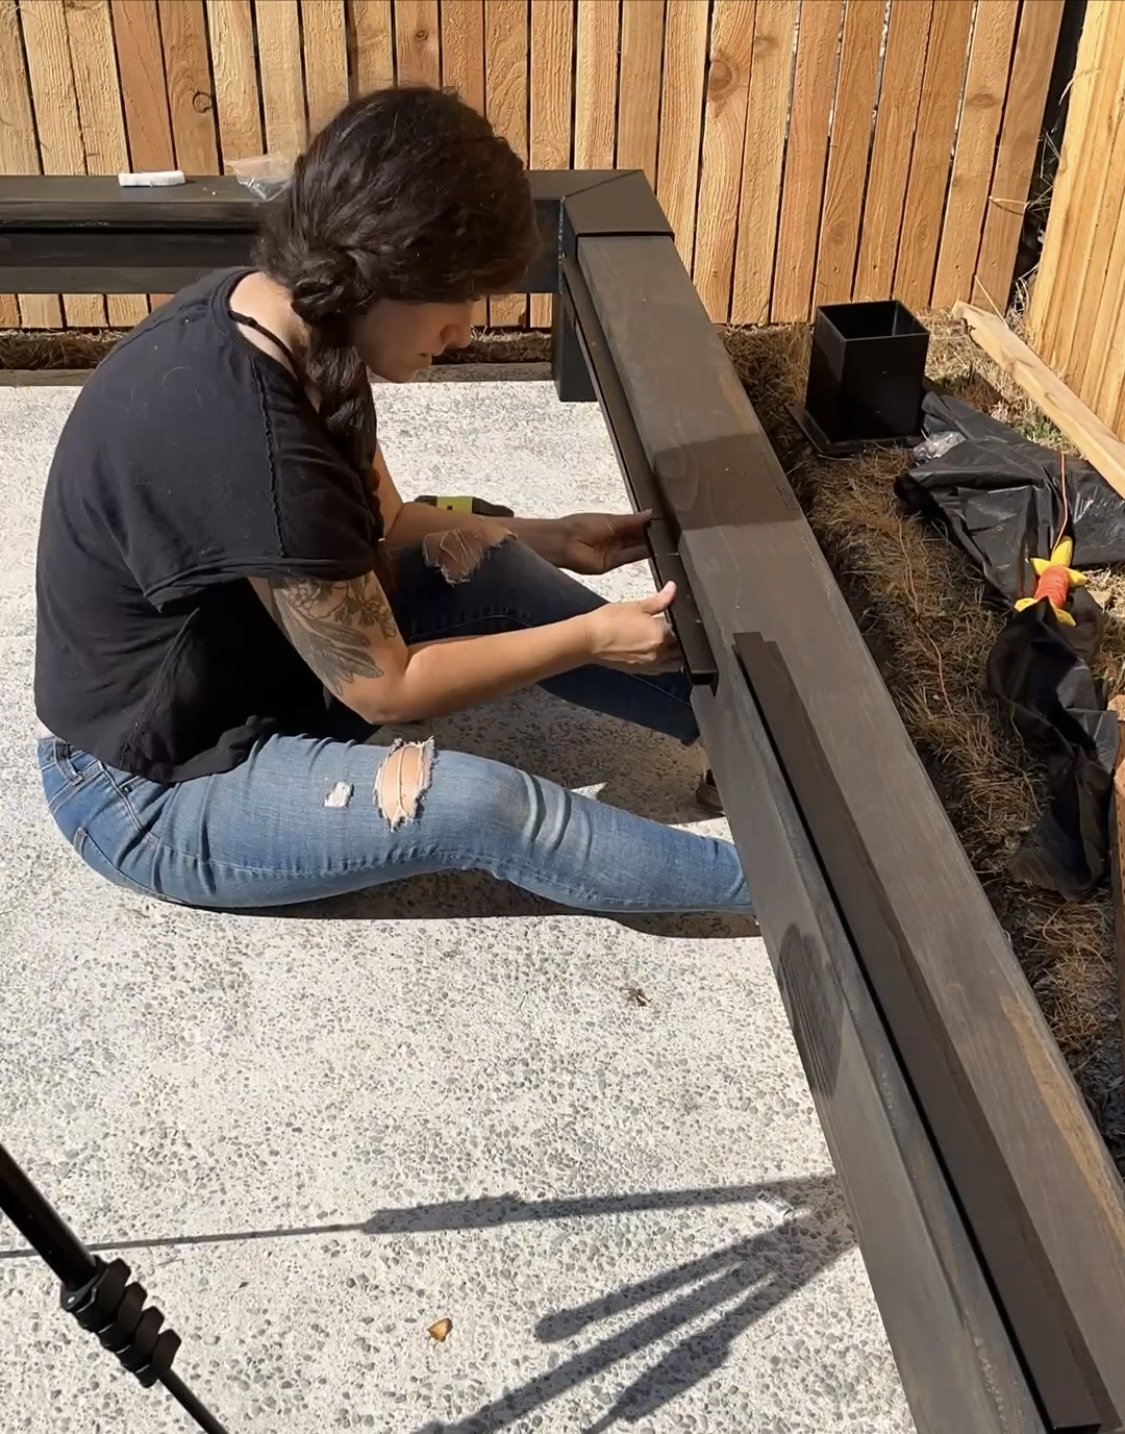
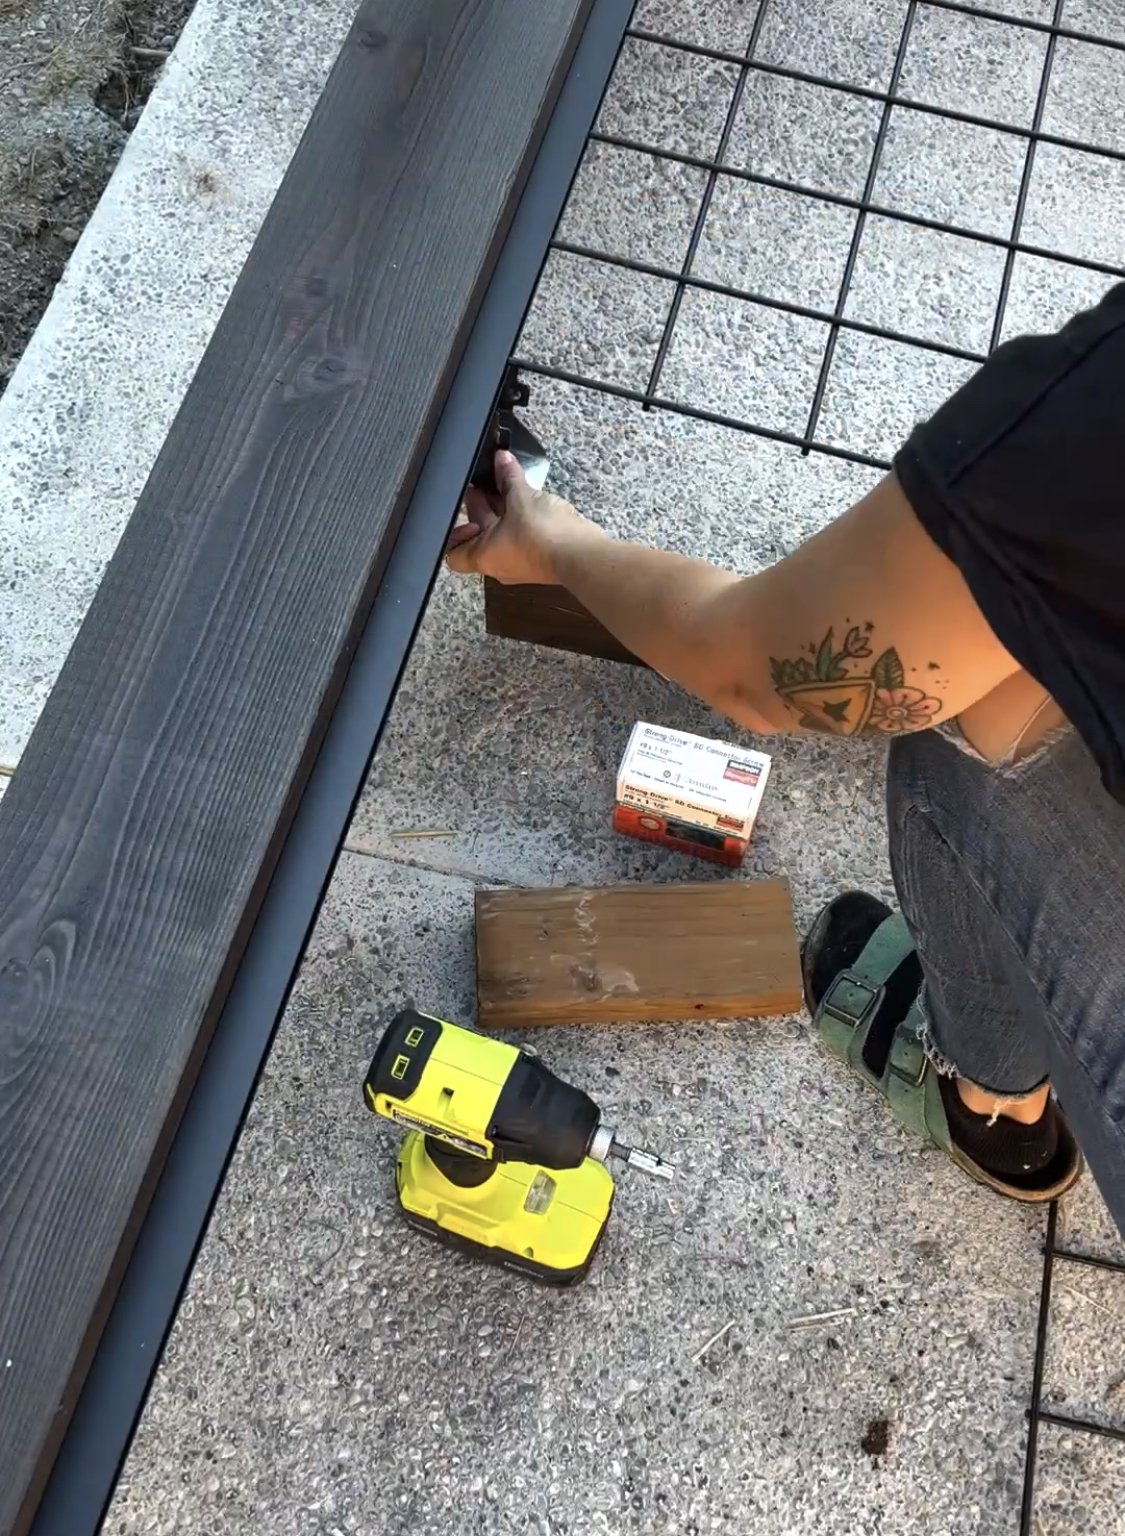
Once all the wood was stained, it was time to start assembling. You start by sliding the corner brackets onto the ends of two opposite side beams, then slide in the other two side beams to one of those to create a U shape. Finally, close up the U shape by sliding the final side, and secure with the provides screws. LINX includes all the screws as well as the driver bits, so you don’t have to worry about finding the proper screws.
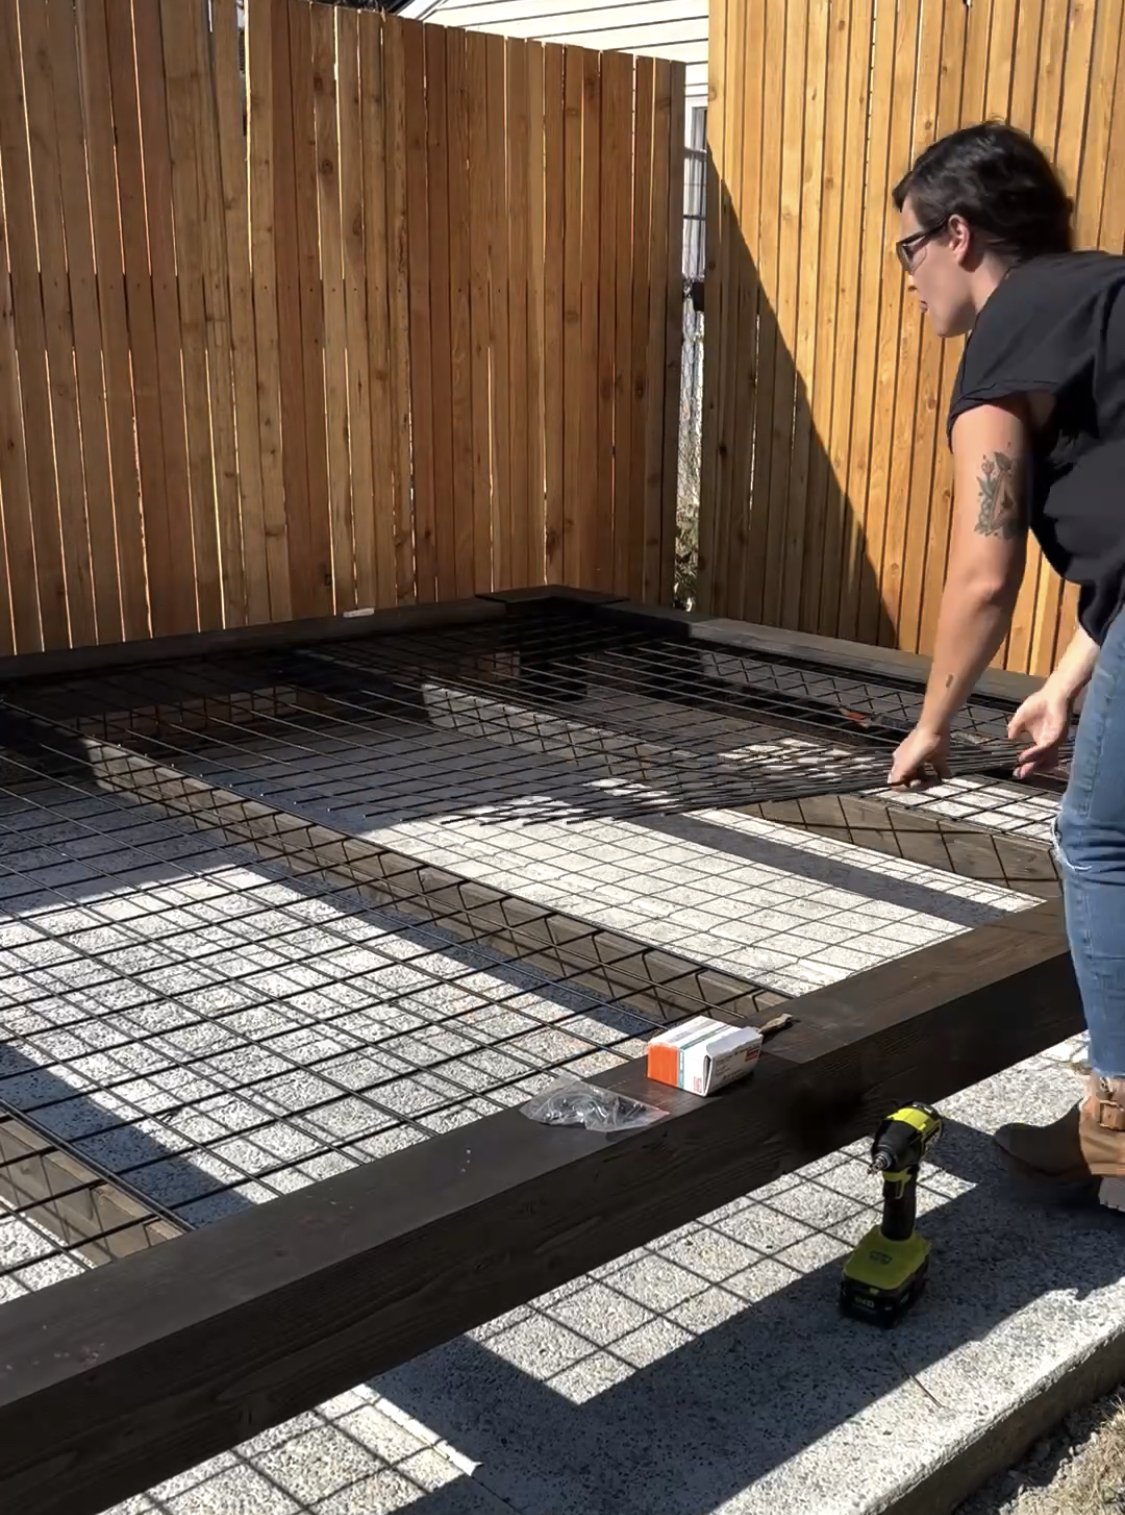
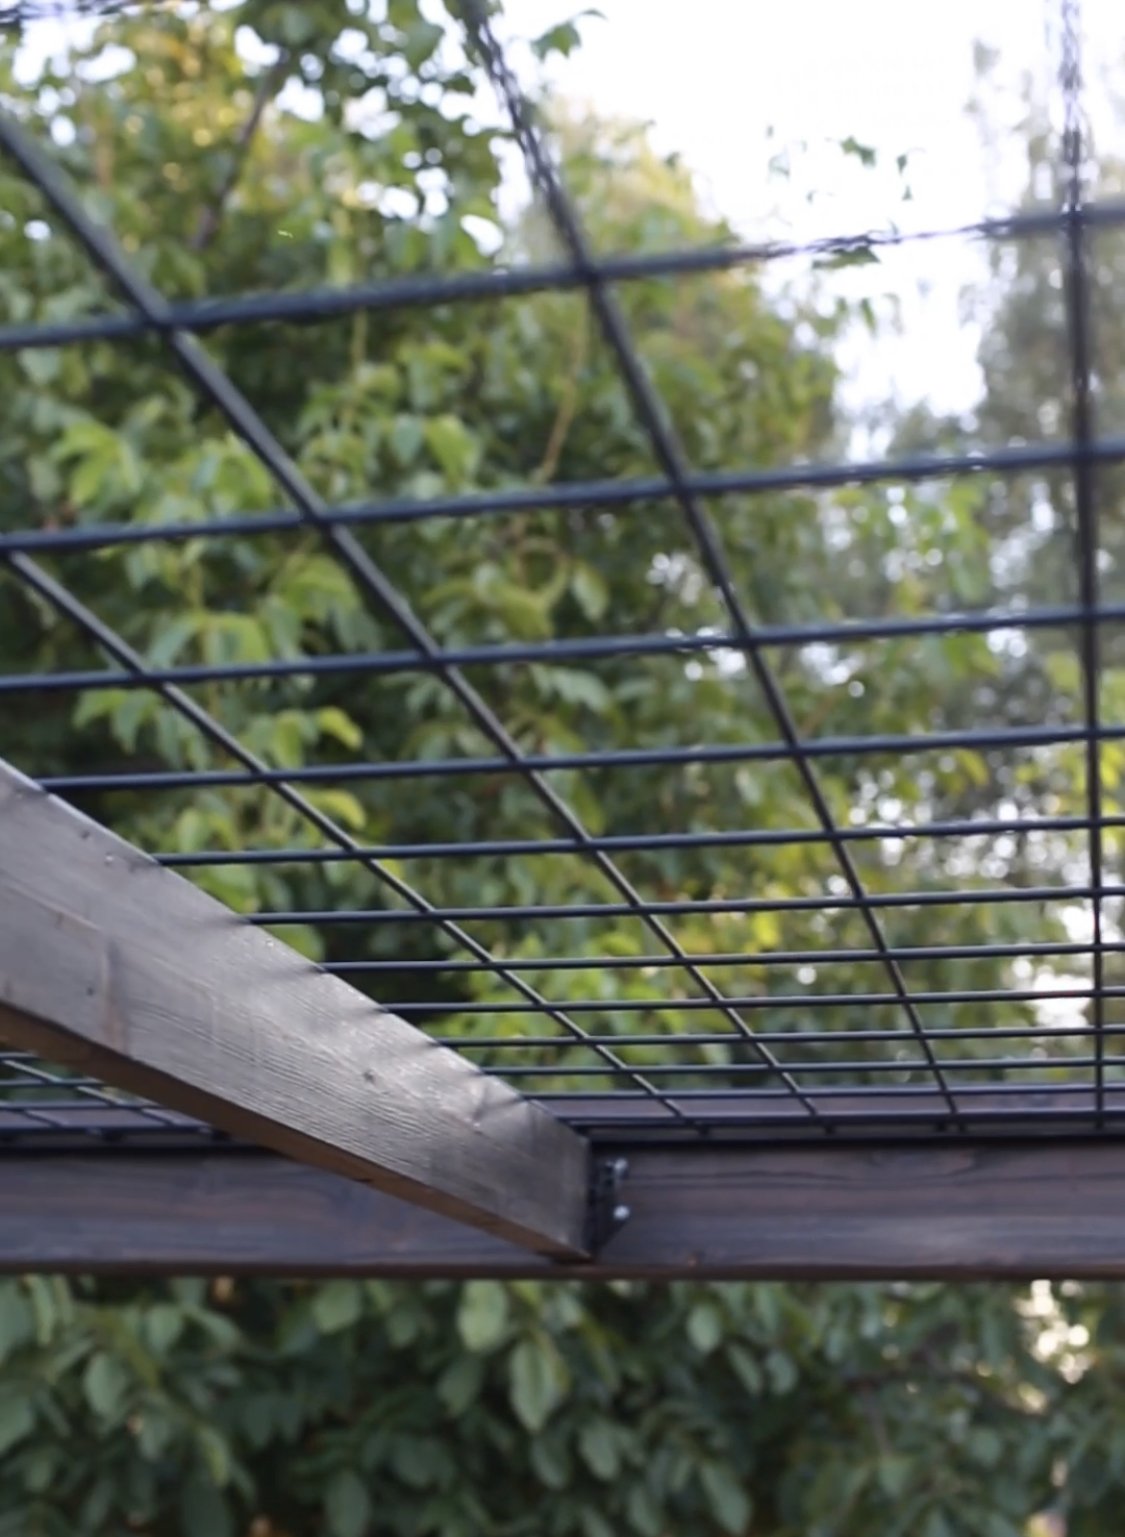
At this point you can install a shade cover if you want (LINX has shade covers that work perfectly with their system), but I wanted to create a gridded roof for my hop plants to climb on during the summer. I used Wild Hog fence panels along with their Hog Tracks to seamlessly integrate the fence panels into the pergola. I installed three cedar 2x4’s across the middle to support those Wild Hog fence panels.
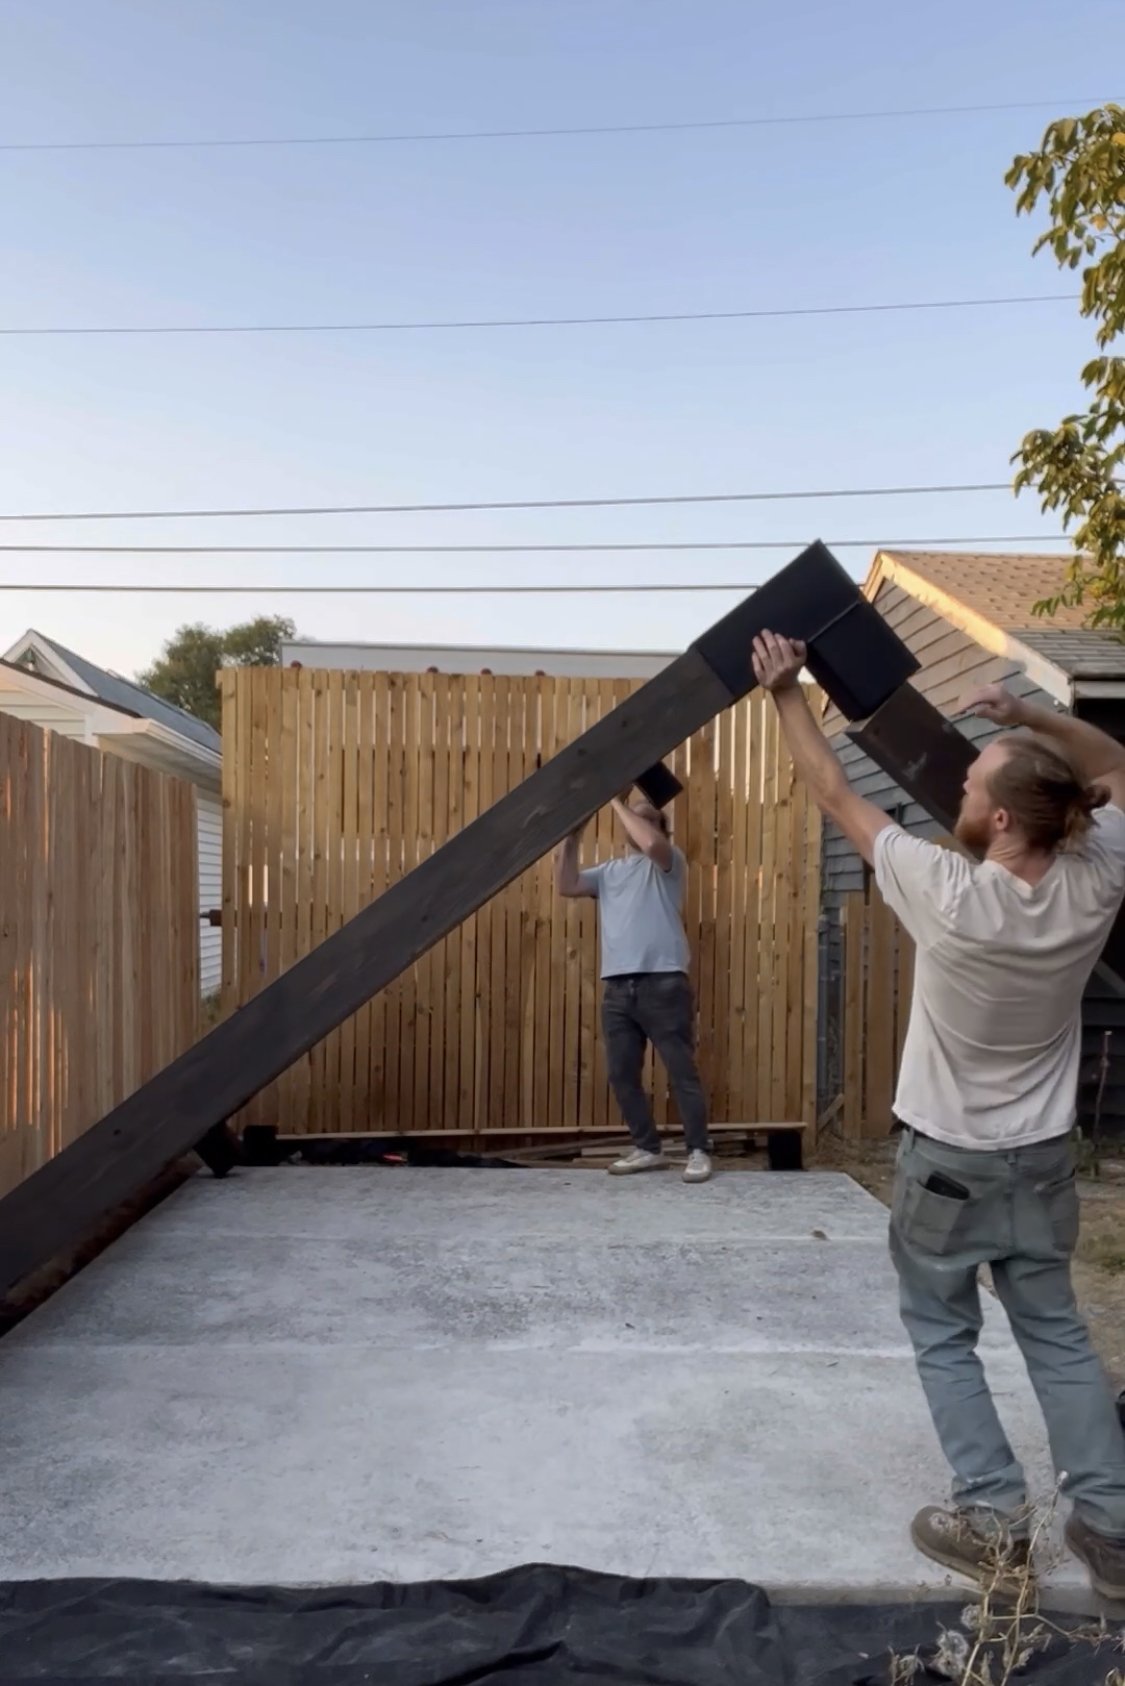
Now, the exciting part— getting this bad boy raised up! This is a step you definitely want to have help with. For a pergola with 6x6 lumber I’d highly recommend having at least 4 strong people, and you’ll want two 6ft ladders. First, you raise up one side at an angle to slide in the posts into the brackets. Then you’ll go to the other side, raise that side up so you can slide the ladders under to support it, then two people will climb up the ladders and raise the pergola high enough that the other two people can slide the remaining two posts in. Then, you’ll position the pergola in place (one person on each leg of the pergola, lift the pergola and carefully move it to its final resting place).
Securing the pergola will depend on what it’s sitting on. If it’s a deck, you’ll use the base brackets to attach it to the deck, since we put it on a concrete patio, we used concrete expansion anchors to secure it. If you’re not sure the best way to secure it, you can look up your local building codes.
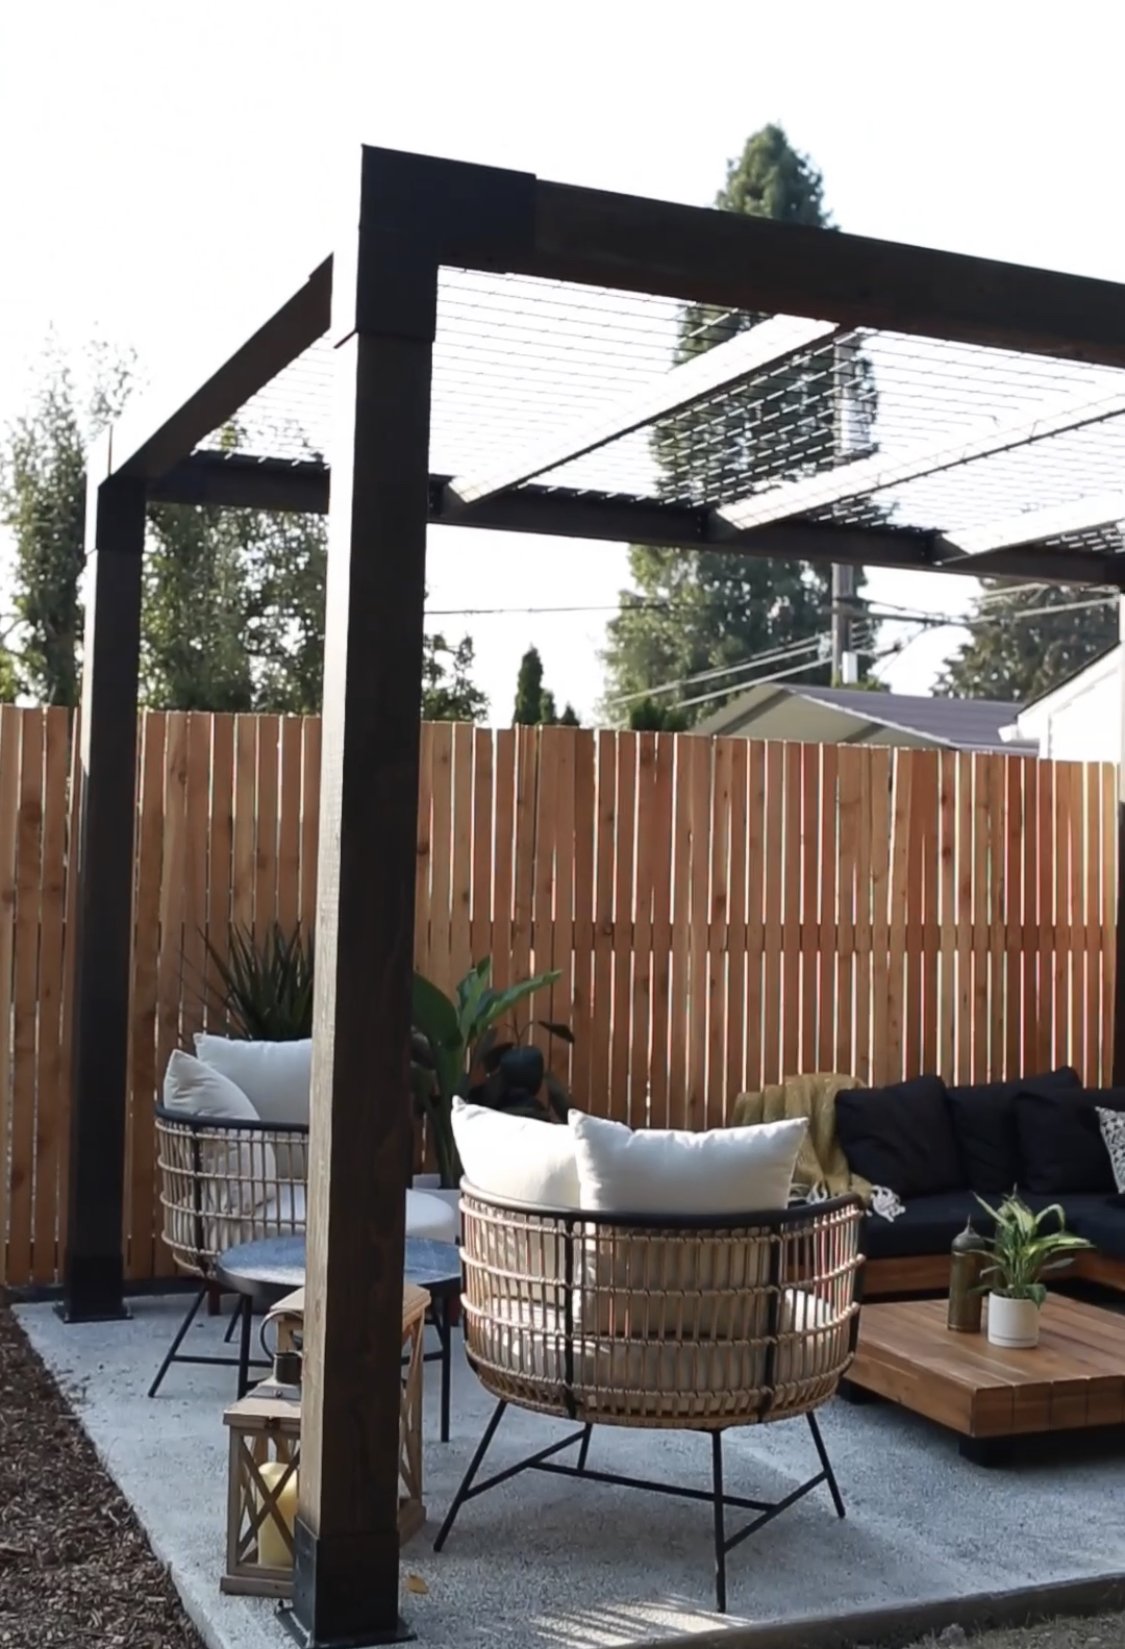
That’s it! It’s a really simple plug-and-play installation, and with all the different bracket configurations, there’s a ton of options for creating something completely custom. Check out LINX’s instagram to see a bunch of ways that people have created their own custom designs! I’ve got some of my own ideas scheming up in my head for some custom creations!

Hi, I’m Liz
I'm an artist, writer, designer, DIY renovator, and … well basically I like to do all the things. If it’s creative I’m probably doing it. I’ve spent over 30 years voraciously pursuing a life steeped in creativity and I wholeheartedly believe creativity and joy are inextricably linked.
Read more…


Explore The Archive
- July 2025
- May 2025
- January 2025
- December 2024
- August 2024
- July 2024
- May 2024
- April 2024
- January 2024
- December 2023
- October 2023
- September 2023
- July 2023
- June 2023
- May 2023
- April 2023
- March 2023
- February 2023
- January 2023
- December 2022
- November 2022
- October 2022
- August 2022
- June 2022
- May 2022
- April 2022
- March 2022
- November 2021
- October 2021
- August 2021
- July 2021
- May 2021
- January 2021
- November 2020
- October 2020
- September 2020
- August 2020
- July 2020
- June 2020
- May 2020
- April 2020
- February 2020
- January 2020
- November 2019
- October 2019
- August 2019
- July 2019
- June 2019
- May 2019
- April 2019
- February 2019
- January 2019
- December 2018
- November 2018
- October 2018
- September 2018
- August 2018
- July 2018
- June 2018
- May 2018
- April 2018
- February 2018
- January 2018
- November 2017
- September 2017
- August 2017
- July 2017
- June 2017
- May 2017
- April 2017
- March 2017
- February 2017
- January 2017
- December 2016
- November 2016
- October 2016
- September 2016
- August 2016
- June 2016
- May 2016
- April 2016
- March 2016
- February 2016
- January 2016
- December 2015
- November 2015
- October 2015
- September 2015
- August 2015
- July 2015
- June 2015
- May 2015
- April 2015
- March 2015
- February 2015
- January 2015
- December 2014
- November 2014
- October 2014
- September 2014
- August 2014
- July 2014
- June 2014
- May 2014
- April 2014
- March 2014
- February 2014
- January 2014
- December 2013
- November 2013
- October 2013
- September 2013
- August 2013
- July 2013
- June 2013
- May 2013
- April 2013
- March 2013
- February 2013
- January 2013
- December 2012
- November 2012
- October 2012
- September 2012
- August 2012
- July 2012
- June 2012
- May 2012
- April 2012
- March 2012
- February 2012
- January 2012
- December 2011
- November 2011
- October 2011
- September 2011
- August 2011
- July 2011
- June 2011
- May 2011
- April 2011
- March 2011
- February 2011
- January 2011
- December 2010
- November 2010
- October 2010
- September 2010
- August 2010
- July 2010
- June 2010
- May 2010
- April 2010
- March 2010
- February 2010
- January 2010
- December 2009
- November 2009
- October 2009
- September 2009
- August 2009
- July 2009
- June 2009
- May 2009
- April 2009
- March 2009
- February 2009
- January 2009
- December 2008
- November 2008
- October 2008
- September 2008
- August 2008
- July 2008

VISIT THE SHOP


PRIVACY POLICY & DISCLOSURE
We are a participant in the Amazon Services LLC Associates Program, an affiliate advertising program designed to provide a means for us to earn fees by linking to Amazon.com and affiliated sites.