

DIY Coffin Charcuterie board

I was perusing halloween decor at Target and spotted a coffin shaped charcuterie board and immediately got the bug to make one for myself. Could I have bought it at target? Sure, but why buy something for 25 bucks when you can spend a week making one with scrap wood you have in your garage?
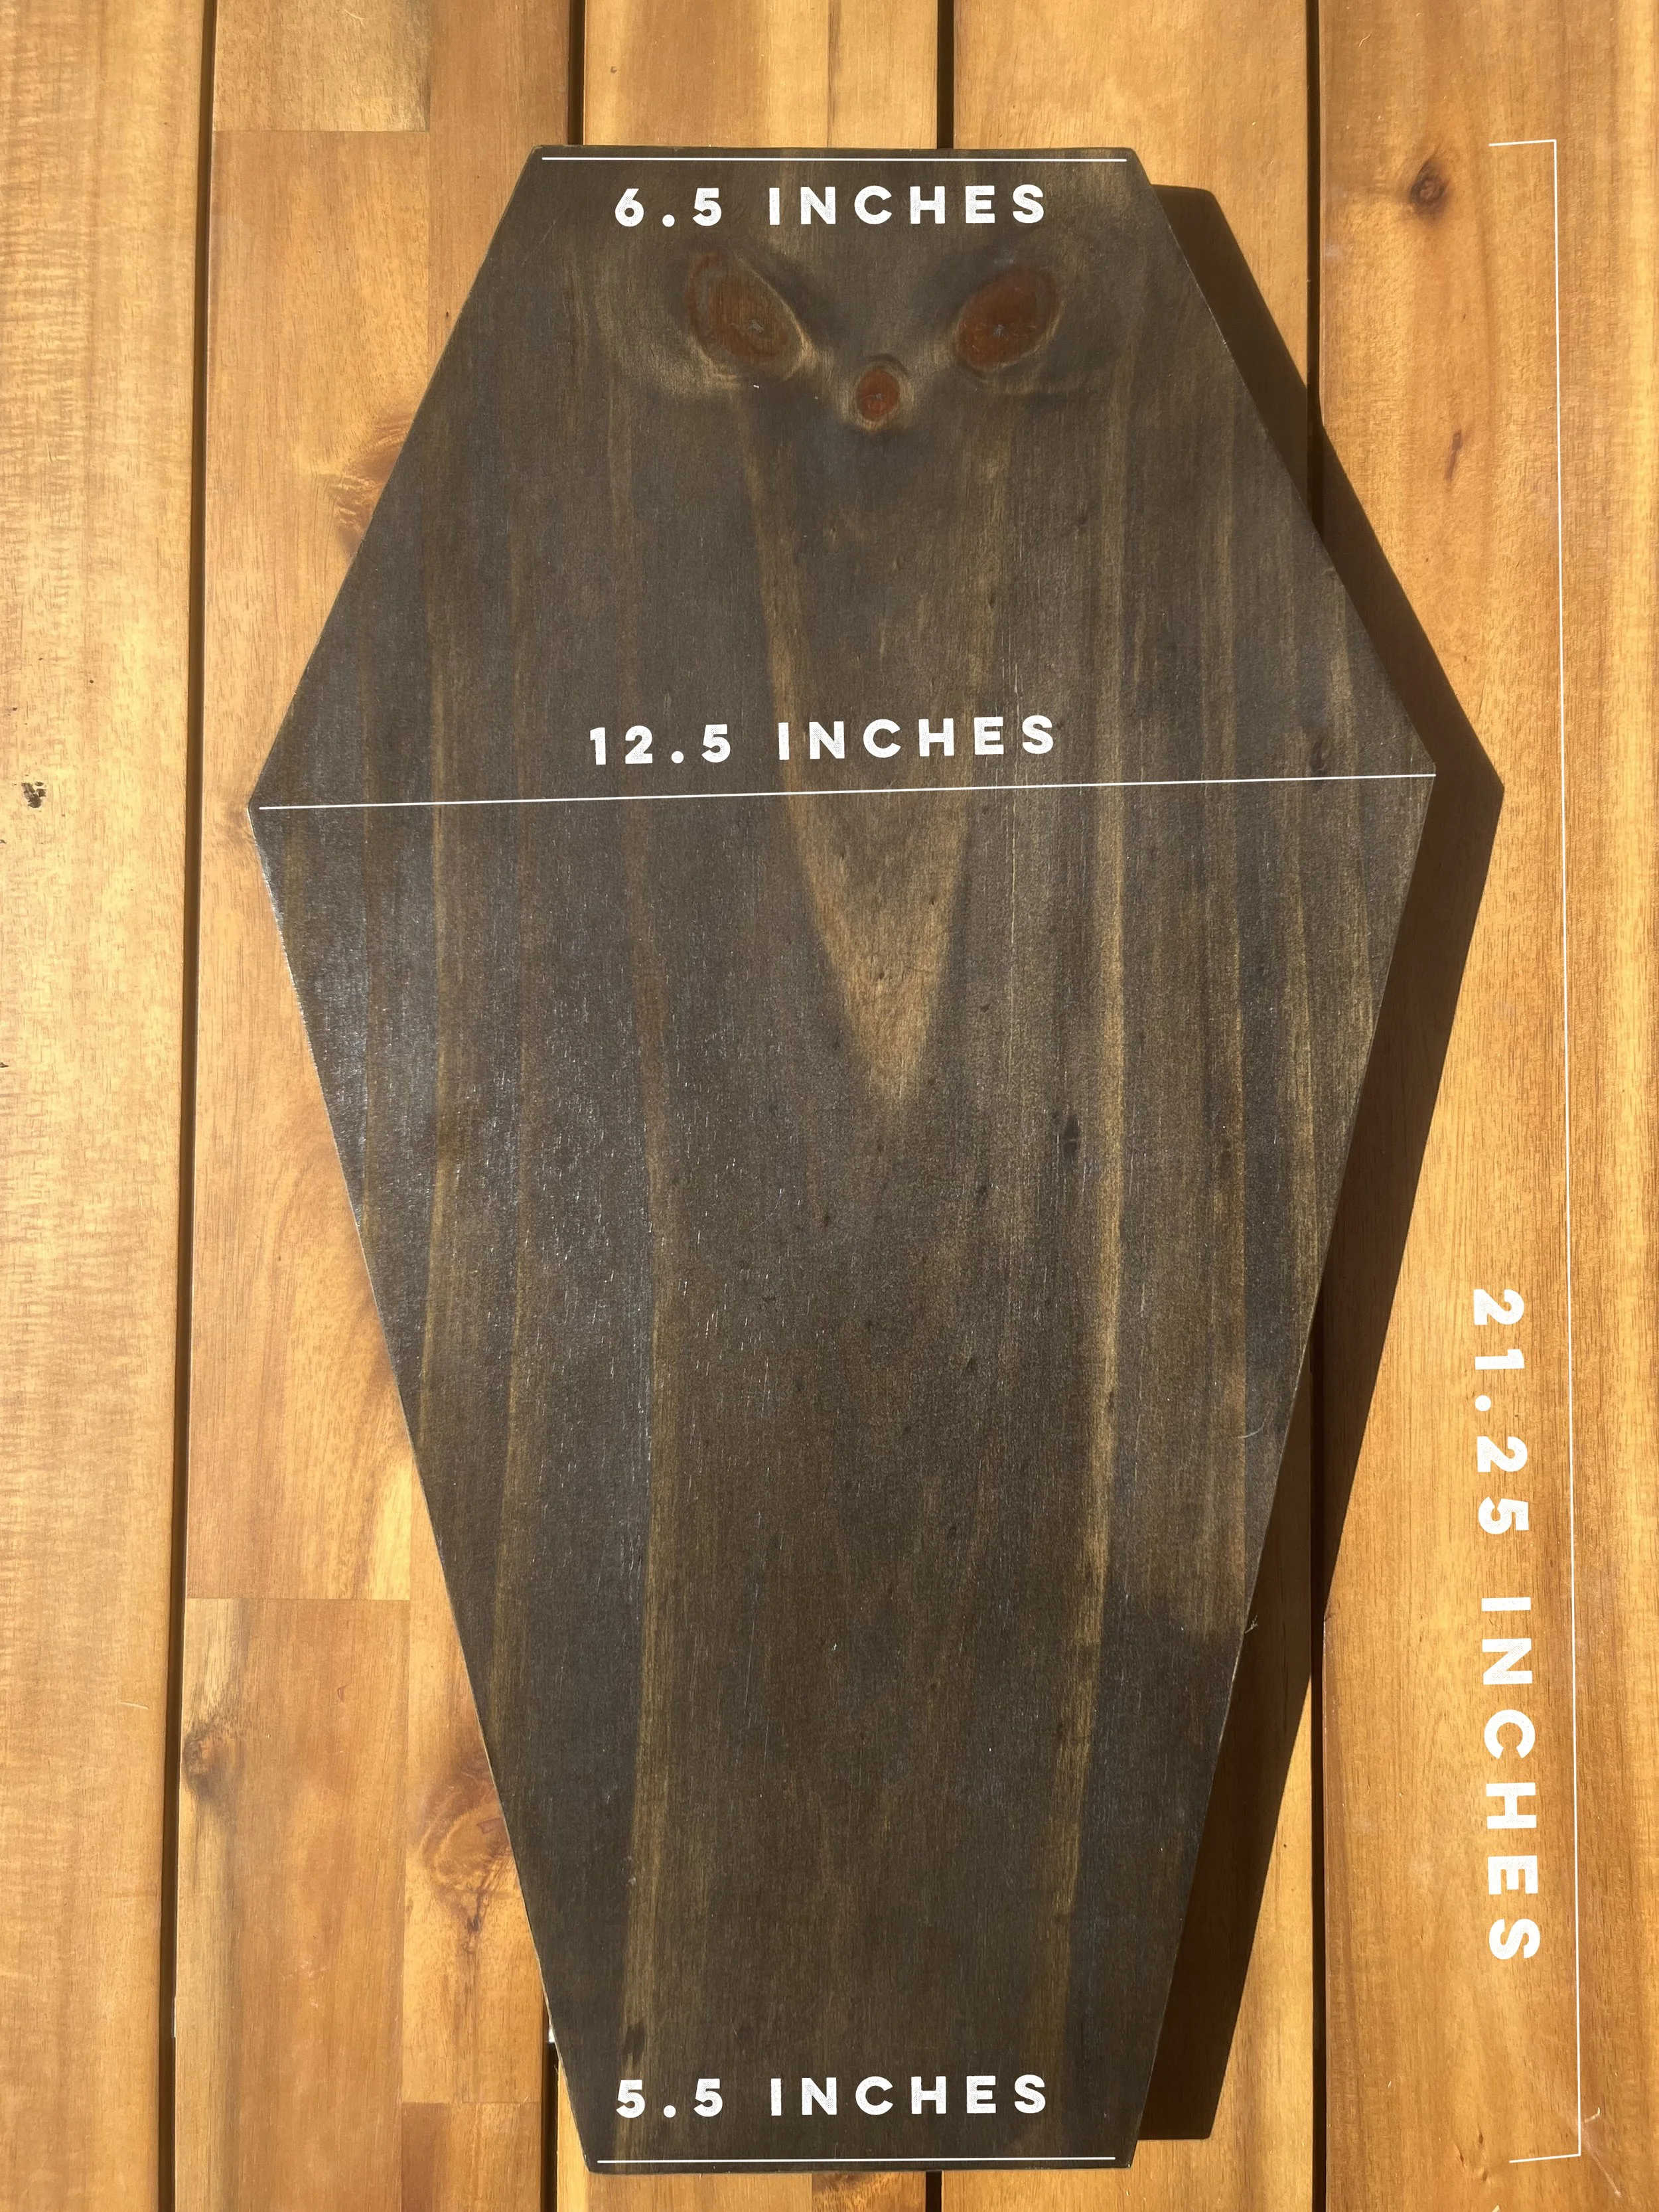
I had some nice Birch plywood leftover from a previous project sitting in my garage, so I started by cutting that into the shape of a coffin using my circular saw. The shape of a cofffin is just an elongated hexagon, and I sketched out one side of it till the shape felt right, then reflected that to the other side so that it was a symmetrical shape. The overall dimensions are shown below so you can replicate the exact measurements if you’d like. The size felt pretty ideal for a charcuterie board, but you could always make it smaller or bigger if you’re making your own!
Once It was cut out I gave it a quick sand, then finished it with edge banding. I wasn’t originally going to do this (I was planning to just paint the whole thing, but I need to test the edge banding out for another project, and it actually ended up making it look very nice and finished).
I then used my router to create little rounded channels as handles. I had planned on using some drawer pulls to make handles, but when I realized that the grain on one side made a very spooky looking face, I didn’t want the handle to get in the way of the spooky face, so I ended up using my router and a round bit to create the groove “handles”
I had planned on painting in black, but with the discovery of the face in the wood grain I pivoted and instead stained that side ebony so the spooky face remained. I painted the underside black, that way I could have it black or stained- best of both worlds. Since this isn’t something like a bowl, or something that knives will be used on, I finished it with Lacquer. Based on what I could find online, for this application that sounded like a fine food-safe finish once it’s dried and cured. (it’s also what I had on hand). But if you’re concerned about food safety, do you own research on what feels like the safest finish for you.


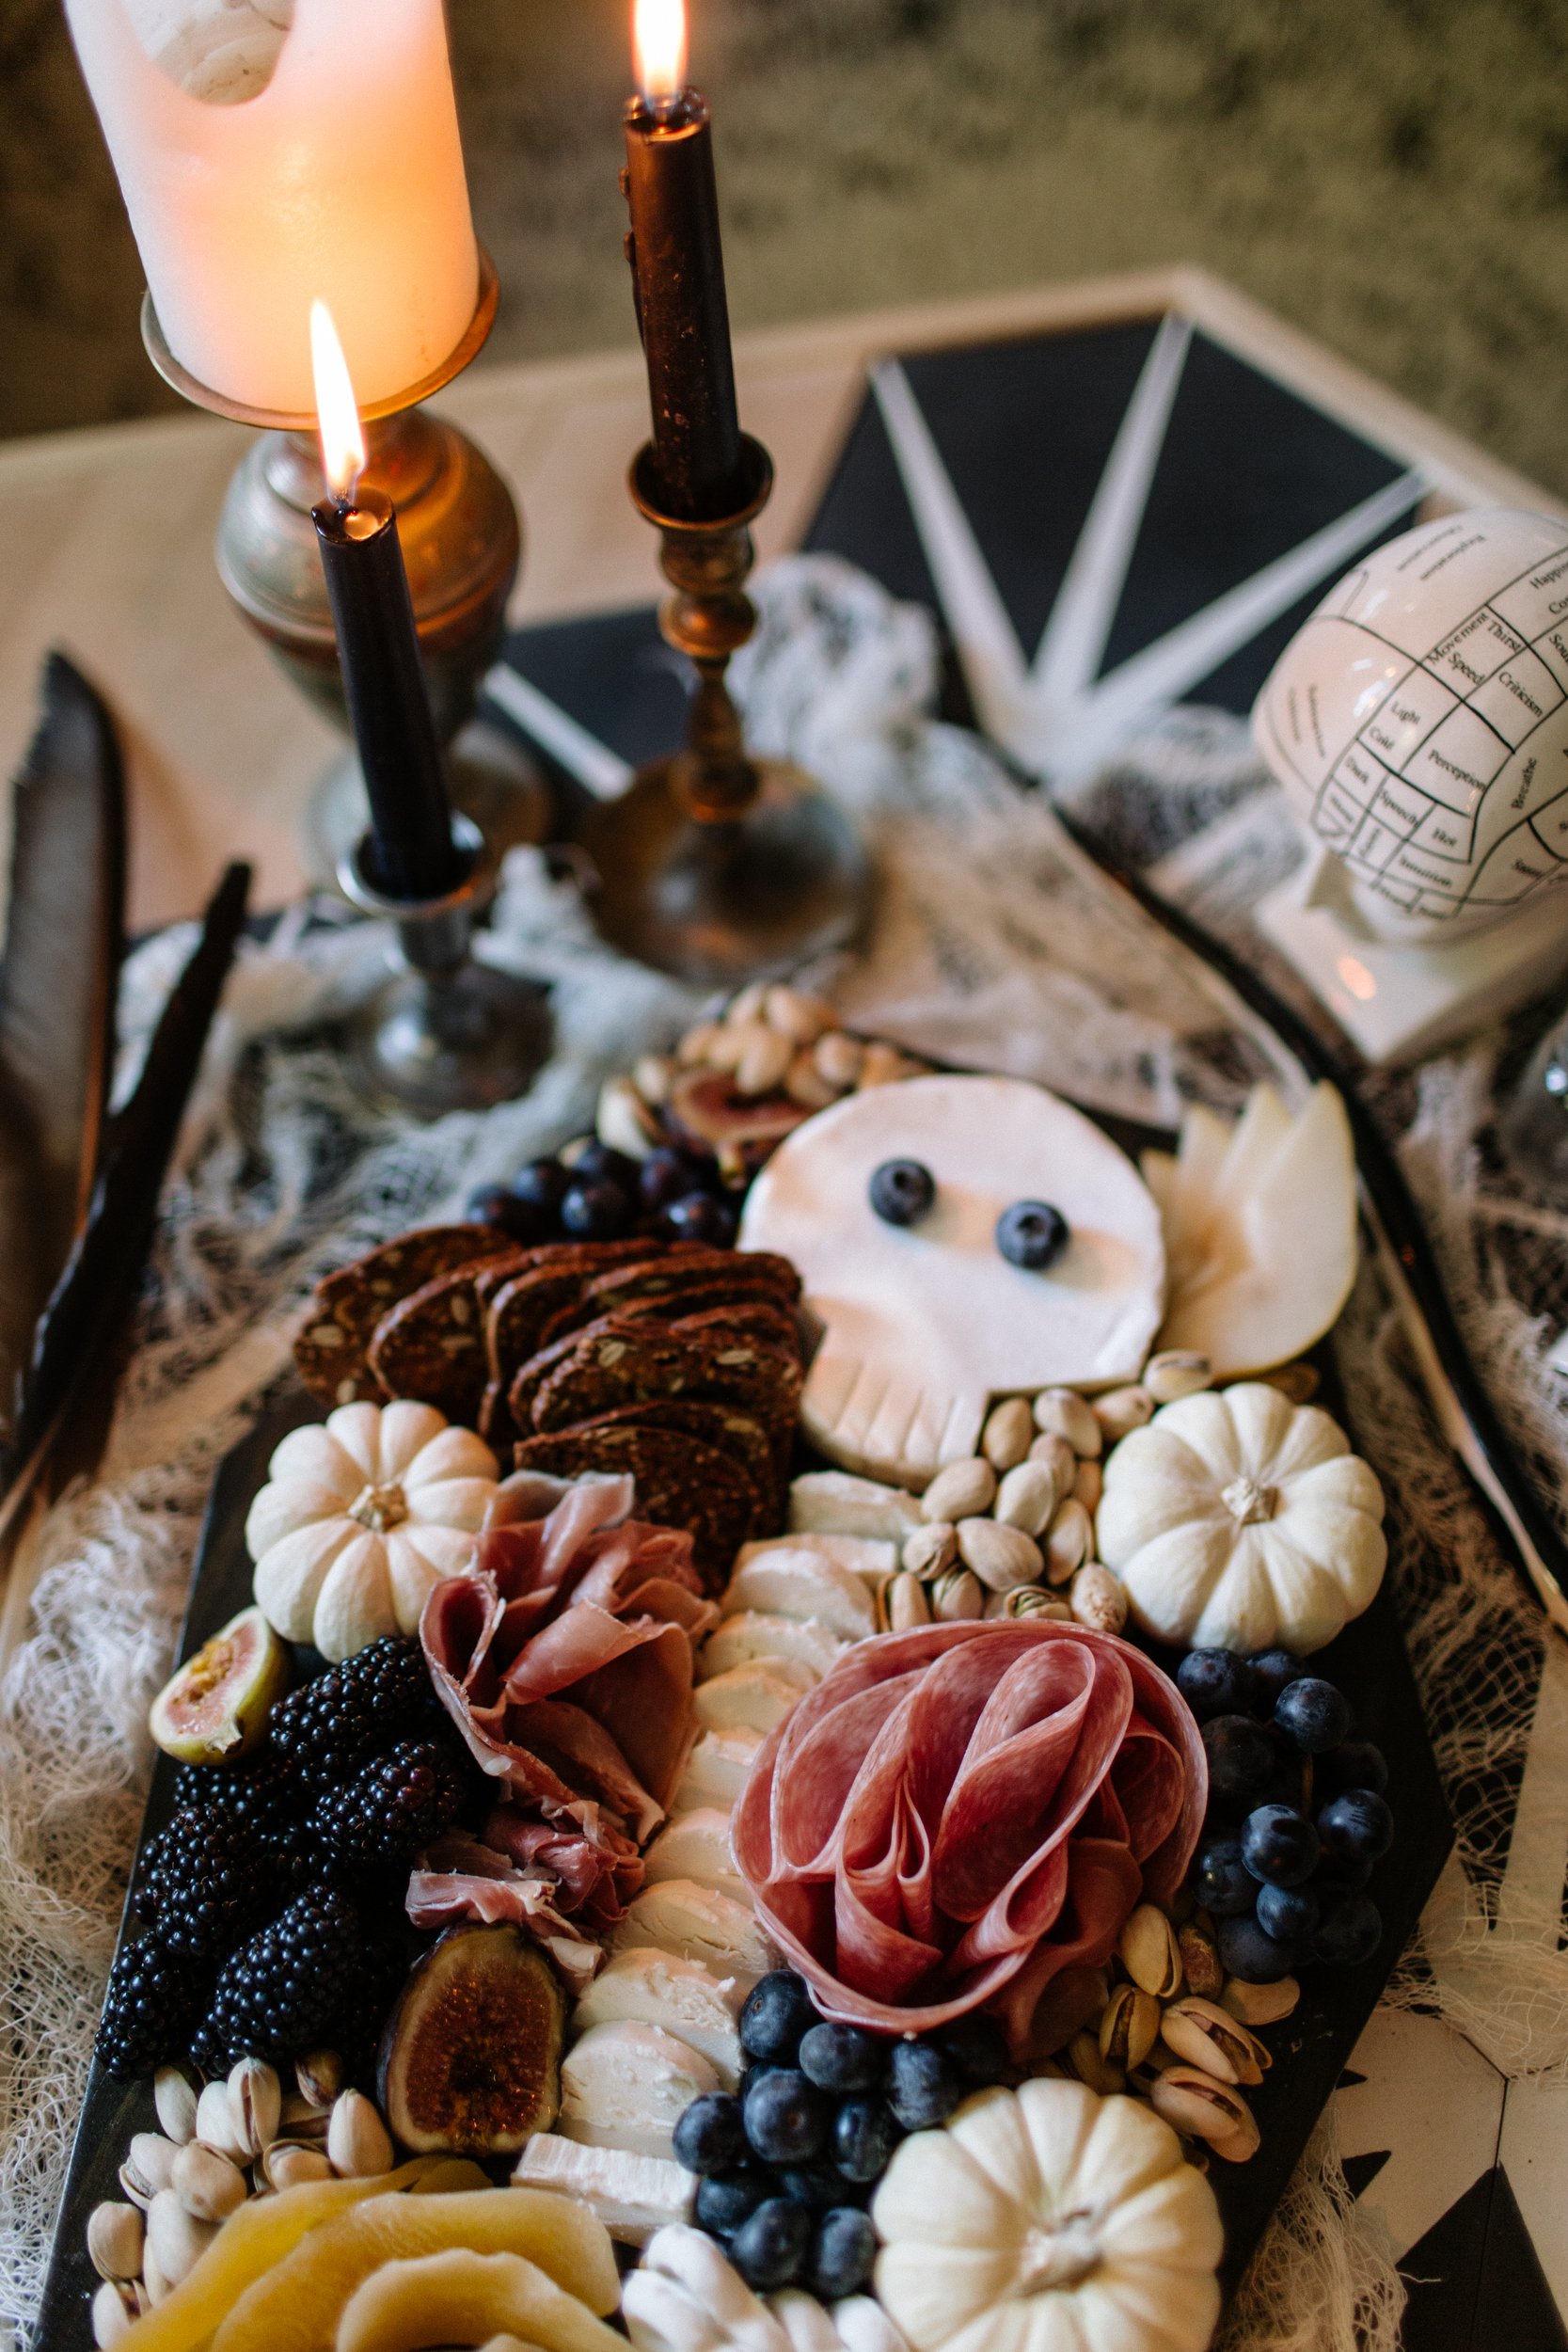

Once it was all dry and finished, it was time to load her up with tasty things! This is, of course, up to your own taste. You can make it a sweet-things board, a savory things board, whatever the heck you fancy. Since it’s a coffin shape, I made a simple skeleton shape out of the food (though I’ve see this done with a little plastic skeleton surrounded by the food, which is also super cute).
I filled my charcuterie board with:
Brie (cut into the shape of a skull)
Goat Cheese (sliced into a “spine”)
Candied Mango slices
Pear Slices
Blueberries
Blackberries
Figs
Meringue Cookies
Yogurt covered pretzels
Crackers
Pistachios
Salami
Prociutto
Tiny White pumpkins
There you go! If you don’t feel like tackling the DIY project, but still want to do a charcuterie board like this, there are a bunch of fun coffin-shaped boards out there like these ones on Etsy, or these ones on Amazon.


DIY Hex Tile Coffee Table

Two of the things I love most about DIY are refreshing old pieces, and using reclaimed or leftover materials to make something totally new and beautiful. Most of this coffee table is made using salvaged pieces and leftover building materials. I had a few tiles left over from my bathroom remodel and I never could throw them away, even though there weren’t very many, simply because they’re SO pretty. I started scheming how I could use them and realized there’d probably be enough to make a coffee table. I found some vintage table legs at a local building material salvage spot, and the coffee table started coming to life. Thanks to some beautiful Behr Champagne Gold spray paint, the table legs got a refresh, and I was able to make a mixed material table top with the tiles I had.
Watch the full tutorial below!
You might also like


DIY Corrugated Metal Raised Beds
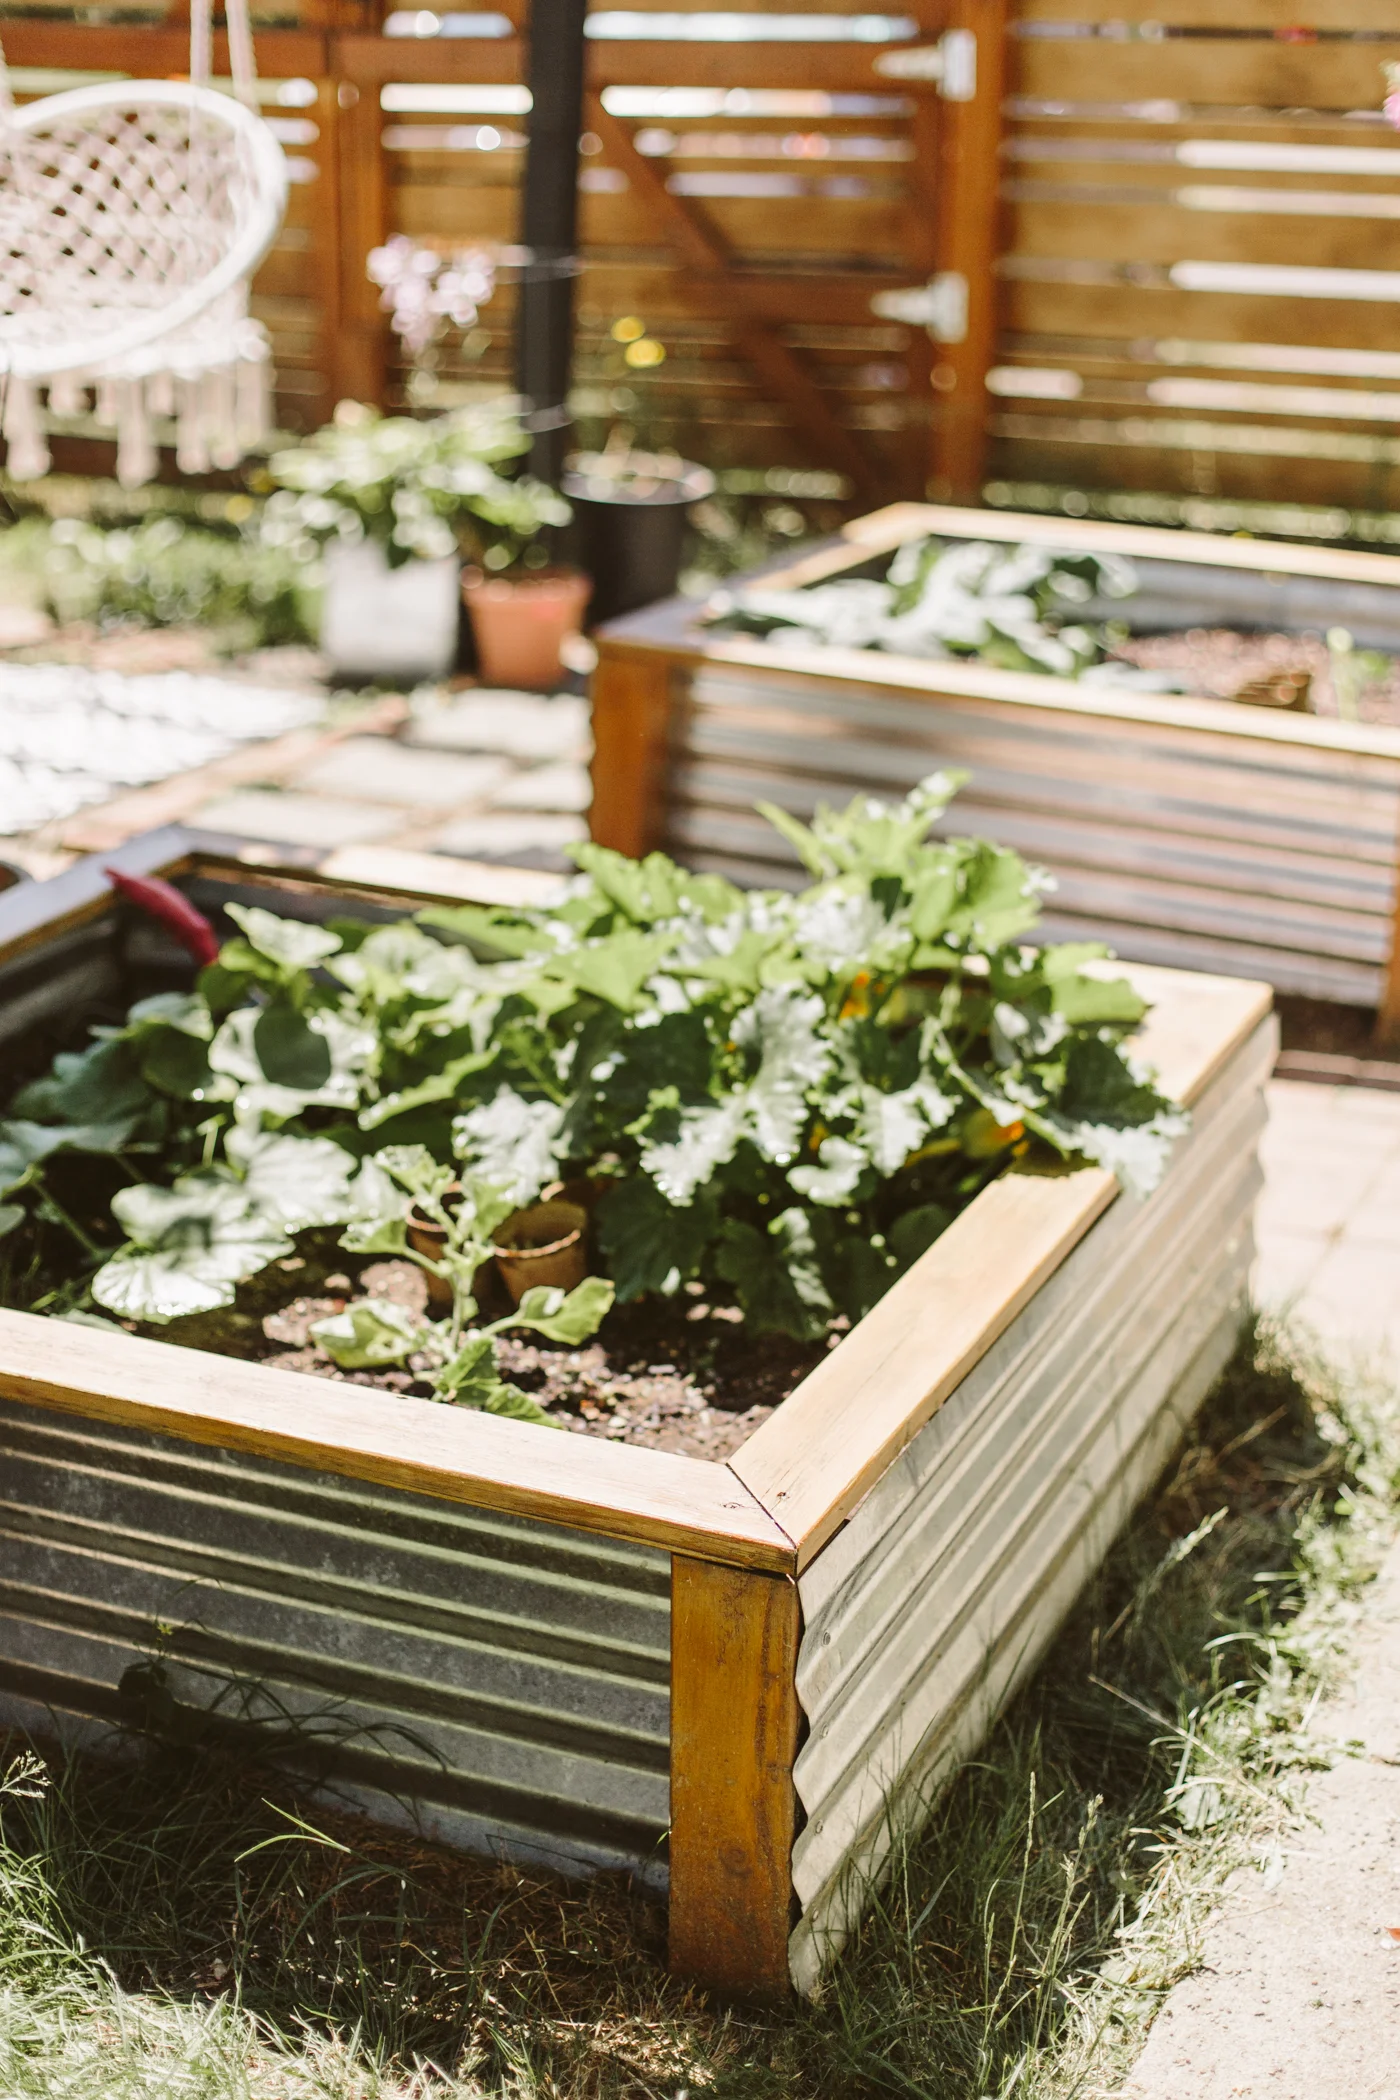
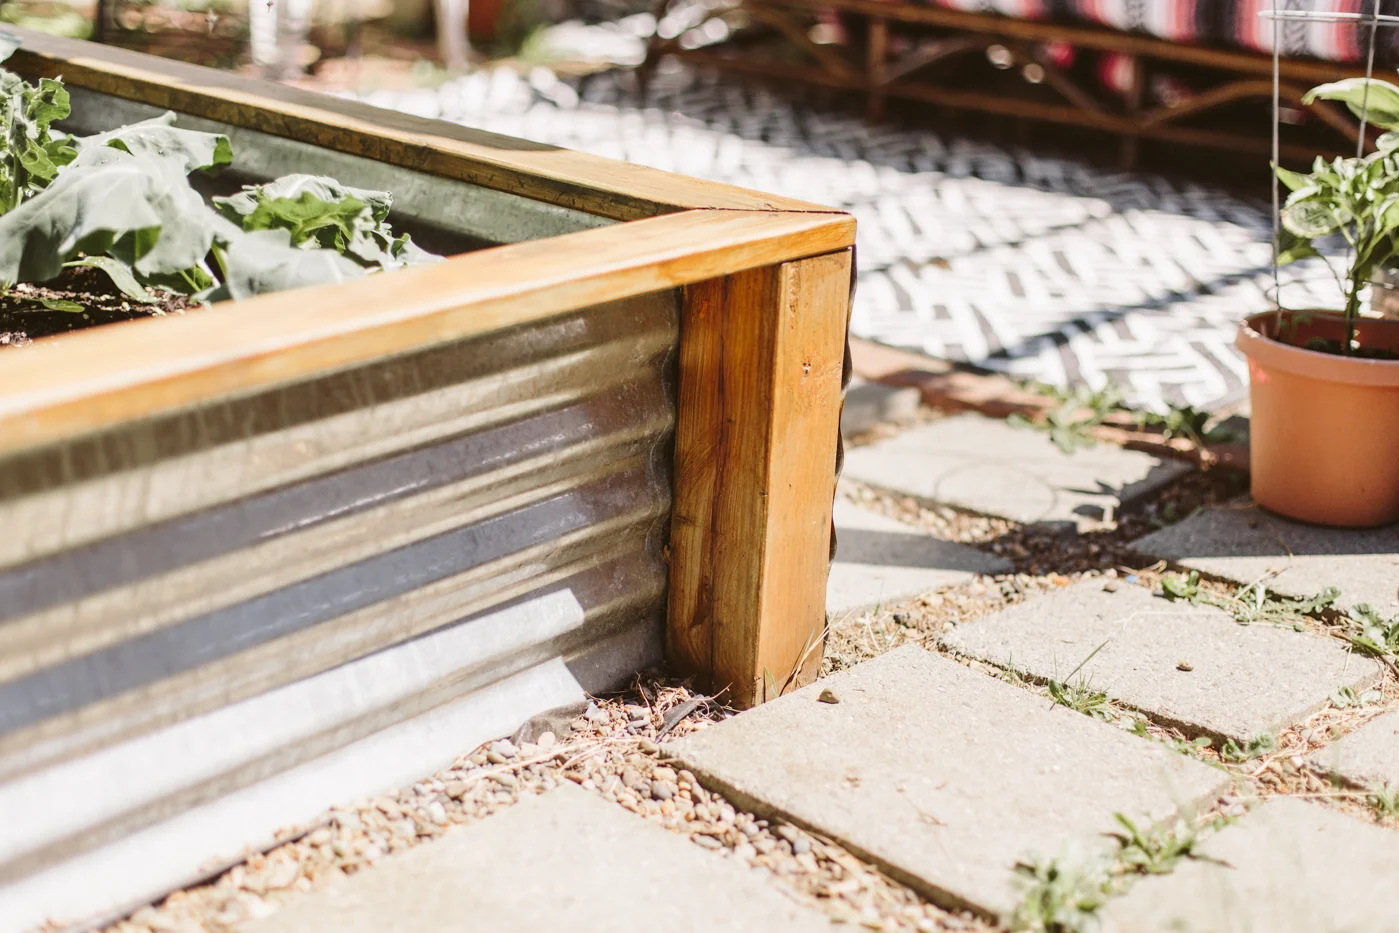
I made these galvanized corrugated metal raised beds a few years ago and always intended on doing a DIY tutorial for them and never got around to it until now! I'm actually kind of glad because I was able to see how they held up over the years. They've held up beautifully! The only part that needed some TLC was the top trim, which needed to be re-stained after years of being pelted with rain for months on end during our wet winters here in the PNW. So today I sanded those down and put a new coat of stain on and they look nice and (almost) new.
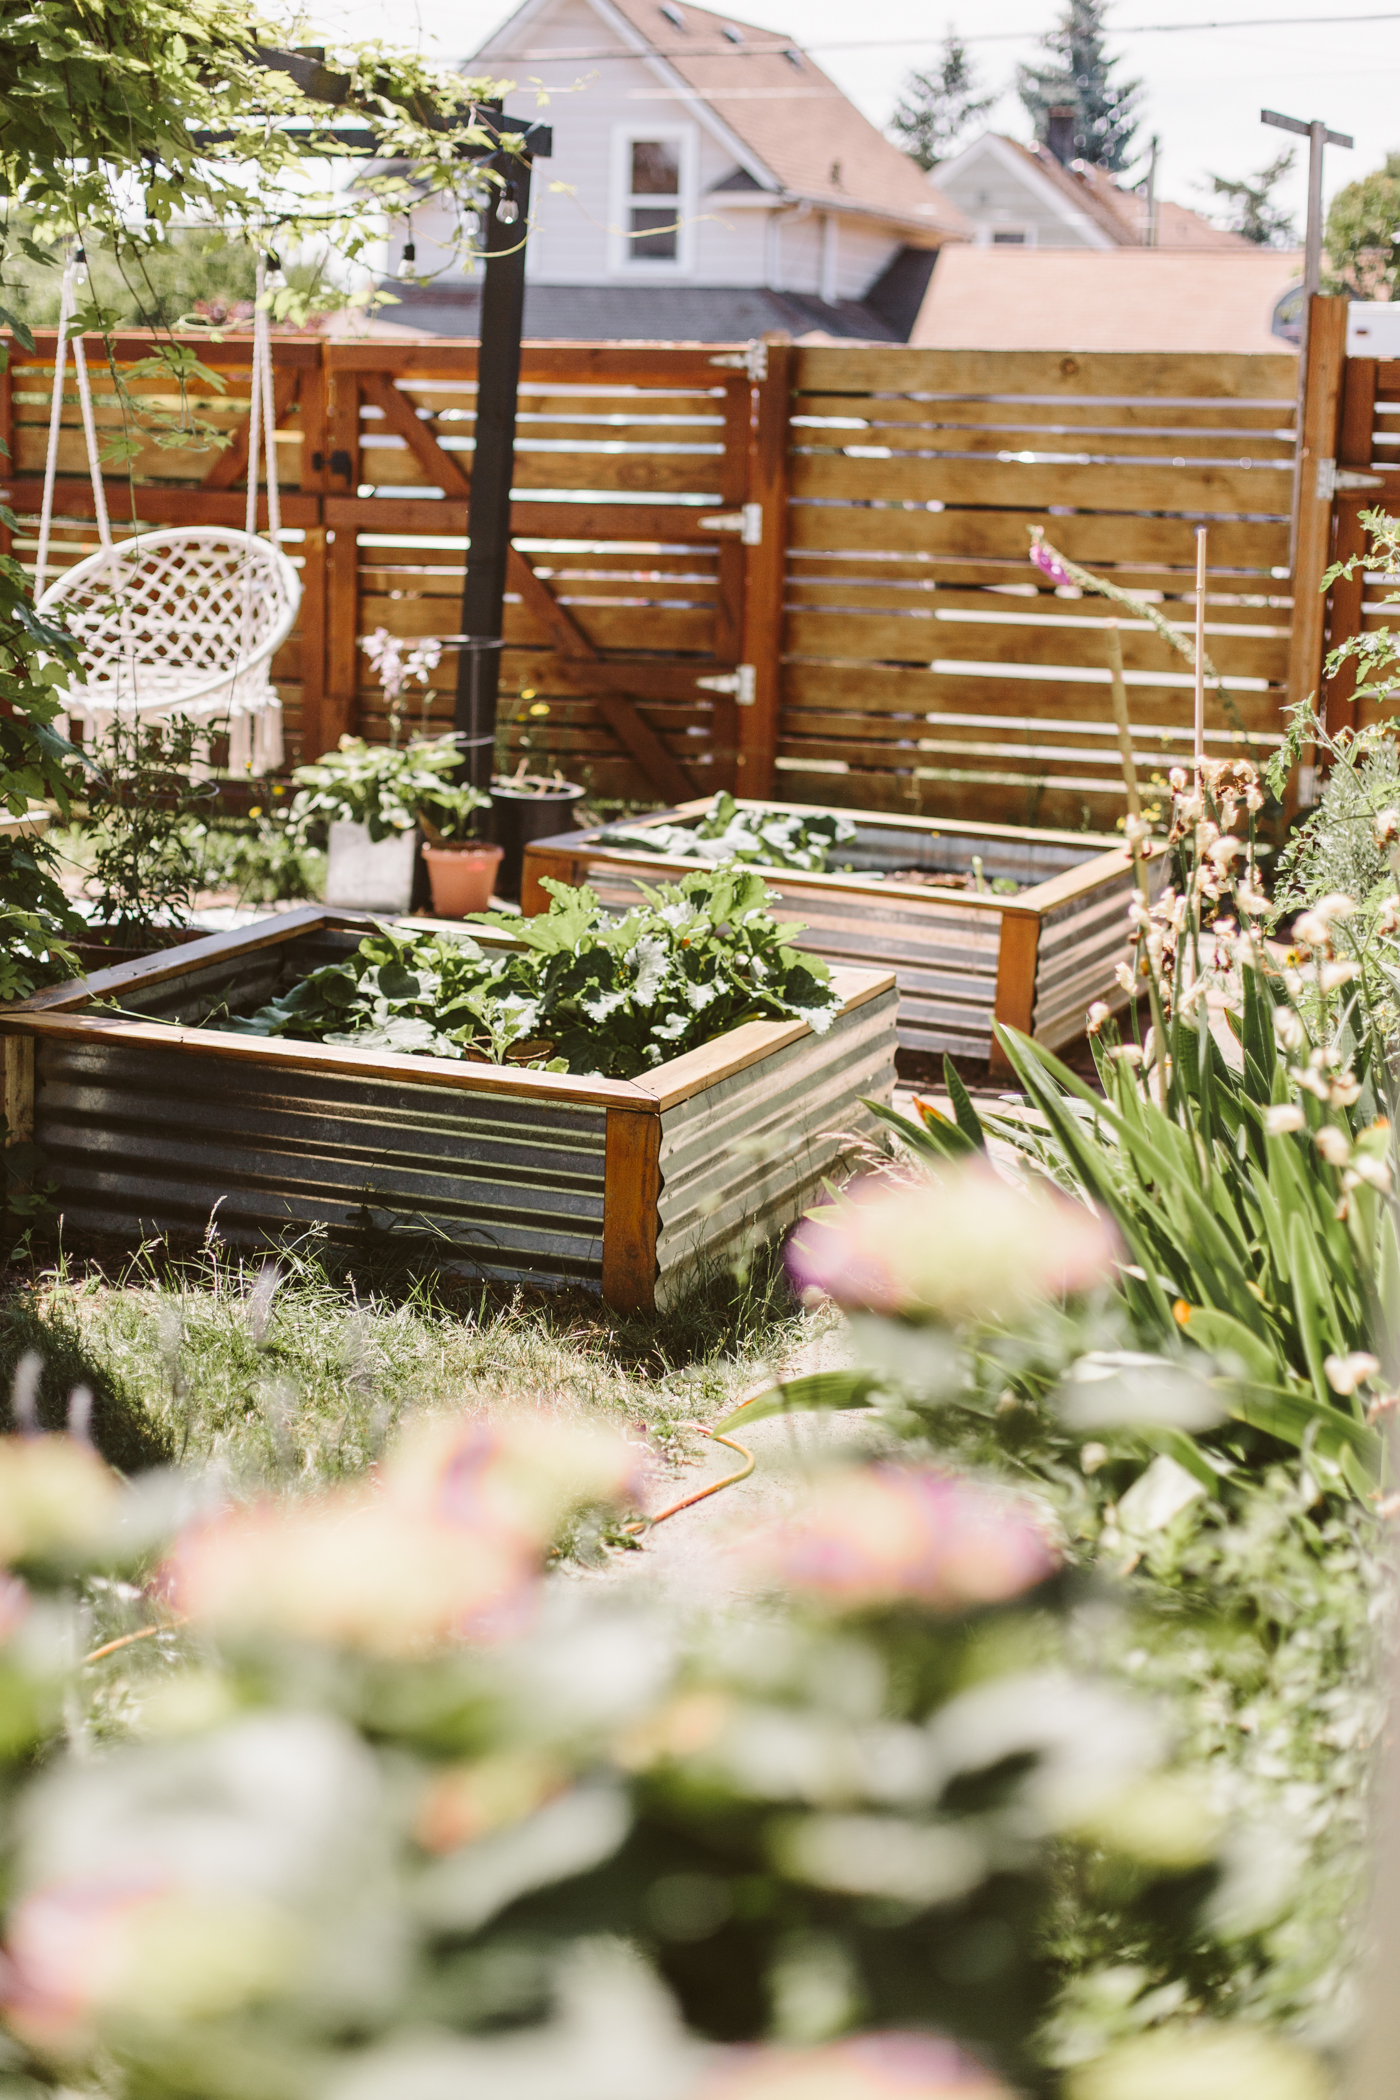
These beds are seriously one of my favorite DIYs that we did in our yard, they were pretty easy to build and I like the way they add a little bit of industrial vibes. I'm not usually a fan of corrugated metal, it can get too kitschy and shabby chic, but these are pretty low-profile and to me they don't read as either of those aesthetics.
What you'll need to make one 4ft x 4ft raised bed:
(adjust quantities sizes depending on the size of the beds you're making)
1- 8ft 4x4
2- 8ft galvanized corrugated metal sheets
2- 8ft 1x4's
16- 1 in screws with small washers (to attach the metal to the 4x4s)
8- 1.5 in wood screws (to attach the top trim to the 4x4s)
Skill Saw
Metal cutting skill saw blade (to cut the corrugated metal)

01/ Cut the 4x4 into four 15 inch long pieces to make the "legs" of your raised bed.

02/ Chop the two corrugated metal pieces in half to create four 4 ft pieces. Then cut each piece down to be 15 in wide-- the height of your raised beds.
03/ Attach one of your four metal pieces to two of the 4x4s to create the first side of the raised bed. Do this again to create the opposite side. Use the screws with washers and place the screws in the dips of the corrugated metal- I used 4 screws for each 4x4.
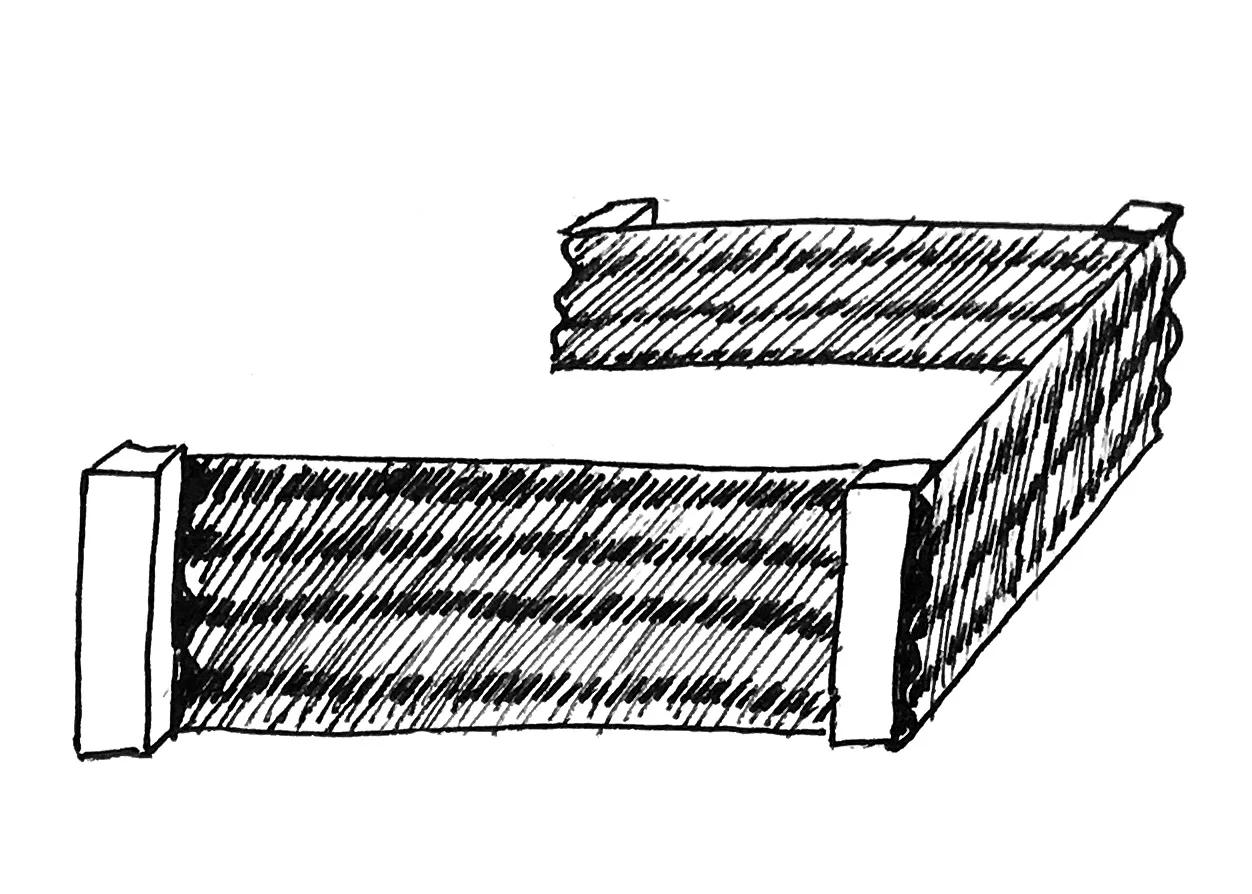
04/ Now you'll start putting the sides together. Place the two sides you've just made so they stand up (they should be able to stand up on their own, but if not, have someone help hold them), and have the metal sides facing each other. Take another piece of the corrugated metal that you pre-cut and place it against the 4x4 to create the third side of your bed. Screw it to the 4x4s with your screws + washers.
Two of the sides will have the metal "inside" the 4x4s and two will have the metal on the outside.
Do this again to attach the final side of the bed.
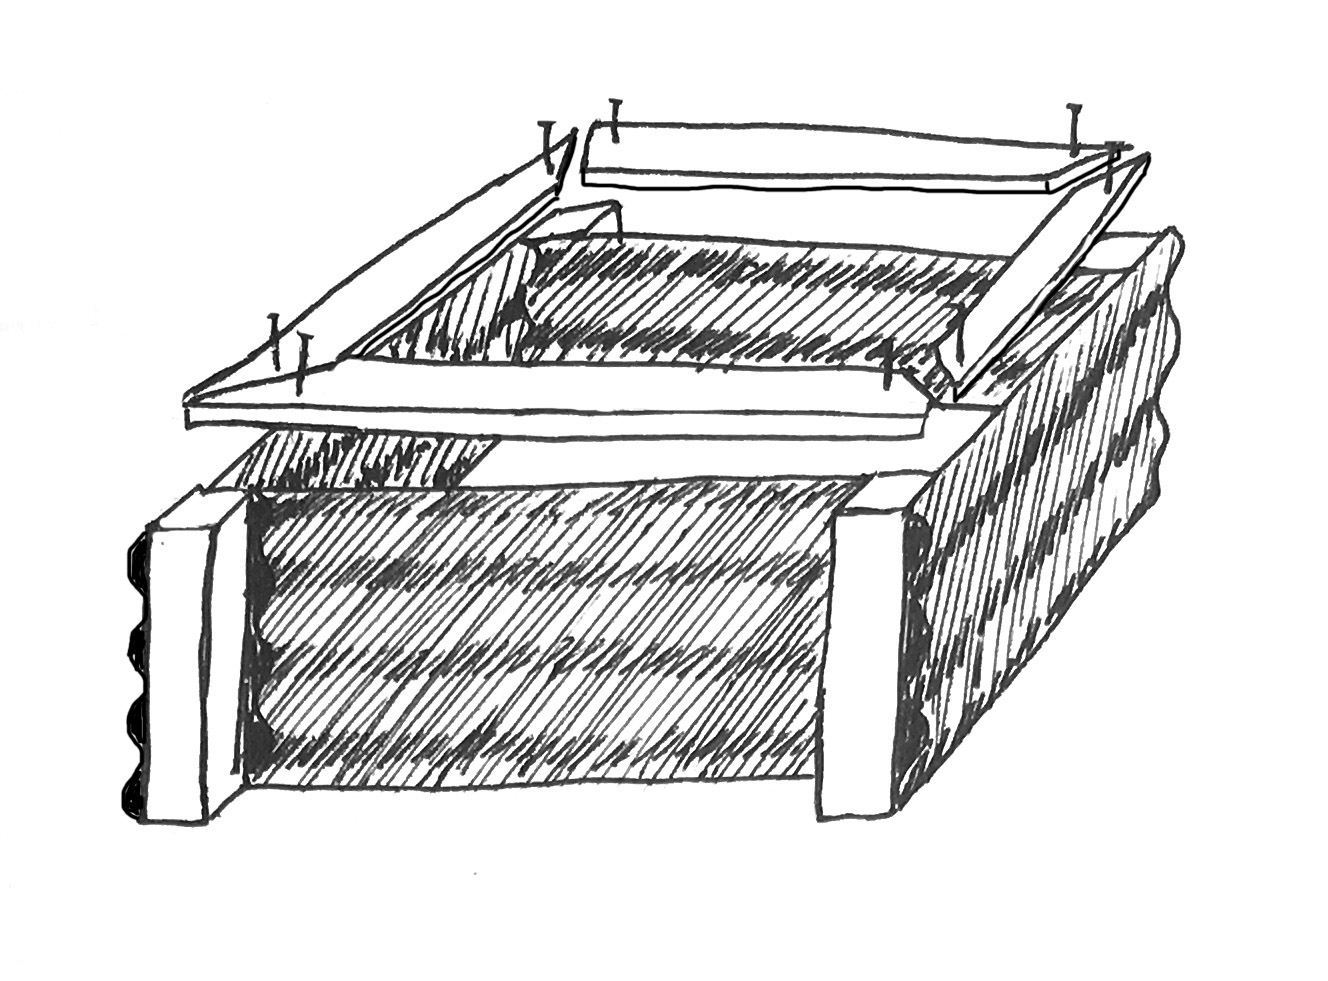
05/ Cut the 1x4s into four 4ft pieces, then cut a 45º angle on every end so that they fit together to create 90º corners. Place these flat on top the 4x4's and screw them into the top of the 4x4s.
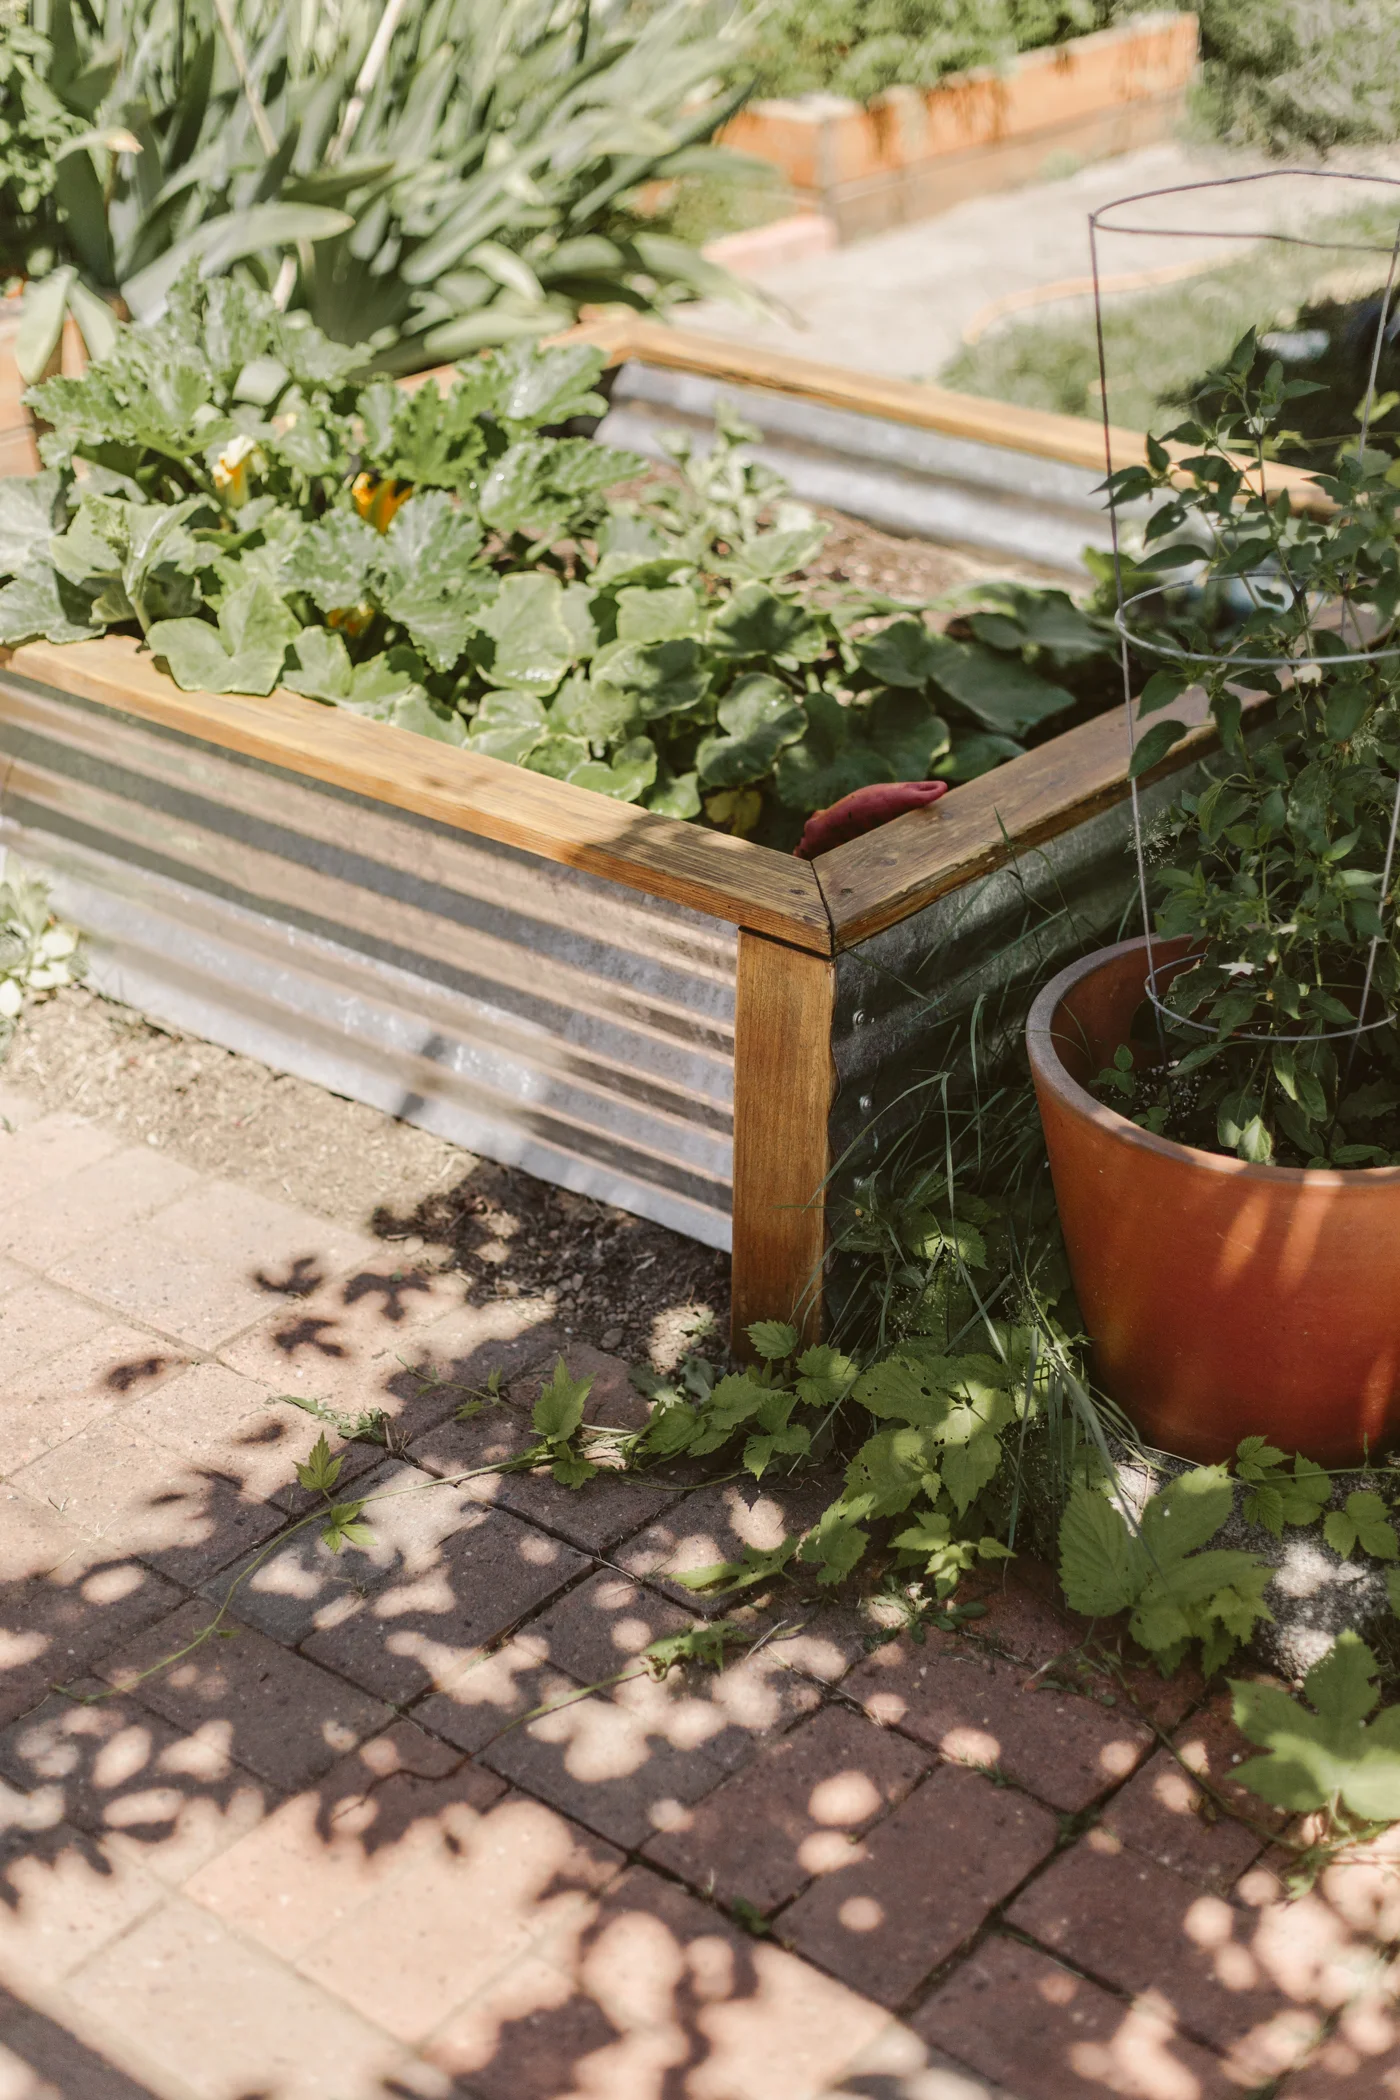
06/ optional, but I recommend staining the wood to protect it from the elements. We built our beds about 4 years ago and I just now had to sand and re-stain the top trim because it'd been worn down by all the rain we get in the winters.
The metal is still perfect and hasn't rusted at all! These beds are super affordable and can be made in an afternoon!
If you're worried about the beds moving (mine haven't at all) and want to anchor them a little, you can make the 4x4's a little longer than the bottom of the corrugated metal and dig those down into the ground, or just dig the whole thing, sides and all, into the ground a few inches.


You Might Also Like


Blueprint Lighting Glow Up
Thank you to Blueprint Lighting for sponsoring this post and providing the light fixture for this space.

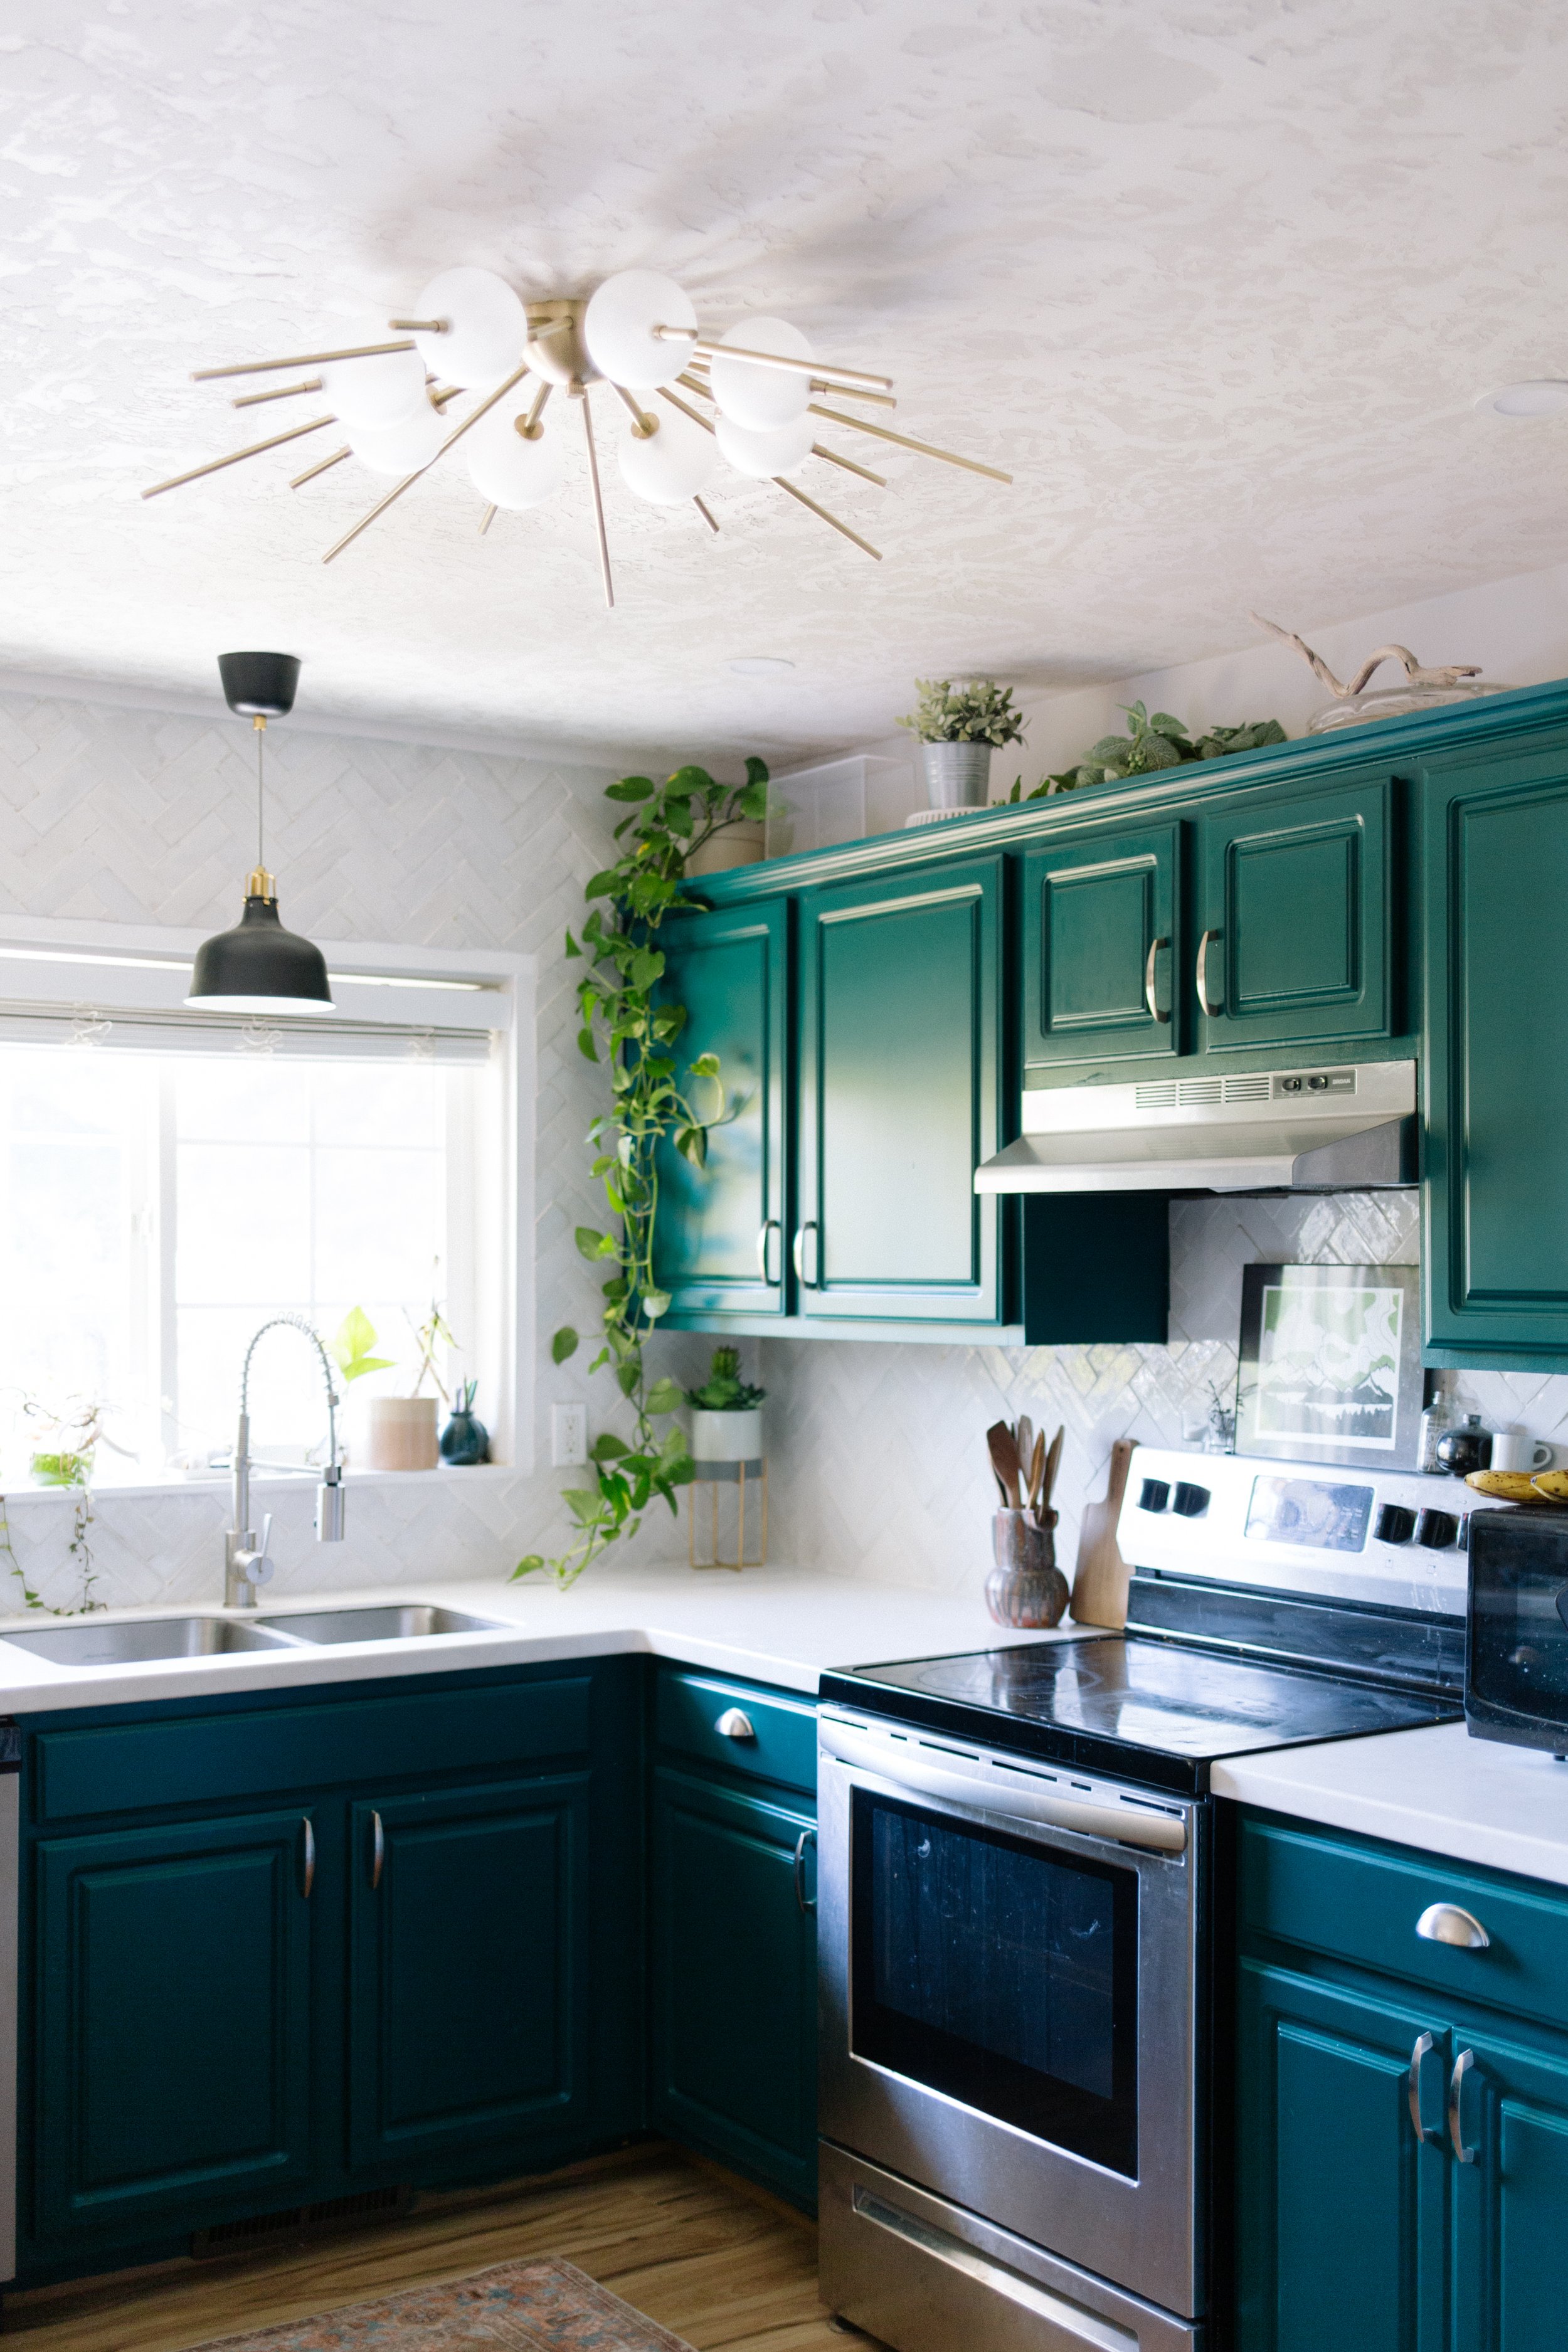
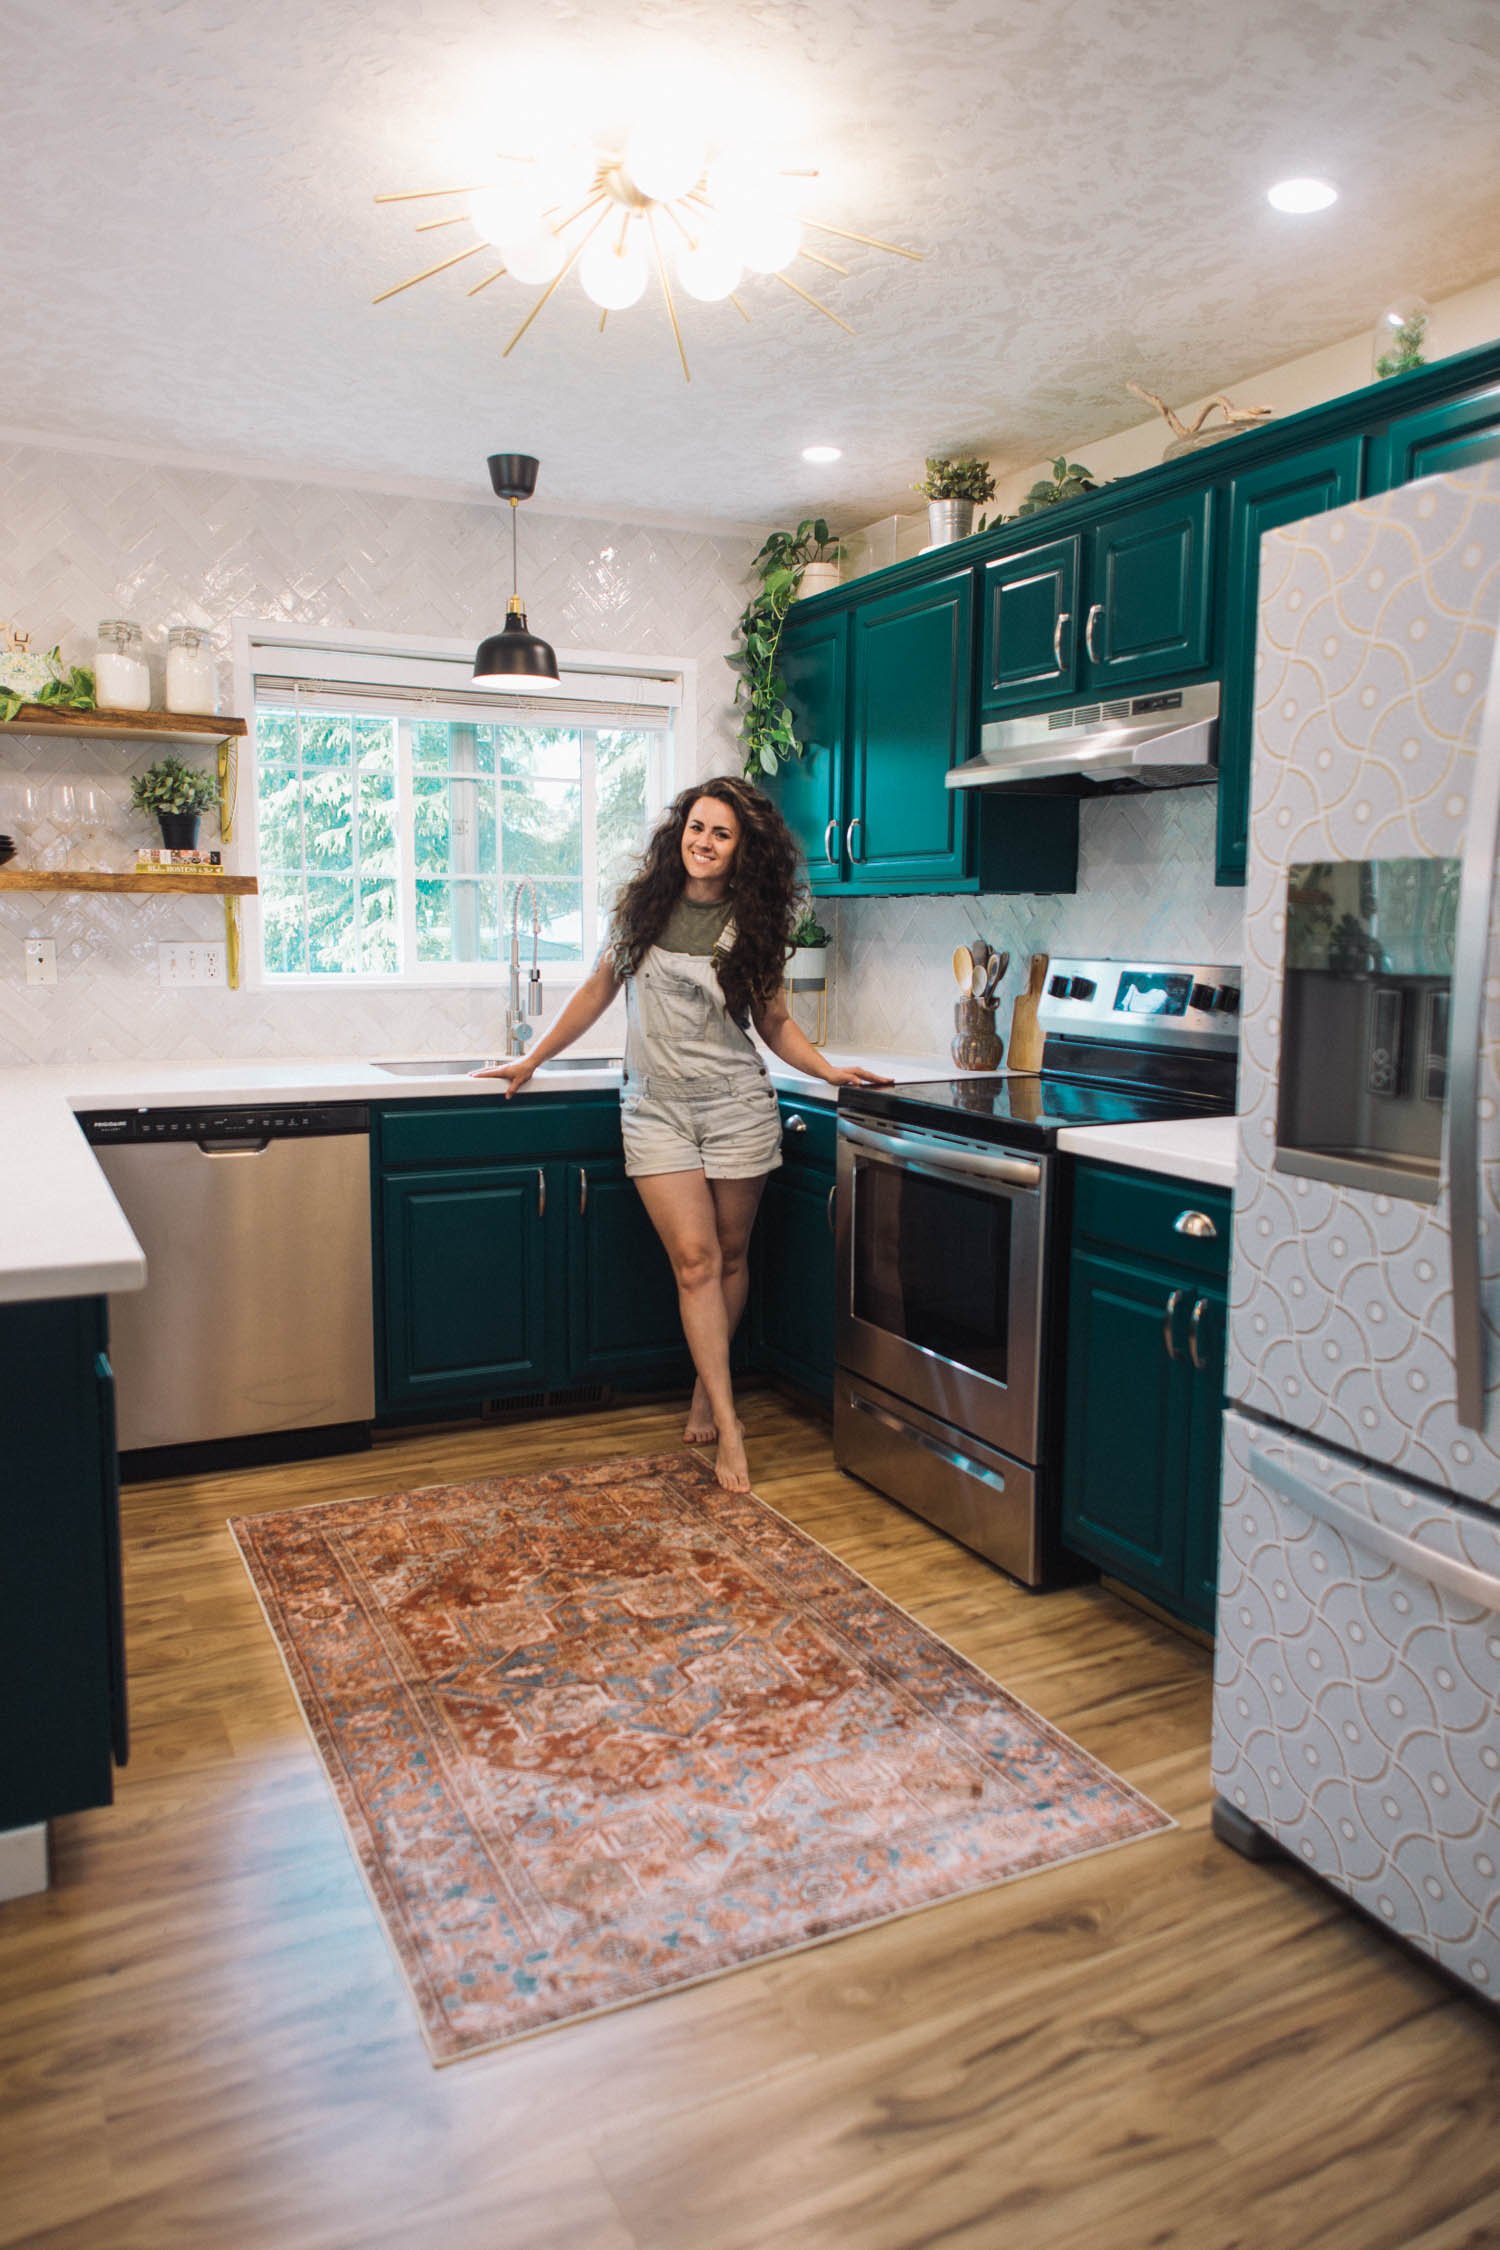
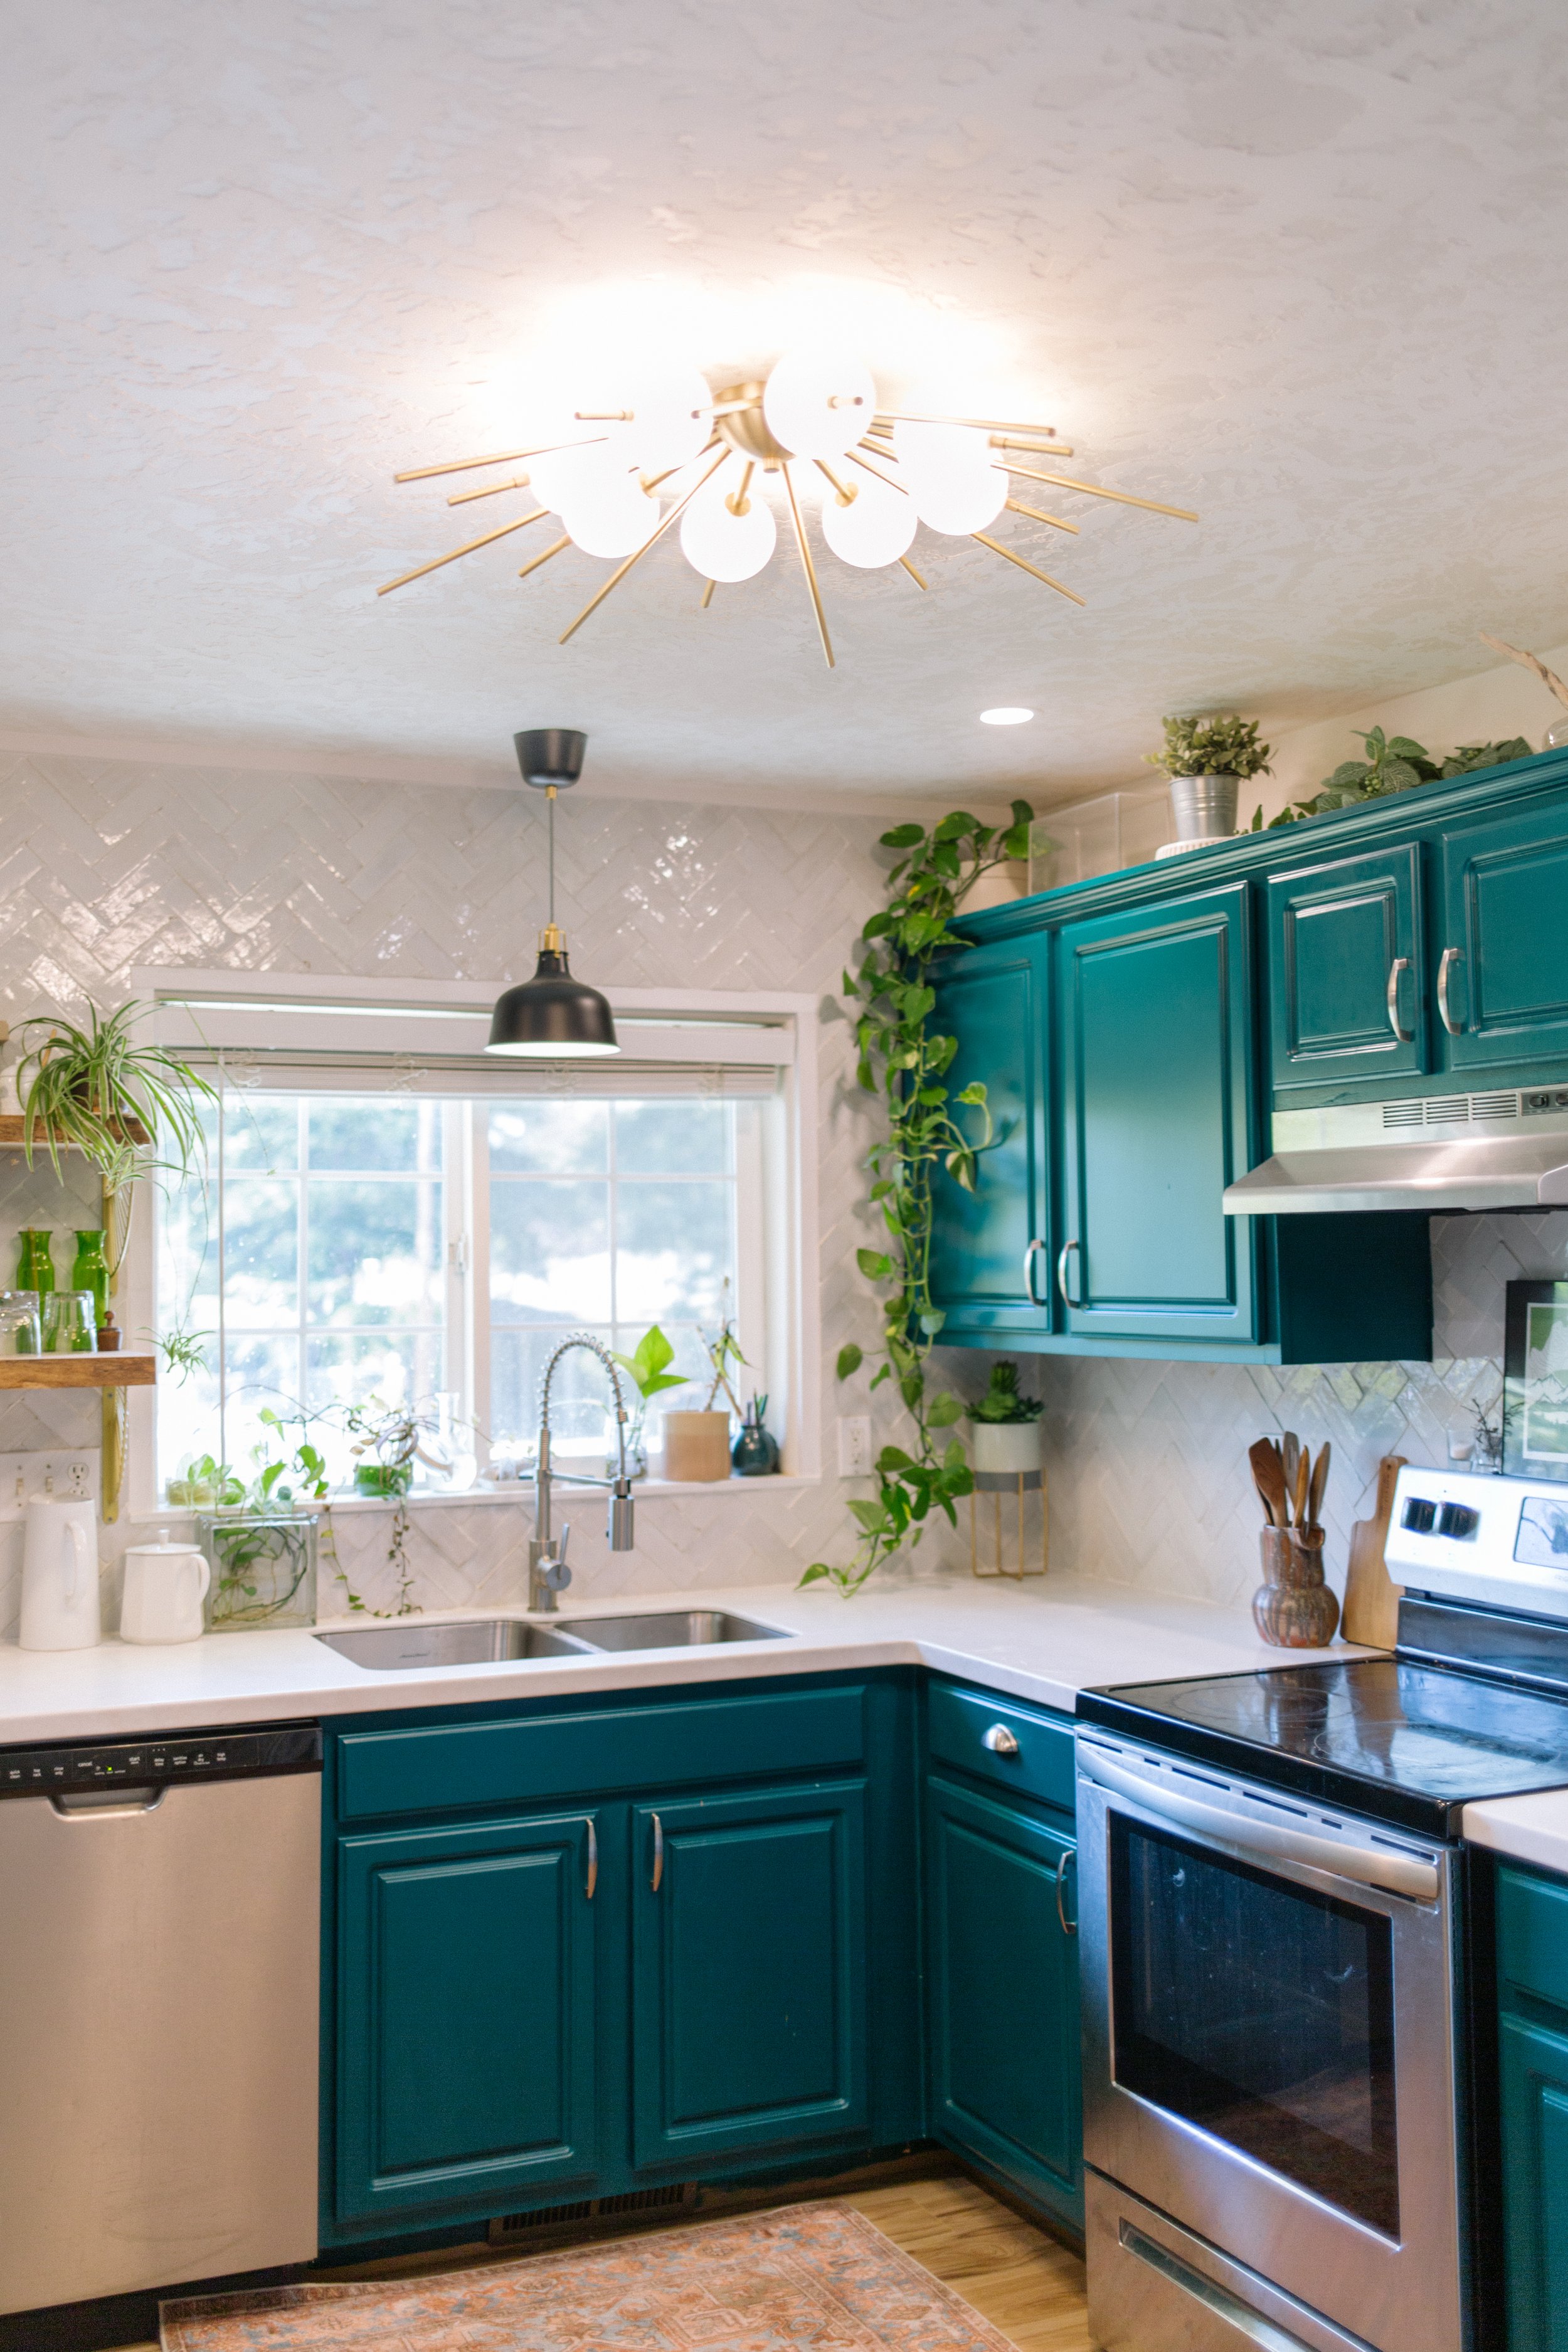
It’s truly hard to say what the biggest transformation in this space was since every single element made such an impact, but updating light fixtures not only replaced an ugly element with something stunning, but also vastly improved the brightness in a room that was previously pretty dark.
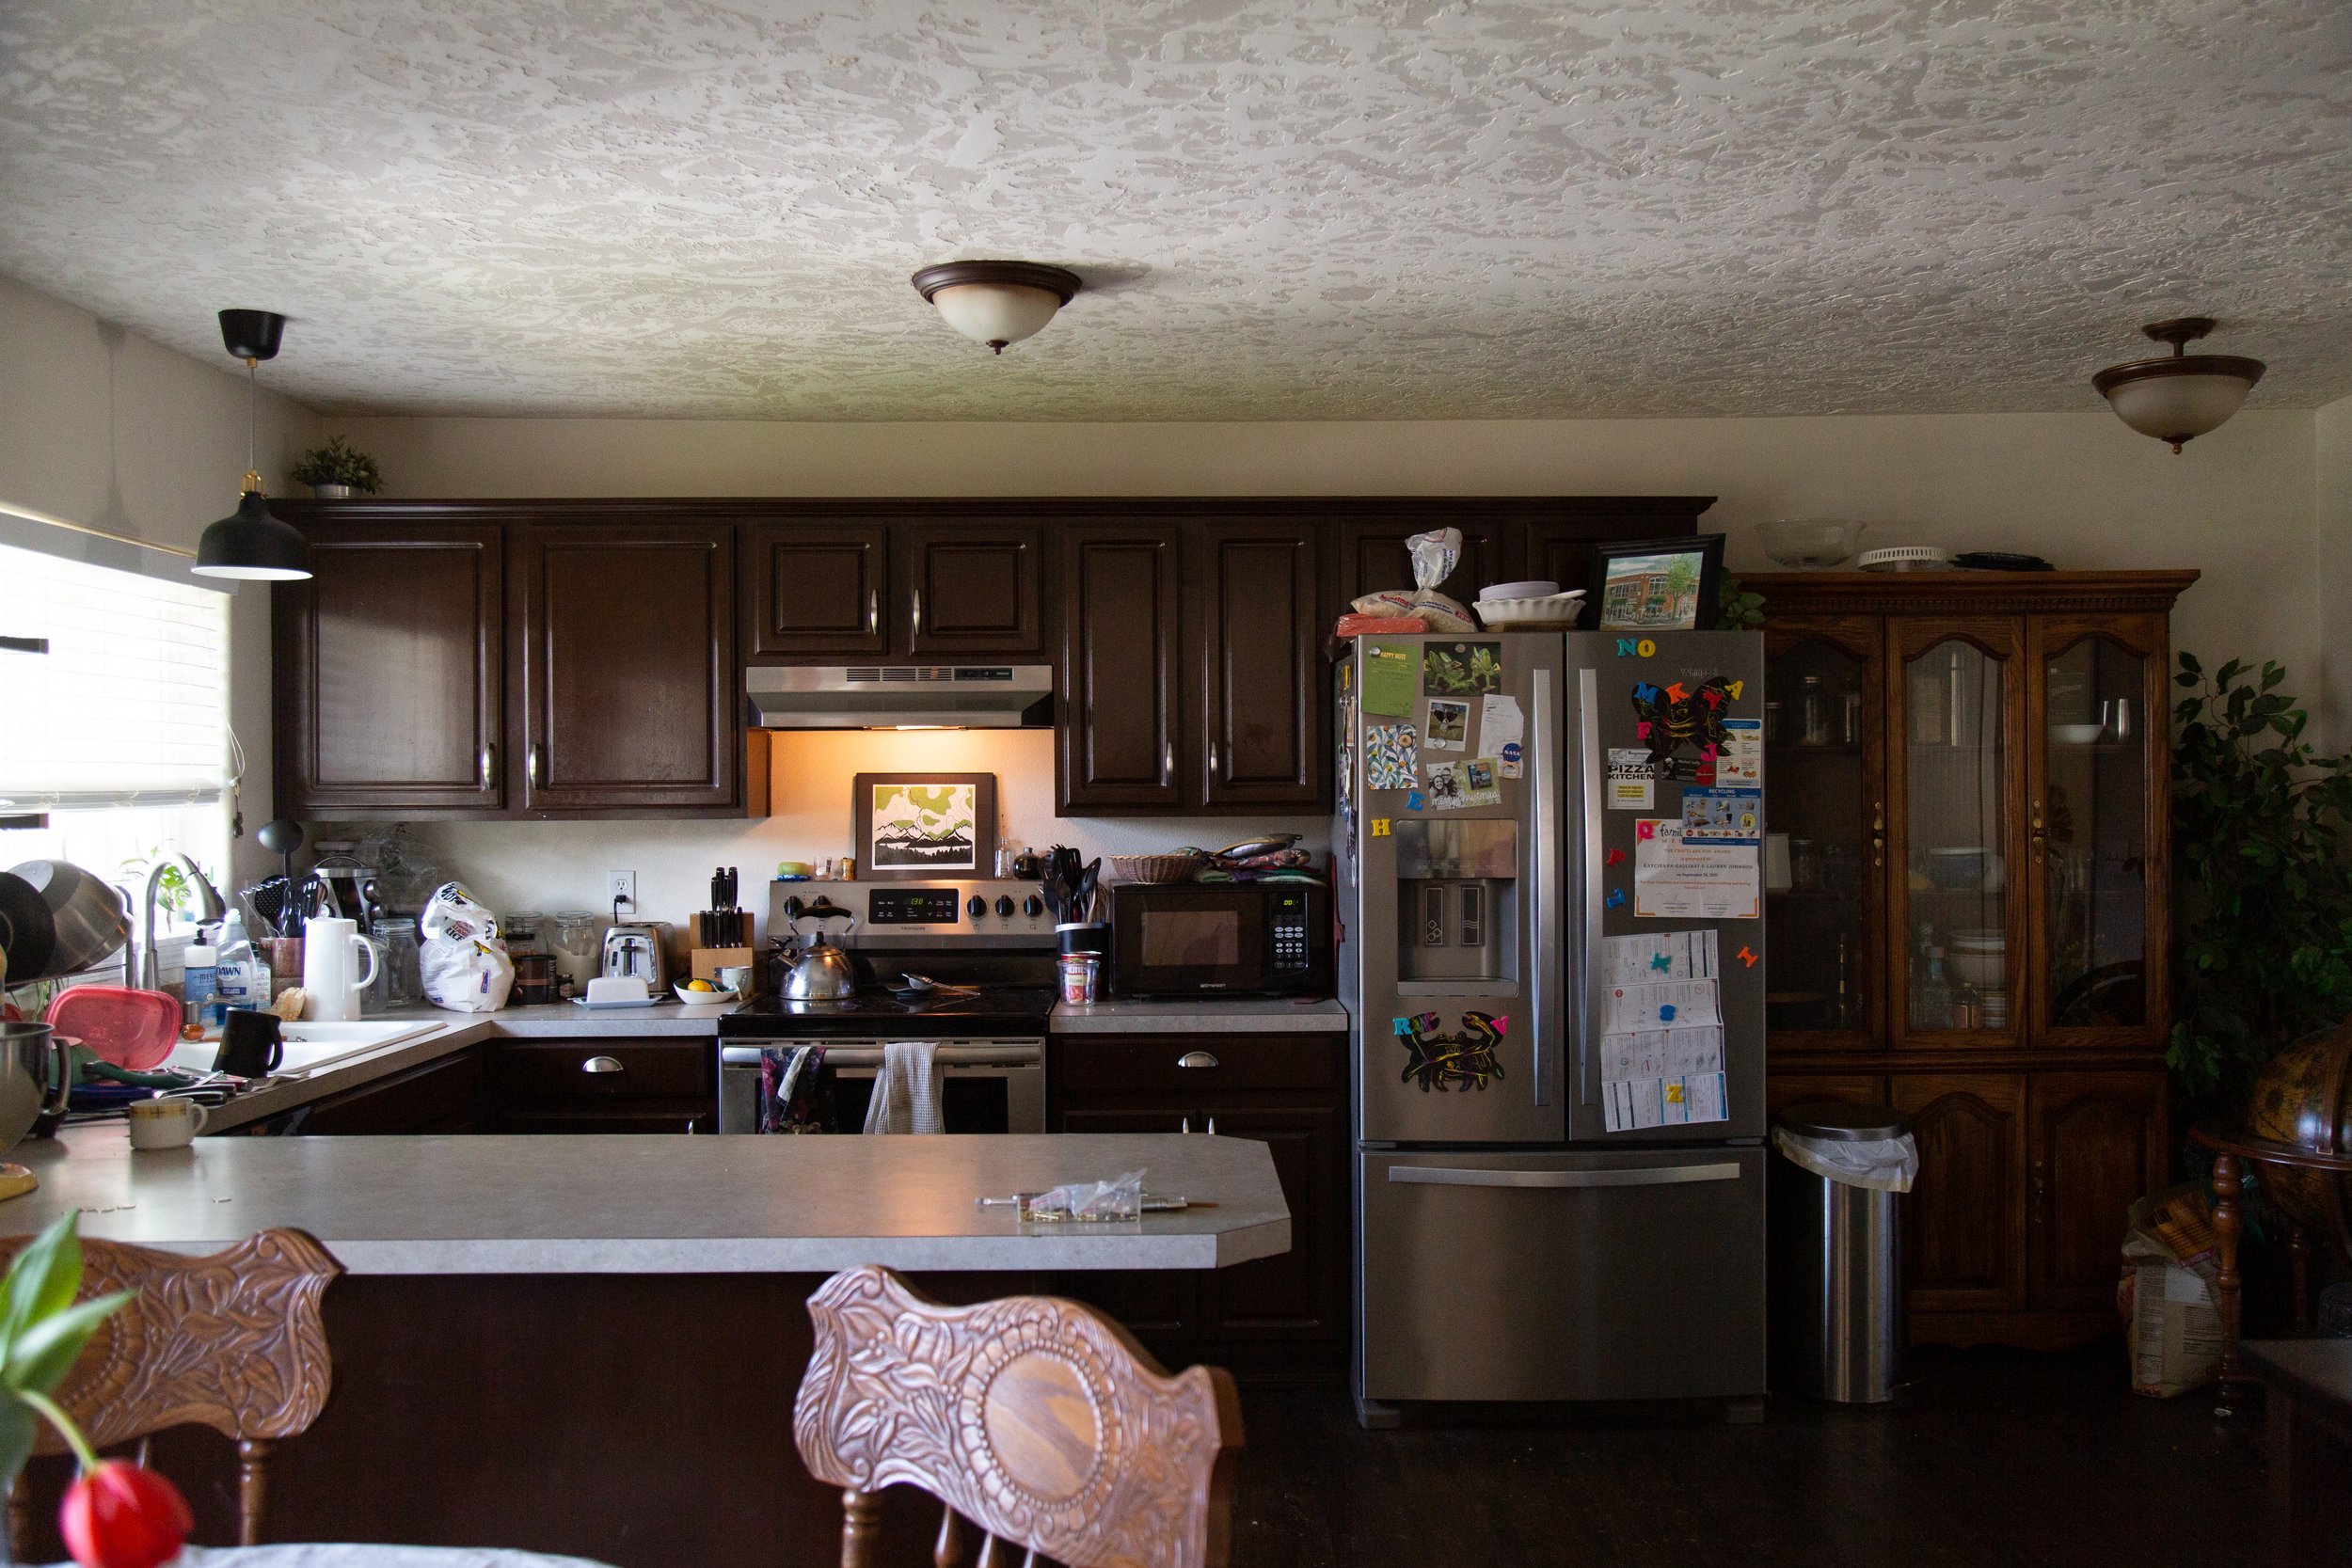
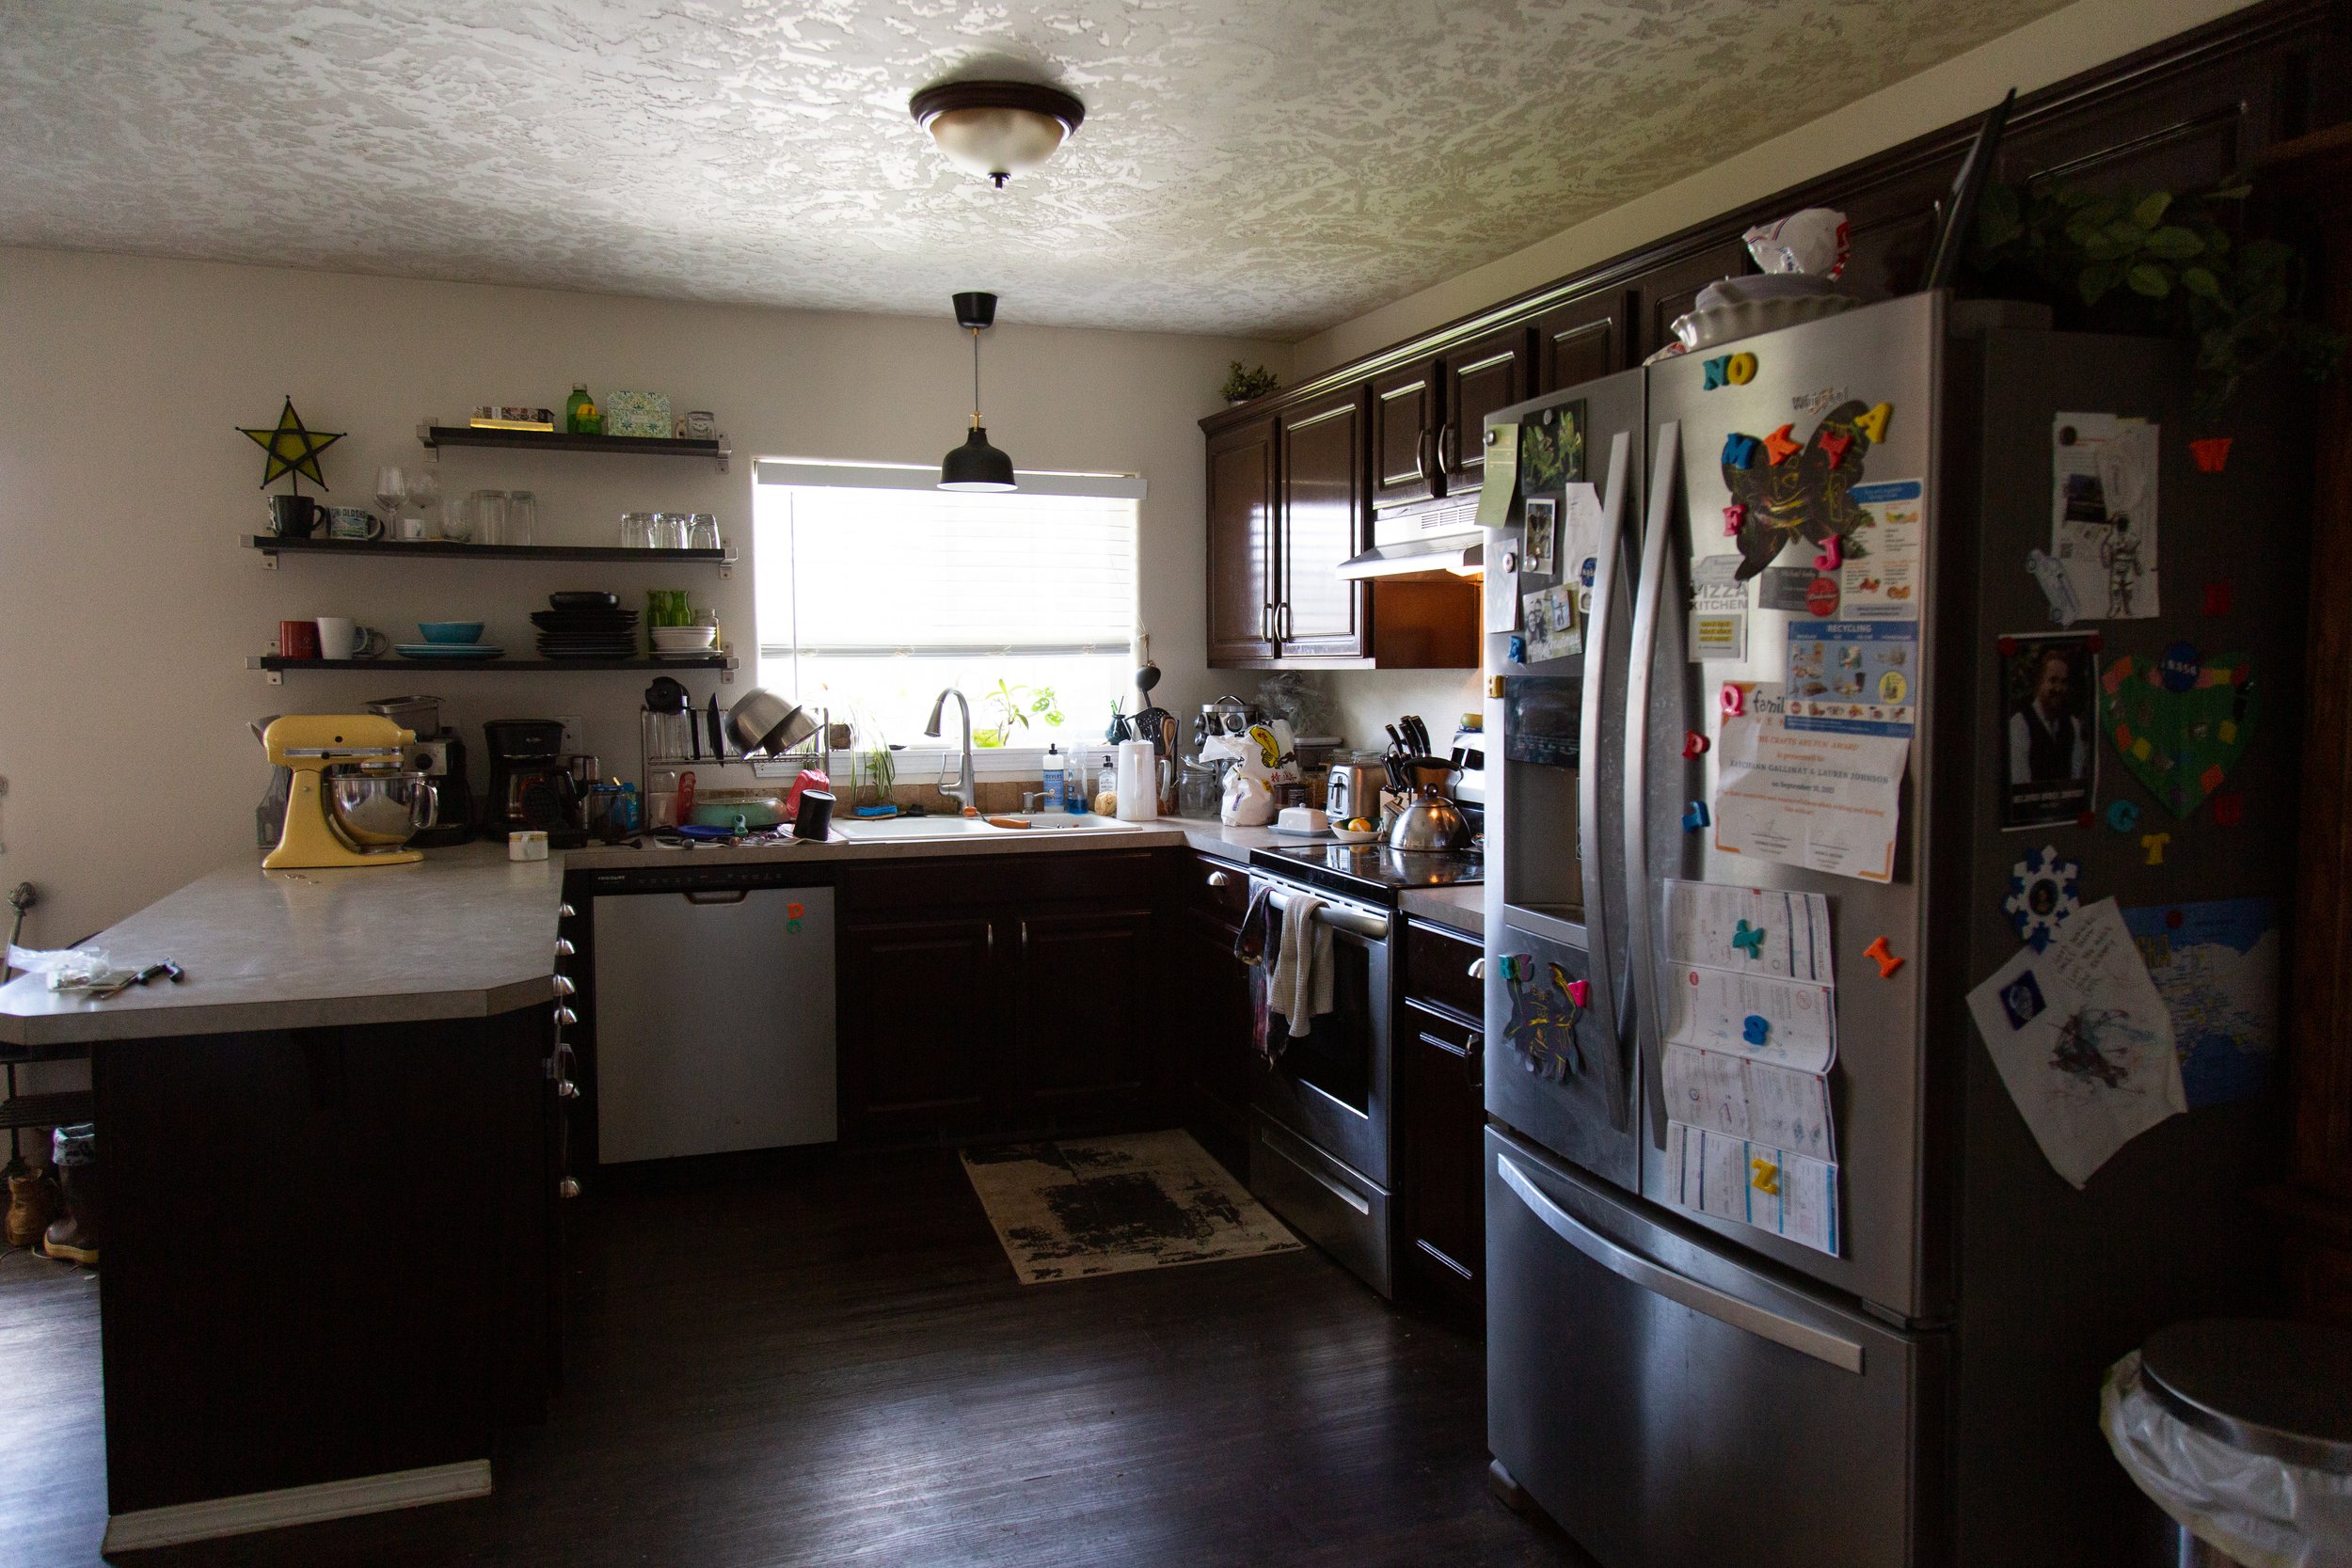
The original “boob light” flushmount fixture was ugly, sure, but it also did not do enough in terms of lighting the kitchen. This kitchen only has a north facing window, which means in the overcast winter days, it was not lighting the space adequately.
The ceilings in this room aren’t high enough for much more than a flushmount, so I knew I’d have to replace it with something at least semi-flushmount at most, and when I found Blueprint Lighting’s Lucienne flushmount I immediately knew it’d be perfect!
They sent over a whole set of finish samples, which made it even harder to pick because there are so many color and finish options! I almost went with the Malachite or Denmark colors to match the cabinet color, but ultimately I decided to go with the brushed brass to match the other brass elements in the room.
It’s legitimately one of the most beautiful light fixtures I’ve ever installed and now I’m jealous that it’s in my brother’s kitchen, not my own, thought to be honest, I do have my eye on some of their chandeliers for my kitchen. Now that my ceiling is painted black, a light fixture would really pop against the dark ceiling!

Jack's yellow ceiling!

This is your sign to paint your ceiling! I love how fun this room is now that the ceiling is painted!


Hi, I’m Liz
I'm an artist, writer, designer, DIY renovator, and … well basically I like to do all the things. If it’s creative I’m probably doing it. I’ve spent over 30 years voraciously pursuing a life steeped in creativity and I wholeheartedly believe creativity and joy are inextricably linked.
Read more…


Explore The Archive
- July 2025
- May 2025
- January 2025
- December 2024
- August 2024
- July 2024
- May 2024
- April 2024
- January 2024
- December 2023
- October 2023
- September 2023
- July 2023
- June 2023
- May 2023
- April 2023
- March 2023
- February 2023
- January 2023
- December 2022
- November 2022
- October 2022
- August 2022
- June 2022
- May 2022
- April 2022
- March 2022
- November 2021
- October 2021
- August 2021
- July 2021
- May 2021
- January 2021
- November 2020
- October 2020
- September 2020
- August 2020
- July 2020
- June 2020
- May 2020
- April 2020
- February 2020
- January 2020
- November 2019
- October 2019
- August 2019
- July 2019
- June 2019
- May 2019
- April 2019
- February 2019
- January 2019
- December 2018
- November 2018
- October 2018
- September 2018
- August 2018
- July 2018
- June 2018
- May 2018
- April 2018
- February 2018
- January 2018
- November 2017
- September 2017
- August 2017
- July 2017
- June 2017
- May 2017
- April 2017
- March 2017
- February 2017
- January 2017
- December 2016
- November 2016
- October 2016
- September 2016
- August 2016
- June 2016
- May 2016
- April 2016
- March 2016
- February 2016
- January 2016
- December 2015
- November 2015
- October 2015
- September 2015
- August 2015
- July 2015
- June 2015
- May 2015
- April 2015
- March 2015
- February 2015
- January 2015
- December 2014
- November 2014
- October 2014
- September 2014
- August 2014
- July 2014
- June 2014
- May 2014
- April 2014
- March 2014
- February 2014
- January 2014
- December 2013
- November 2013
- October 2013
- September 2013
- August 2013
- July 2013
- June 2013
- May 2013
- April 2013
- March 2013
- February 2013
- January 2013
- December 2012
- November 2012
- October 2012
- September 2012
- August 2012
- July 2012
- June 2012
- May 2012
- April 2012
- March 2012
- February 2012
- January 2012
- December 2011
- November 2011
- October 2011
- September 2011
- August 2011
- July 2011
- June 2011
- May 2011
- April 2011
- March 2011
- February 2011
- January 2011
- December 2010
- November 2010
- October 2010
- September 2010
- August 2010
- July 2010
- June 2010
- May 2010
- April 2010
- March 2010
- February 2010
- January 2010
- December 2009
- November 2009
- October 2009
- September 2009
- August 2009
- July 2009
- June 2009
- May 2009
- April 2009
- March 2009
- February 2009
- January 2009
- December 2008
- November 2008
- October 2008
- September 2008
- August 2008
- July 2008

VISIT THE SHOP


PRIVACY POLICY & DISCLOSURE
We are a participant in the Amazon Services LLC Associates Program, an affiliate advertising program designed to provide a means for us to earn fees by linking to Amazon.com and affiliated sites.