

Blueprint Lighting Glow Up
Thank you to Blueprint Lighting for sponsoring this post and providing the light fixture for this space.

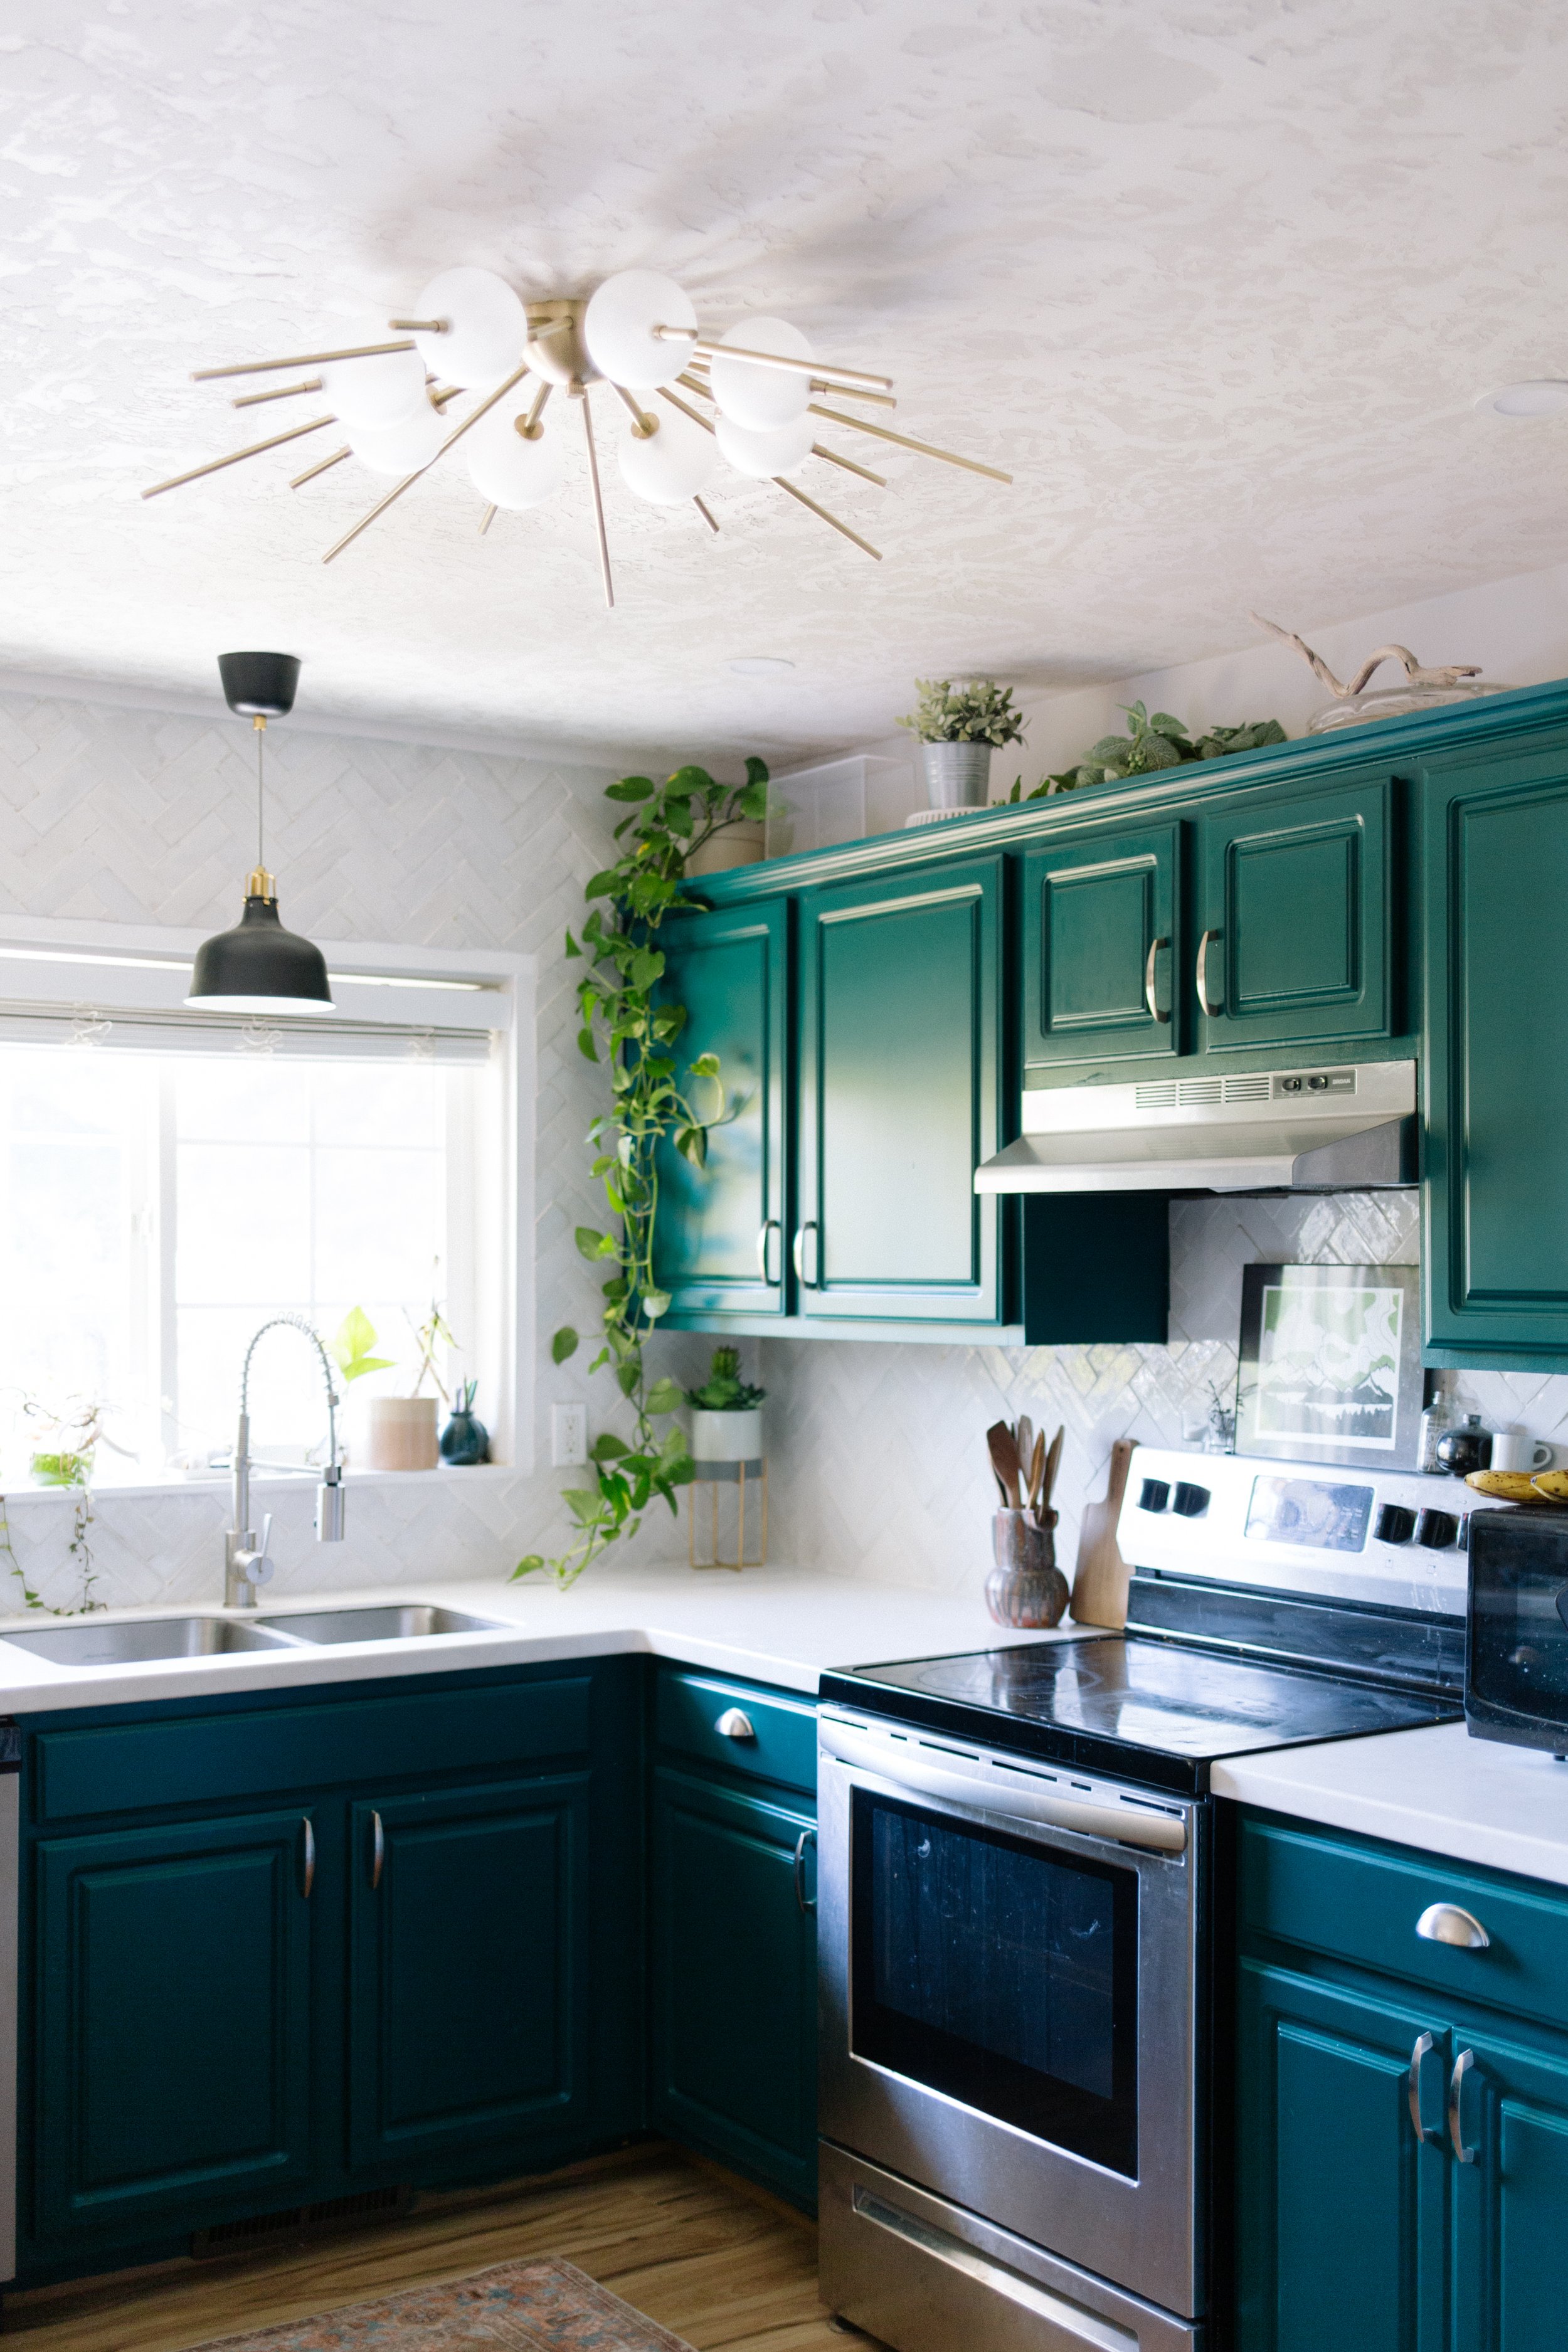
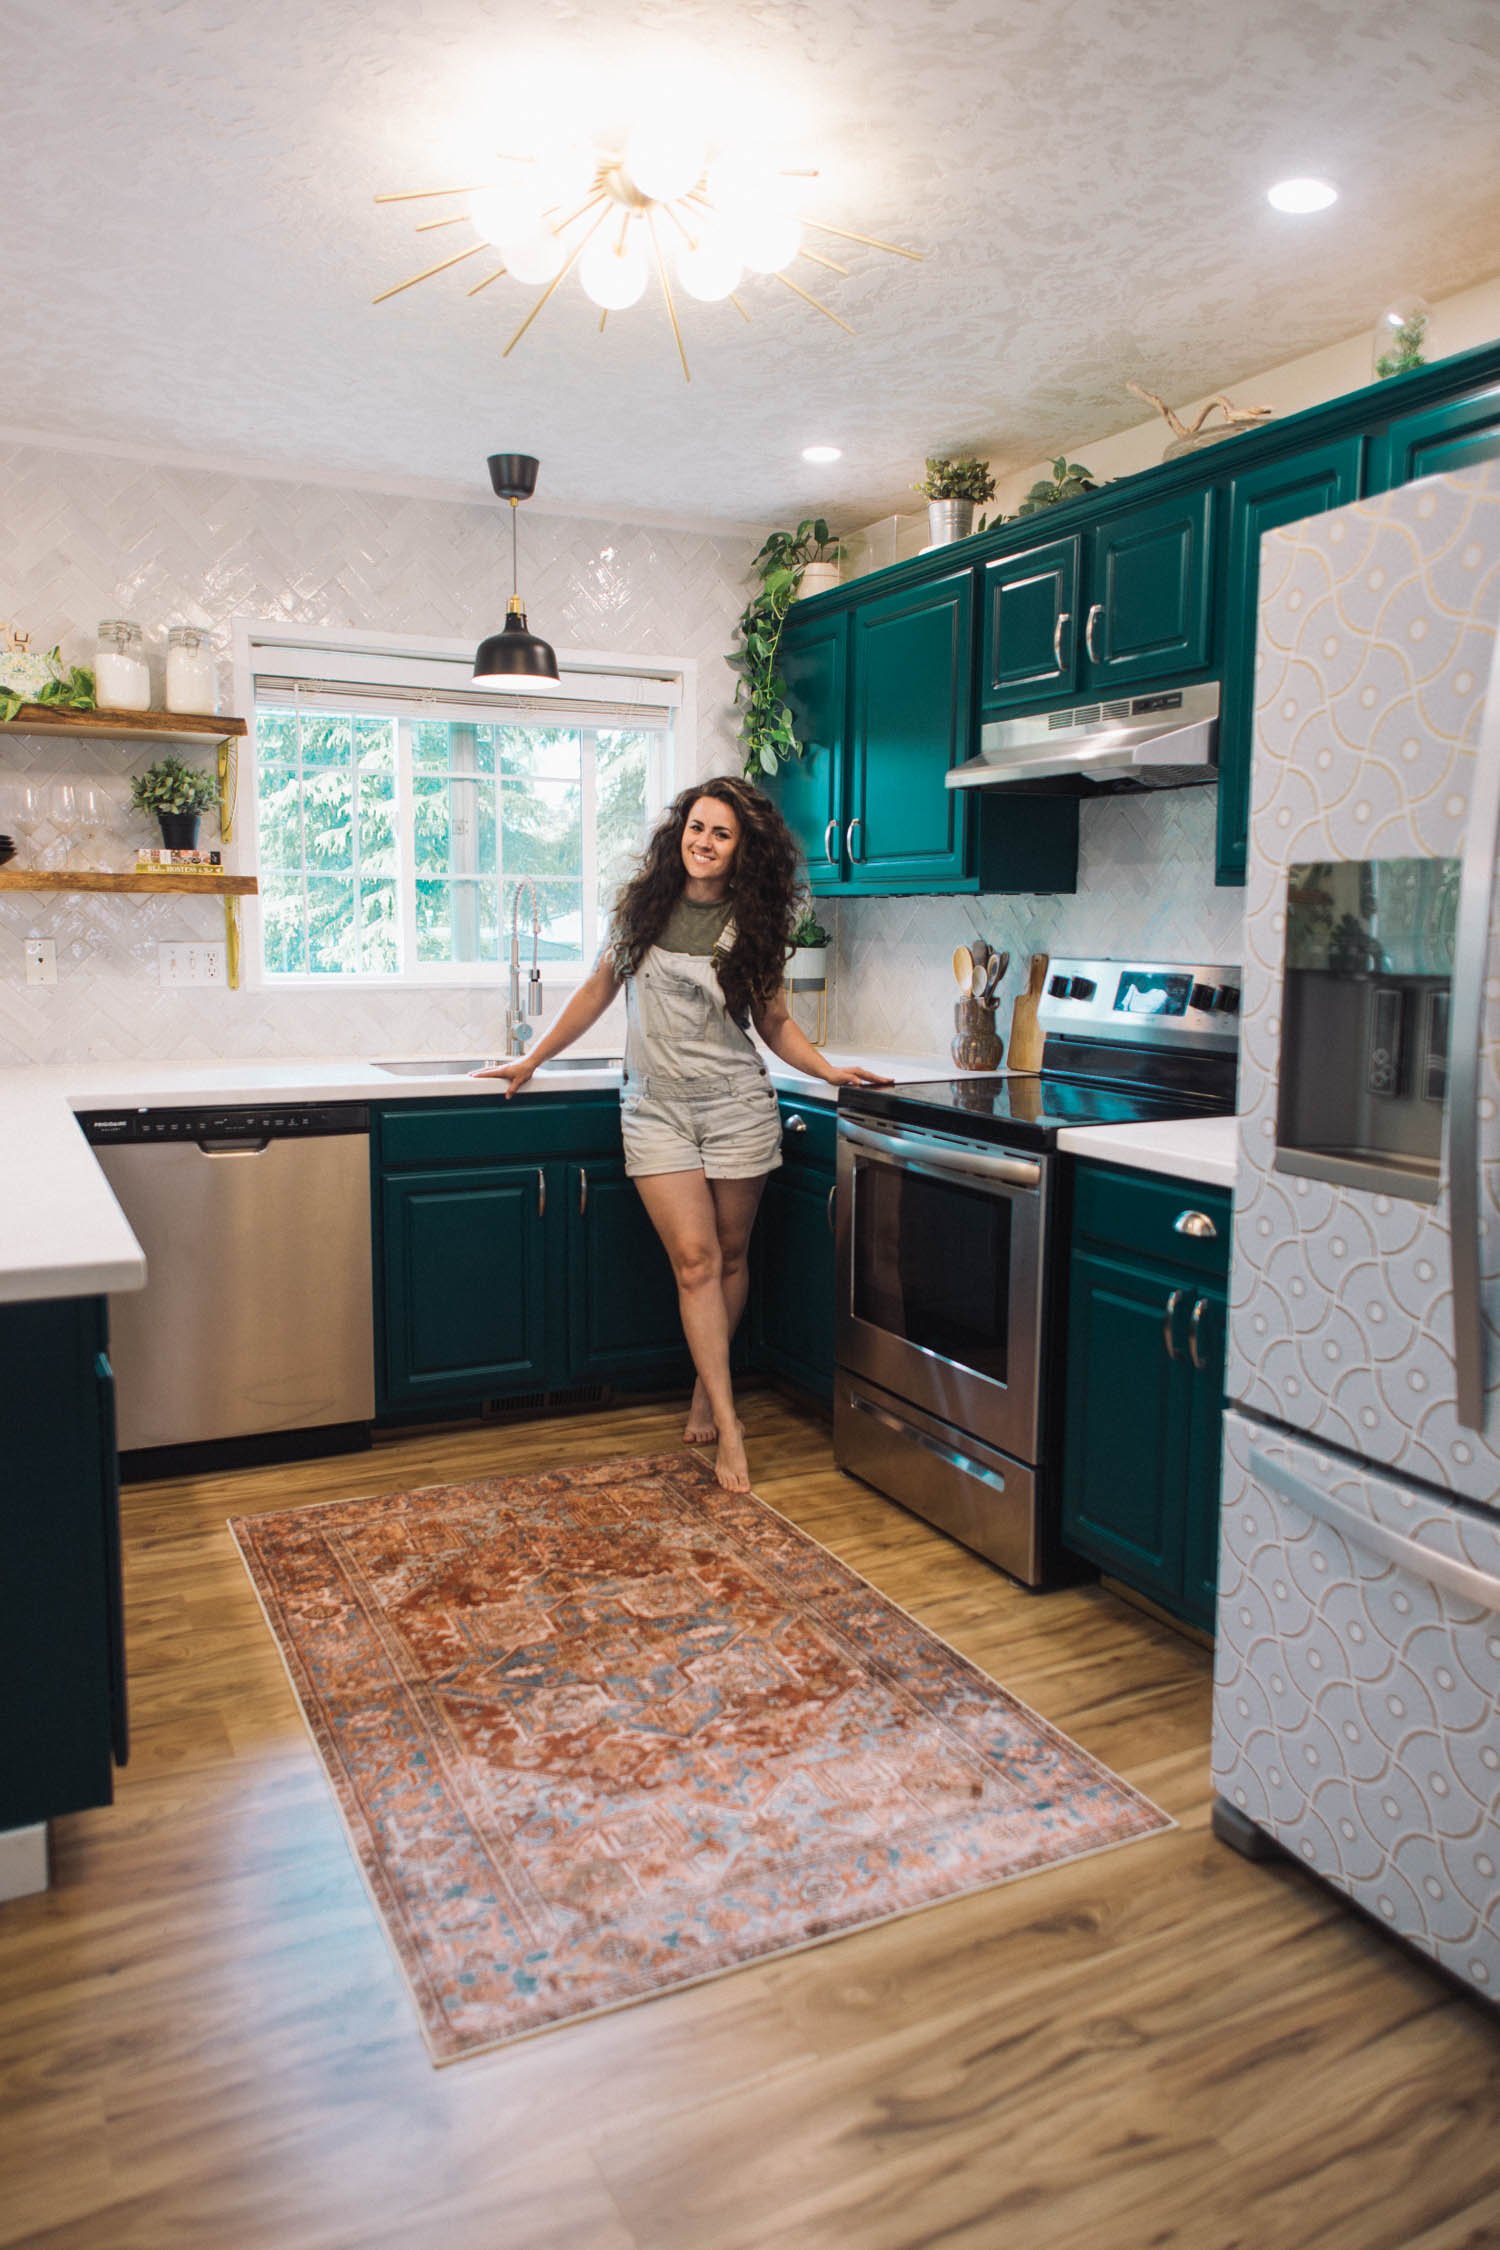
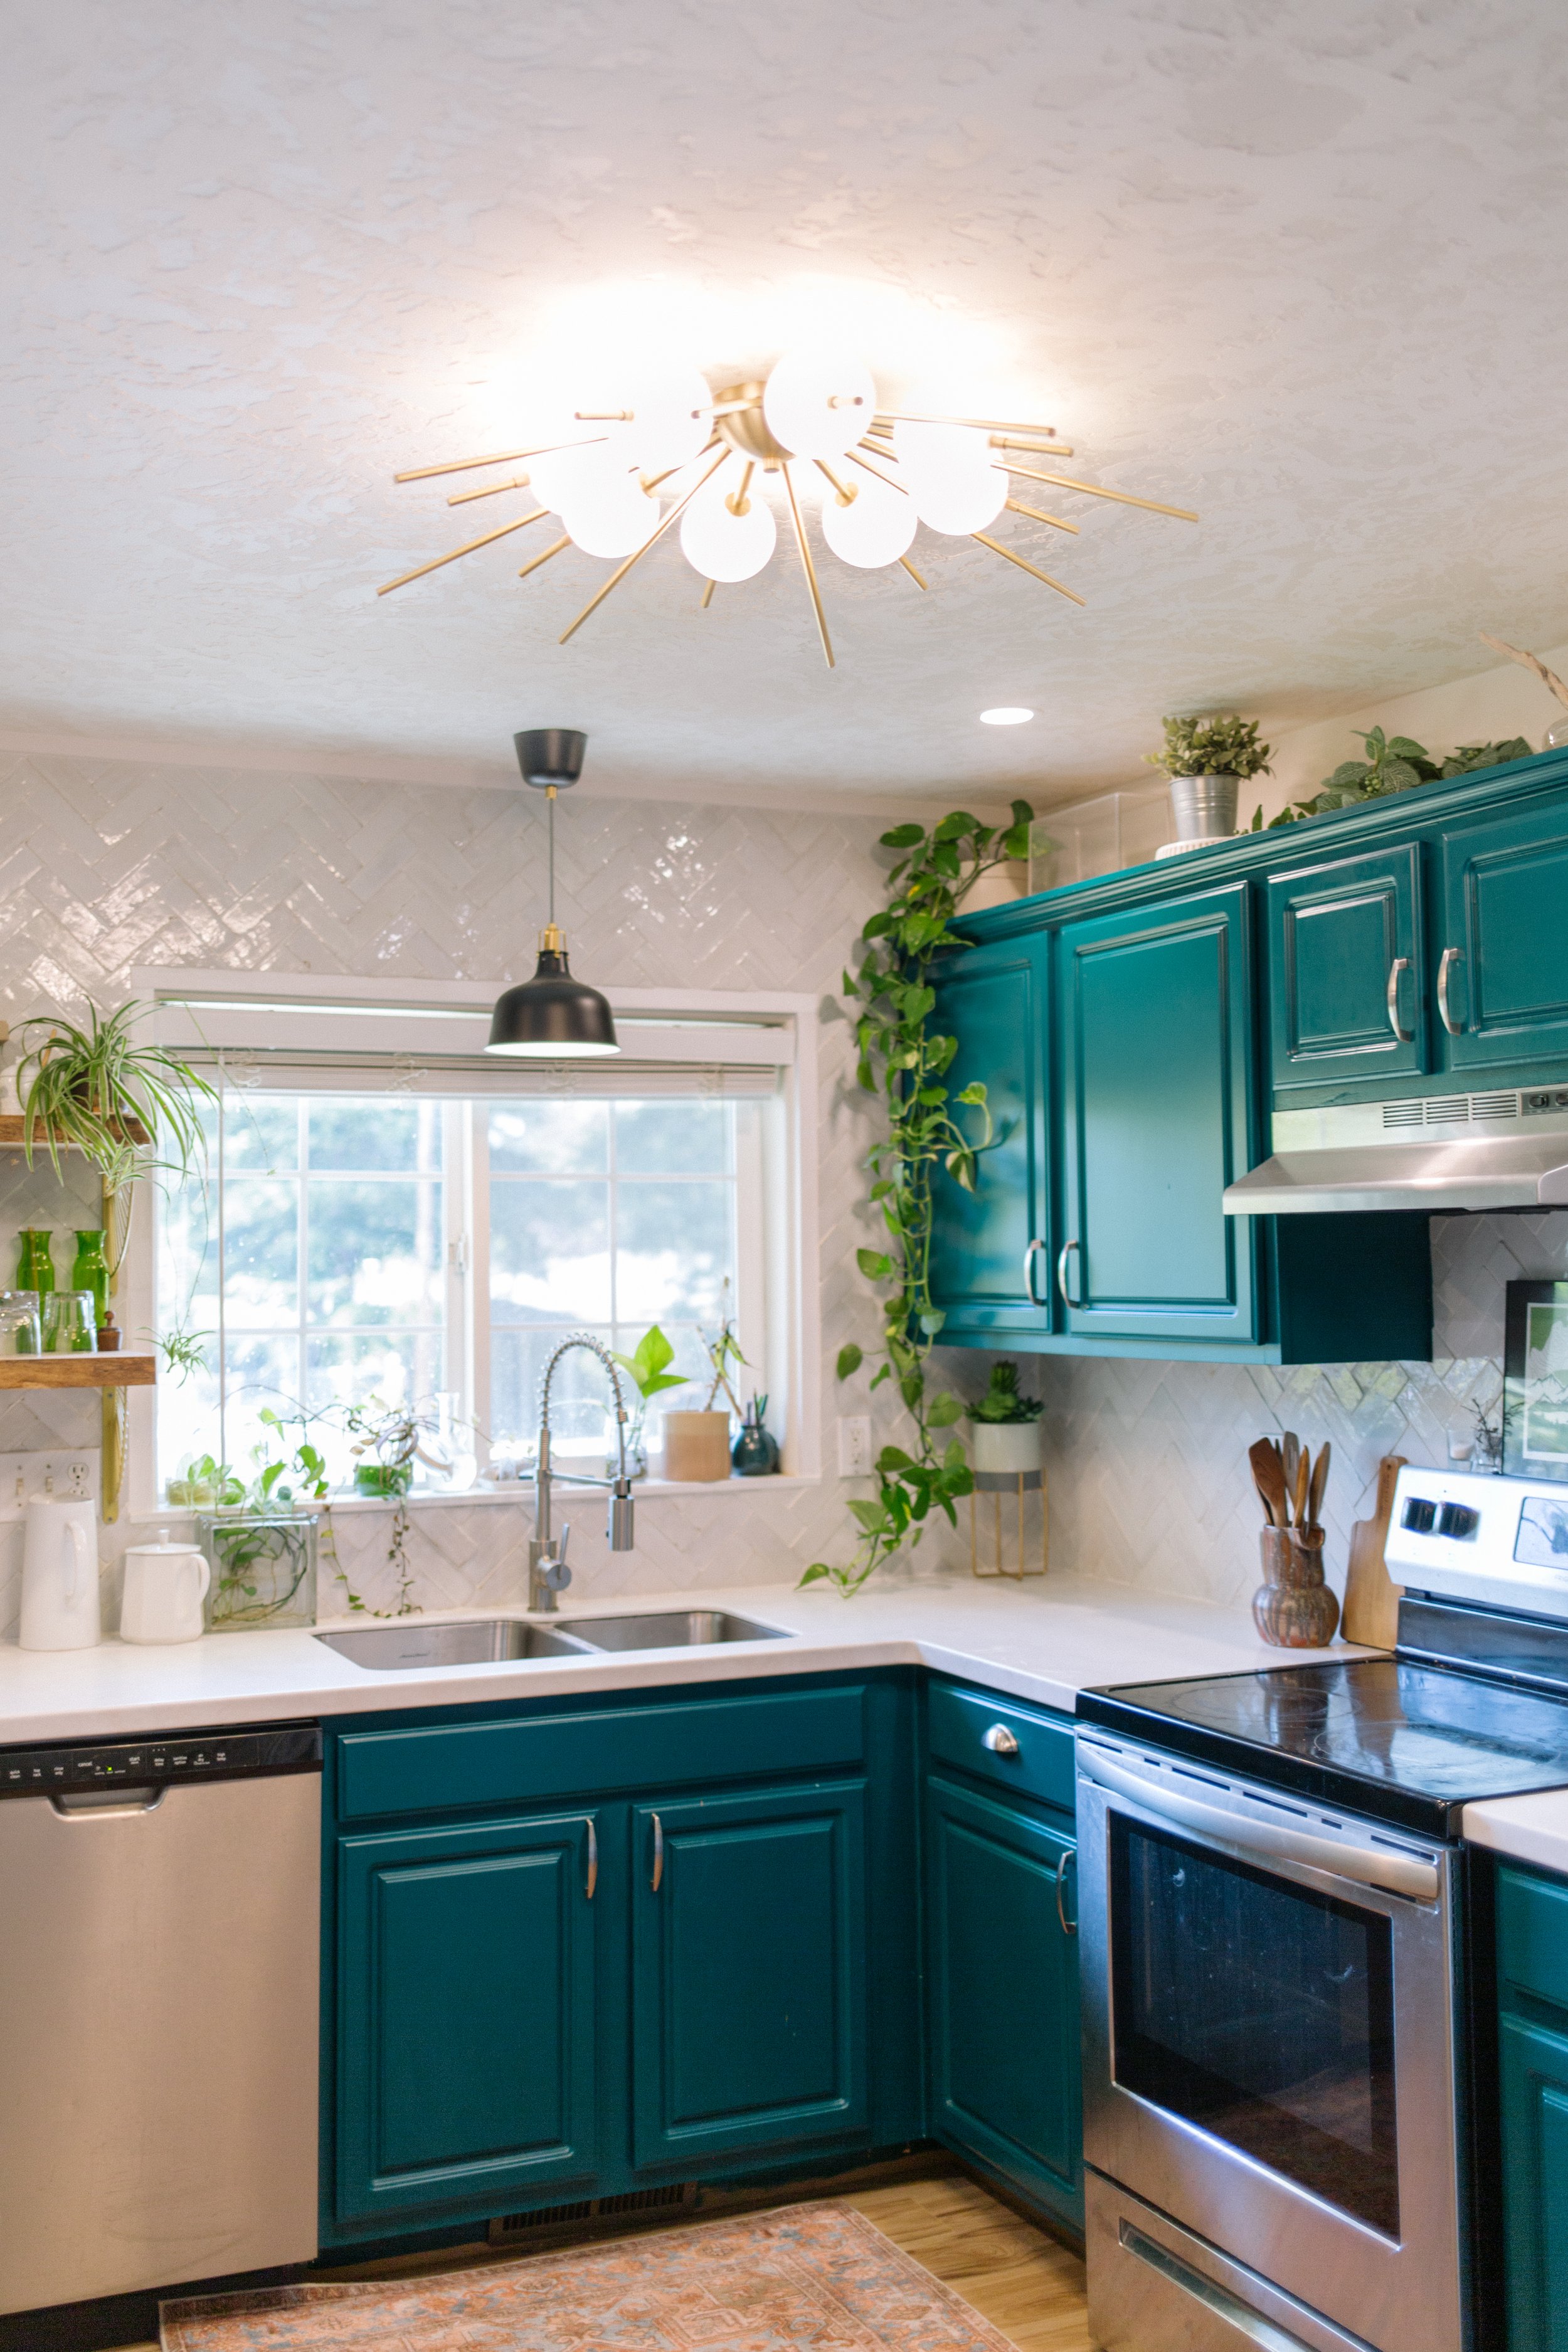
It’s truly hard to say what the biggest transformation in this space was since every single element made such an impact, but updating light fixtures not only replaced an ugly element with something stunning, but also vastly improved the brightness in a room that was previously pretty dark.
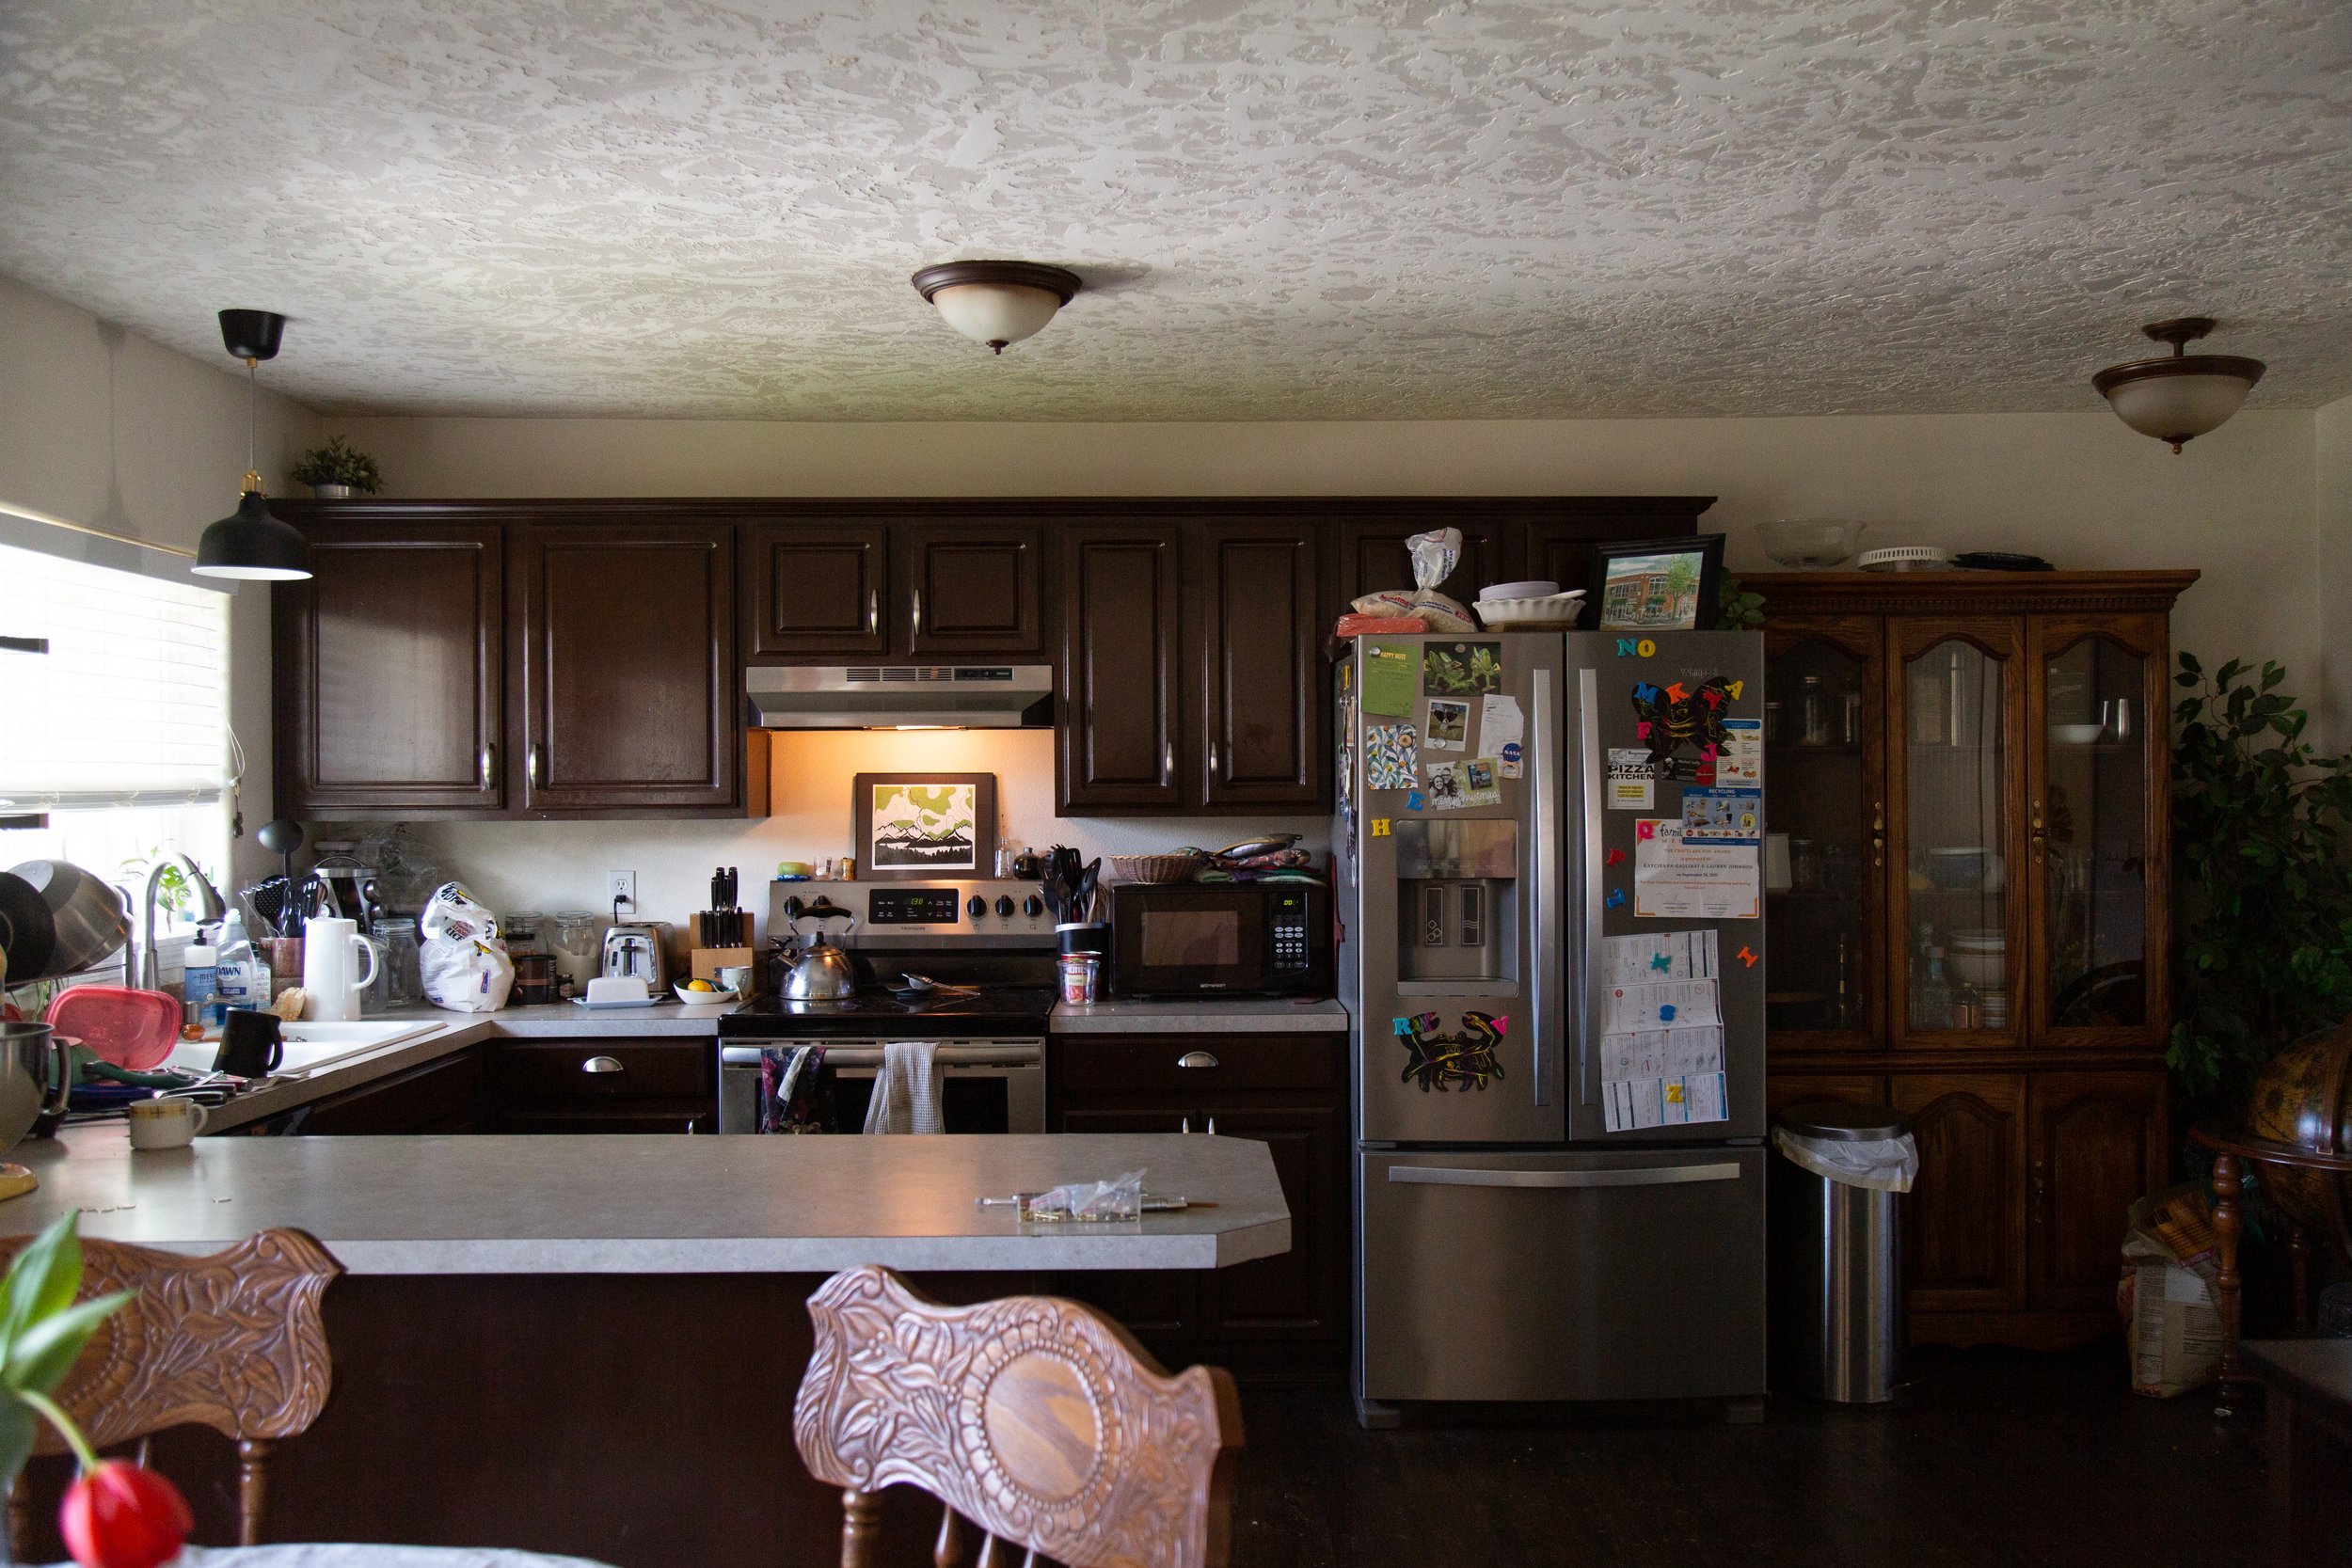
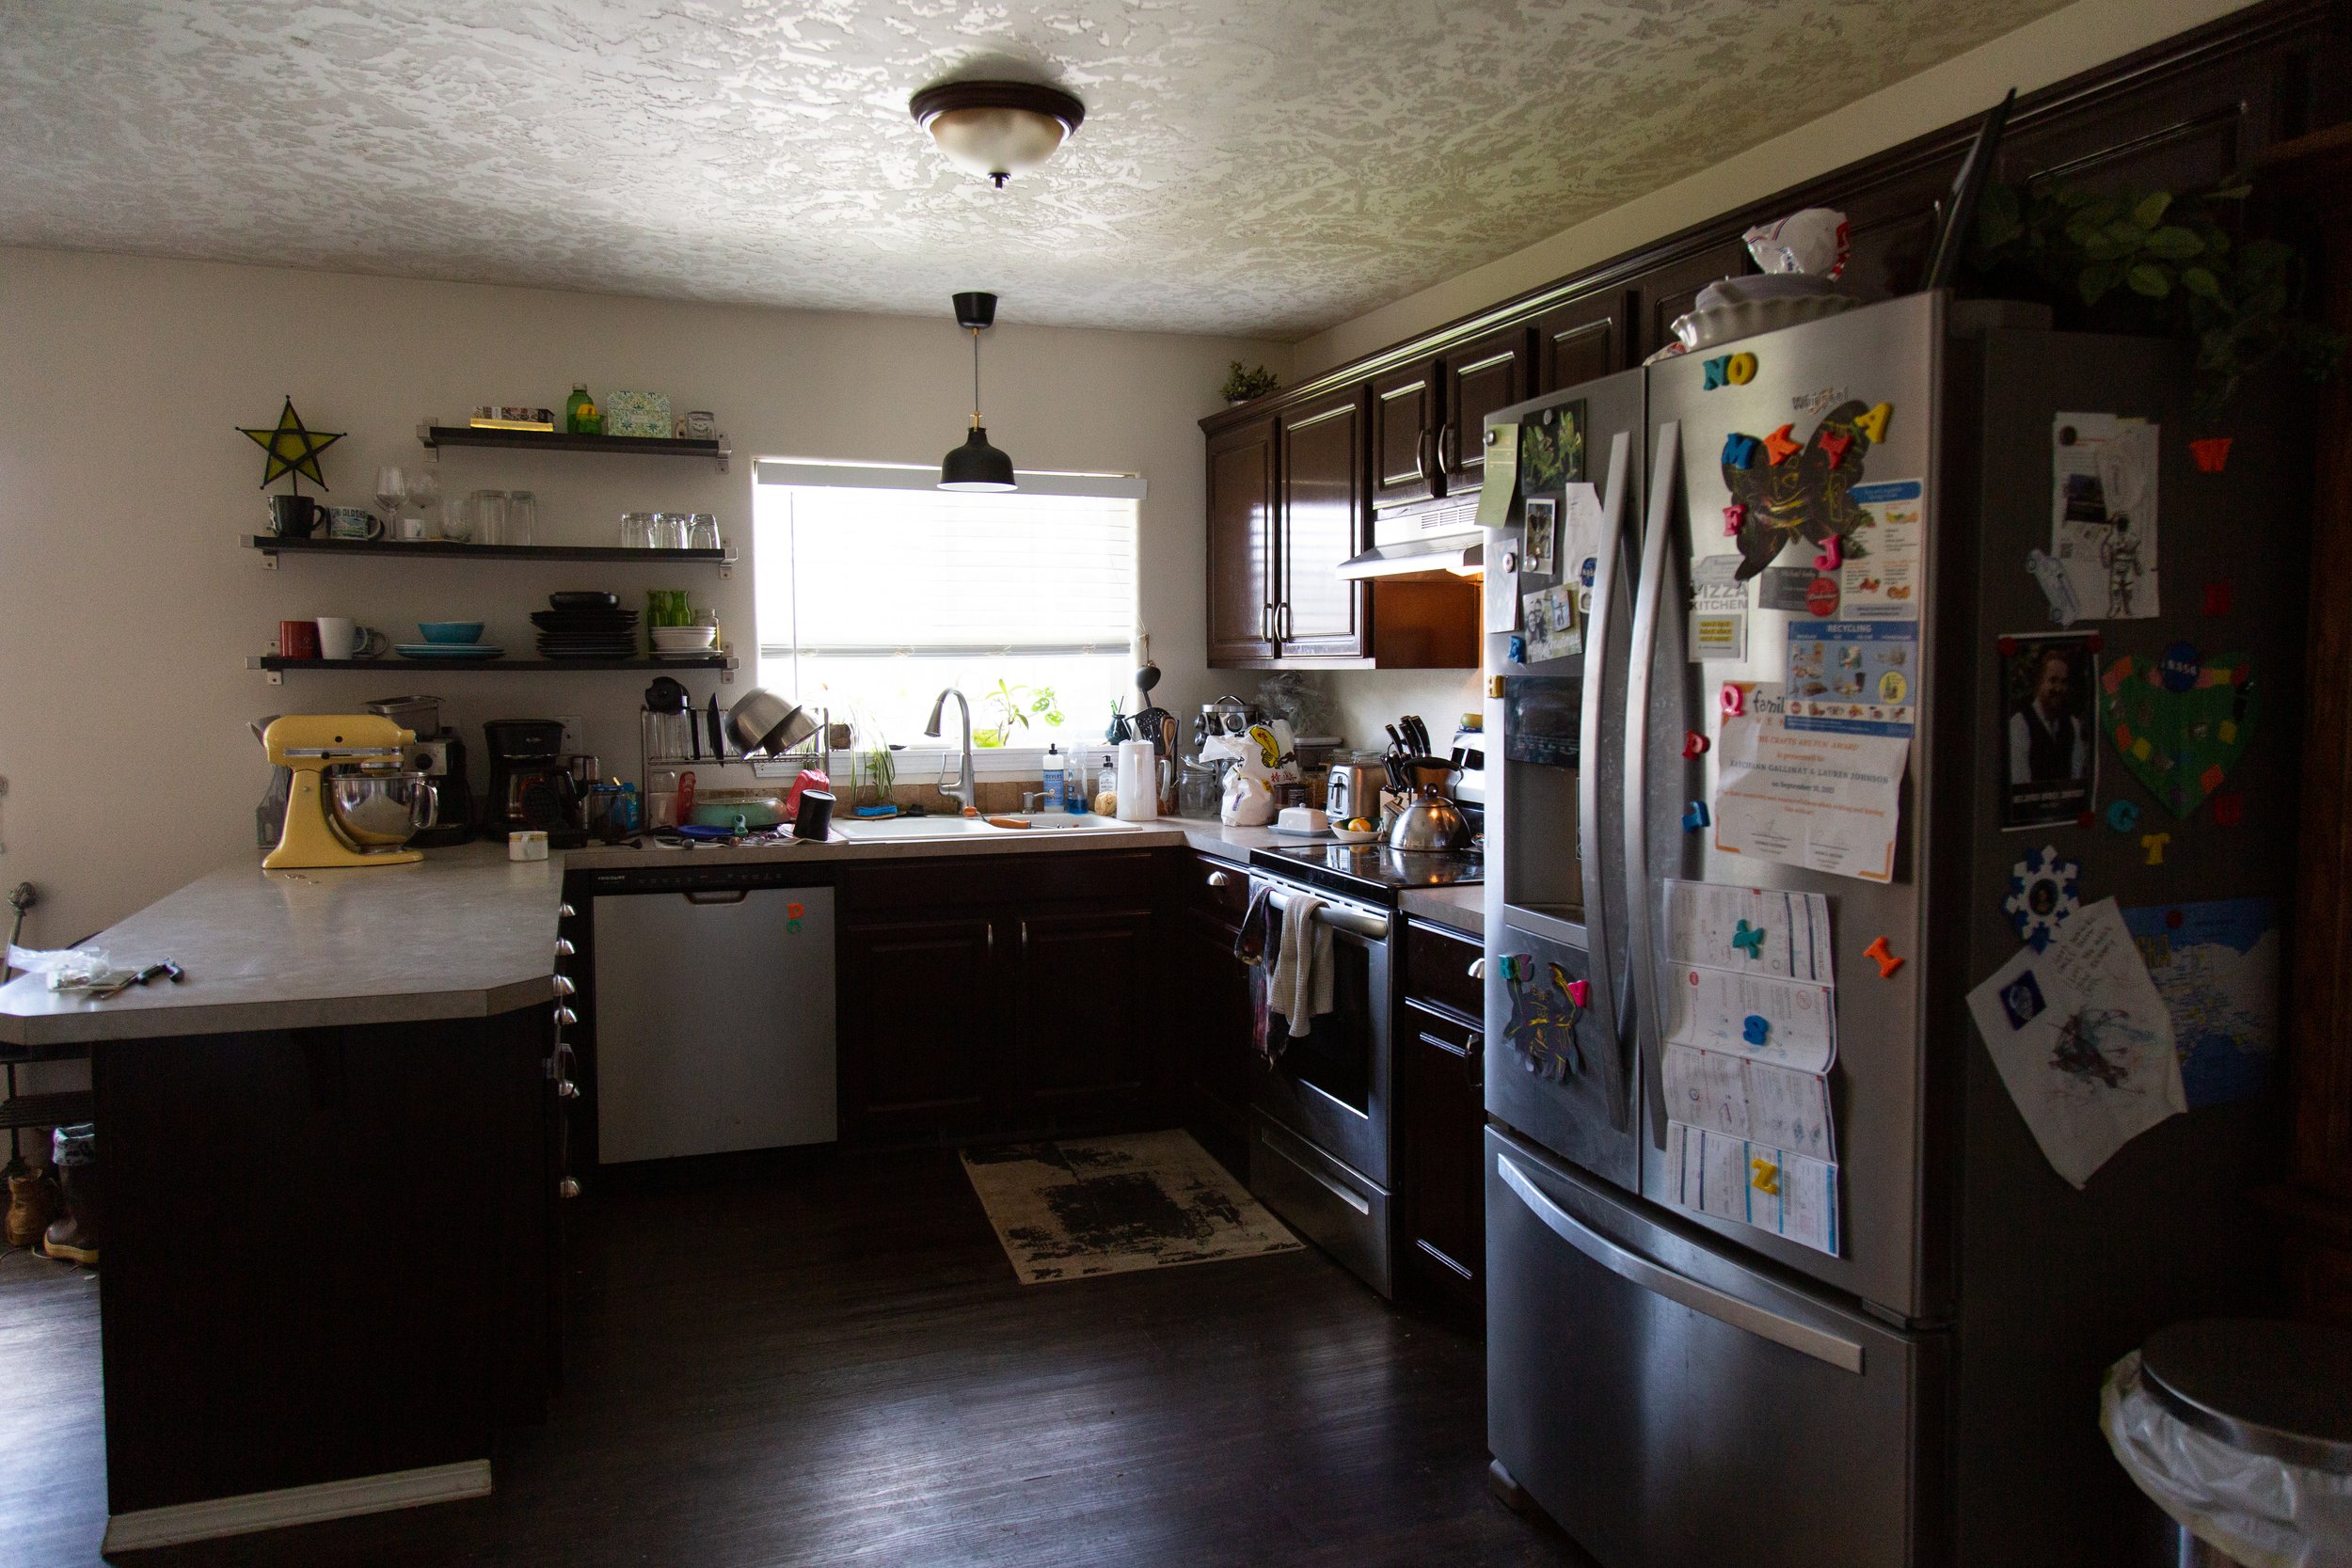
The original “boob light” flushmount fixture was ugly, sure, but it also did not do enough in terms of lighting the kitchen. This kitchen only has a north facing window, which means in the overcast winter days, it was not lighting the space adequately.
The ceilings in this room aren’t high enough for much more than a flushmount, so I knew I’d have to replace it with something at least semi-flushmount at most, and when I found Blueprint Lighting’s Lucienne flushmount I immediately knew it’d be perfect!
They sent over a whole set of finish samples, which made it even harder to pick because there are so many color and finish options! I almost went with the Malachite or Denmark colors to match the cabinet color, but ultimately I decided to go with the brushed brass to match the other brass elements in the room.
It’s legitimately one of the most beautiful light fixtures I’ve ever installed and now I’m jealous that it’s in my brother’s kitchen, not my own, thought to be honest, I do have my eye on some of their chandeliers for my kitchen. Now that my ceiling is painted black, a light fixture would really pop against the dark ceiling!

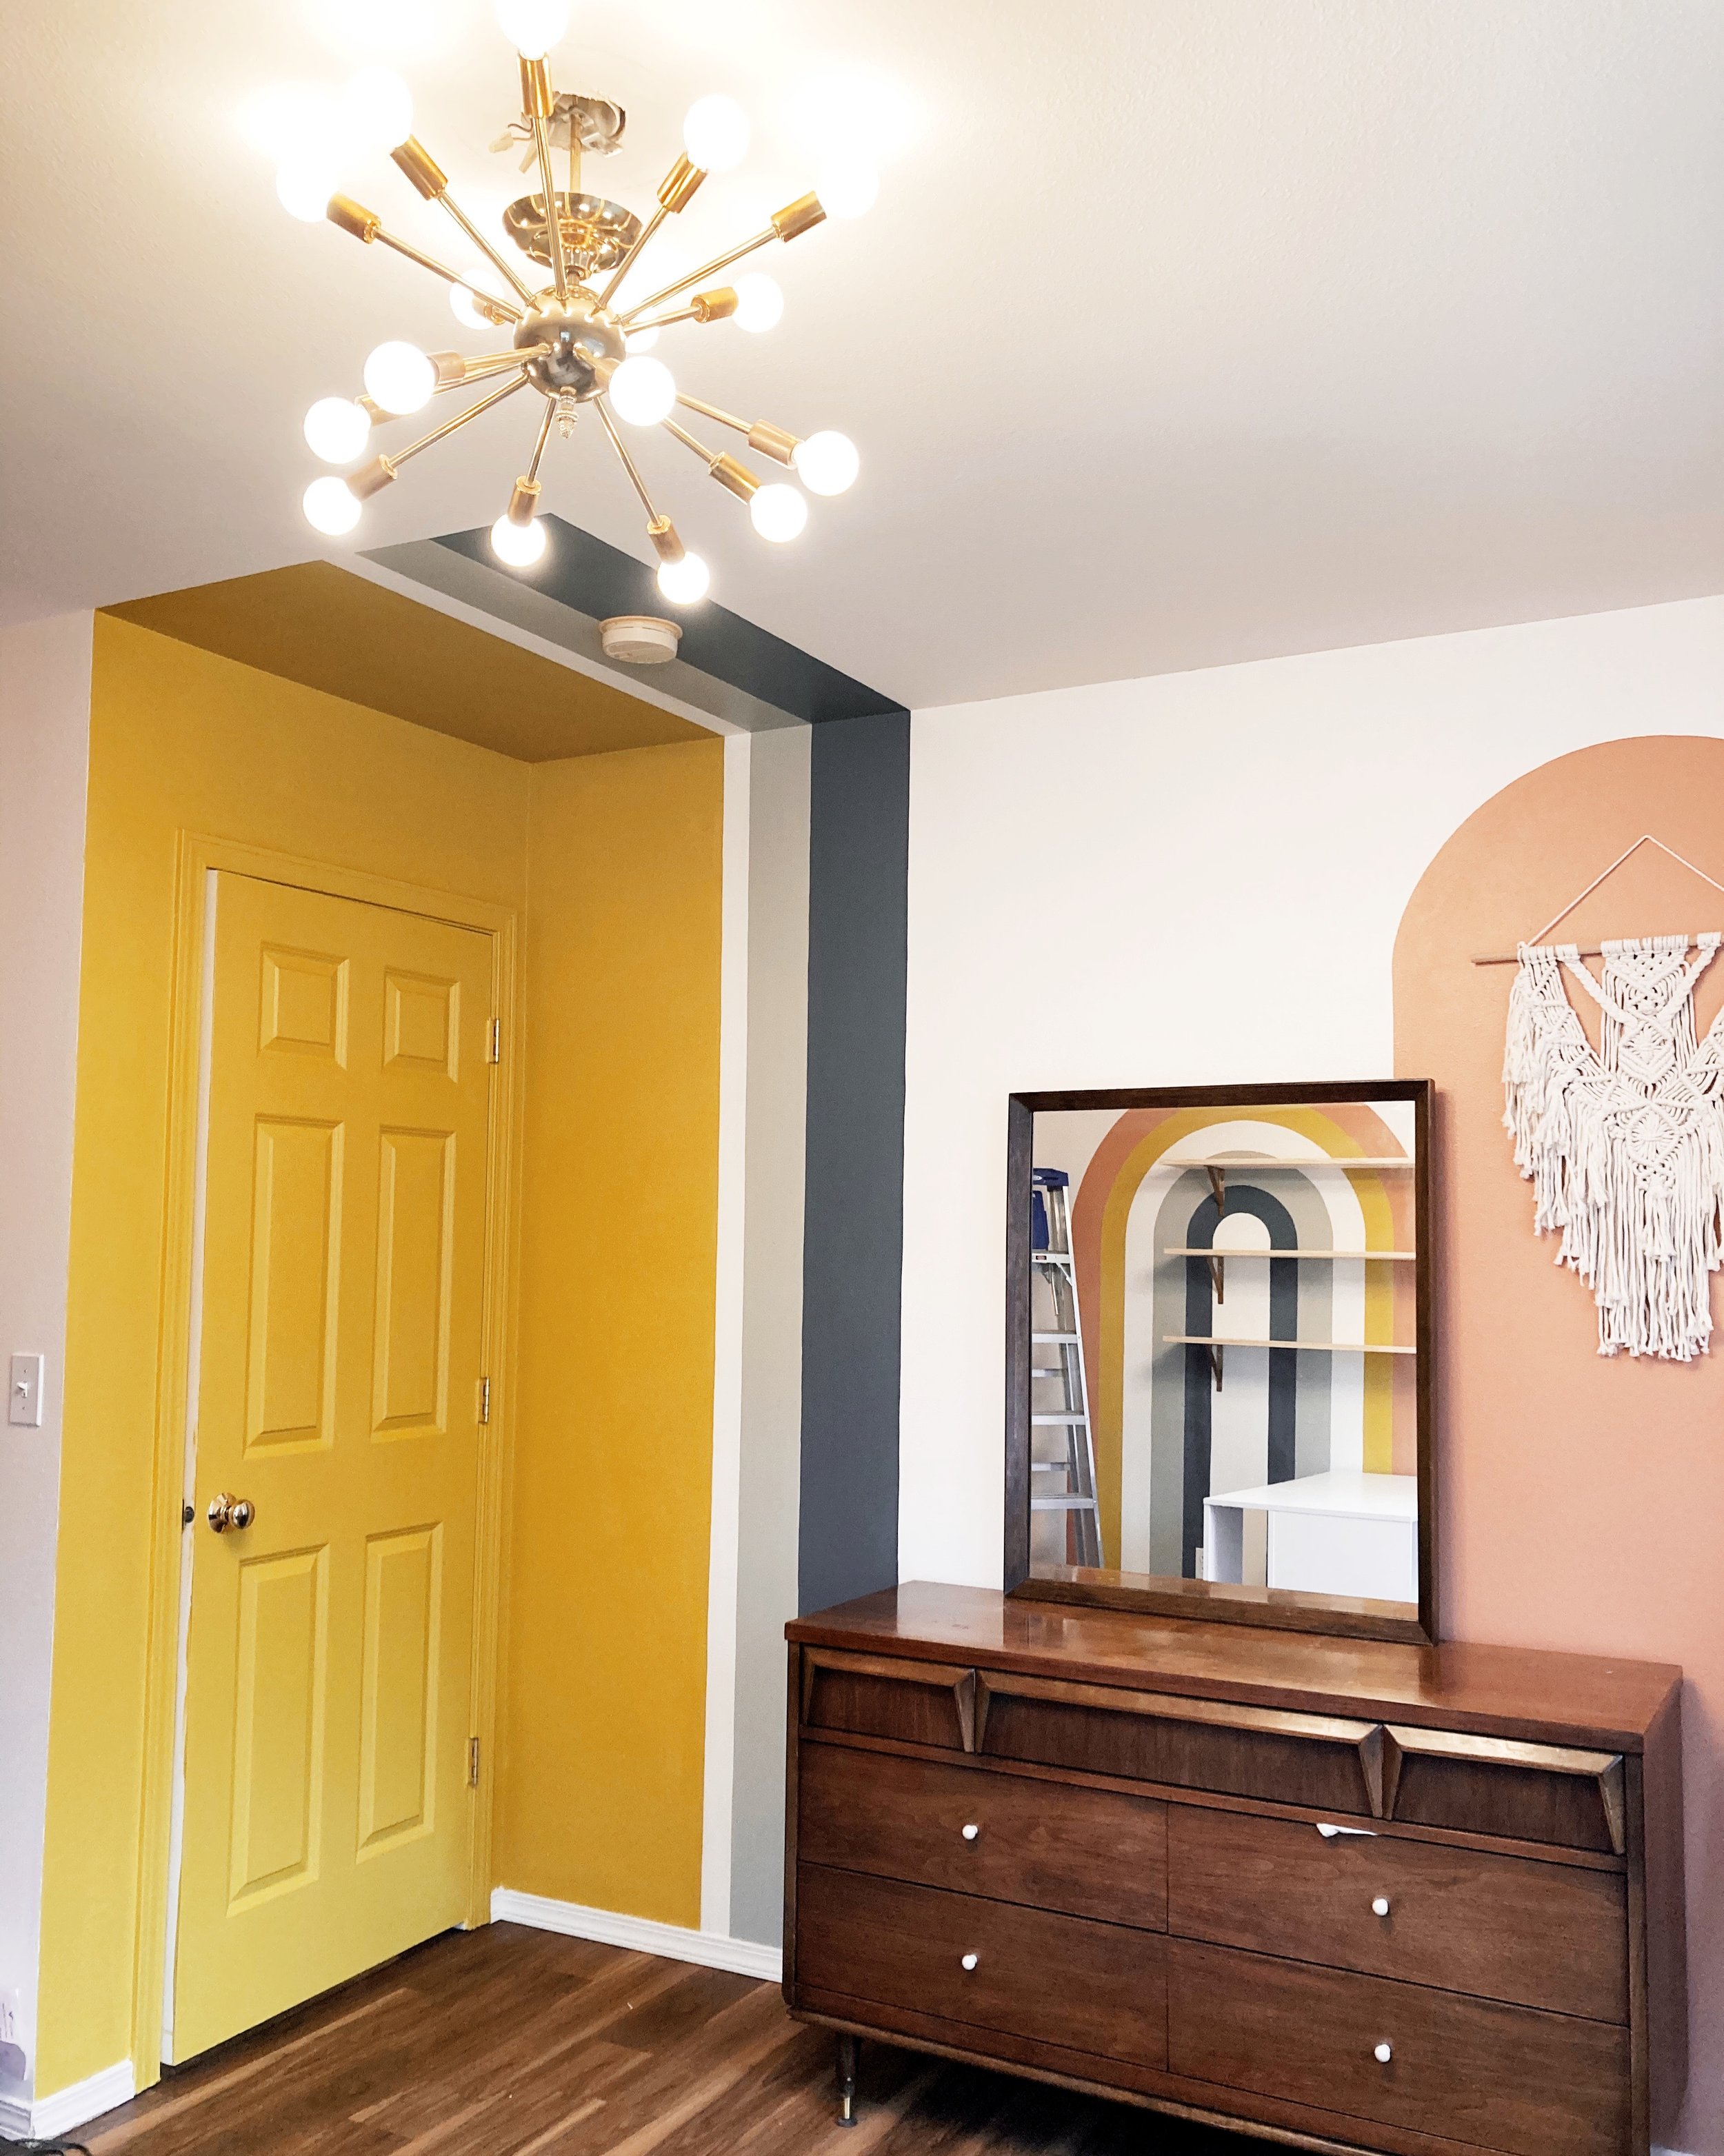
Jack's yellow ceiling!

This is your sign to paint your ceiling! I love how fun this room is now that the ceiling is painted!


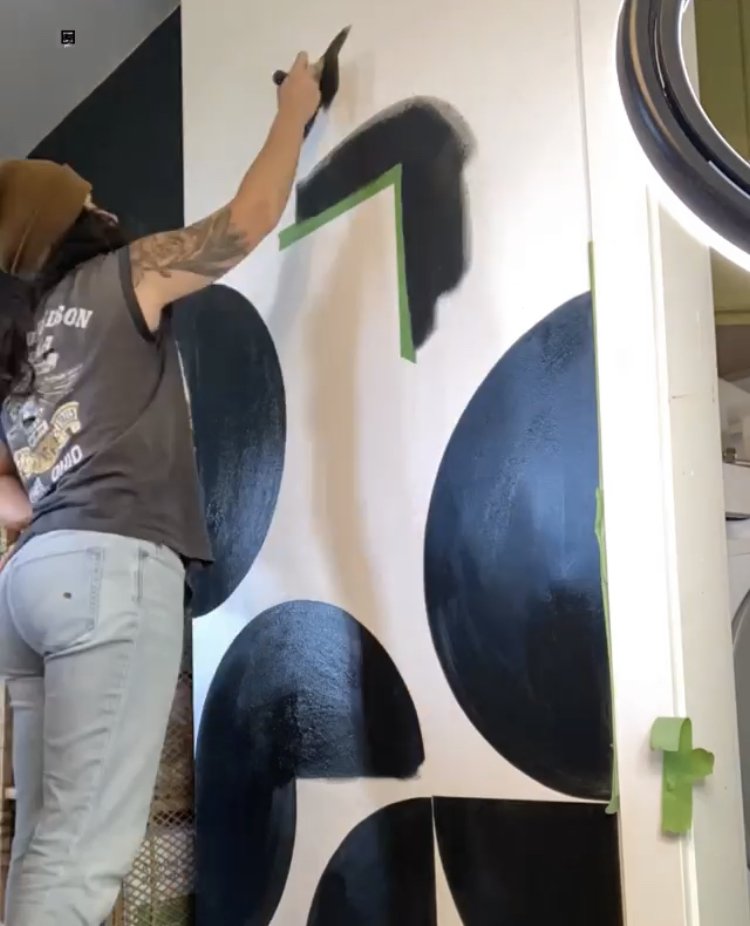
What's in my Mural Kit | Tacoma Mural Artist

Having an easily transportable mural kit makes traveling for murals so much easier. I ended up using an old laundry tote to bring my mural stuff on site, which I actually like so much more than something like an Ikea tote because it has a rigid wire around the top to hold the bag open, I like being able to see everything in there and not have the sides flop in. The fabric is also somewhat water-resistant and wipeable on the inside which is nice when you’re hauling around paint that sometimes spills.
Since my murals are usually multi-colored, I like to have plastic wrap with me to wrap up the brushes that are painty but not done being used yet.
I keep a rope and picture nails on hand for making circles or arches, and a level for making straight lines. I also have a few different kinds of painter's tape depending on the wall texture (multisurface, delicate surface, etc).
A lot of the time I’ll dip my brush right into the paint can to avoid having to pour paint, but that’s not always convenient, so having easy to hold paint buckets is also a great to keep in your kit.
My go-to brushes are Wooster Short Cuts brushes. I love these with their little rubber handle— my hand never feels crampy or sore after using these brushes all day. I can usually get almost all areas with just this brush, but sometimes I end up with small areas that need a tiny artist/craft brush, so I also keep some of those with me as well.
Mess ups and spills are inevitable, so I love to keep baby wipes and some rags with me to quickly wipe up any mistakes. Baby wipes are clutch, I highly recommend keeping some with you for painting projects, even if you’re not doing a mural.
And for finishing up, I like to have a nice eraser to get rid of any stray pencil lines that didn’t get painted over!
Short Cuts Paint Brushes | Small Craft Brushes | Rope | Painters Tape | Carpenter’s pencils | Baby Wipes | Plastic Wrap | Paint can opener | Hammer | Paint buckets | Level | Picture Nails | Rags | Eraser | Laundry Tote


I hope that was helpful! I’m sure my mural kit will change as I do more and more murals, but for now this is my core kit. It’s easy to throw in my truck and carry with me to the mural site. If you do murals or just paint a lot do you have any other items you keep with you?

Removable Wallpaper Fridge Makeover
Spring 2022 One Room Challenge | Week 3
If you guys know me, you know I can't leave a regular fridge alone. In my last three places I've re-covered my fridge with contact paper. Refrigerators can be ultra boring, and if you're renting, it's not like you can paint it or replace it, so you're stuck with it. Not so! Ladies and gentlemen, removable wallpaper is your fridge's best friend.
I've used chalkboard contact paper, woodgrain contact paper, and marble contact paper, as well as removable peel and stick wallpaper to cover fridges.
What you'll need:
Peel and Stick Wallpaper
Scissors
X-acto knife (optional
Tape Measure
First thing you need to do is remove the fridge door handles, which is very easy. There's usually just a screw on top the door and either on the bottom of the door, or on the bottom front of the door. Unscrew both screws and the handle pops right off. You can screw the handle back on after applying your contact paper, but I liked how clean it looked without the handle and it's perfectly easy to open without a handle.
Applying the removavle wallpaper to the fridge is pretty straightforward. I did two vertical pieces of wallpaper on the front , and then the sides also took two vertical pieces, again, one full width and then a smaller strip to complete the side.
Measure how much you need for each piece as you go, cut the piece and then pull a few inches of the backing off to start applying. Make sure your measurements include enough to wrap around the edges of the doors. Apply it to the front of the door, leaving the edges loose to wrap once you've got the front stuck on. Pull the backing off and smooth the sticky side to the fridge in increments so you don't get air bubbles. Once the front is stuck on, go around the edges and stick them down. You'll need to cut a little slice out of the the corner so it lays flat.
Continue that process around the whole fridge till it's all covered!
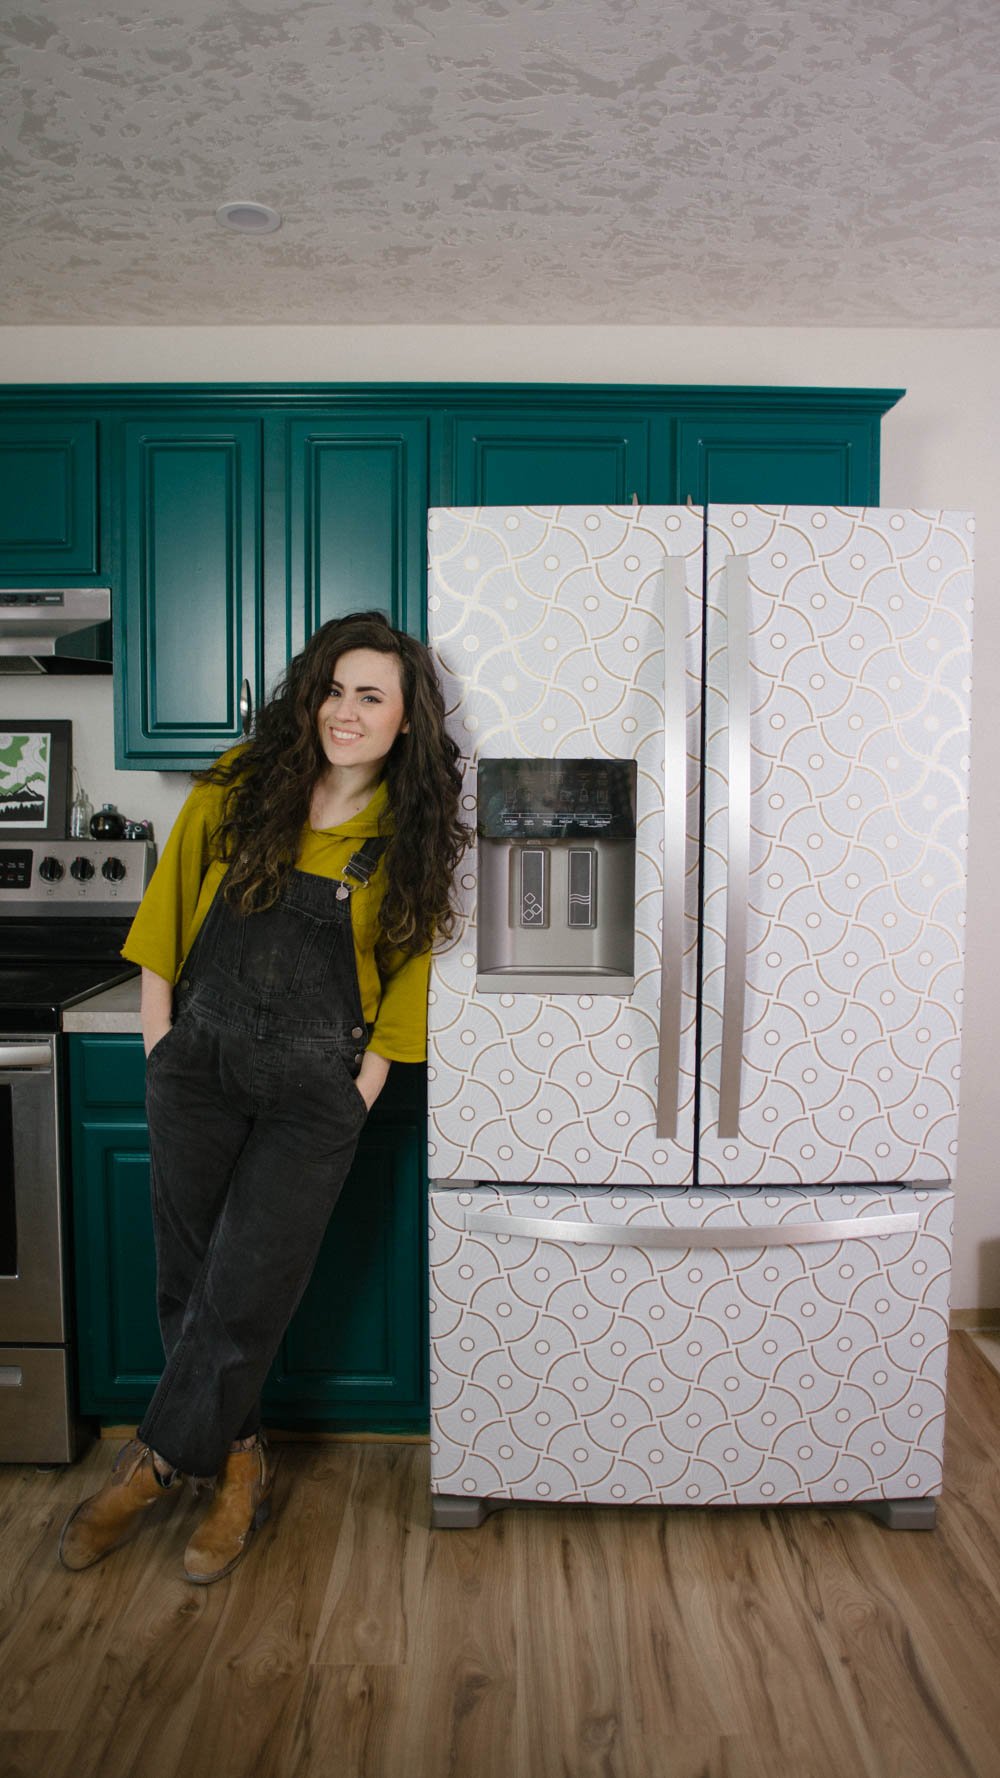
Now revel in the awesomeness of your swanky new fridge!
DIY Easy click-connect laminate flooring install
Spring 2022 One Room Challenge | Week 2
There are a lot of nailed-down details on this One Room Challenge remodel, but one thing that was up in the air when I started- the flooring. The original flooring was, well, it was okay. The kitchen/dining/entry area had vinyl plank and the living room was carpeted. It all looked very worn down, and there was a noticeable hump in the floor right as you entered the kitchen.
We needed to decide on the flooring situation ASAP because I didn’t want to paint the cabinets and get those finished nicely and THEN go in and do flooring demo and potentially bang up the new cabinet paint. Since this decision was being made last minute, we also needed flooring that was in stock and available in the quantity we needed to do the entire space— kitchen/dining and the entry/living room.
Well, my parents found some beautiful waterproof laminate flooring at Costco and bought out the whole store (and had to hit up another Costco to get the remaining boxes needed), and we quickly decided to tackle the floors first thing.
Demo was pretty easy, the old vinyl planks came out super easily, and the carpet did as well. Once the flooring was out we were able to figure out what what going on with the lump in the subfloors by the kitchen. The carpeted living room also needed a 1/4in underlayment plywood added to bring that area’s subfloor up to the same level as the floor that had the vinyl planks, which was much easier than fixing the hump.
We ended up pulling out the 1/4in underlayment on either side of the lump, which brought the peak of the hump down lower and we were able to fill in that area with self leveler so the new floors are nice and level with no awkward hump. We ended up needing a couple coats of the self leveler (we didn’t buy enough the first time), so that took a couple days of prep work, which we folded in with prepping the cabinets to prime and paint so there wasn’t any lost time on the cabinet painting front.
I’ve done floating click-connect laminate flooring before in our house, so I had a pretty good idea of what to expect. These kinds of floors are very DIYer friendly. It’s hard to mess up the install, and it’s super straightforward, these were no different. We ended up with Mohawk Waterproof Laminate floors in Millport Hickory. They have the foam under pad attached to the bottom of the plank so you don’t even need to install a pad before going in with the flooring install!
I picked up a laminate flooring install kit from Home Depot, which was exactly what we needed to do the install, and Ryobi had sent over their flooring saw, which came in clutch. I was on cutting duty outside and my brother and Dad were on install inside and we made pretty quick work of the floor!
One thing manufacturers recommend, and I’ll second, is to use planks from different boxes as you work, and to inspect the planks as you install because there are only so many plank designs and you don’t want to end up with identical planks super close to one another. The other thing you’ll want to make sure of is that the gap you leave around the edges of the room (there should be a slight gap to allow for expasion) isn’t too big so that your baseboard trim is able to cover that. We weren’t super careful in a couple spots and had to to some tweaking to make it work.
Ultimately, click-connect laminate flooring is a perfect DIY project. It’s straightforward, relatively easy, and there are so many options out there now for different looks, as well as water-resistant or waterproof planks as well!

Hi, I’m Liz
I'm an artist, writer, designer, DIY renovator, and … well basically I like to do all the things. If it’s creative I’m probably doing it. I’ve spent over 30 years voraciously pursuing a life steeped in creativity and I wholeheartedly believe creativity and joy are inextricably linked.
Read more…


Explore The Archive
- July 2025
- May 2025
- January 2025
- December 2024
- August 2024
- July 2024
- May 2024
- April 2024
- January 2024
- December 2023
- October 2023
- September 2023
- July 2023
- June 2023
- May 2023
- April 2023
- March 2023
- February 2023
- January 2023
- December 2022
- November 2022
- October 2022
- August 2022
- June 2022
- May 2022
- April 2022
- March 2022
- November 2021
- October 2021
- August 2021
- July 2021
- May 2021
- January 2021
- November 2020
- October 2020
- September 2020
- August 2020
- July 2020
- June 2020
- May 2020
- April 2020
- February 2020
- January 2020
- November 2019
- October 2019
- August 2019
- July 2019
- June 2019
- May 2019
- April 2019
- February 2019
- January 2019
- December 2018
- November 2018
- October 2018
- September 2018
- August 2018
- July 2018
- June 2018
- May 2018
- April 2018
- February 2018
- January 2018
- November 2017
- September 2017
- August 2017
- July 2017
- June 2017
- May 2017
- April 2017
- March 2017
- February 2017
- January 2017
- December 2016
- November 2016
- October 2016
- September 2016
- August 2016
- June 2016
- May 2016
- April 2016
- March 2016
- February 2016
- January 2016
- December 2015
- November 2015
- October 2015
- September 2015
- August 2015
- July 2015
- June 2015
- May 2015
- April 2015
- March 2015
- February 2015
- January 2015
- December 2014
- November 2014
- October 2014
- September 2014
- August 2014
- July 2014
- June 2014
- May 2014
- April 2014
- March 2014
- February 2014
- January 2014
- December 2013
- November 2013
- October 2013
- September 2013
- August 2013
- July 2013
- June 2013
- May 2013
- April 2013
- March 2013
- February 2013
- January 2013
- December 2012
- November 2012
- October 2012
- September 2012
- August 2012
- July 2012
- June 2012
- May 2012
- April 2012
- March 2012
- February 2012
- January 2012
- December 2011
- November 2011
- October 2011
- September 2011
- August 2011
- July 2011
- June 2011
- May 2011
- April 2011
- March 2011
- February 2011
- January 2011
- December 2010
- November 2010
- October 2010
- September 2010
- August 2010
- July 2010
- June 2010
- May 2010
- April 2010
- March 2010
- February 2010
- January 2010
- December 2009
- November 2009
- October 2009
- September 2009
- August 2009
- July 2009
- June 2009
- May 2009
- April 2009
- March 2009
- February 2009
- January 2009
- December 2008
- November 2008
- October 2008
- September 2008
- August 2008
- July 2008

VISIT THE SHOP


PRIVACY POLICY & DISCLOSURE
We are a participant in the Amazon Services LLC Associates Program, an affiliate advertising program designed to provide a means for us to earn fees by linking to Amazon.com and affiliated sites.