
10 tools to start on your DIY journey

One of the things that can feel overwhelming when it comes to being a beginner DIYer is not knowing where to start when it comes to those first tool purchases. Whether it’s not knowing which tools to get first, or what brand to go with, or what accessories to get, the world of tools is one that you’ll need to enter in order to have success with your DIYs!
Another big reason it can feel overwhelming: money. Tools cost money! And some of them can be more expensive than others. Don’t feel like you need to run out and buy a whole workshop full of tools right of the bat. You can buy tools slowly, as you need them.
We’ll start with some non-power tools that I always keep on hand, and then we’ll get into the power tools that are essential!

Hammer
This almost feels like it goes without saying! A hammer is one of the most basic tools out there and it’s extremely handy. A hammer is great for everything from putting up shelves and building Ikea furniture, to framing a wall. There are lots of hammers out there, but a basic standard hammer is all you really need (unless you start getting into some more specific building realms). And! They’re very inexpensive.
Tape Measure
”Measure twice, cut once!” and in order to measure twice, you’ll need a Tape Measure. You may want multiple, because if you’re anything like me, you’ll misplace yours and there’s nothing more annoying than not being able to find a tape when you’re working. I also keep a smaller 12 or 16ft tape in my house for easy grabbing, and I’ll usually have a 12ft one in my purse for when I’m out and about and need to measure furniture or stuff at Home Depot. A standard 25ft one is a really great length for having in your toolbox, and is what I have in mine!
Level
A level is super handy and the type you get first may depend on what you’re most wanting to do, DIY-wise. If you’re just installing shelving, hanging pictures, etc— smaller stuff, you may only need a short little level. If you’re leveling counters, floors, or larger projects, you’ll probably want a larger one. I like having a small 1ft level for little things, a more substantial 4ft level, as well as an 8ft one. If you want to get techy and fancy you can also get a laser level, which is a very cool little tool!
Sawhorses
Havinga set of sawhorses, even just some cheap plastic ones, comes in SO handy when you’re working on projects. Cutting wood, making a makeshift table, painting things, sawhorses will help with countless projects and make things 100 times easier.

Power Tools:
Power tools come in two options: corded and battery powered. Typically corded versions are a little more affordable, and they can also be more powerful, but cordless battery operated tools can be more lightweight and convenient. For instance, my battery operated brad nailer is WAY more convenient because I don’t have to hook up my air compressor and pull out the long air hose. I just pick it up and start nailing. My battery operated circular saw is also much lighter and easier to wield than my corded version, but the corded version is more powerful.
Another thing to consider if you start buying battery powered tools is that you’ll want to stick to a brand, only because once you start buying batteries, those batteries will be specific to that brand’s tools and won’t work on another brand. So you don’t want to buy a Ryobi drill and get the battery pack and charger for that and then get a Makita circular saw, because then you’ll have to invest in Makita batteries and charger (and batteries can be expensive!). So stick to one brand, get a few batteries so you can have a spare or two on hand, or charging up so you’ll never get stuck with a tool and a bunch of dead batteries mid-project— that’s the worst!
This obviously doesn’t apply to corded tools since their power source will be the outlet, so you can go “off brand” with those. I use Ryobi for my battery powered tools and I have a few random brands in my corded tools.
Brad Nailer
Having a brad nailer is super handy for a lot of different projects. Working on furniture, installing trim, putting up molding, making shelving, my brad nailer gets a ton of use around my house. There are lots of different nailer types and sizes too, so depending on what projects you think you’re most likely to tackle, you may want a stapler, a pin nailer, a 16 gauge, etc. I LOVE having a battery powered nailer because then I don’t have to have an air compressor with a long air hose dragging through my house in order to work on projects.
Drill + Impact Driver
A drill is one of the most useful and basic power tools you can have in your arsenal. Not only can you drill various size holes with standard drill bits, spade bits, hole bits, and more, you can also use it as a power screw driver. I would say that my drill is my most used tool over the years and if you don’t have any tools at all start with a power drill! An impact driver is very similar to a drill and they look almost identical, but there are some differences. Impact drivers are more lightweight and compact and they also have more torque. While drills hold bits using a “chuck” which is basically a unique way to clamp down on the bit to hold it in place (and you can use standard or hex bits), Impact drivers have a quick change clamp and only take hex bits.
So why/when do you use an impact driver? Impact drivers are more commonly used to drive in a large quantity of fasteners, longer screws and lag bolts. If you use impact-rated, 1/4-inch hex-shank drill bits, you can accomplish some basic drilling tasks with an impact driver. However, these tasks will be limited in scope. An impact driver is not ideal for precision drilling tasks and should be limited to jobs where the size or placement of the hole is not crucial but more torque may be needed, such as drilling through metal and dense or knotty wood.
A lot of time you’ll see these two sold in a set, which is a nice way to get both, but if you can only afford one, go with a standard drill. I will add that driving in screws is much easier with an impact driver, and as a small (yet strong) woman, I have to use much less force to screw in using an impact driver, which is nice.

Circular Saw
The circular saw is an extremely useful tool if you’re doing any kind of building. It’s the first power saw you should add to your toolkit, IMHO. You can make cross cuts, rip cuts, angled cuts, and more. It’s great for cutting plywood, lumber, you can use a blade designed to cut metal, etc. It’s a super handy tool that will instantly level up your DIY. A circular saw can feel intimidating to some, so make time to practice to get the feel for and hang of how it behaves and cuts.
Jig Saw
The one big limitation that a circular saw has is that it can’t make curved cuts. Which is why I highly recommend grabbing a jig saw next. After my circular saw, my jig saw is my most used saw. I love it’s capabilities, and it’s the pervect tool for making more precision cuts.
Sander
Having a power sander on hand is super useful. I use mine all the time. Whether I’m sanding down a piece of furniture to refinish, prepping cabinets to paint, cleaning up cut edges, or smoothing rough surfaces, my sander makes it so easy. There are a few different style of sanders, but for starting out I’d get a sheet sander, or orbital sander, though a corner sander is also a great starter. These styles are great for most basic sanding you’ll be doing.
Spring 2022 One Room Challenge | Week 1

I don’t know if anyone’s been around long enough to remember my last ORC attempt. I fizzled out on my Spring 2020 attempt and my bathroom is still half done, lol. This time— I’ve got a plan of attack and a “client” I can’t ditch out on halfway through. I’ll be making over my brother and sister-in-law’s kitchen/living room!

The main focus will. be the kitchen, but we’re replacing the old flooring throughout the kitchen/living/dining areas since those spaces are open-concept. The current space has carpet in the living quadrant of the space and old, dark, worn-down LVP flooring in the rest of the kitchen/dining. The carpet and LVP are going and we’ll be putting in a lighter wood laminate that will brighten and unite the space.

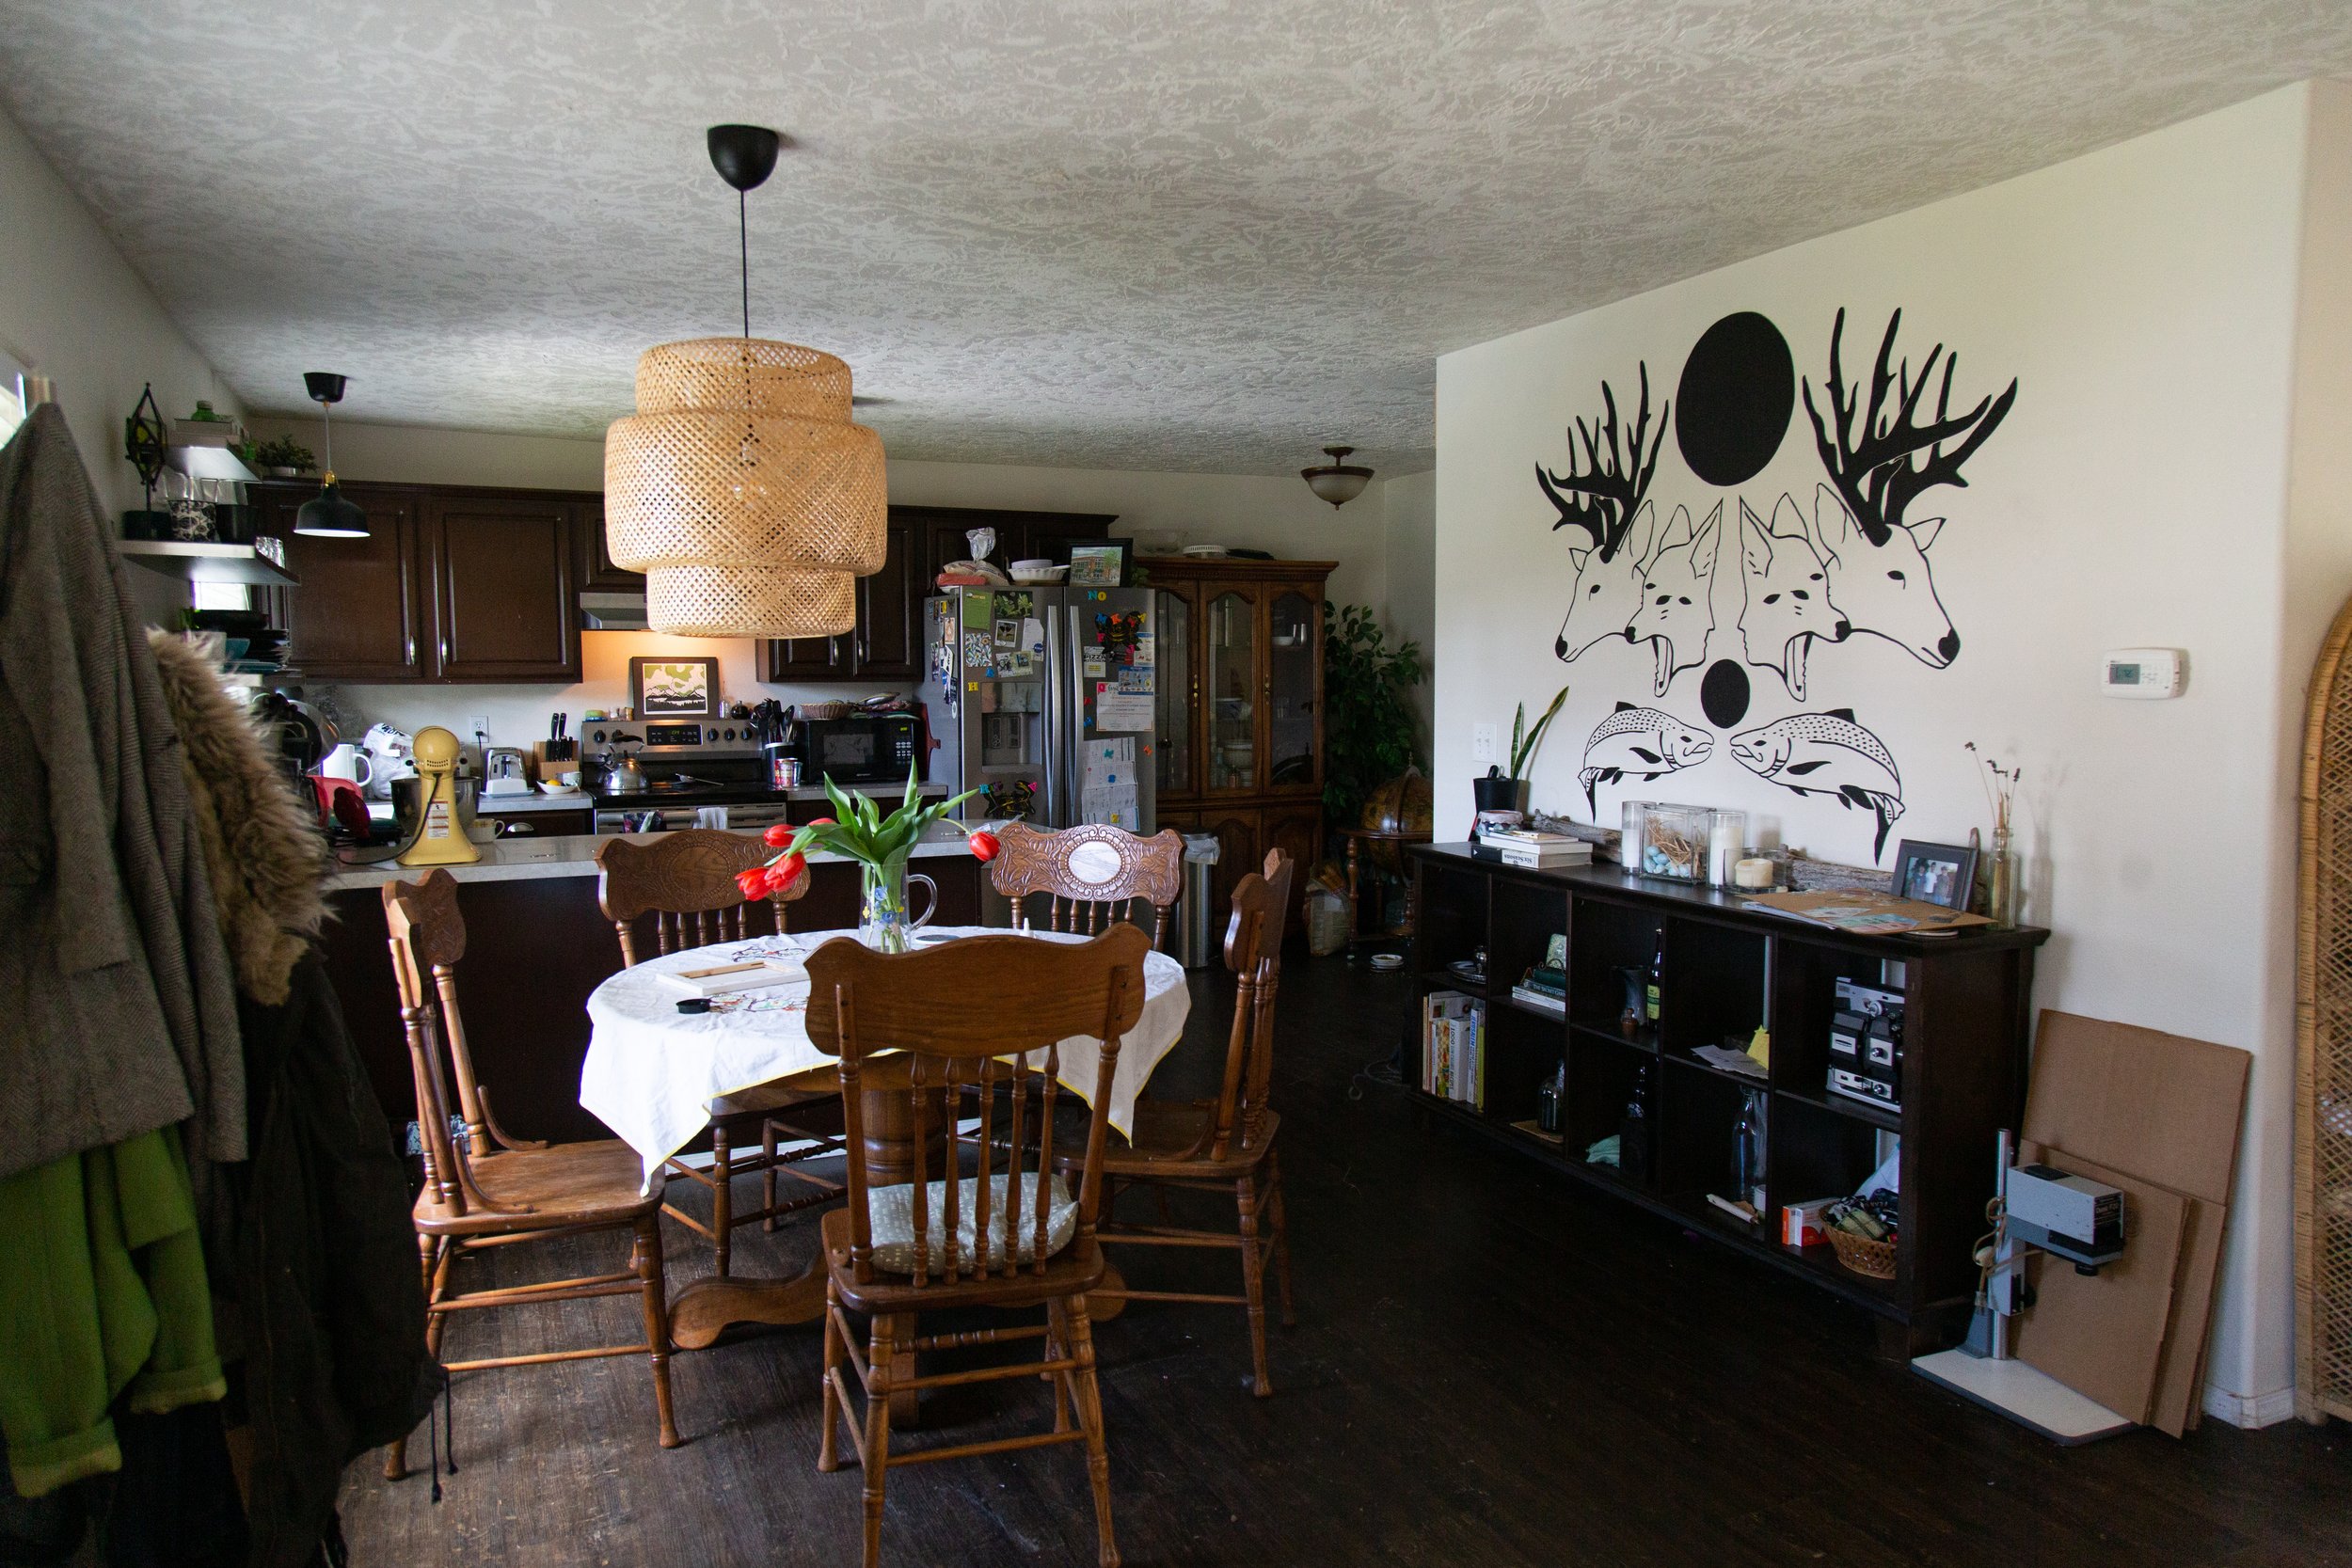

As you can see, the kitchen feels very dark due to the brown cabinets, and what you can’t see is that they are pretty poorly painted. I’m super excited to bring in a rich emerald green onto the cabinets and add some texture and elevate the space with gorgeous white zellige tile on the backsplash. Unsurprisingly I’m also going to be kicking that boob-light to the curb and replacing it with something pretty and refined, and the Ikea pendant over the dining table also isn’t going to be staying.
I like the open shelving to the left of the sink, but I want to replace it with some beautiful wood shelving and brass accents. The countertop is a well worn laminate so that’s going to be replaced with a solid surface quartz countertop. Another fun plan? We’ll be wallpapering the fridge! I had so much fun wallpapering the fridge in the kitchen I did for my BFF last spring, I knew it’d be a fun way to add a graphic element in this space.

We’re already knee-deep in demo and the it-gets-worse-before-it-gets-better phase! Can’t wait to flip this drab, dated kitchen in to an elevated organic-classic space over the next 8 weeks of One Room Challenge!

Laundry Room Before + After | Tacoma Mural Artist

There’s a lot about the floorplan of this house that doesn’t make much sense, and the dead space in the kitchen/laundry closet area was definitely one of the more glaring instances. Since the back door is right there, it became an odd catch-all junk space that you had to wade through to do laundry. Despite the fact that it was open square footage, having that floor space in the kitchen never felt like it actually added anything because there wasn’t much you could do with the room other than fill it with random stuff.
Annoyed with the total lack of a laundry room in the house, I realized that it wouldn’t take much to build a couple of walls that encompassed that awkward dead space and turn it into an actual laundry room.
Material Sources
Wainscoting paint: Behr Paint— Broadway (eggshell)
Sheen mural paint- Behr Paint— Broadway (matte and high gloss)
Cabinets- unfinished cabinets from Home Depot
Cabinet paint- Behr Paint— Lemongrass (eggshell)
Cabinet hardware- Liberty black bar pulls from Home Depot
Ceiling Wallpaper- Zebra Marble gifted from Tempaper
Light fixture: Vinluz 8-light Sputnik chandelier from Amazon
Rug- Buckman flatweave rug from Rejuvenation
Counter- Walnut butcher block from Home Depot
French Door Paint - Behr Paint— Emergency Zone (eggshell)
Backsplash tile - Floor and Decor— Maravilla Basalt Black Stacked Mosaic
Floor Tile- Floor and Decor — Concrete Grey Ceramic Tile
Washer/Dryer- Kenmore (secondhand via Craigslist)
French Doors- second hand from Second Use Building Materials

I pulled out the doorway drywall and framing, then got to work framing out the new walls, adding and moving some electrical outlets and switches, added a ceiling light in the new room, and got the drywall up.
The design for the room, finish-wise, evolved over time, especially as I added the mural on the outside of the wall, which then impacted what I wanted the inside of the room to look like, considering you could see into the room through the glass french doors.
The Lemongrass cabinet color was a last minute decision and I’m really glad I went bold with the cabinets, especially since I went black with the rest of the walls. I love the pop of color and the added lightness in an area that could’ve ended up being a dark corner.
I loved the mix of curved and straight lines of the mural on the outside of the laundry room, and I wanted something that echoed that design without being a direct replica. I ended up doing a mural playing on sheen instead of colors, opting to use both matte and high gloss sheens of the same black I used for the the quarter-circle mural outside the room.

For the ceiling, I knew that I didn’t want a plain ceiling. I love utilizing that wall for a design element, especially in a smaller space. I saw this Zebra Marble removable wallpaper at Tempaper and knew it’d be the perfect design to finish off the room.
Since we have a brass sputnik chandelier in the kitchen, I wanted something that had a similar feel but wasn’t exactly the same. I love this one because it’s more modestly sized, basically flush mount so it doesn’t hang down at all, and it looks especially fancy against the backdrop of the wallpaper!


I think my favorite thing about the whole room is that it feels like it’s always been there. Sometimes I forget that it didn’t even exist when we first moved in. Projects that seamlessly integrate into a house always end up being my favorite because of that reason. It feels like you’re honoring the house itself, creating something that belonged there all along.
And at least now I can feel a little fancier when I’m doing laundry!

Barn Door Install with Gearwrench part 2

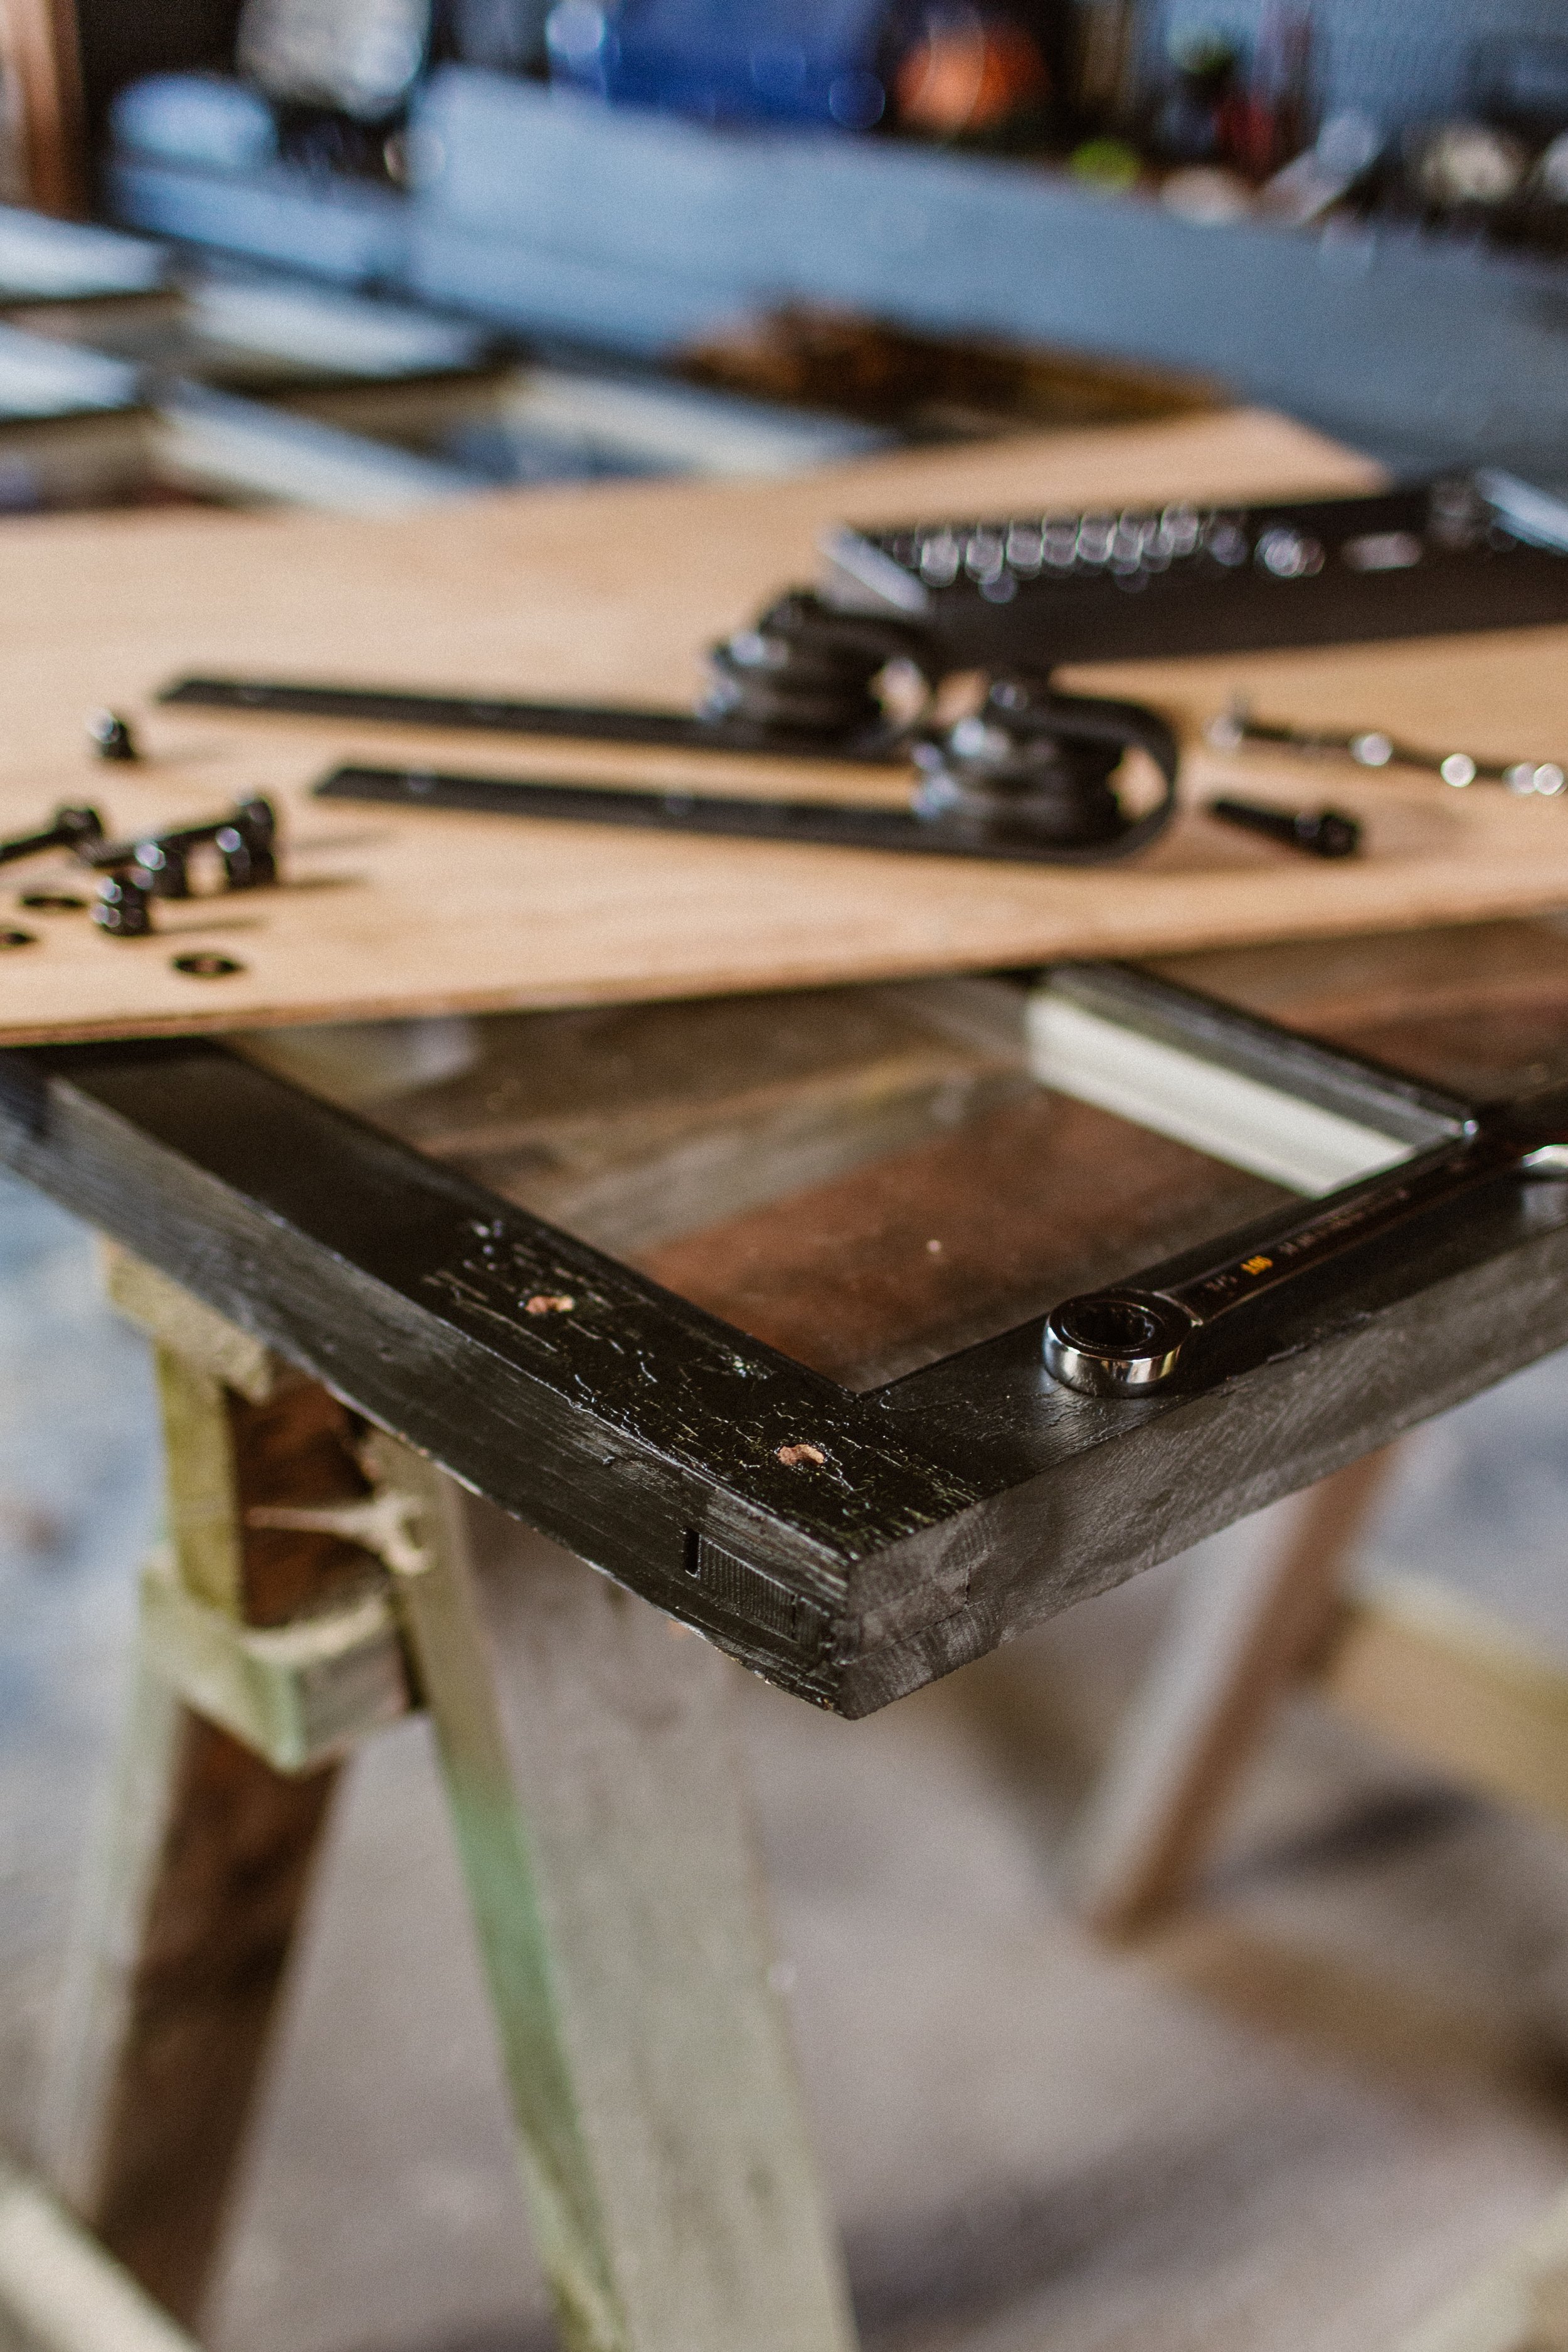
Ready to install this rail? Sweet, let’s do this. For this part, you’ll need a stud finder and a socket wrench. These rails are designed with holes for the lag screws at 16in on center, which is the standard distance between studs. My wall is a little wonky (old house stuff!) so one of my lags needed an anchor, but the rest all had a stud. You’ll need to find where the studs are on your wall and mark those at the height where the rail will go. Your barn door hardware will come with directions on how to measure how high you want your rail.
This project is much easier if you have someone to hold up the other end of the rail as you’re installing, but it’s doable alone! The hardware comes with spacers that hold the rail away from the wall so the door can easily slide. Hold up the rail, then slide a lag screw through a washer, the hole in the rail, through a spacer, and hand screw it into the wall until you feel resistance.
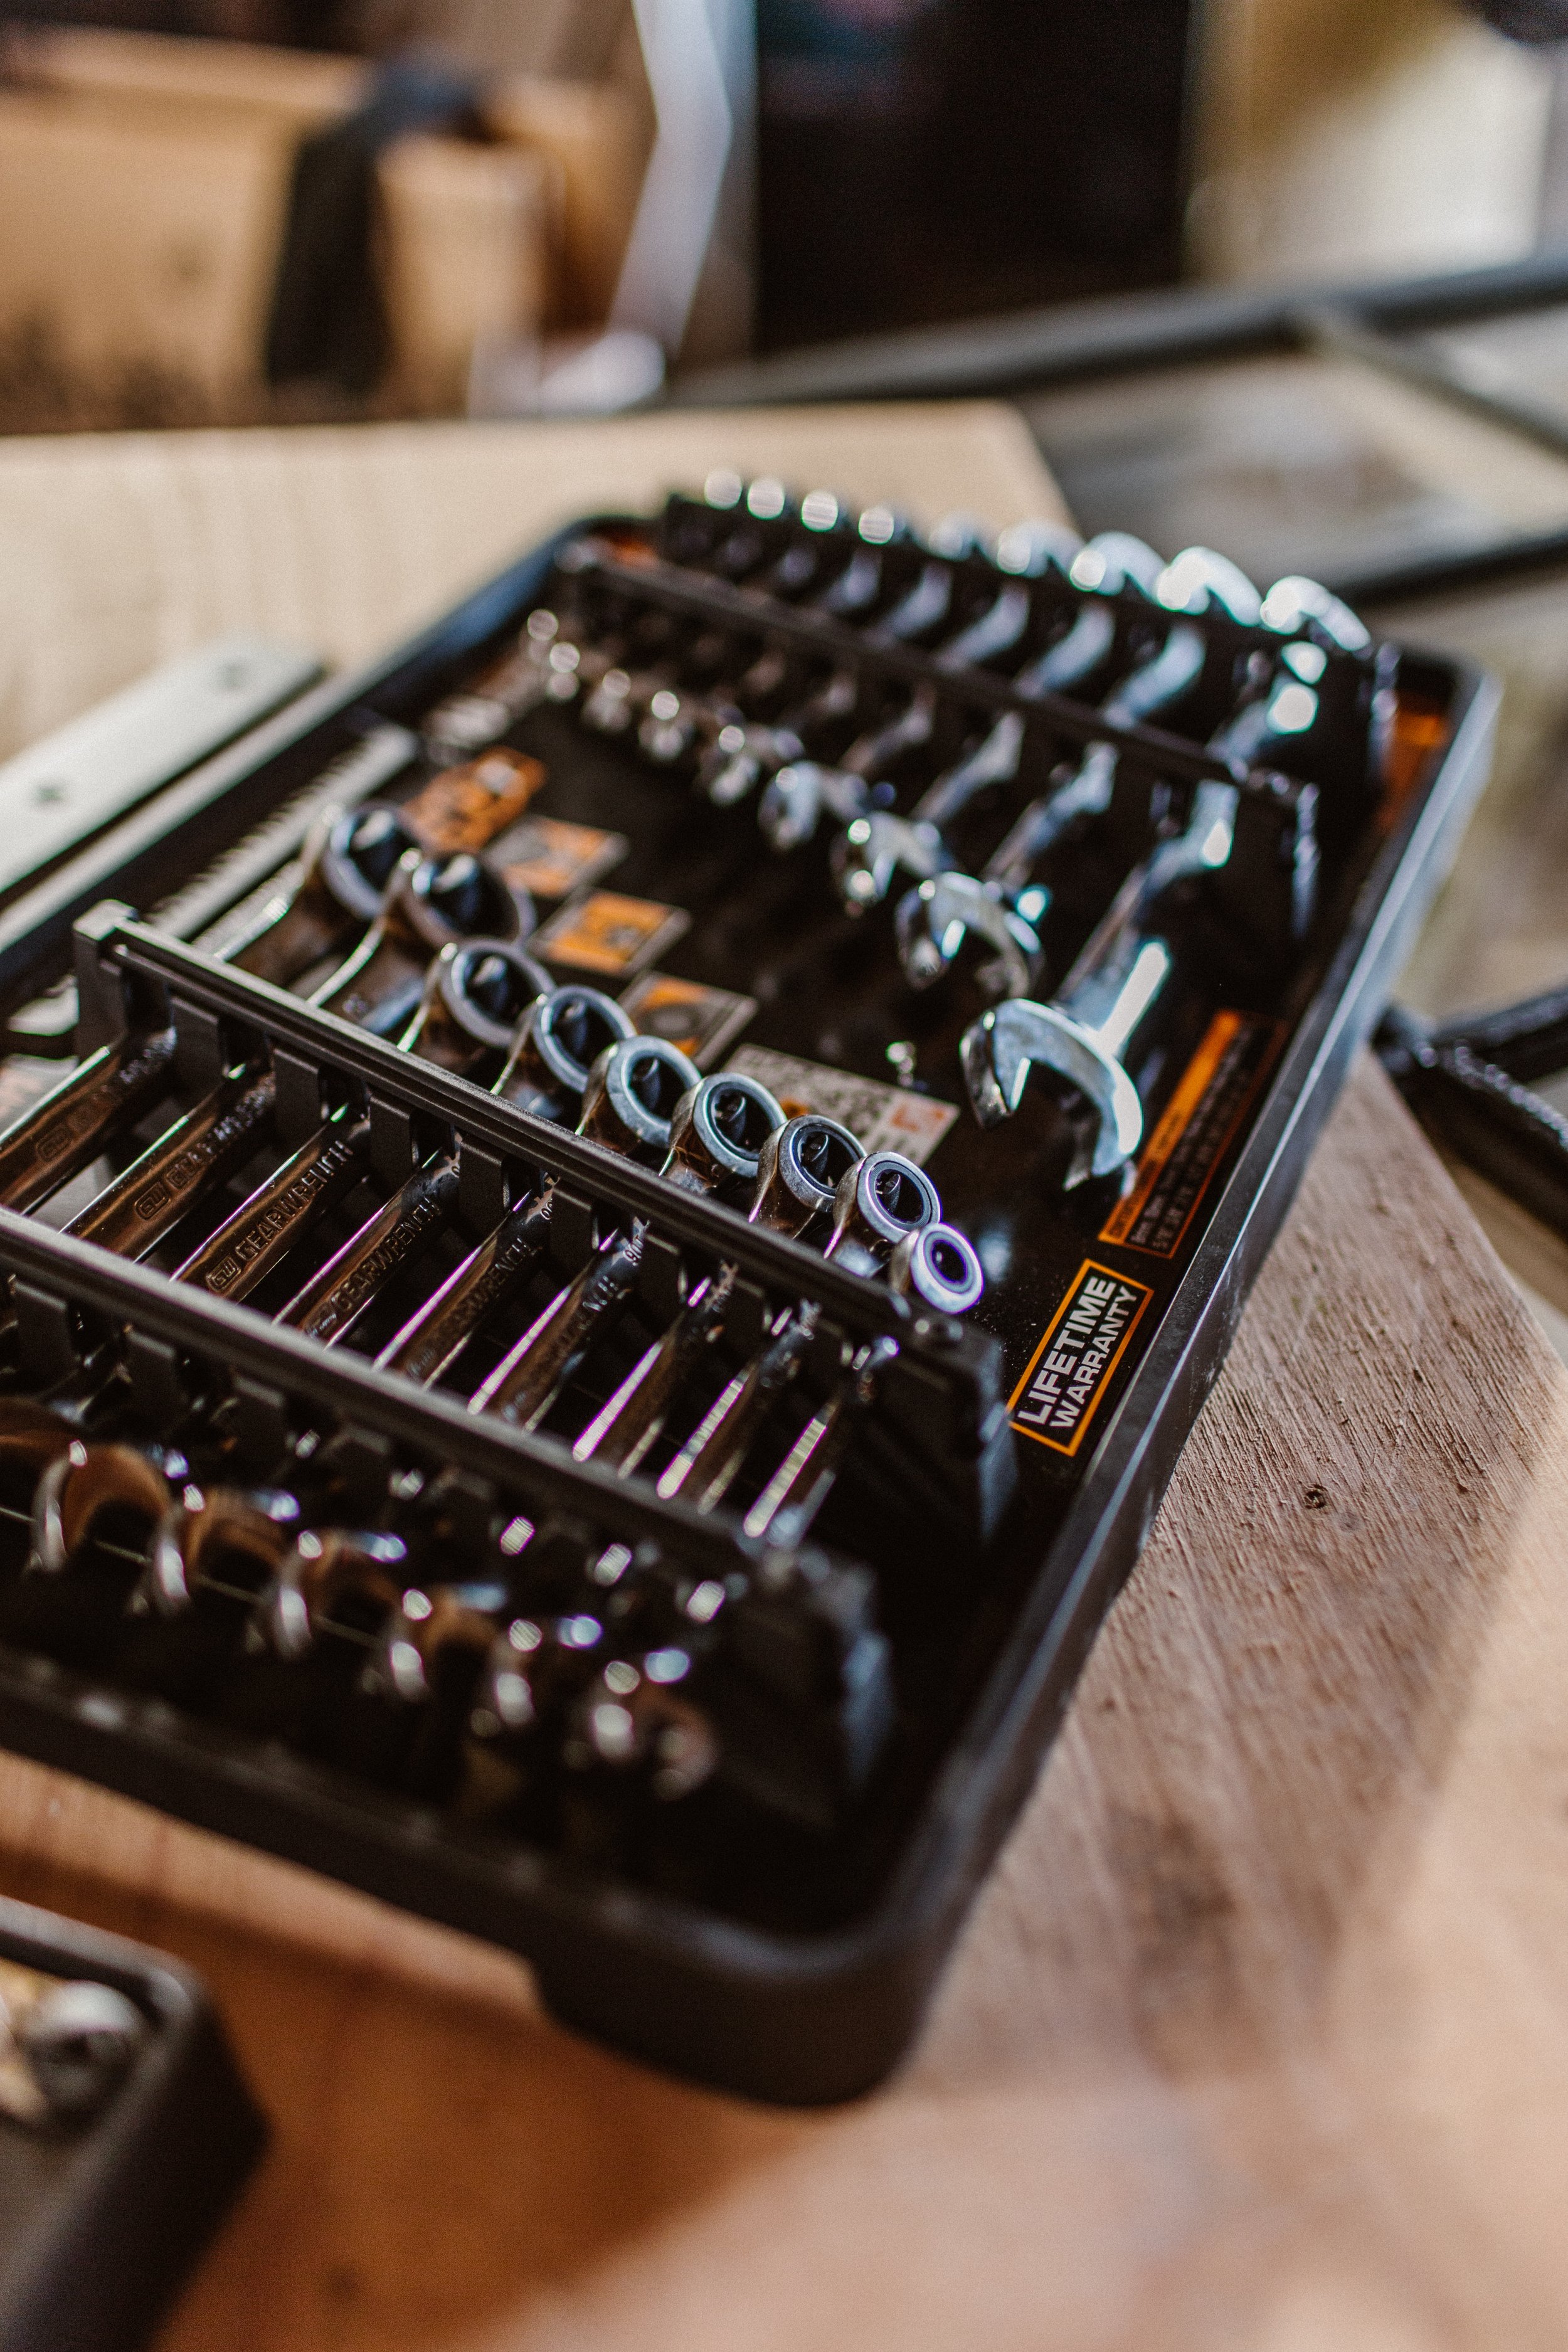
Now for the fun part: grab your socket wrench and go to town on that screw. This Slim Flex-Head Ratchet and Socket set comes with two handles, one that’s 6in, and one that’s 12in. The 12in one worked great for this project, but I’m already anticipating using the short one for the work I’m bound to be doing on my vintage Winnebago RV this coming summer. Plus, if you need to get into some tight or awkward spots, the head tilts on both handles to give you more access. I think a socket set is one of those must-have tools to keep on hand in the garage and I even have one that I always keep in my RV— which I’ve used several times in random parking lots after breaking down, an inevitability when you drive around something 50 years old.


My rail came in two pieces, so I used a level to double-check that the rail was level and then screwed in the lag screw in the middle of the first piece. The third screw in that first piece bisects both rails, so I screwed that one most of the way in, then popped in the end of the second rail piece and continued the process until the whole rail was installed, checking the level as I went to ensure the rail was straight.
There are stoppers included that you’ll install on either end of the rail to prevent the door from flying off the end. If you’re installing the rail close to the corner of the room, you’ll want to put that on before you screw the rail into the wall, otherwise you may not be able to get in on after the rail is installed. If you’re installing in the middle of a wall, though, this shouldn’t be an issue.

Now all that’s left is to hang the door from the rail! The wheels have a channel in the center that the rail will fit perfectly on and the door will glide super smooth. That was easy right? Having the right tools for this job made it go so smoothly.

Here’s the 6-inch handle, which will be so handy for working in smaller areas where I’m not able to have a big swing radius, which can be a very frustrating part of working in tight quarters. You can see in this pic too, the tilting head which, again, helps immensely when working in tight or awkward spaces. If there’s anything I know about working on older houses and cars, it’s that there are always awkward and tight situations where a tool designed for just that comes in so handy.
Another thing to note about this set is that the head takes (and comes with a set of) quarter inch driver bits, so you can also use it for screwing things in tight spots as well where you can’t fit a standard screwdriver. I’d never even thought of a wrench like this being able to be used as a screwdriver, but it’s a genius solution, especially if you don’t have a lot of space to screw something in or out. So useful!
Barn Door Install with Gearwrench pt. 1

The final step of my bathroom doorway “remodel” is installing the barn door. Part of me hates to call this a “barn door” because it’s not farmhouse-y at all. I found this french door at a local salvage shop and knew it’d be perfect for the bed/bathroom. When we started the remodel on the en suite bathroom, we took out the pocket door so we could make sure the wall framing was strong enough to handle the new tiled shower wall, but the bedroom is very small so a standard swinging door was a hard no. A sliding “barn” door was the solution!
The install on these types of doors is actually super easy and straightforward. Home Depot recently sent this Gearwrench 90-Tooth Pro Combination Ratcheting Wrench Tool Set and it was just the right tool for the install of this door! I love having a open-ended wrench set on hand, not only for projects around the house like installing this door, but it’s also something I use all the time when I’m tinkering on my older cars. Owning two 70’s vehicles, and a 20 year old van means I’m always fixing something or other. Anyone who has a house and/or car should definitely consider grabbing a wrench set to have on hand.
Okay, back to the sliding door. You can find the hardware here, and you can use it with any door that you can drill through to attach the top wheels, but something solid wood is ideal. The only power tool you’ll need to install this is a drill to make the holes for the bolts to go through to attach those top wheel pieces.
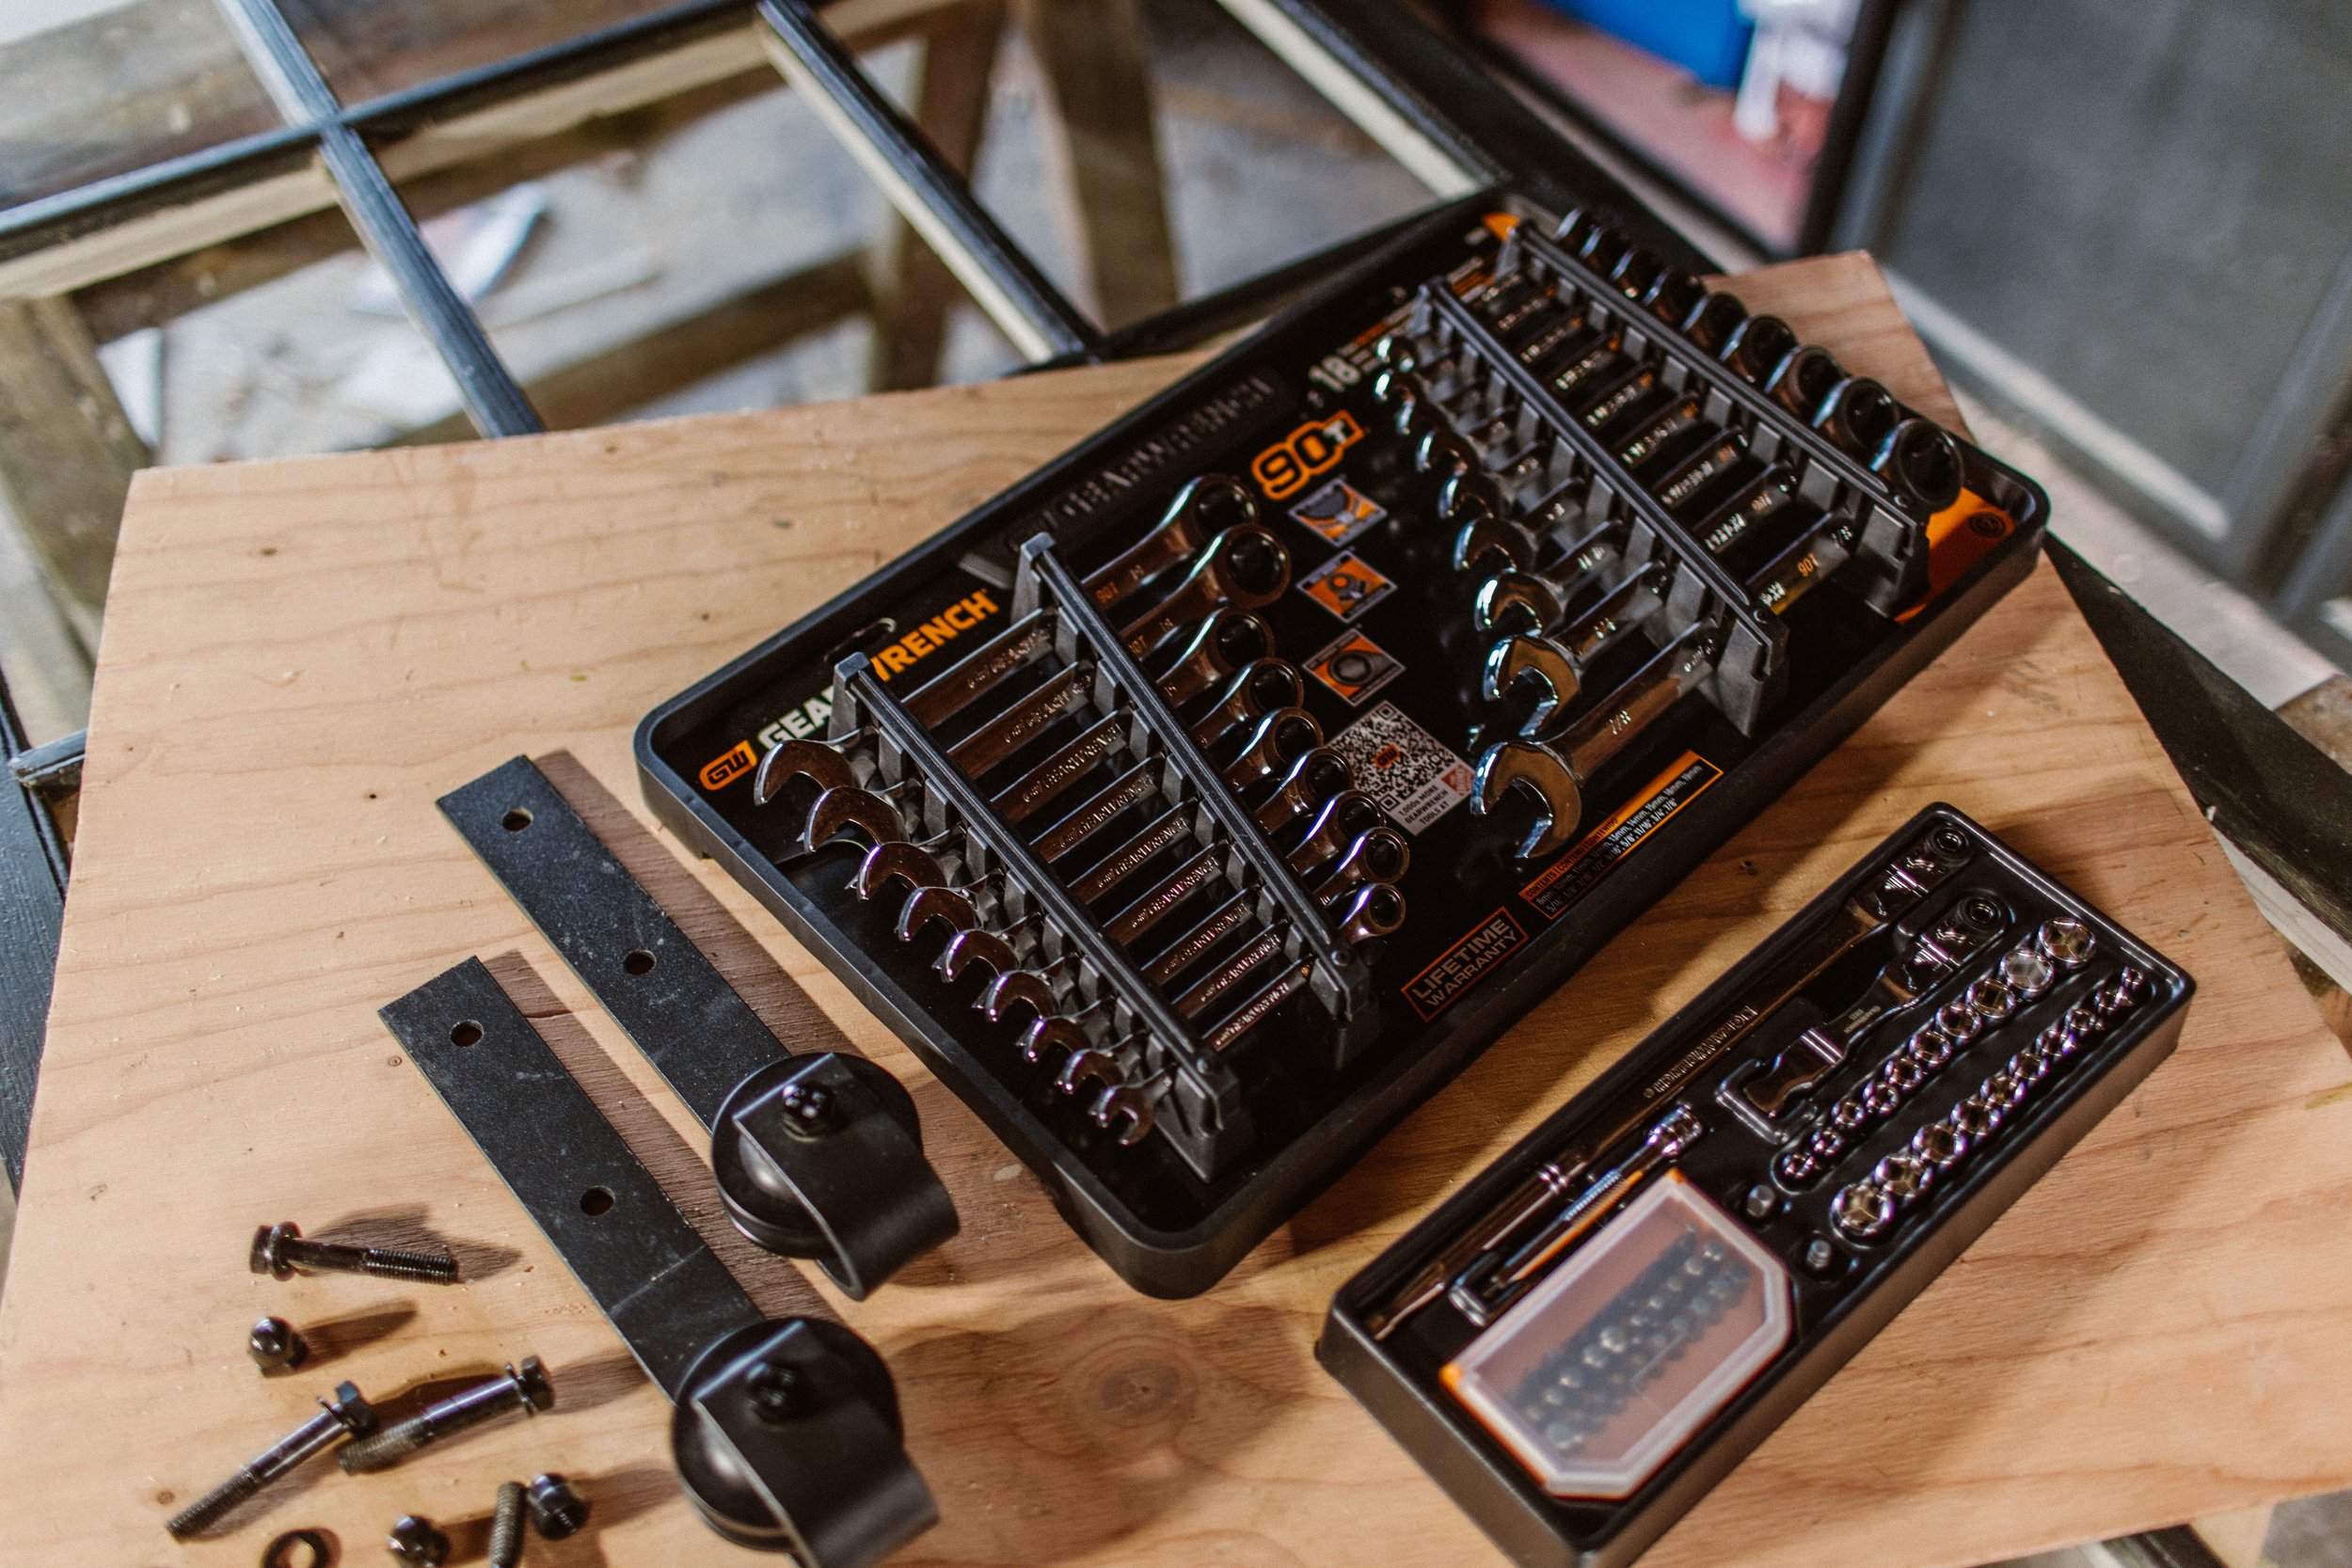
Your sliding door hardware will come with instructions on the measurements for where to drill those holes and what size bit to use. Mark the spots, then drill two holes on either side of the top of your door. Then, grab a wrench and a socket in the correct size (mine used 5/8in) and attach the wheel brackets with the nut and bolt. I loved these Gearwrench ratcheting wrenches, they made super quick work of attaching these brackets, plus, the ratcheting end of the wrench has a 4º swing arc, which means you can work in tight spaces (something that would’ve come in super handy when I was crammed into my minivan engine compartment fumbling with my old wrench). I’ve only ever had non-ratcheting wrenches before, and I can’t tell you how nice a ratcheting wrench is. Game changer!

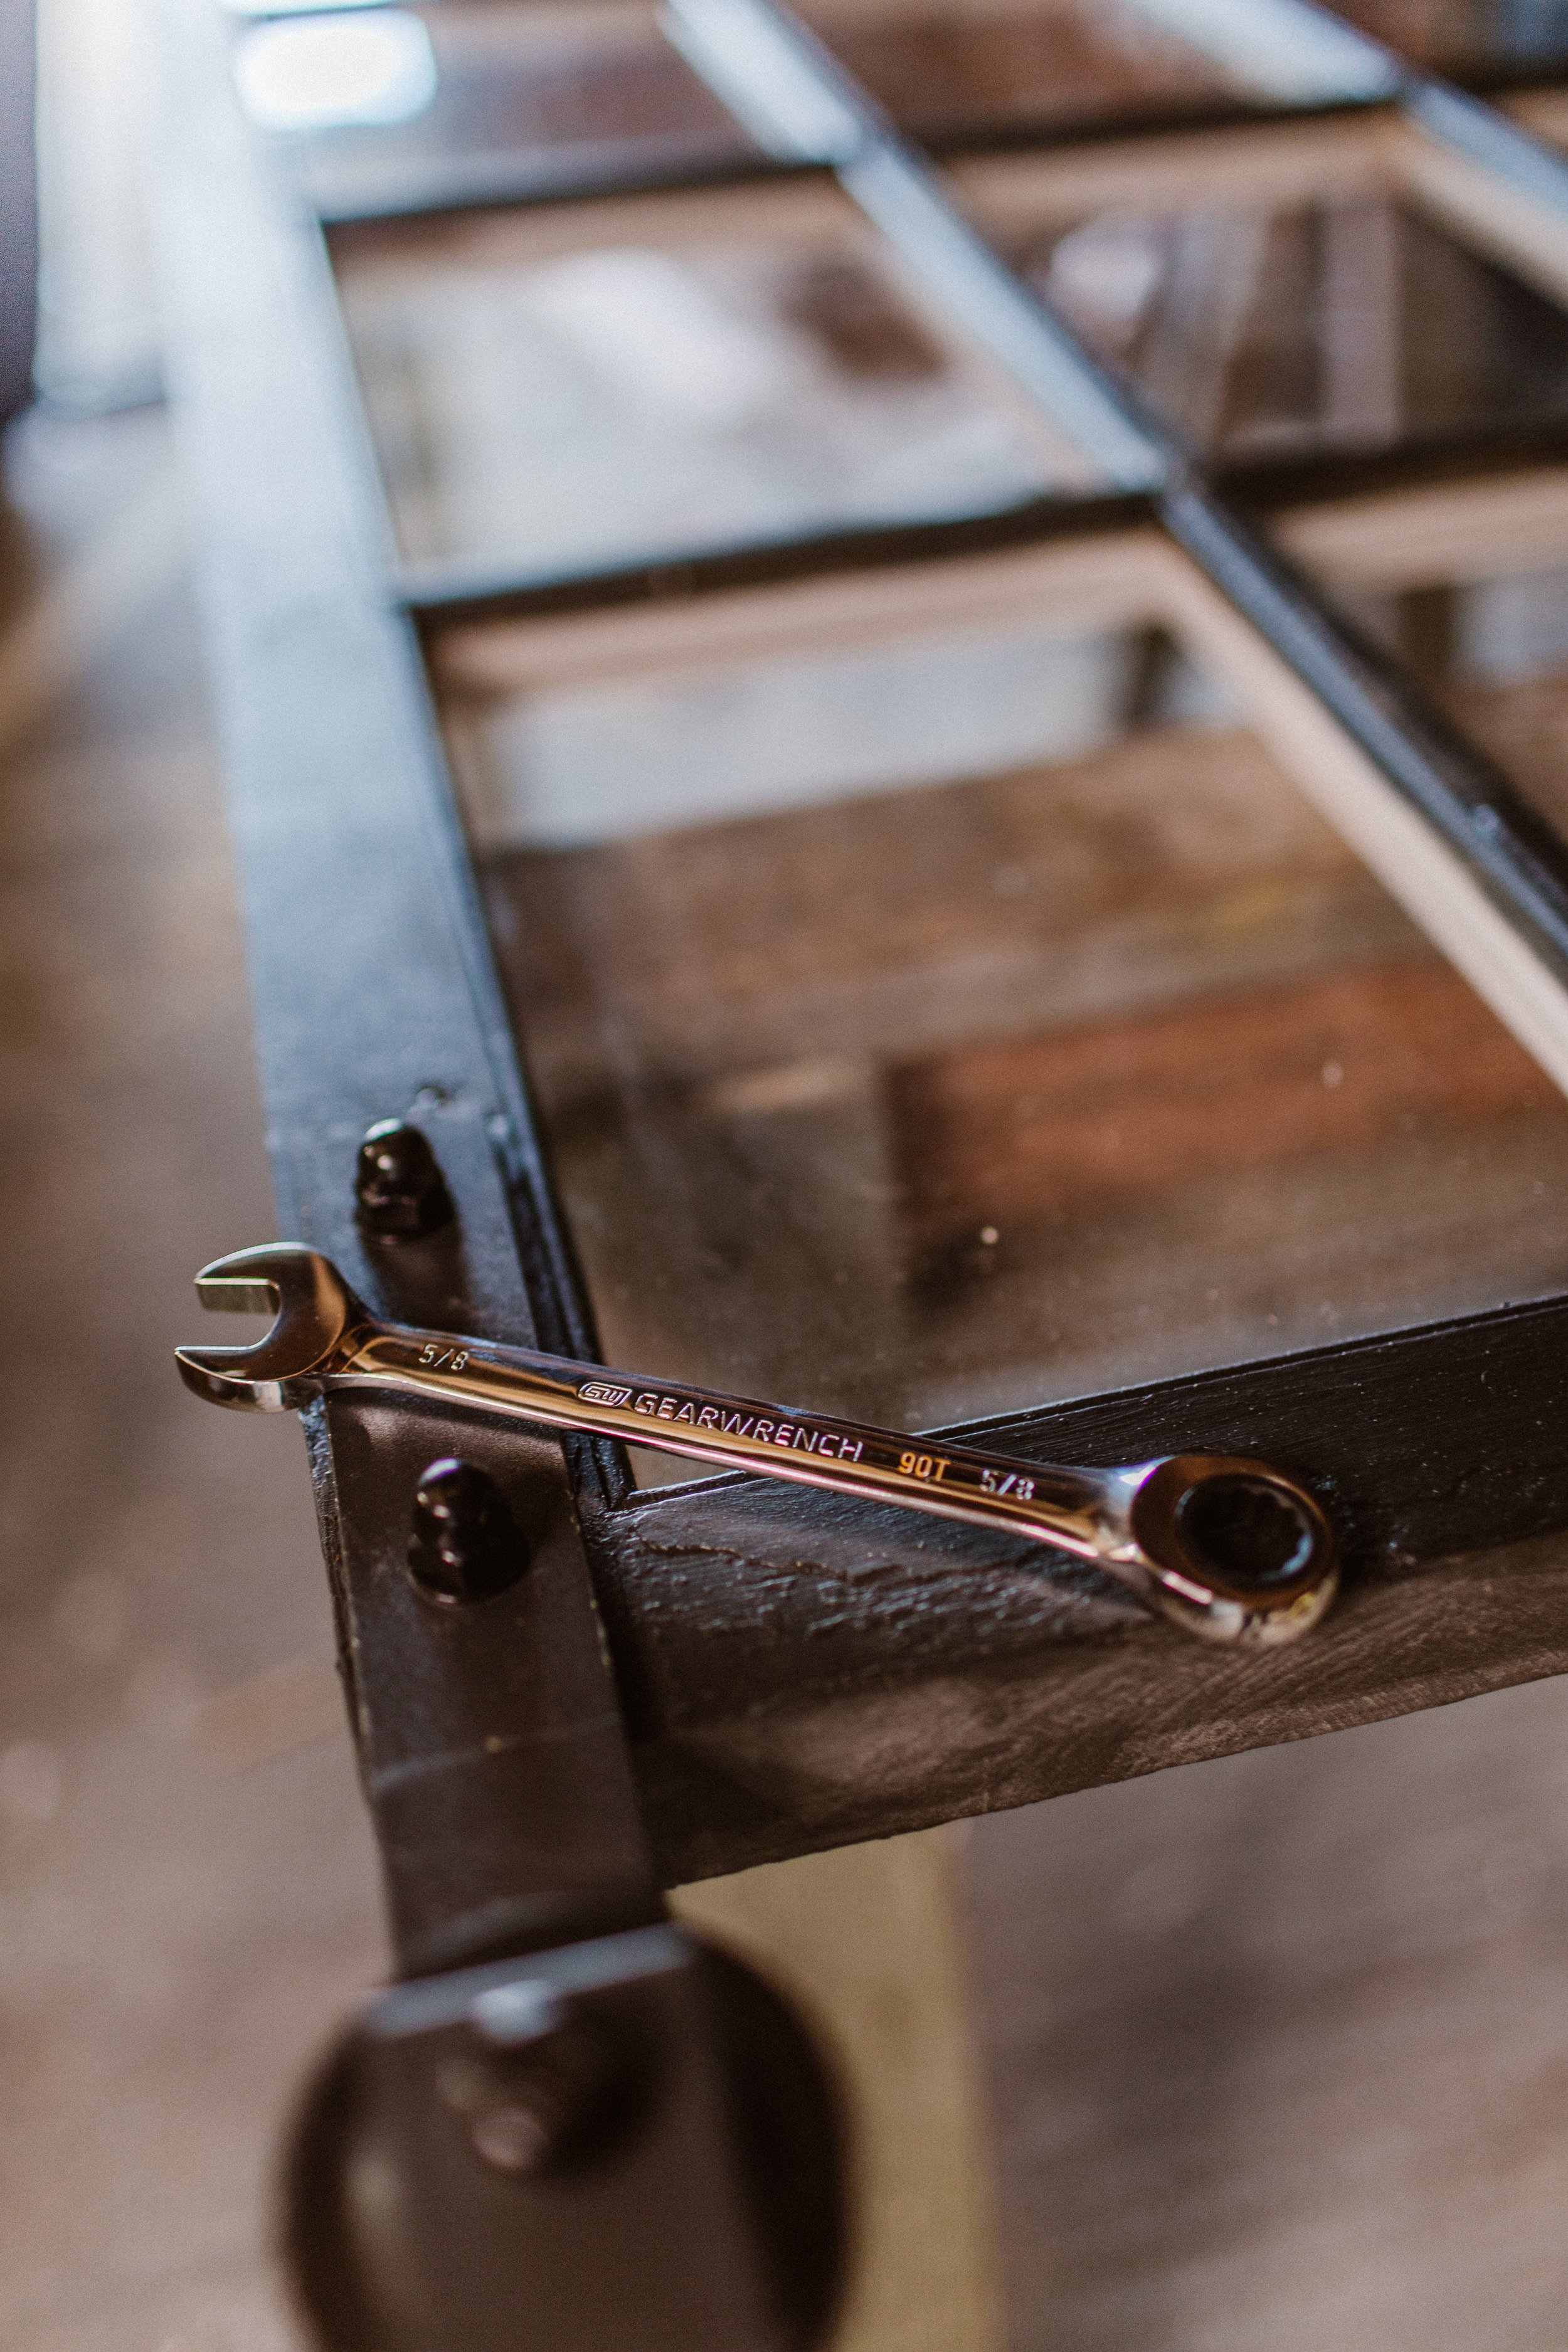


That was easy right? Having the right tools for projects can save a lot of time and headache, and this new wrench set was the exact right tool for the job. I have regular wrench sets that don’t ratchet and while they work fine, having the ratcheting feature made popping this hardware on the doors go so quick. While I didn’t need them for this job, the set comes with a set of metric wrenches as well, so if you’ve got a non-American car or purchase materials made that use metric fasteners, you’re ready to go!
Stay tuned for part 2 where we install the rail in the wall and get the door hung!

Hi, I’m Liz
I'm an artist, writer, designer, DIY renovator, and … well basically I like to do all the things. If it’s creative I’m probably doing it. I’ve spent over 30 years voraciously pursuing a life steeped in creativity and I wholeheartedly believe creativity and joy are inextricably linked.
Read more…


Explore The Archive
- July 2025
- May 2025
- January 2025
- December 2024
- August 2024
- July 2024
- May 2024
- April 2024
- January 2024
- December 2023
- October 2023
- September 2023
- July 2023
- June 2023
- May 2023
- April 2023
- March 2023
- February 2023
- January 2023
- December 2022
- November 2022
- October 2022
- August 2022
- June 2022
- May 2022
- April 2022
- March 2022
- November 2021
- October 2021
- August 2021
- July 2021
- May 2021
- January 2021
- November 2020
- October 2020
- September 2020
- August 2020
- July 2020
- June 2020
- May 2020
- April 2020
- February 2020
- January 2020
- November 2019
- October 2019
- August 2019
- July 2019
- June 2019
- May 2019
- April 2019
- February 2019
- January 2019
- December 2018
- November 2018
- October 2018
- September 2018
- August 2018
- July 2018
- June 2018
- May 2018
- April 2018
- February 2018
- January 2018
- November 2017
- September 2017
- August 2017
- July 2017
- June 2017
- May 2017
- April 2017
- March 2017
- February 2017
- January 2017
- December 2016
- November 2016
- October 2016
- September 2016
- August 2016
- June 2016
- May 2016
- April 2016
- March 2016
- February 2016
- January 2016
- December 2015
- November 2015
- October 2015
- September 2015
- August 2015
- July 2015
- June 2015
- May 2015
- April 2015
- March 2015
- February 2015
- January 2015
- December 2014
- November 2014
- October 2014
- September 2014
- August 2014
- July 2014
- June 2014
- May 2014
- April 2014
- March 2014
- February 2014
- January 2014
- December 2013
- November 2013
- October 2013
- September 2013
- August 2013
- July 2013
- June 2013
- May 2013
- April 2013
- March 2013
- February 2013
- January 2013
- December 2012
- November 2012
- October 2012
- September 2012
- August 2012
- July 2012
- June 2012
- May 2012
- April 2012
- March 2012
- February 2012
- January 2012
- December 2011
- November 2011
- October 2011
- September 2011
- August 2011
- July 2011
- June 2011
- May 2011
- April 2011
- March 2011
- February 2011
- January 2011
- December 2010
- November 2010
- October 2010
- September 2010
- August 2010
- July 2010
- June 2010
- May 2010
- April 2010
- March 2010
- February 2010
- January 2010
- December 2009
- November 2009
- October 2009
- September 2009
- August 2009
- July 2009
- June 2009
- May 2009
- April 2009
- March 2009
- February 2009
- January 2009
- December 2008
- November 2008
- October 2008
- September 2008
- August 2008
- July 2008

VISIT THE SHOP


PRIVACY POLICY & DISCLOSURE
We are a participant in the Amazon Services LLC Associates Program, an affiliate advertising program designed to provide a means for us to earn fees by linking to Amazon.com and affiliated sites.