

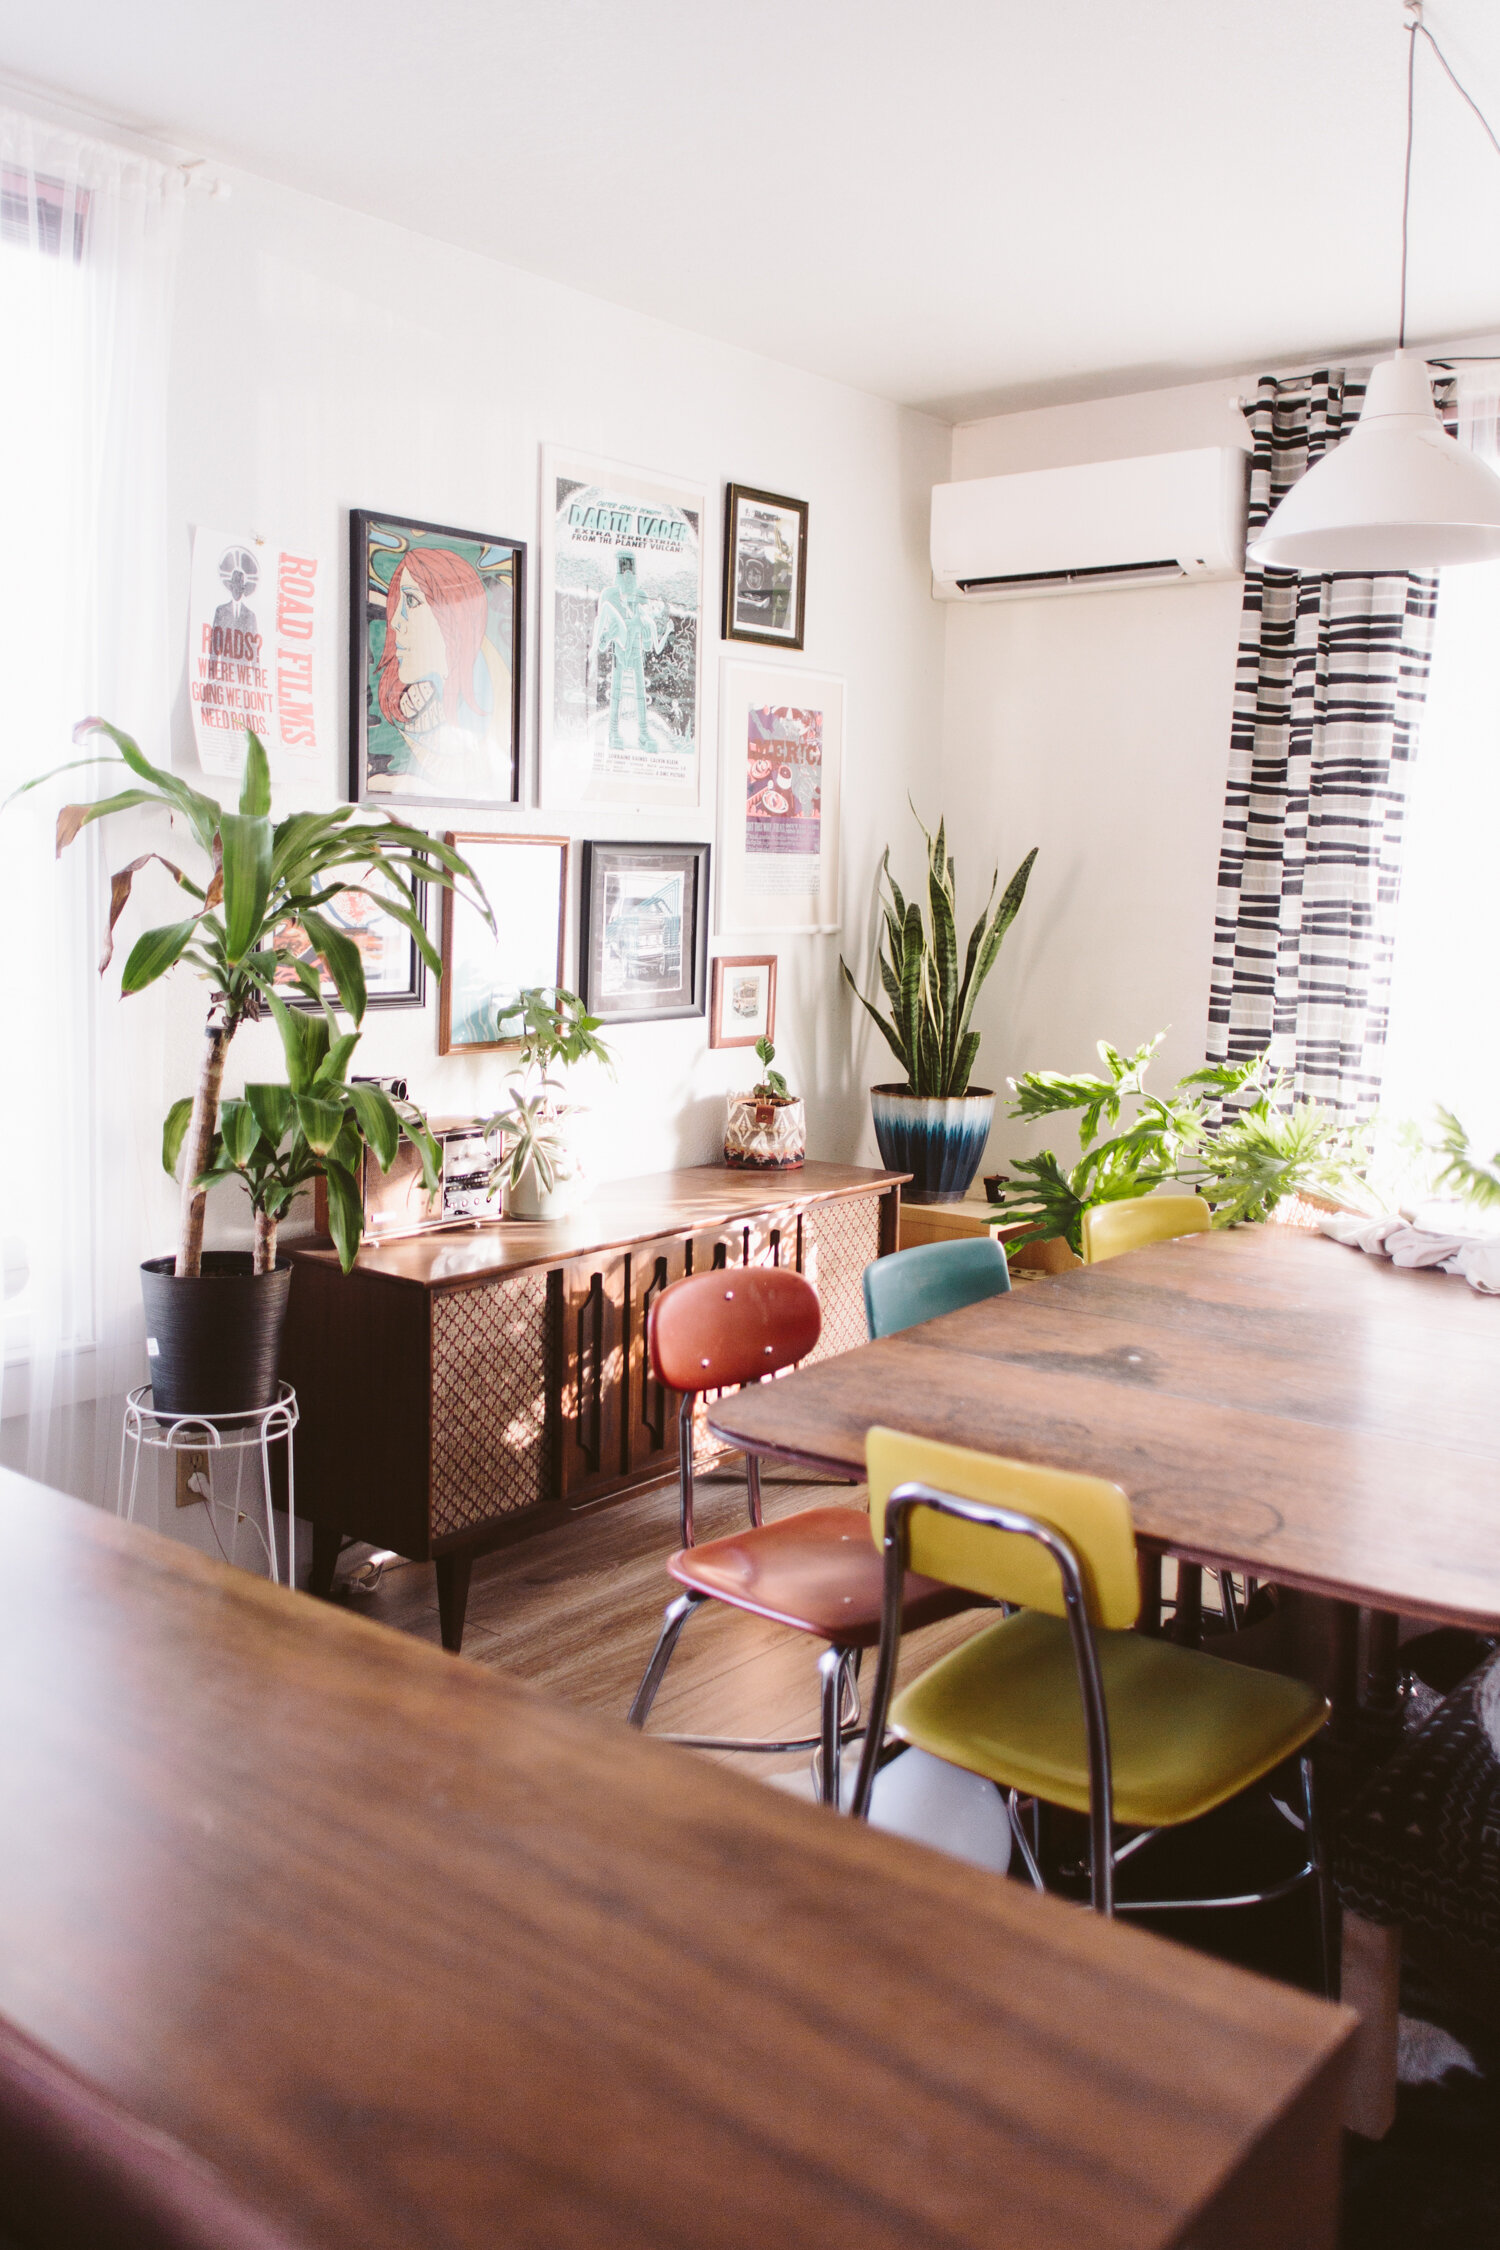
Our Dining Room Transformation!

This space is still very much a work in progress, but I love being able to look back at what it looked like when we bought the house, and appreciate how far we’ve come. This room is * technically * the living room, but it’s smaller space and right by the front door, so having the entry there takes away some space too, so we decided to flip them, and put the living room next to the kitchen and move the dining room to the front of the house.
For us, having a dining table is nice for hosting friends, and doing crafts and projects, but we don’t use it on the daily, so moving the living room to the center of the home, right next to the kitchen, made way more sense. We use the living room and kitchen all the time, so putting them close together was perfect for us.
Because this wasn’t designed as a dining room we didn’t have a hardwired light over the table, so I found one at the thrift store for $5 and strung it up with a hook! It’s a plug in lamp so I plugged it into a smart plug so now we just tell Google to turn on the dining room light and it turns on! Way easier than going through the work to install a hardwired light. We may still eventually install one, but for now this works great!

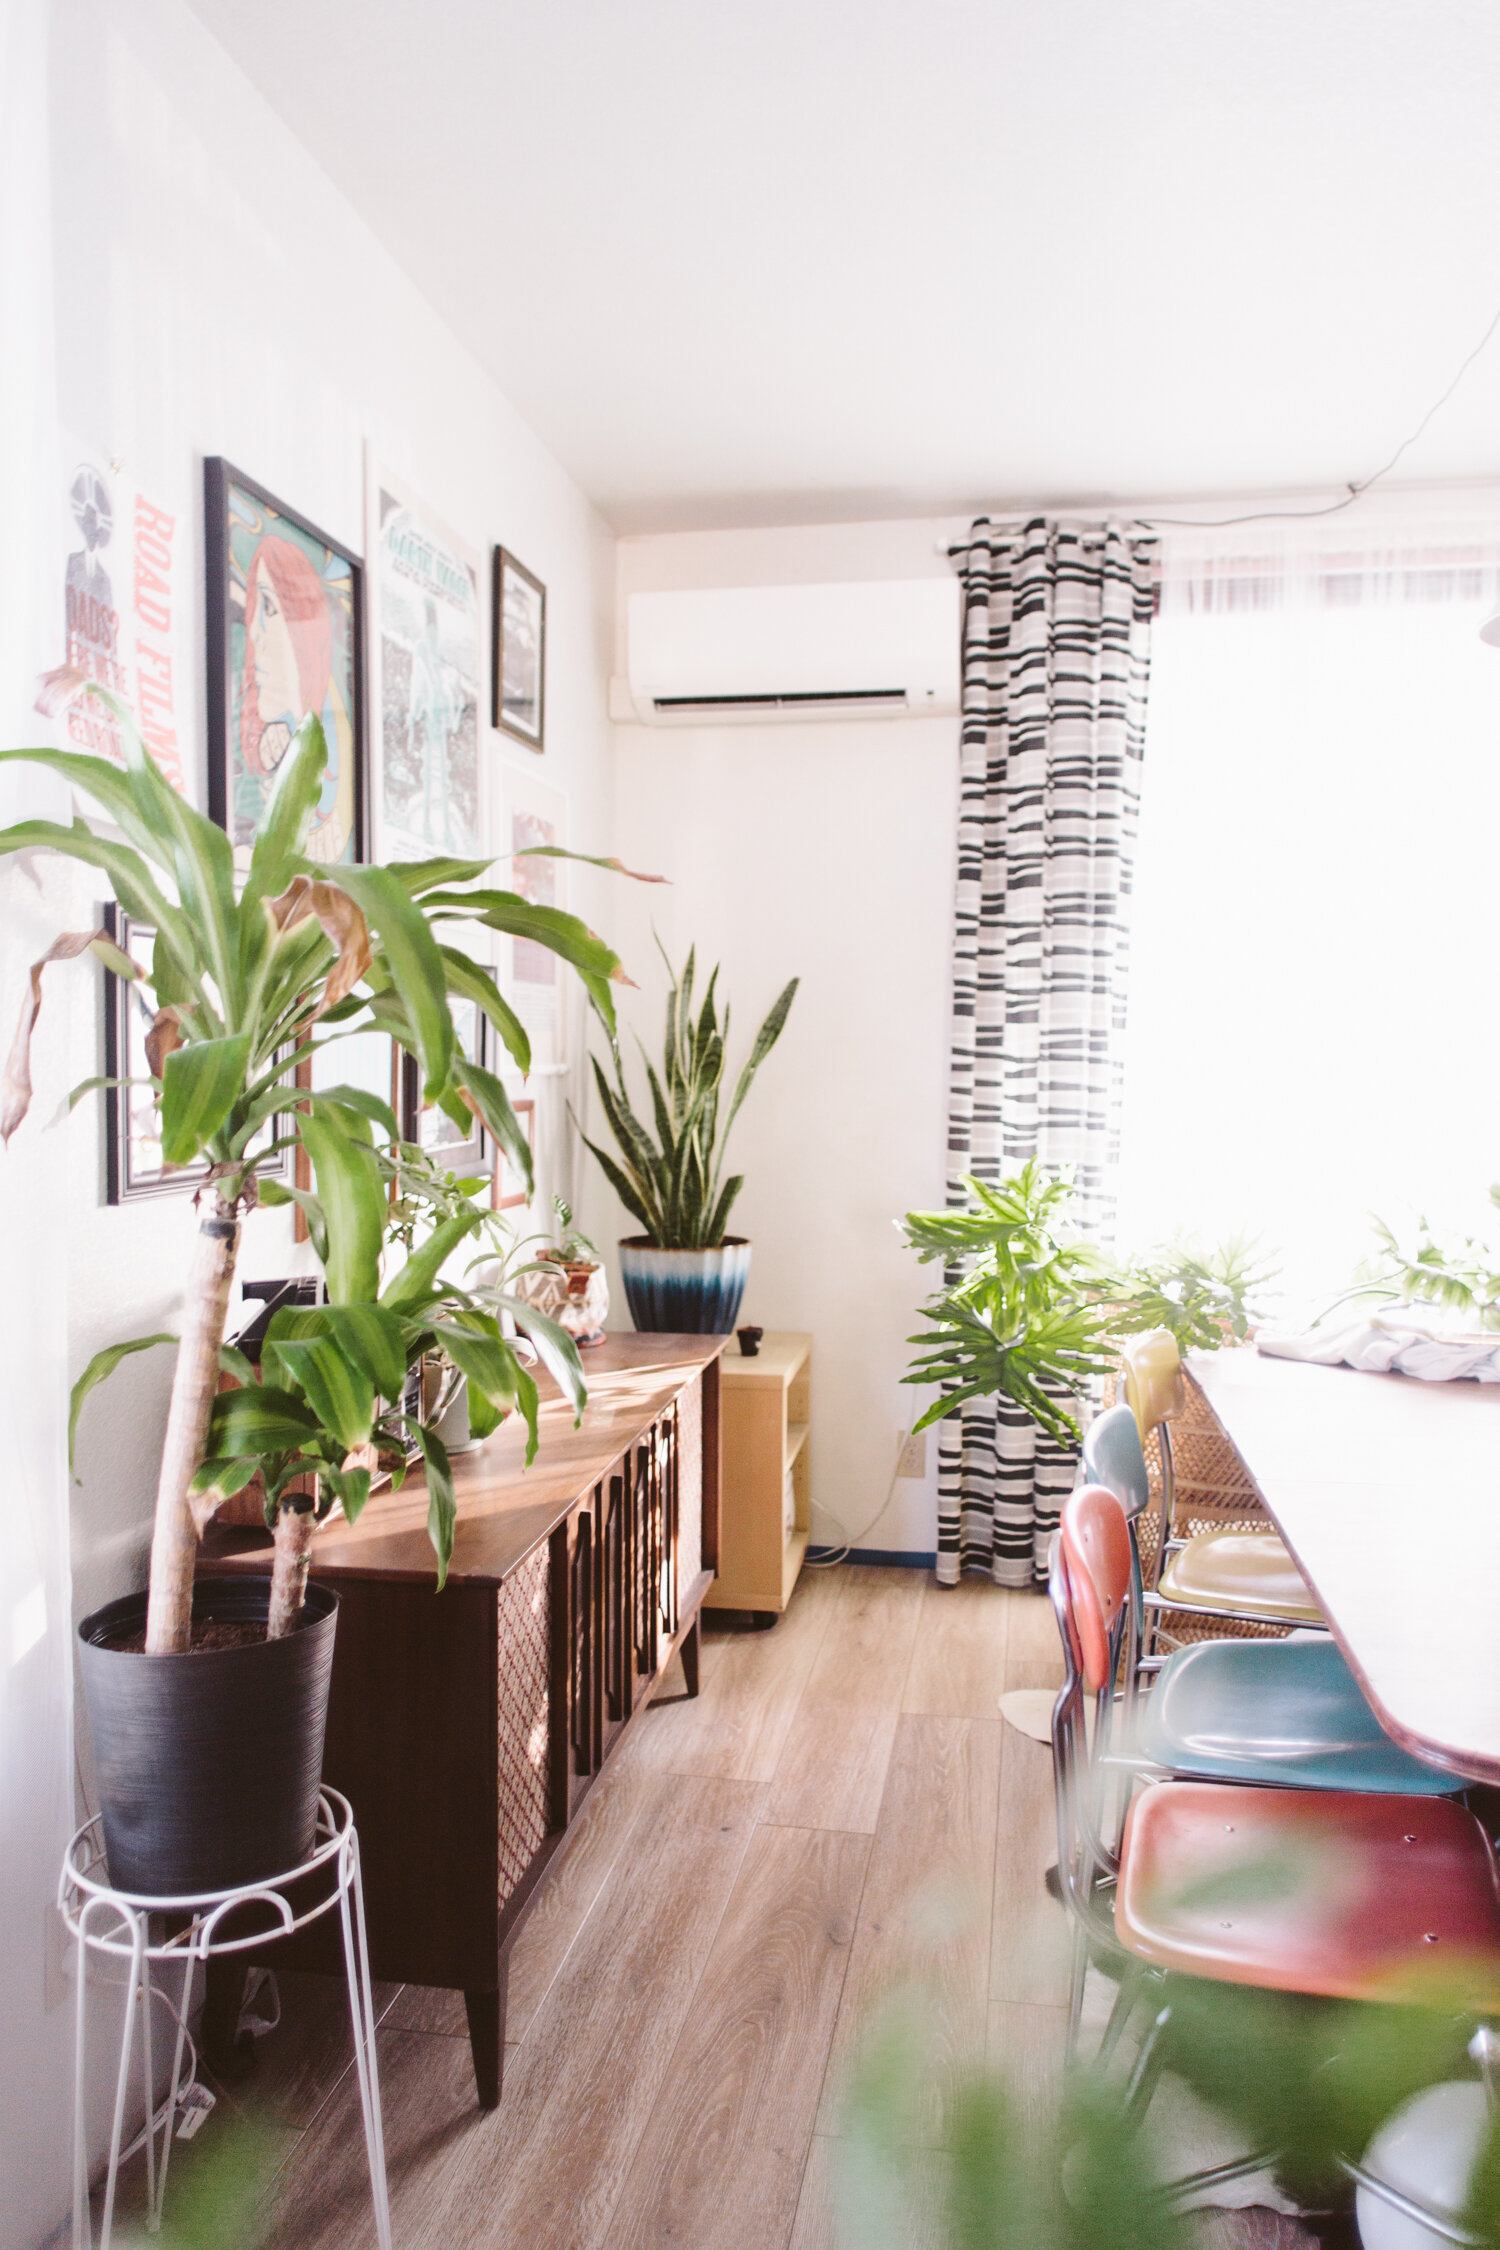

You can kind of tell, but the ceiling was sagging a bit, which is why the old faux beam they had up looks super weird and bent. We jacked the ceiling up and put up a lighter cedar faux beam. We also took out the pony wall that divided the two rooms, and another tiny pony wall that was right by the front door, which made that space extra claustrophobic.
The disgusting, dog scented, dog fur saturated carpet was the first thing to go. It was even more disgusting IRL, and yes, all the stuff in the house was left when we bought it as-is, so we had to fill a couple dumpsters with all that crap as well as the stuff we demoed.
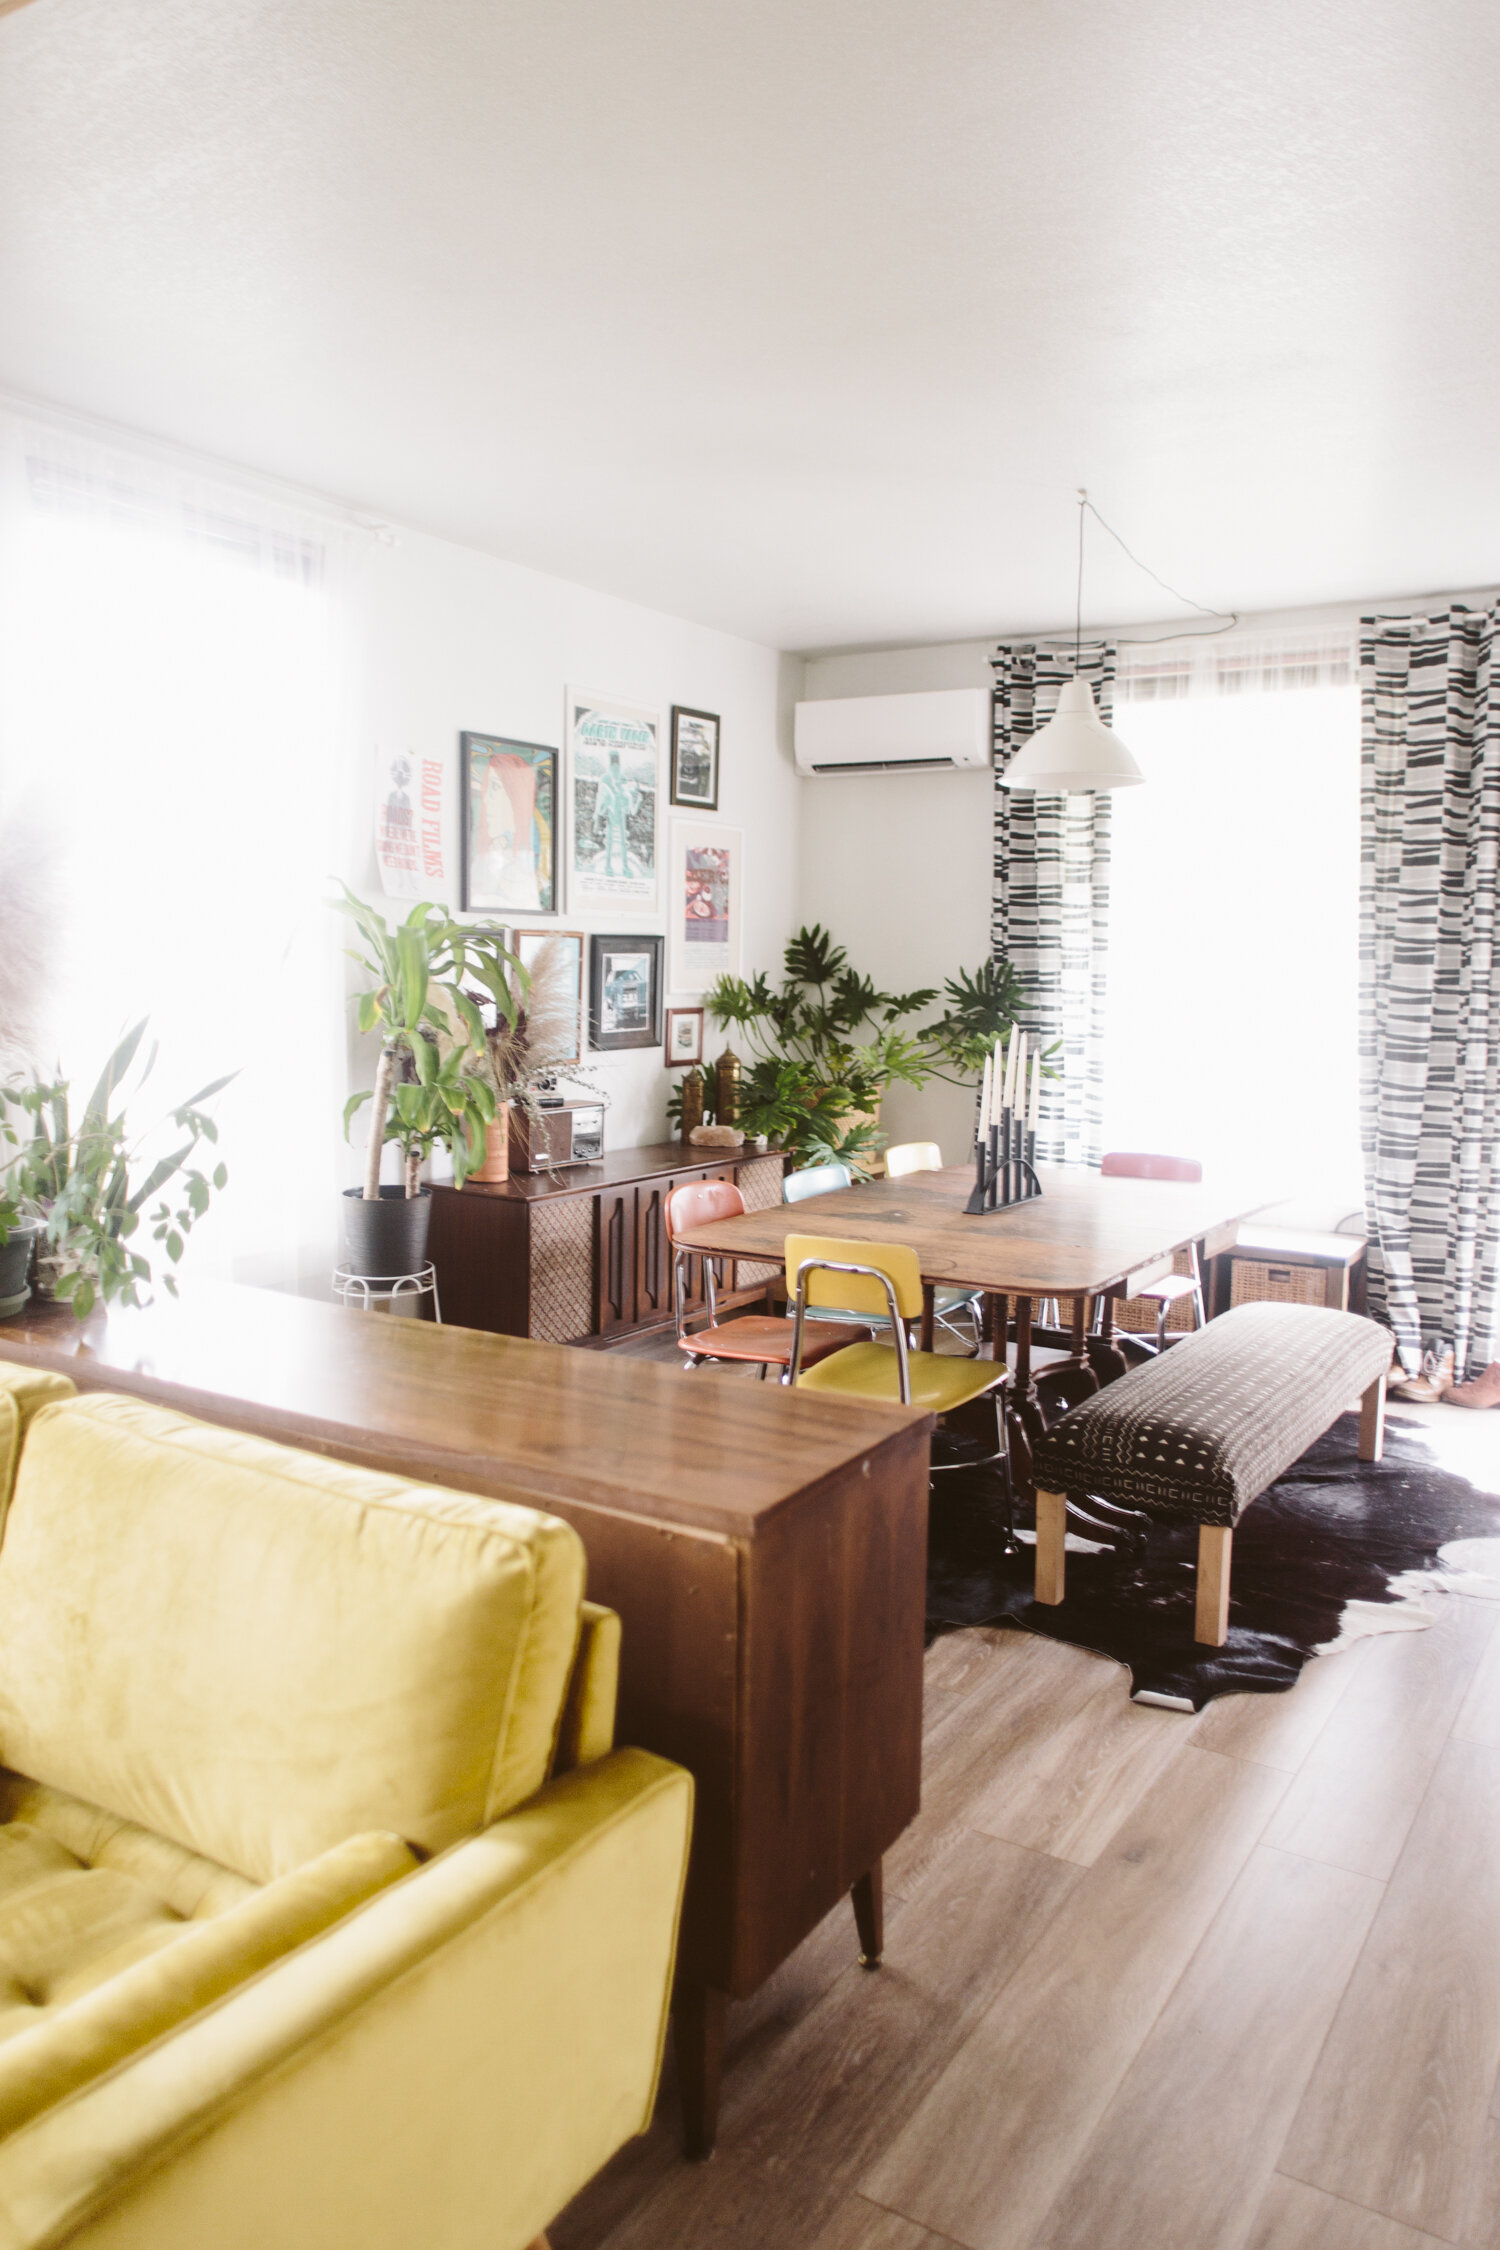

I’ve got more projects up my sleeves for the dining room, but those are on the back burner with some more pressing projects in line first, but I’m so happy with how far we’ve come since those photos on the first day!

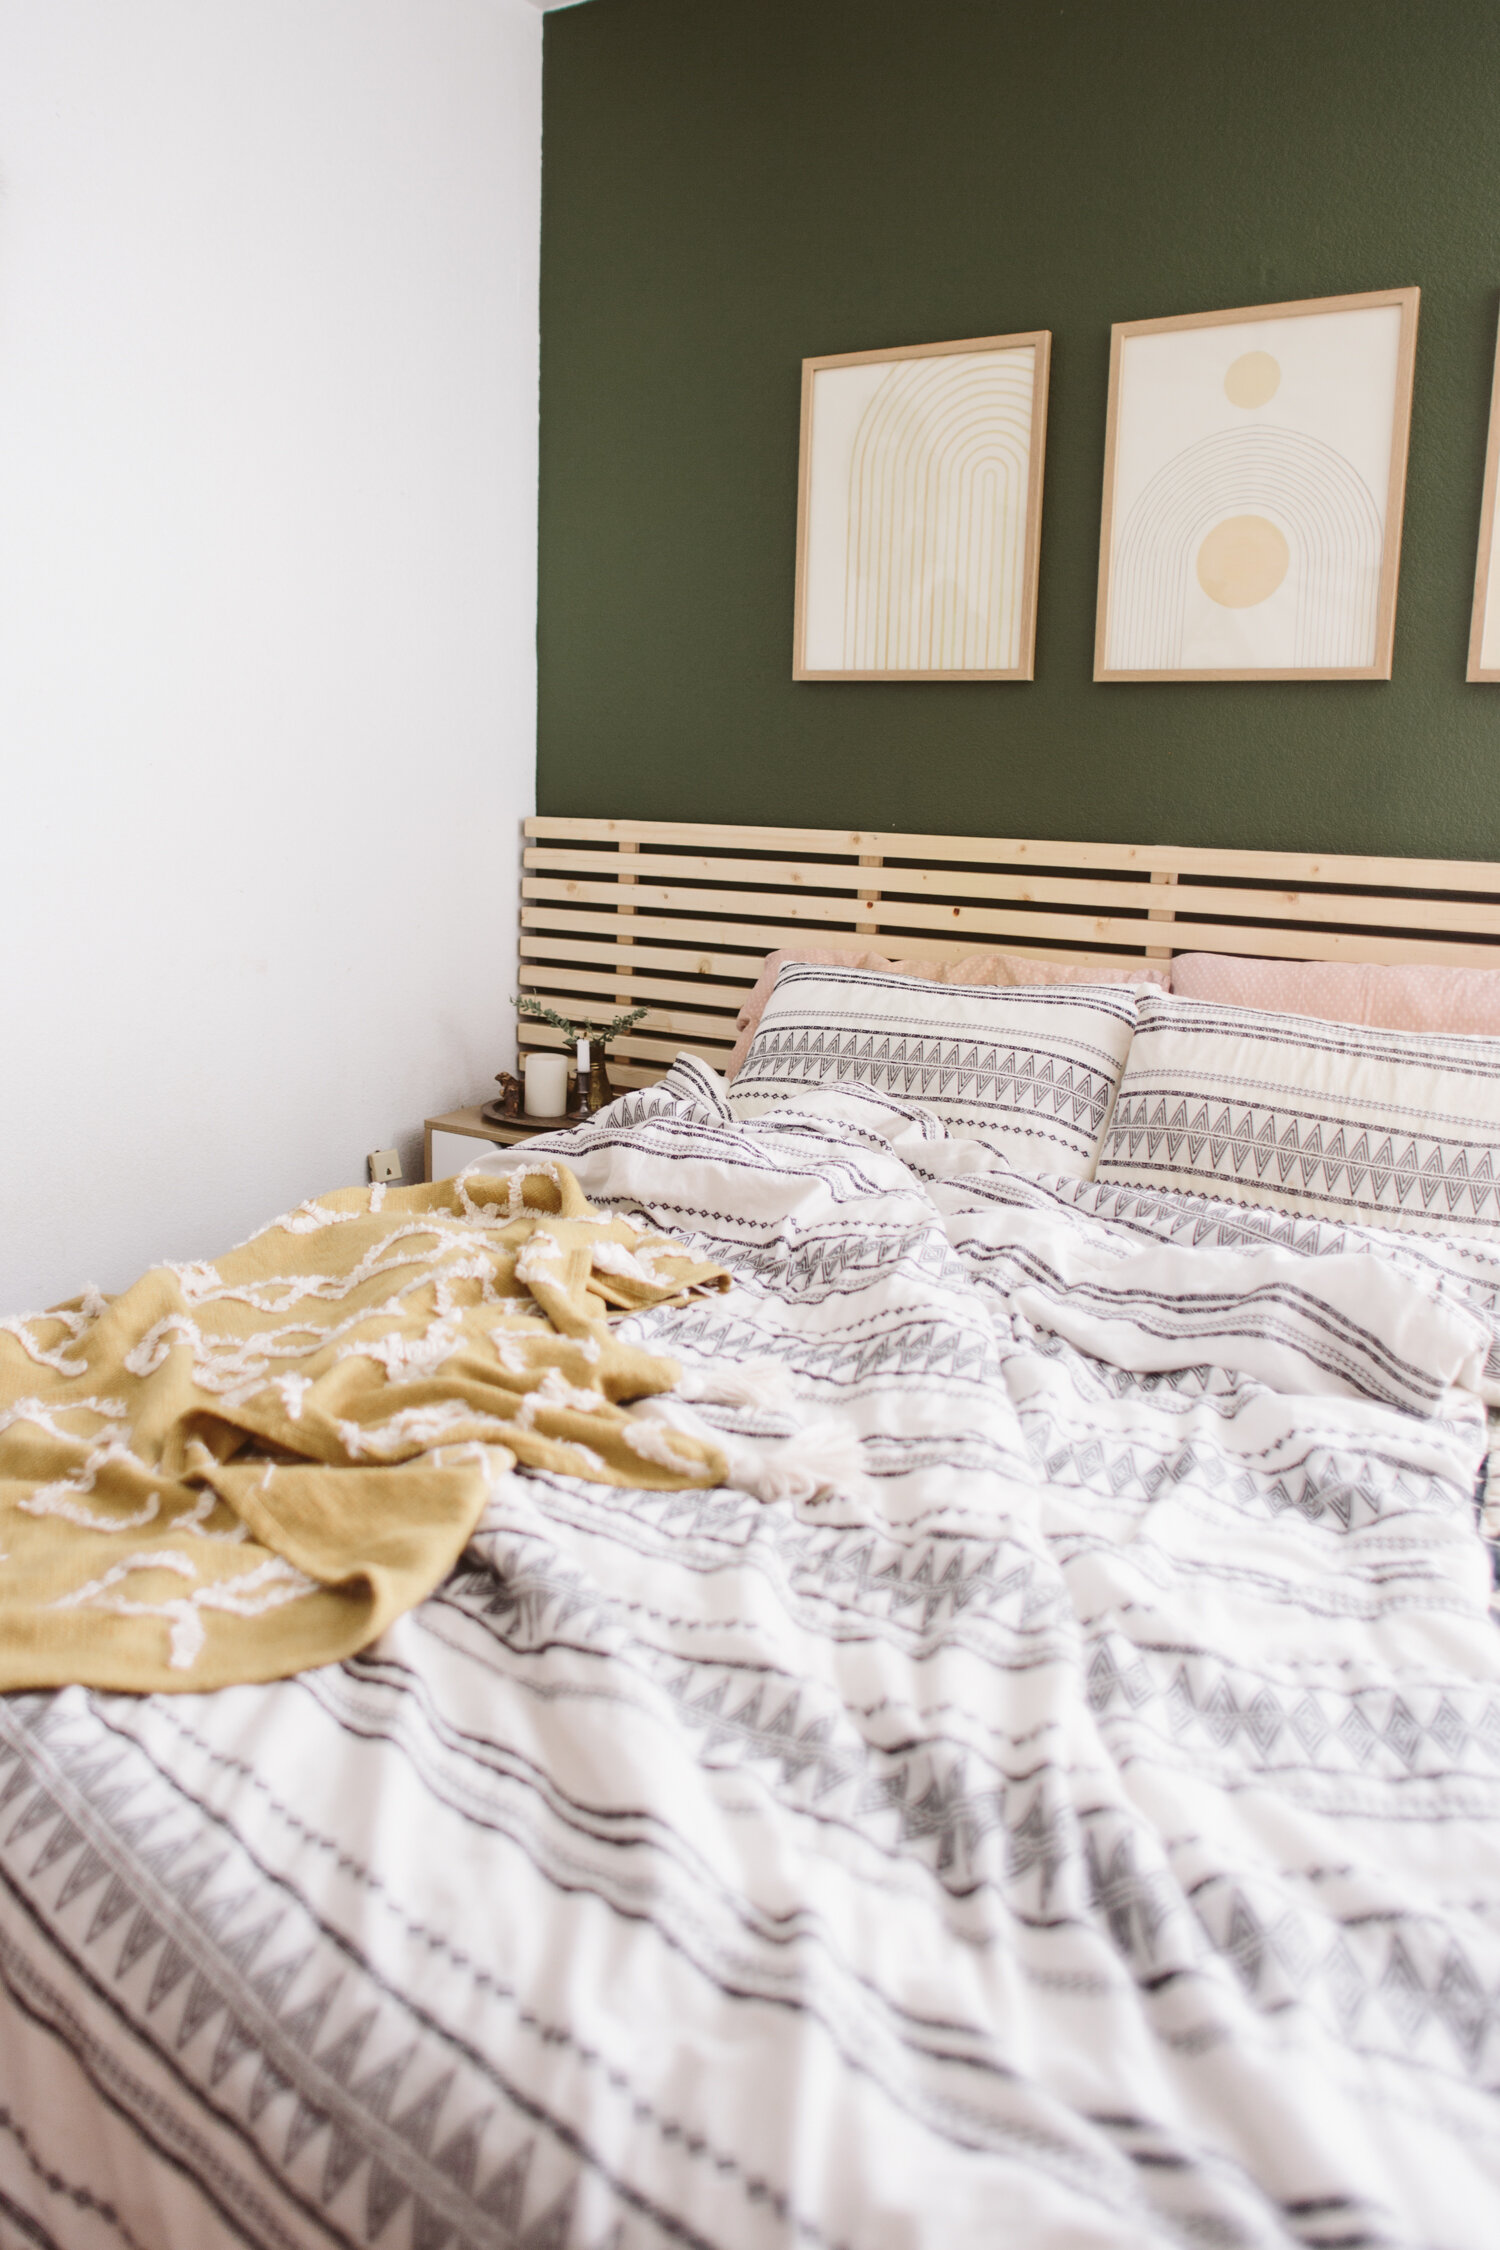
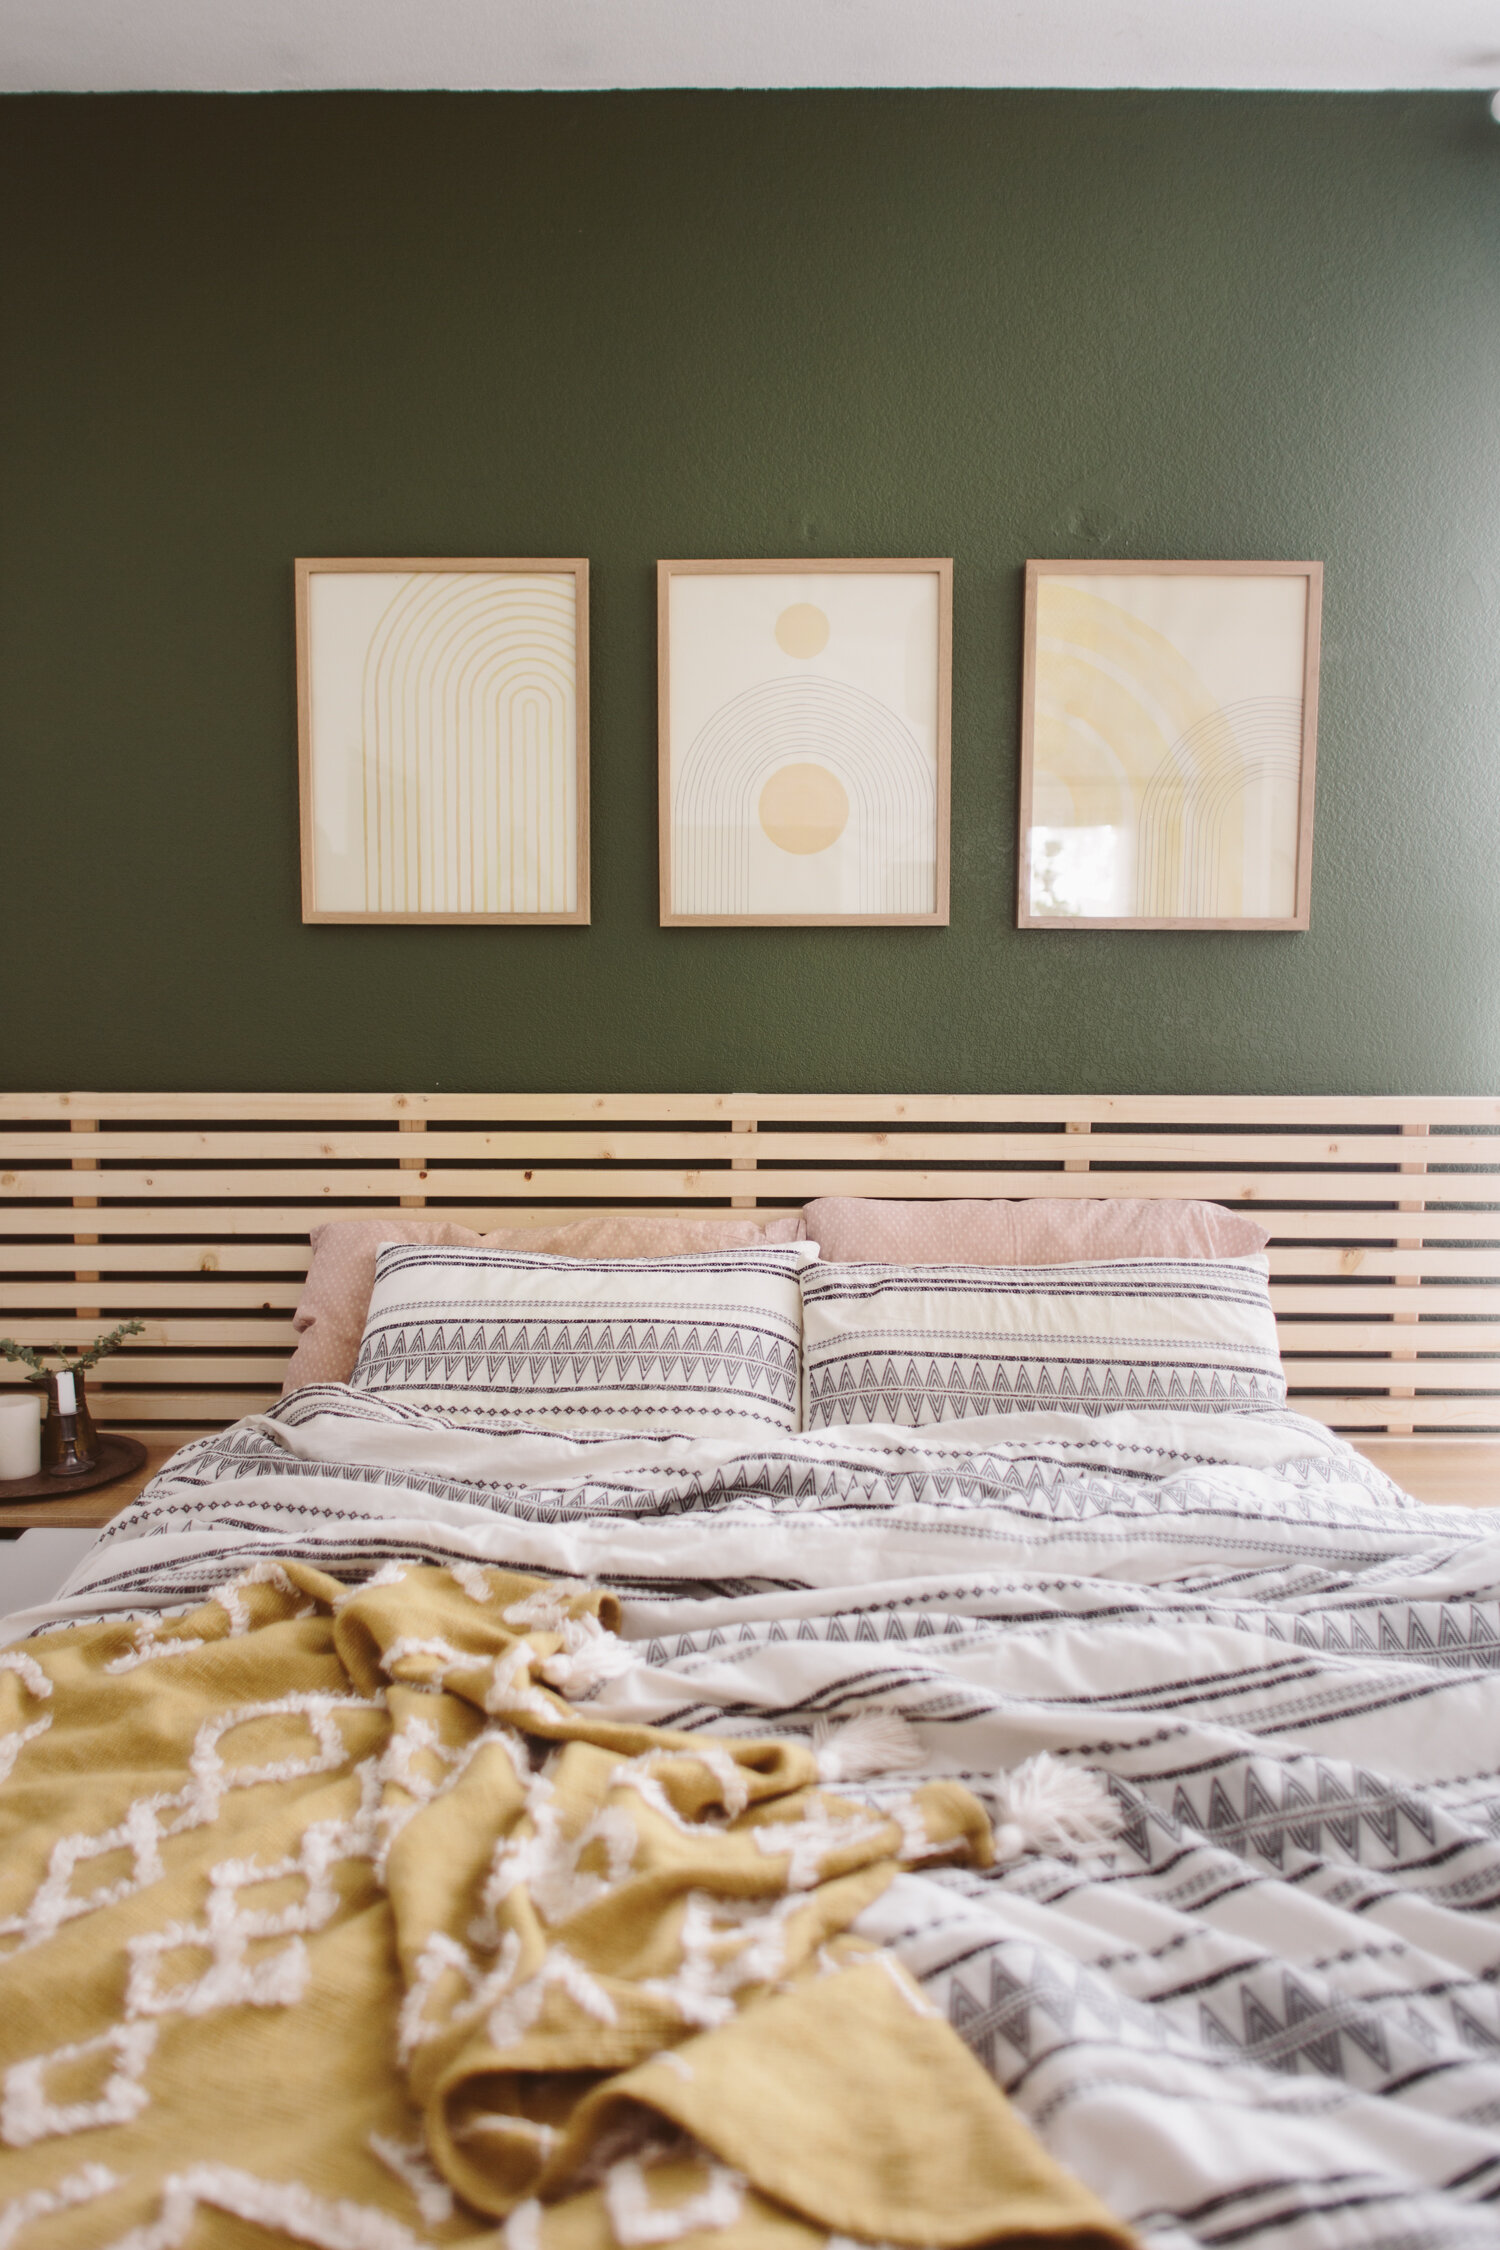
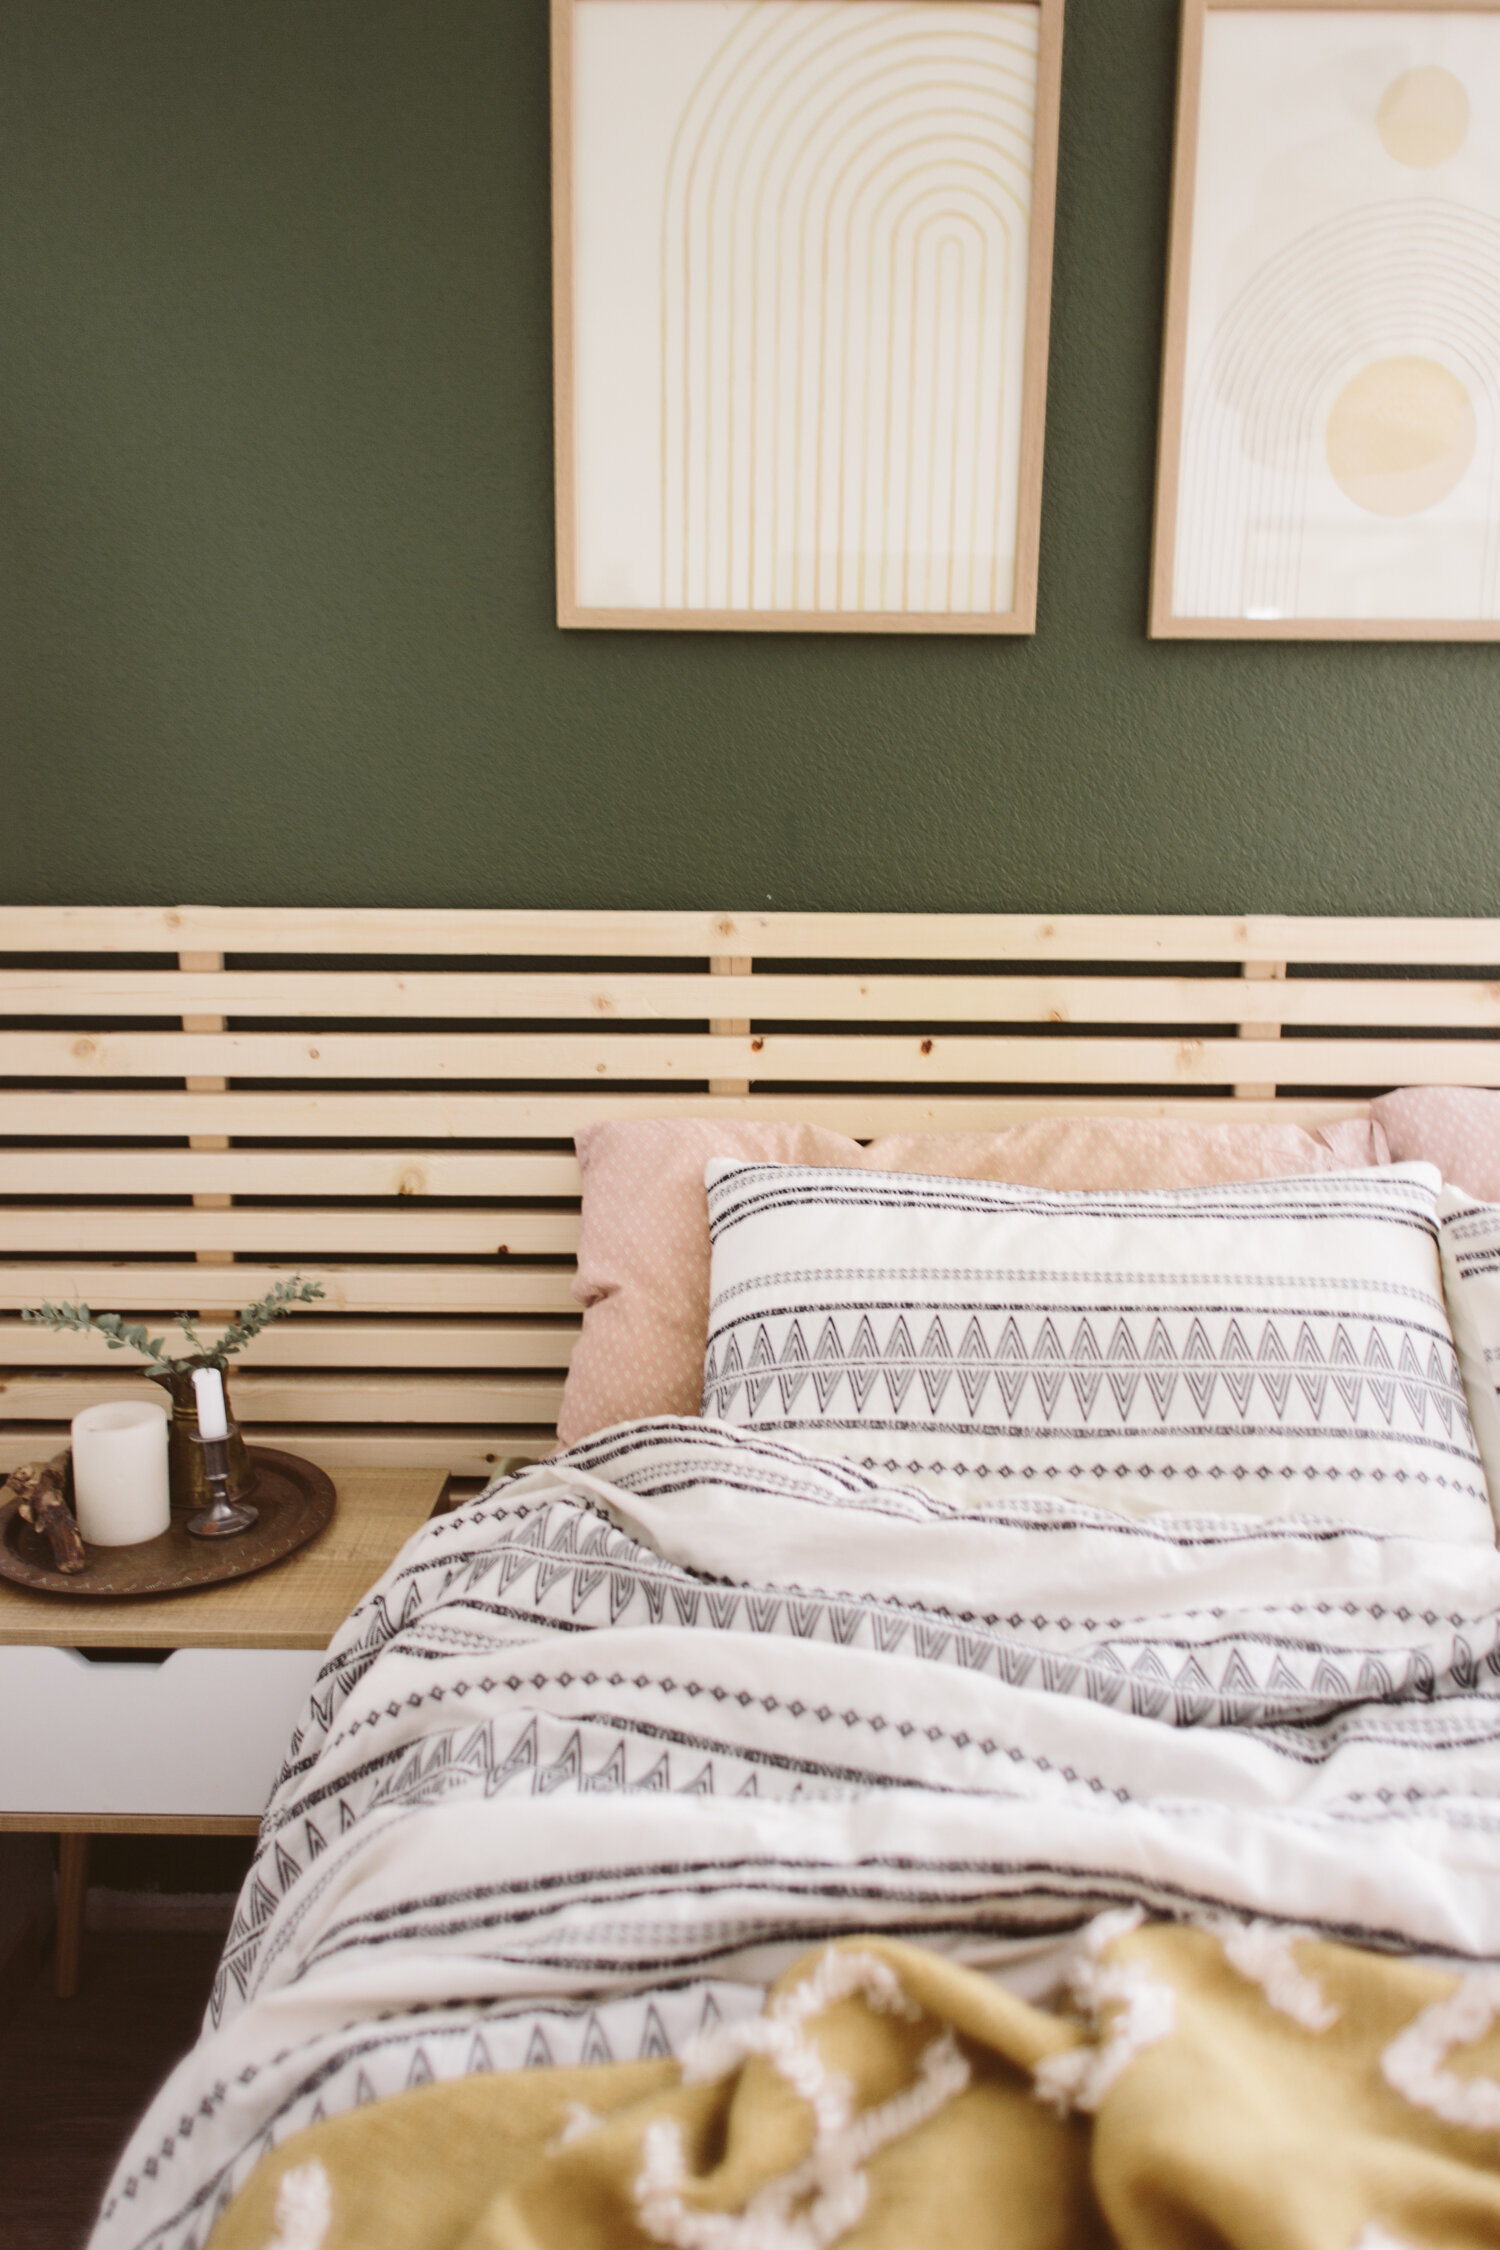
DIY Minimal Scandinavian Slatted Headboard
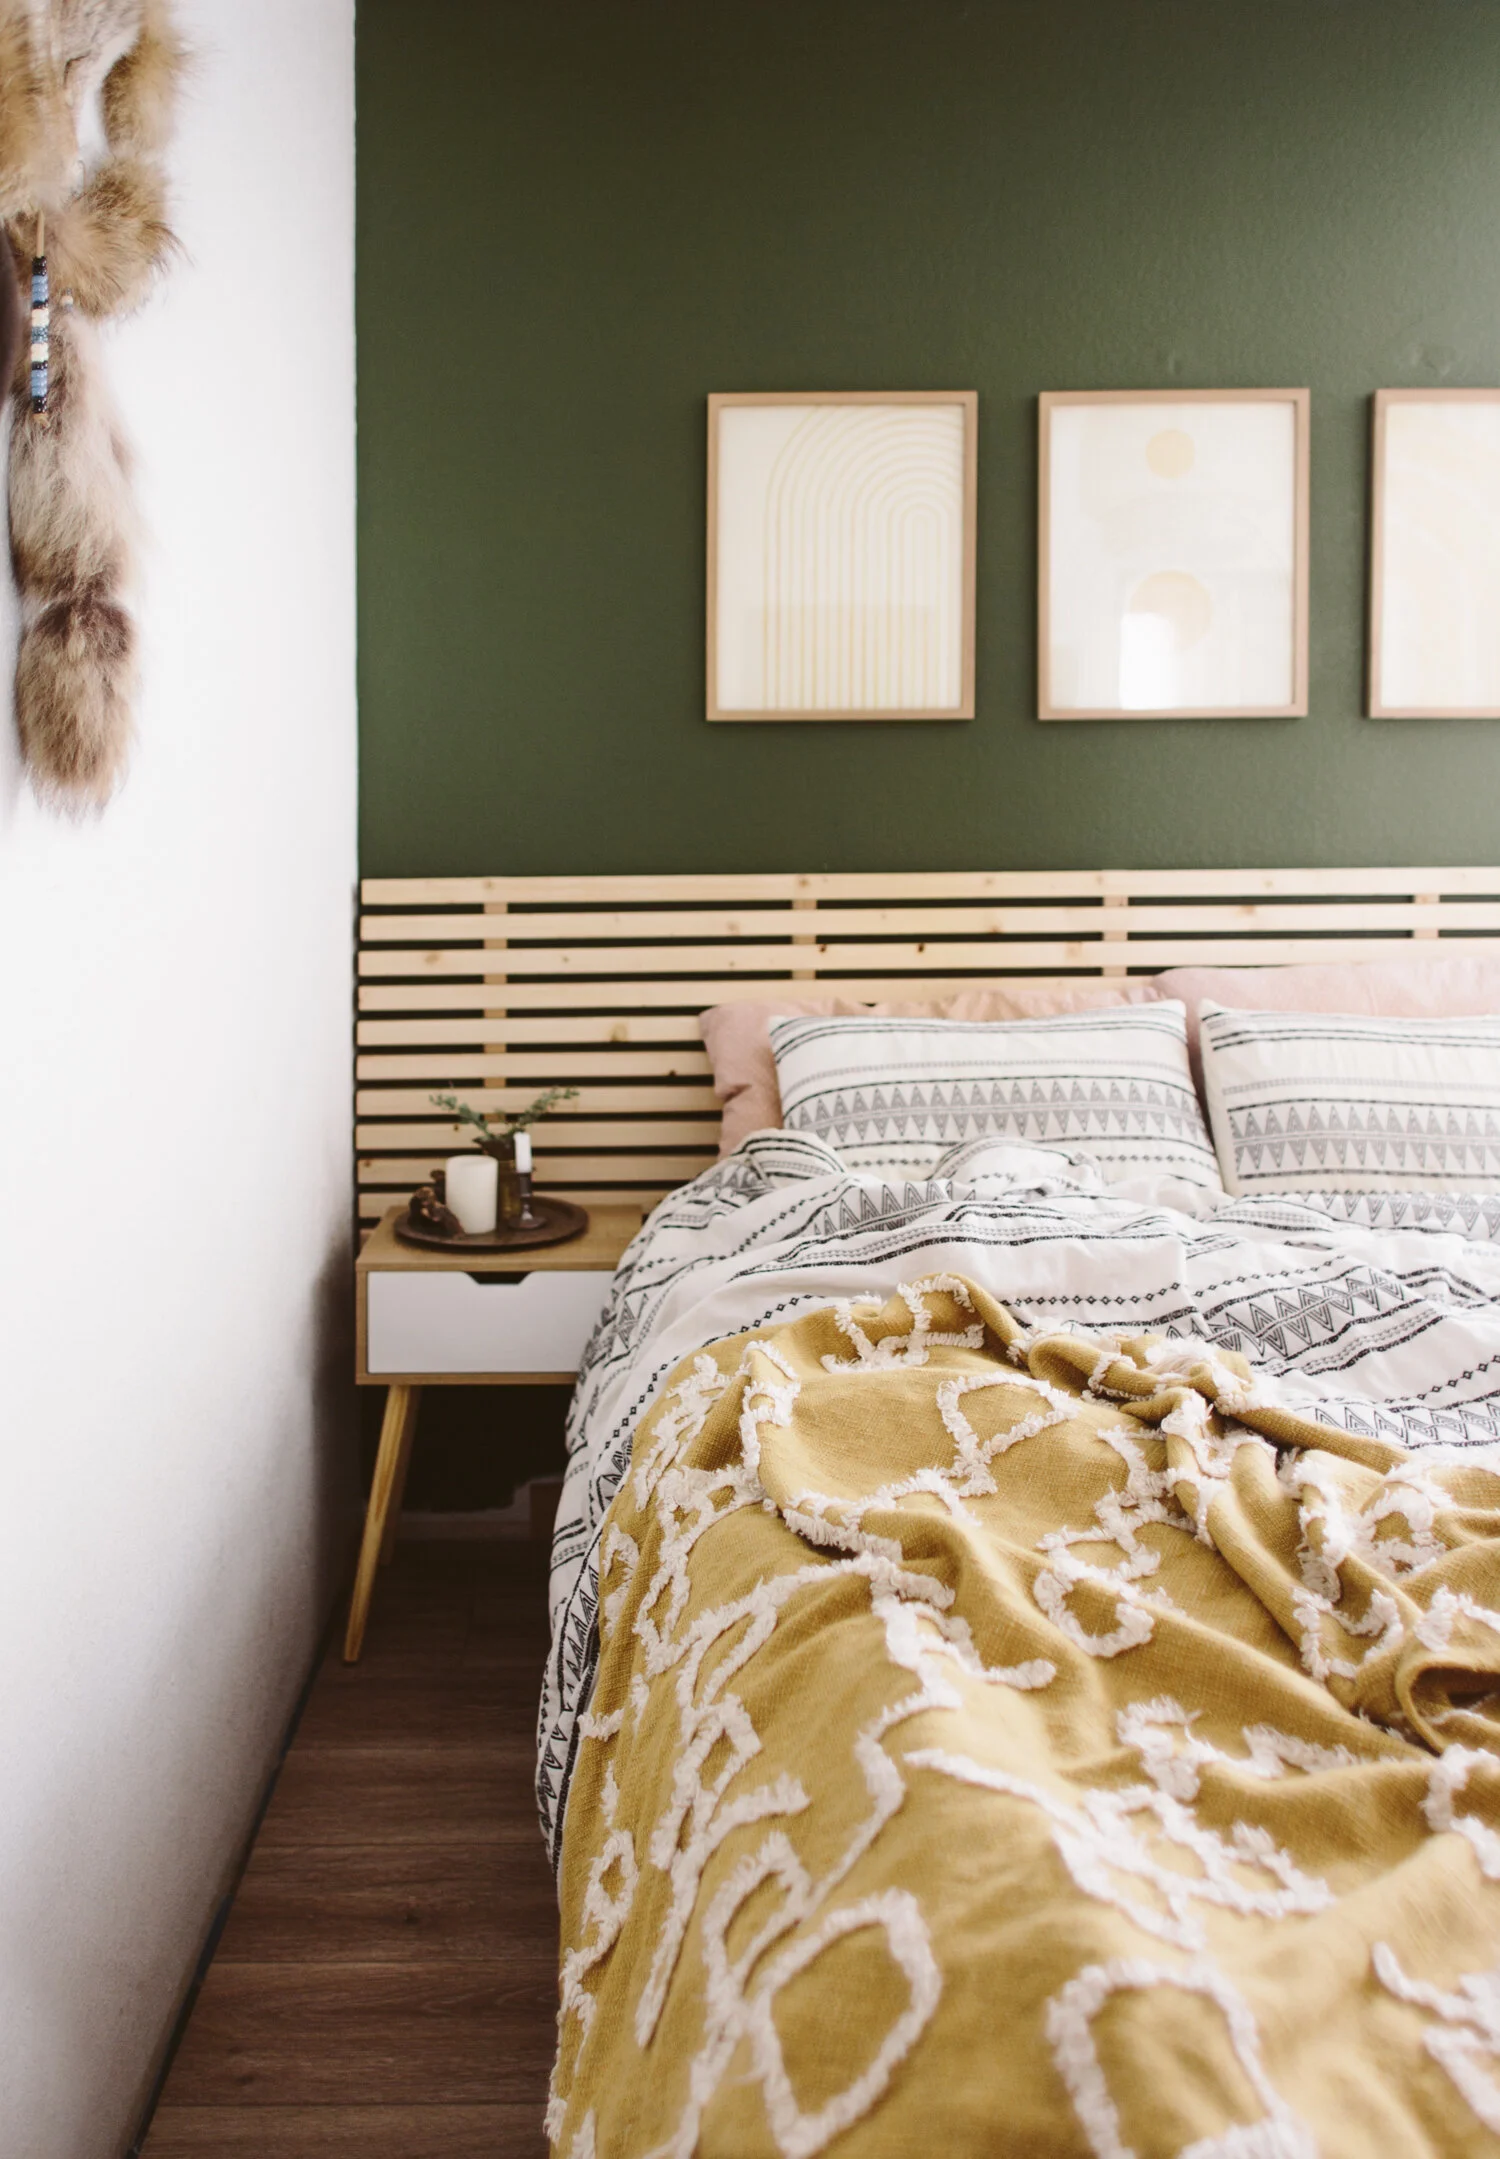
When we moved into the flip house, we left pretty much all our furniture at the other house so it could be a fully furnished Airbnb. We ended up getting an old Ikea Hopen bed frame for free from a friend who didn’t need it anymore, but I knew I wanted to replace the headboard with something unique and more scandinavian-inspired. I’d seen a slatted Ikea headboard before, but upon some research found out it was discontinued, so I set out to make my own! I figured it’d be pretty simple since it was just wood slats, and it was!
What you’ll Need:
12 8ft 2x2’s
2-3 8ft 1x2’s
1.5in wood screws
If you want to make this very affordably, get 2x2 furring strips. They’re usually under $3 each, but furring strips are made of pretty low quality wood, so you’ll need to dig through them to find ones that aren’t warped, cracked, or with a bunch of knots. If you want fancier wood, you can find pine 2x2s in the trim section that can be more like $11-12 each. I wanted to make this on the cheap so I opted for the furring strips.

Depending on how wide you want your headboard, you may need to cut the 1x2’s down. I wanted mine to be 8ft so I didn’t need to cut my 2x2s shorter.
Cut your 1x2s down. I cut mine down to 3 ft so they would stick down below the slats about 6 inches and sit behind the back of my bed frame between the frame and the wall to keep the headboard in place. I kept the middle three 1x2s 3 ft long, and trimmed the ones closest to the end on each side down so those two didn’t stick out below the bottom slat. If you don’t have a bedframe where this method would work, you can cut the middle 1x2s so they go from the top of the headboard, all the way to the floor, appx 44in.
If you want the 1x2 verticals to disappear more, you can paint them the color of the wall behind your headboard before attaching them.

3. Lay out your 2x2s how you want them for your headboard and make sure the ends are all even. I spaced them out about 3/4 inch, using a piece of 1x2 to space the 2x2s evenly.

4. Once all the 2x2s were set up, I placed my 1x2s on top, starting with the one right in the center, then spacing the others 18 inches apart. I used pencil to draw a line along each side of each 1x2 marking where they went (in the illustration I drew four 1x2s, but I realized later that I actually used five).
5. Start by screwing the two outside 1x2s onto the 2x2s. I’d recommend pre-drilling the 1x2s, as I was lazy and didn’t and had a bit of splitting on a couple of my 1x2s. as I was screwing, I put the spacer 1x2 between the 2x2s as I was screwing to make sure they were spaced exactly.
6. With the two outside 1x2s attached, the spacing will be set and you can screw the remaining three 1x2s on, and you’re done! Flip it over and put it behind your bed! I didn’t anchor mine because it’s pretty well stuck between my bed and the wall, but you can also screw the 1x2’s to the wall between the slats in a few spots to make sure it stays put.


More DIY this way….


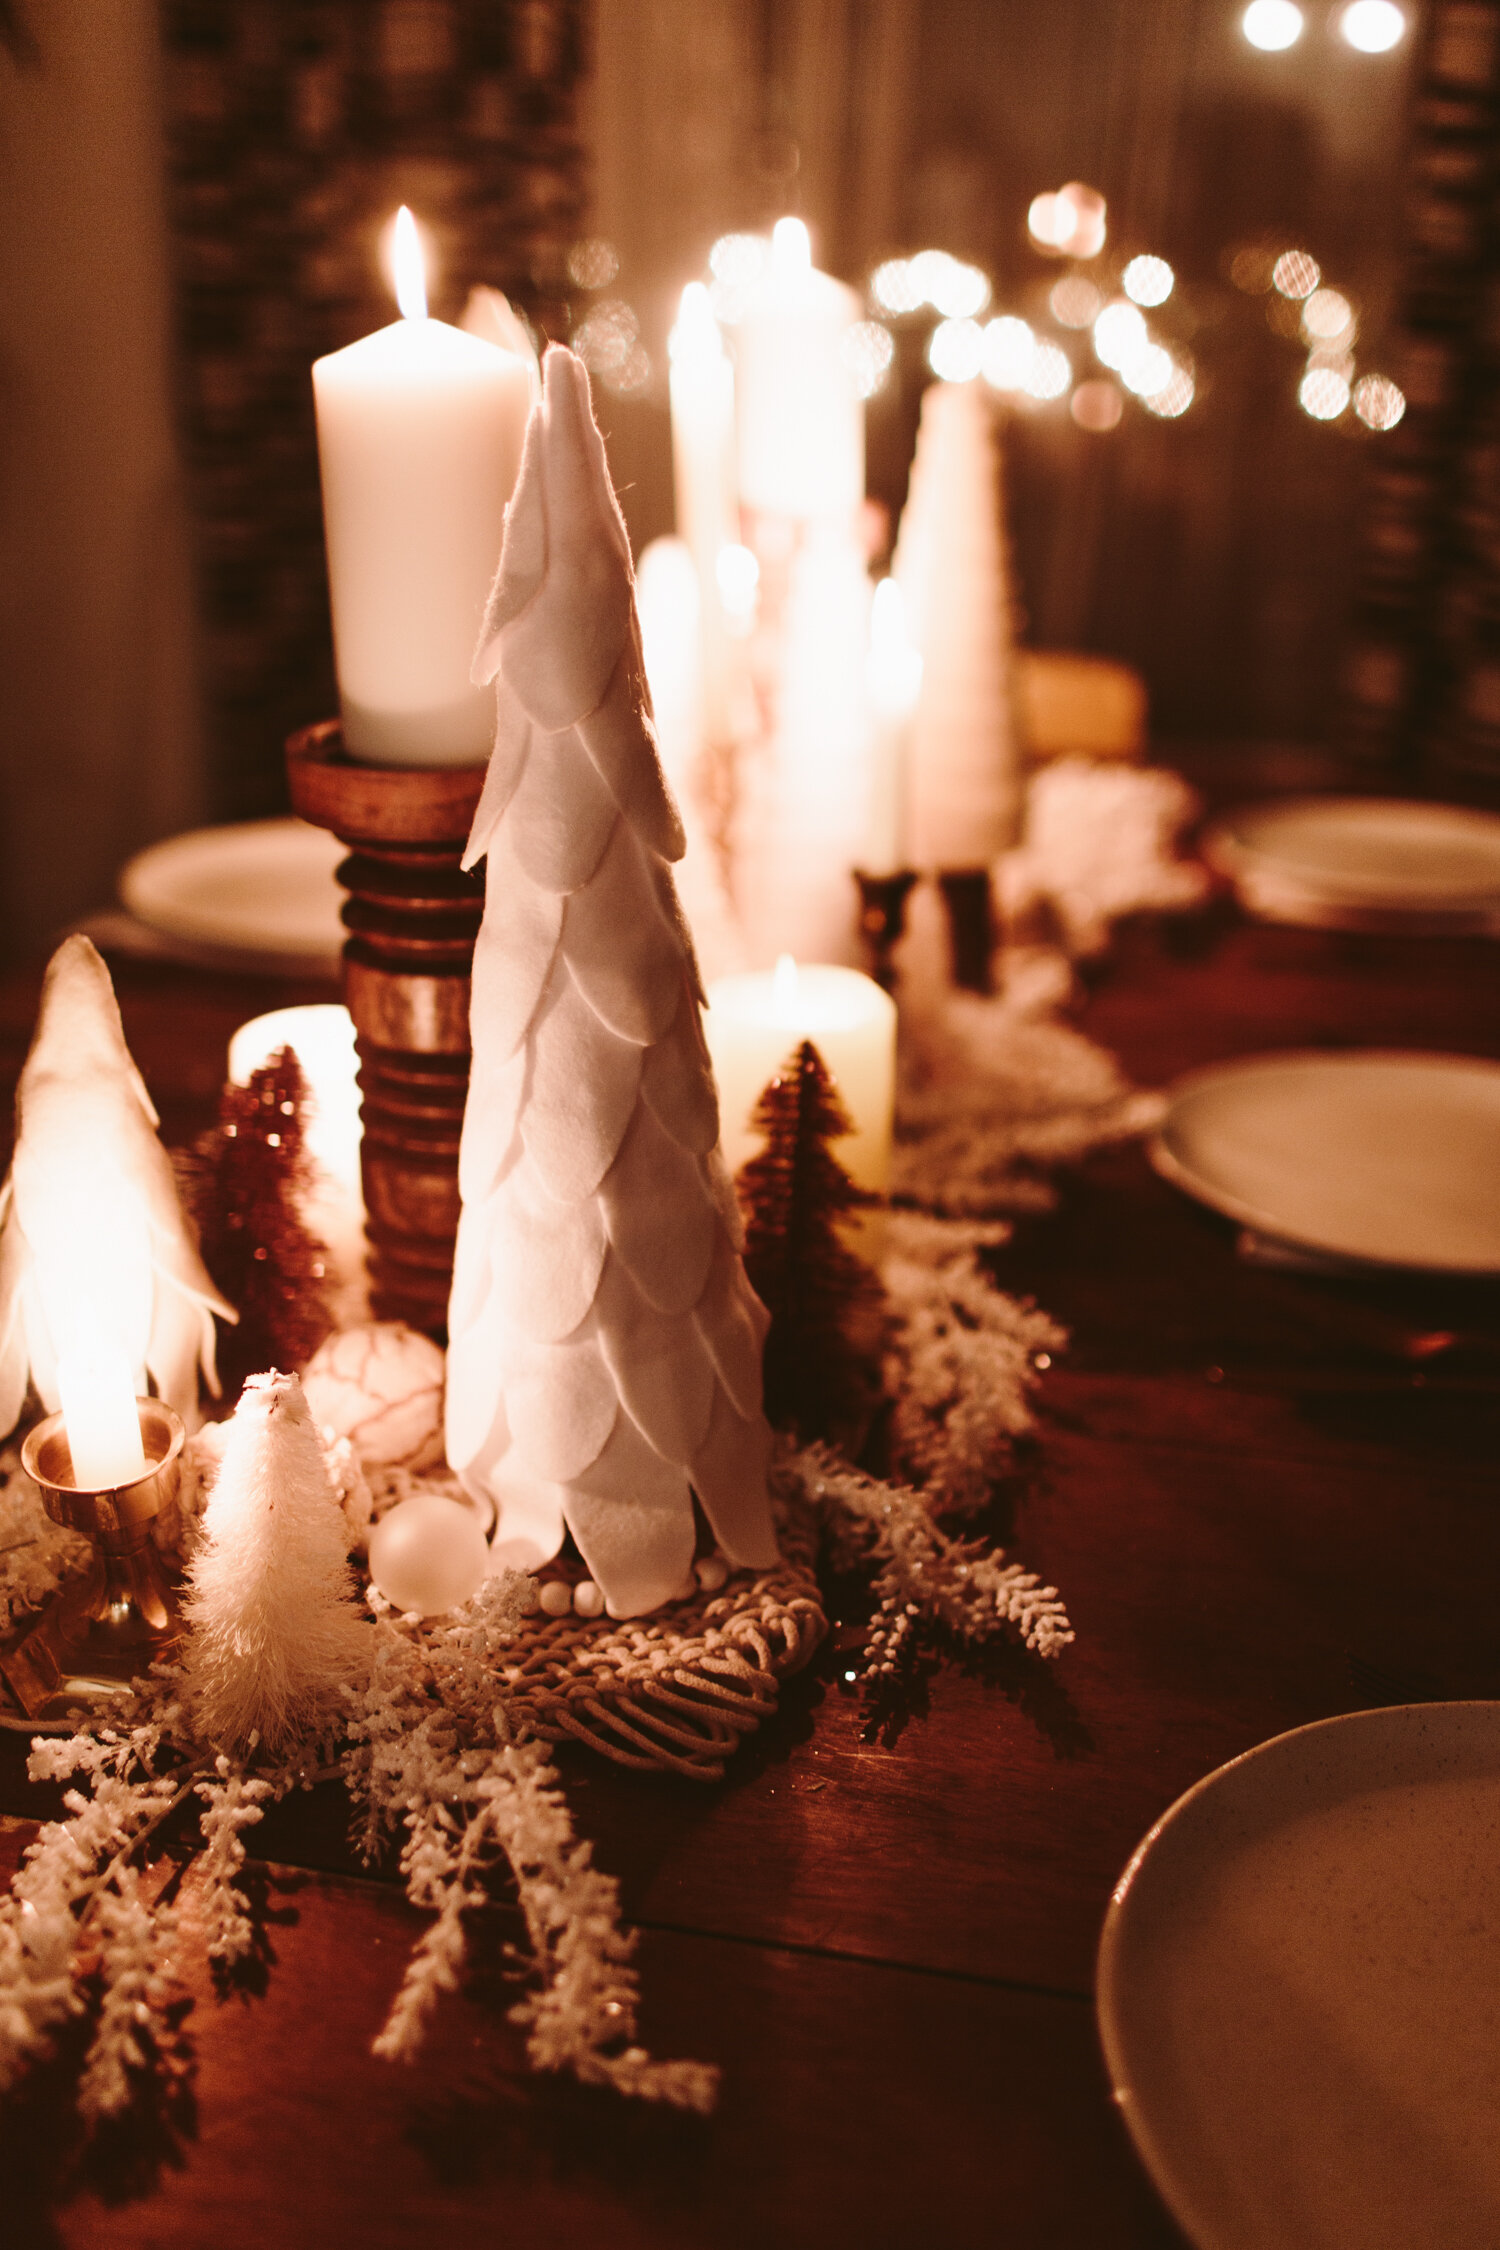
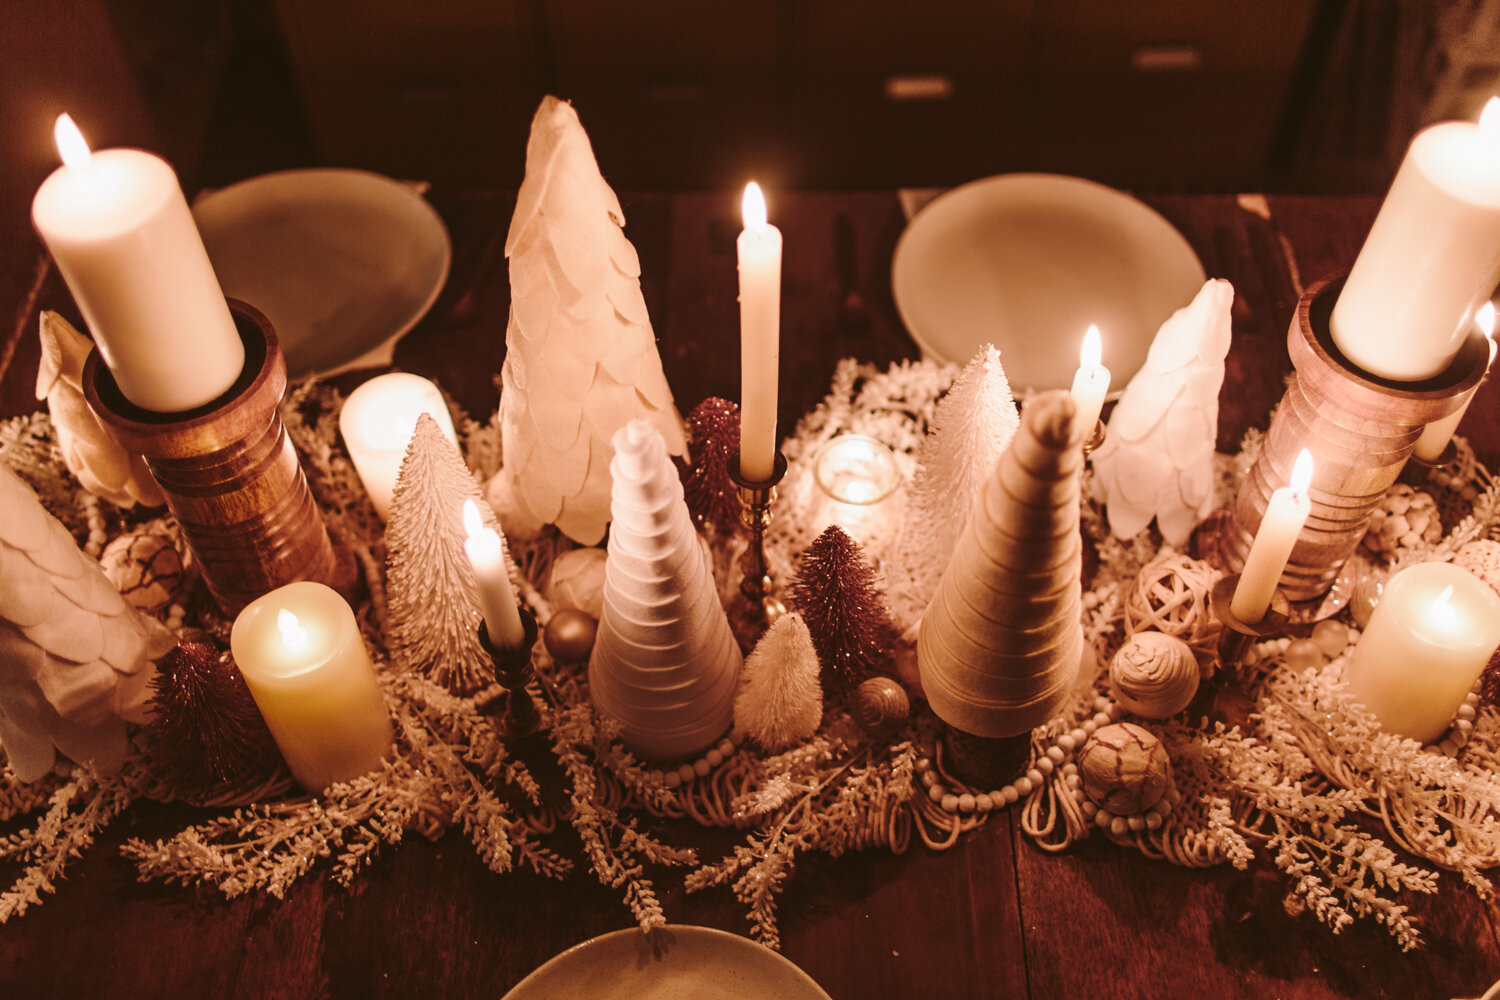
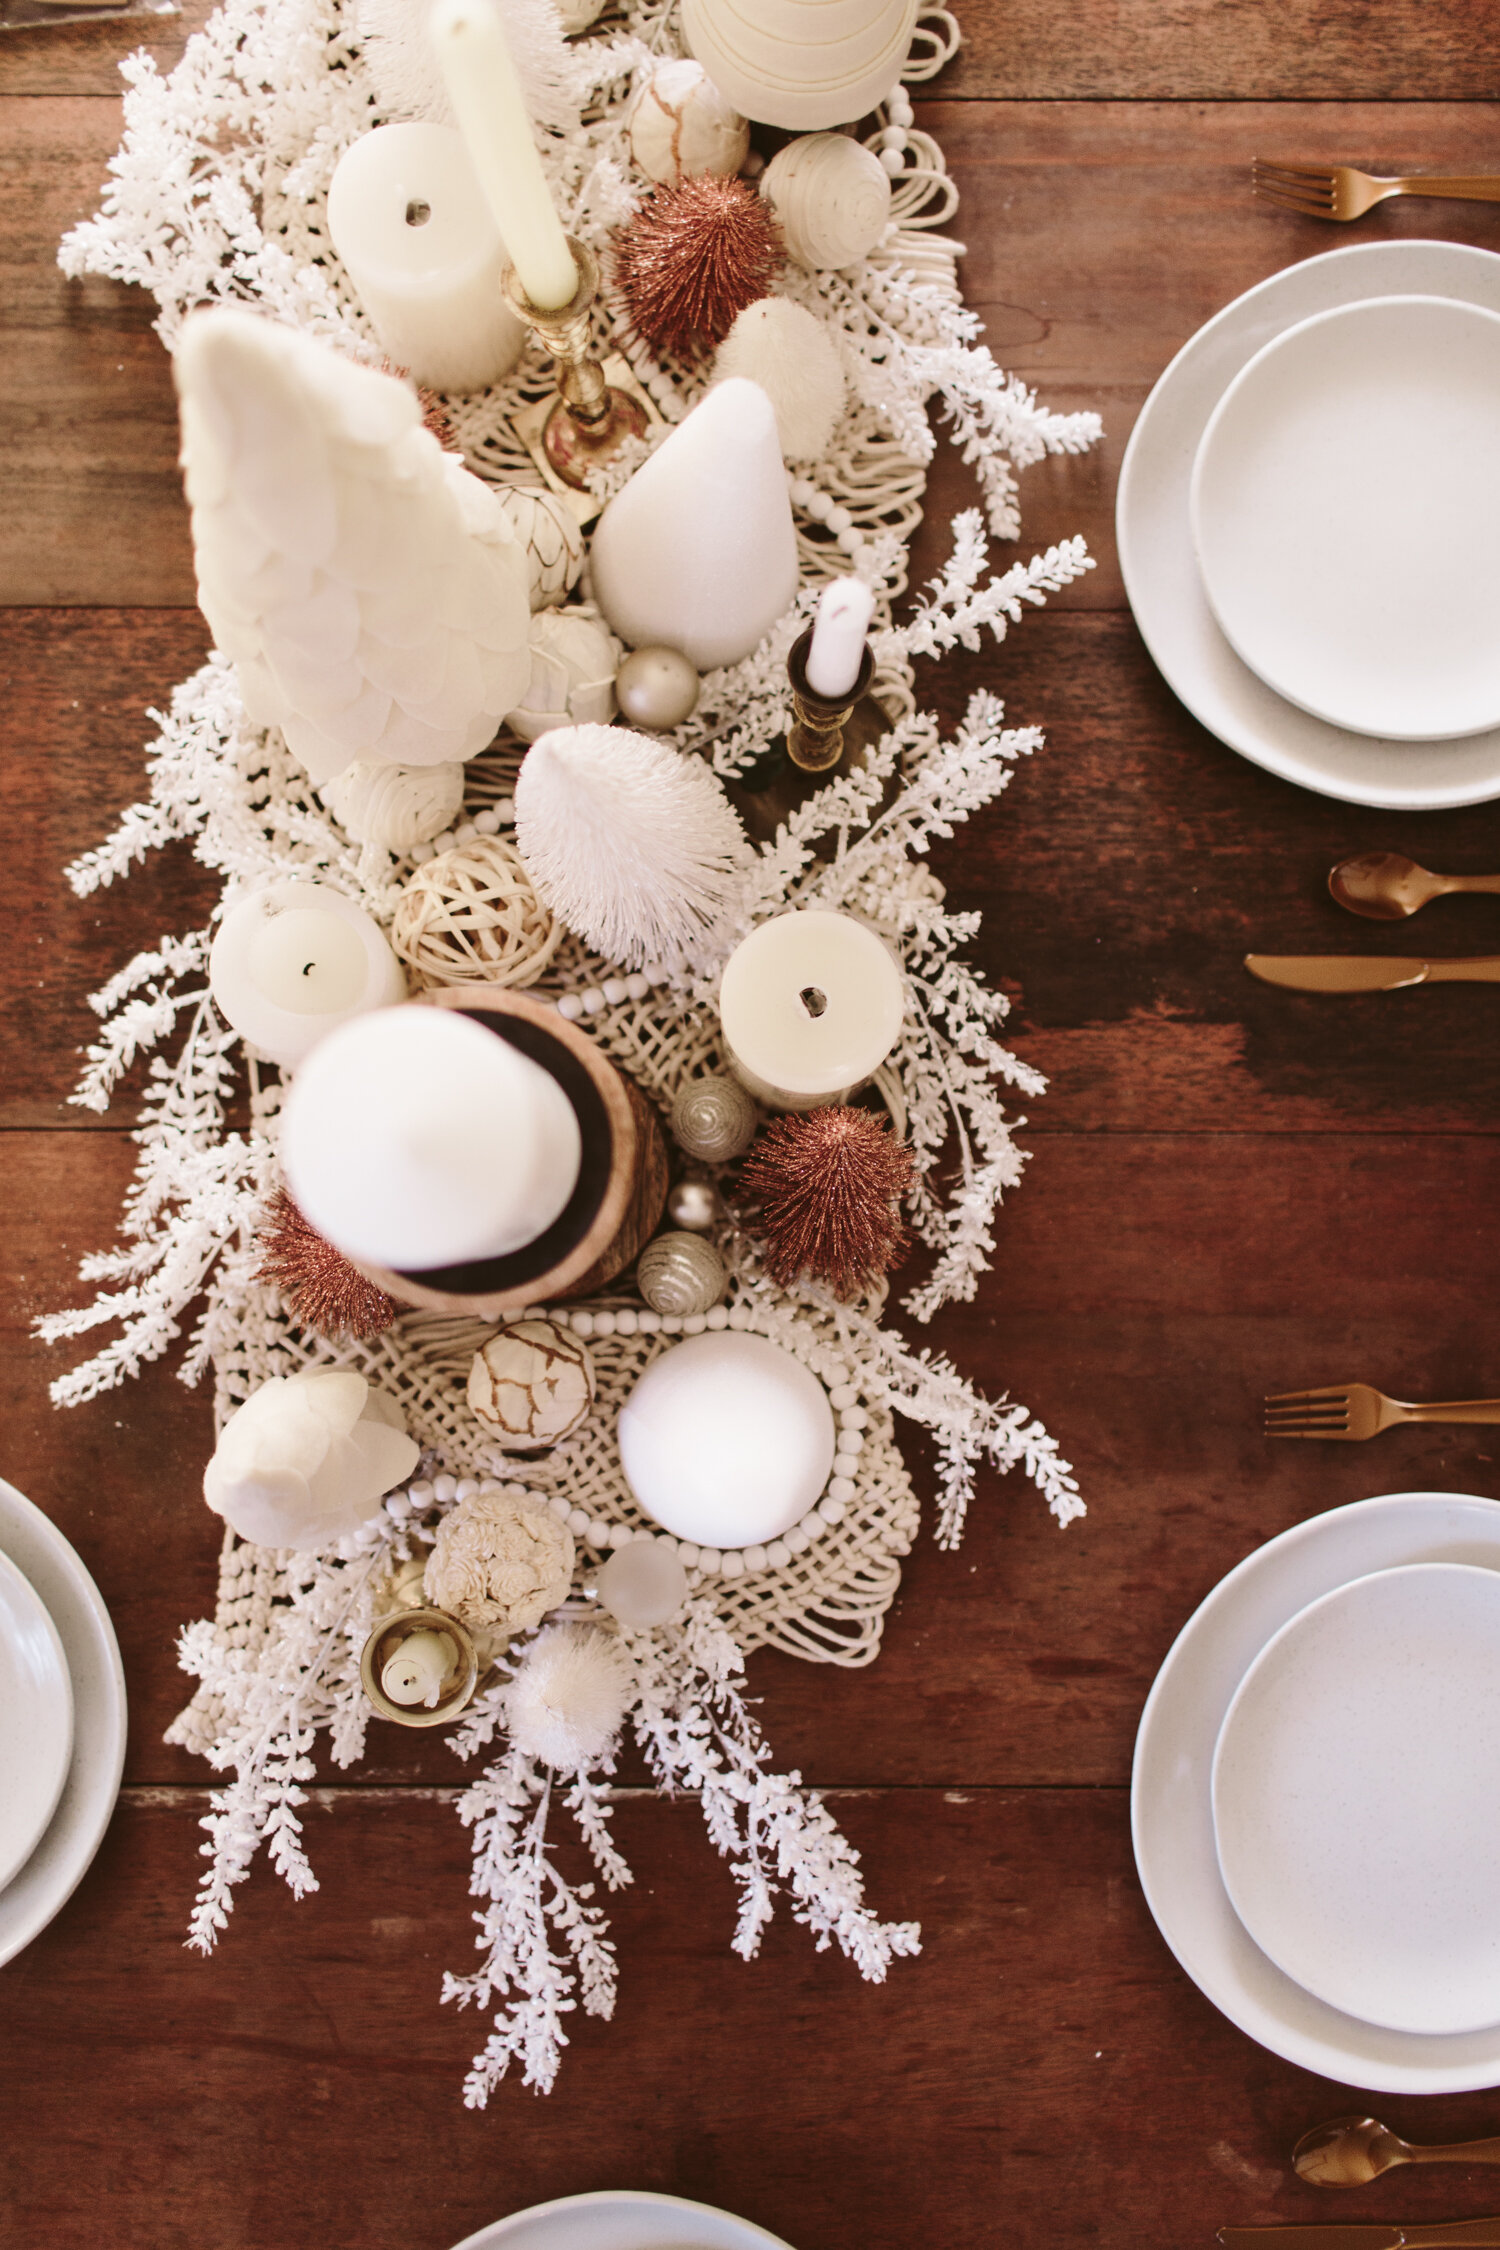
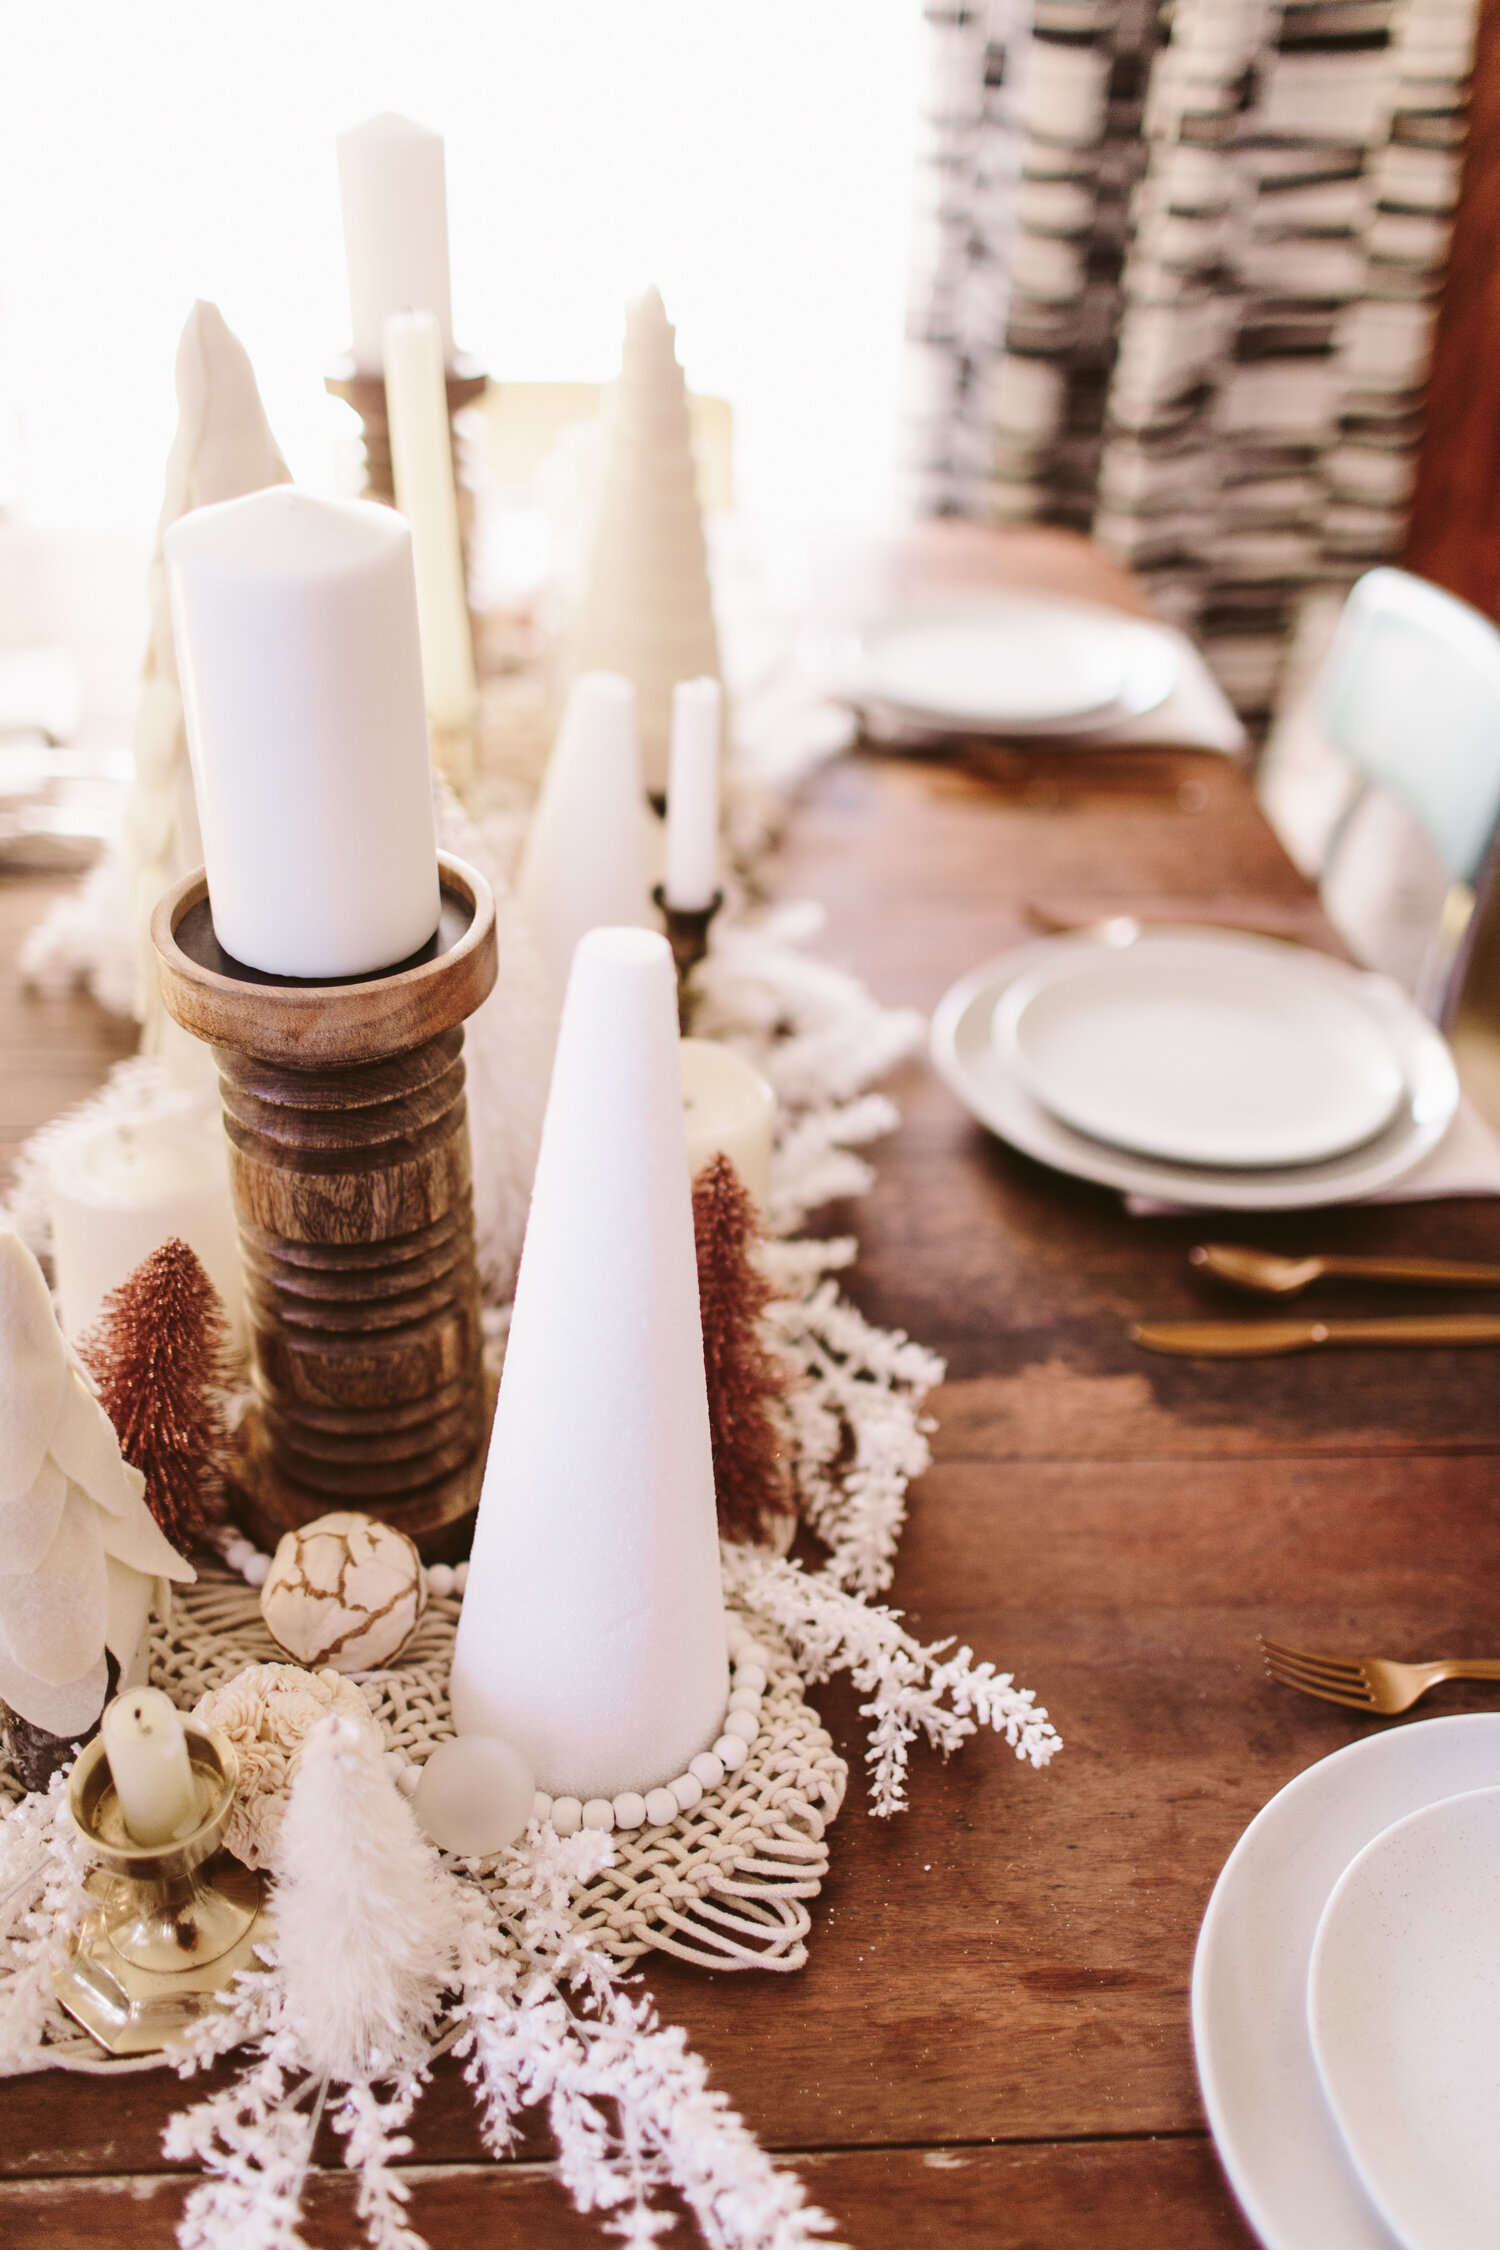
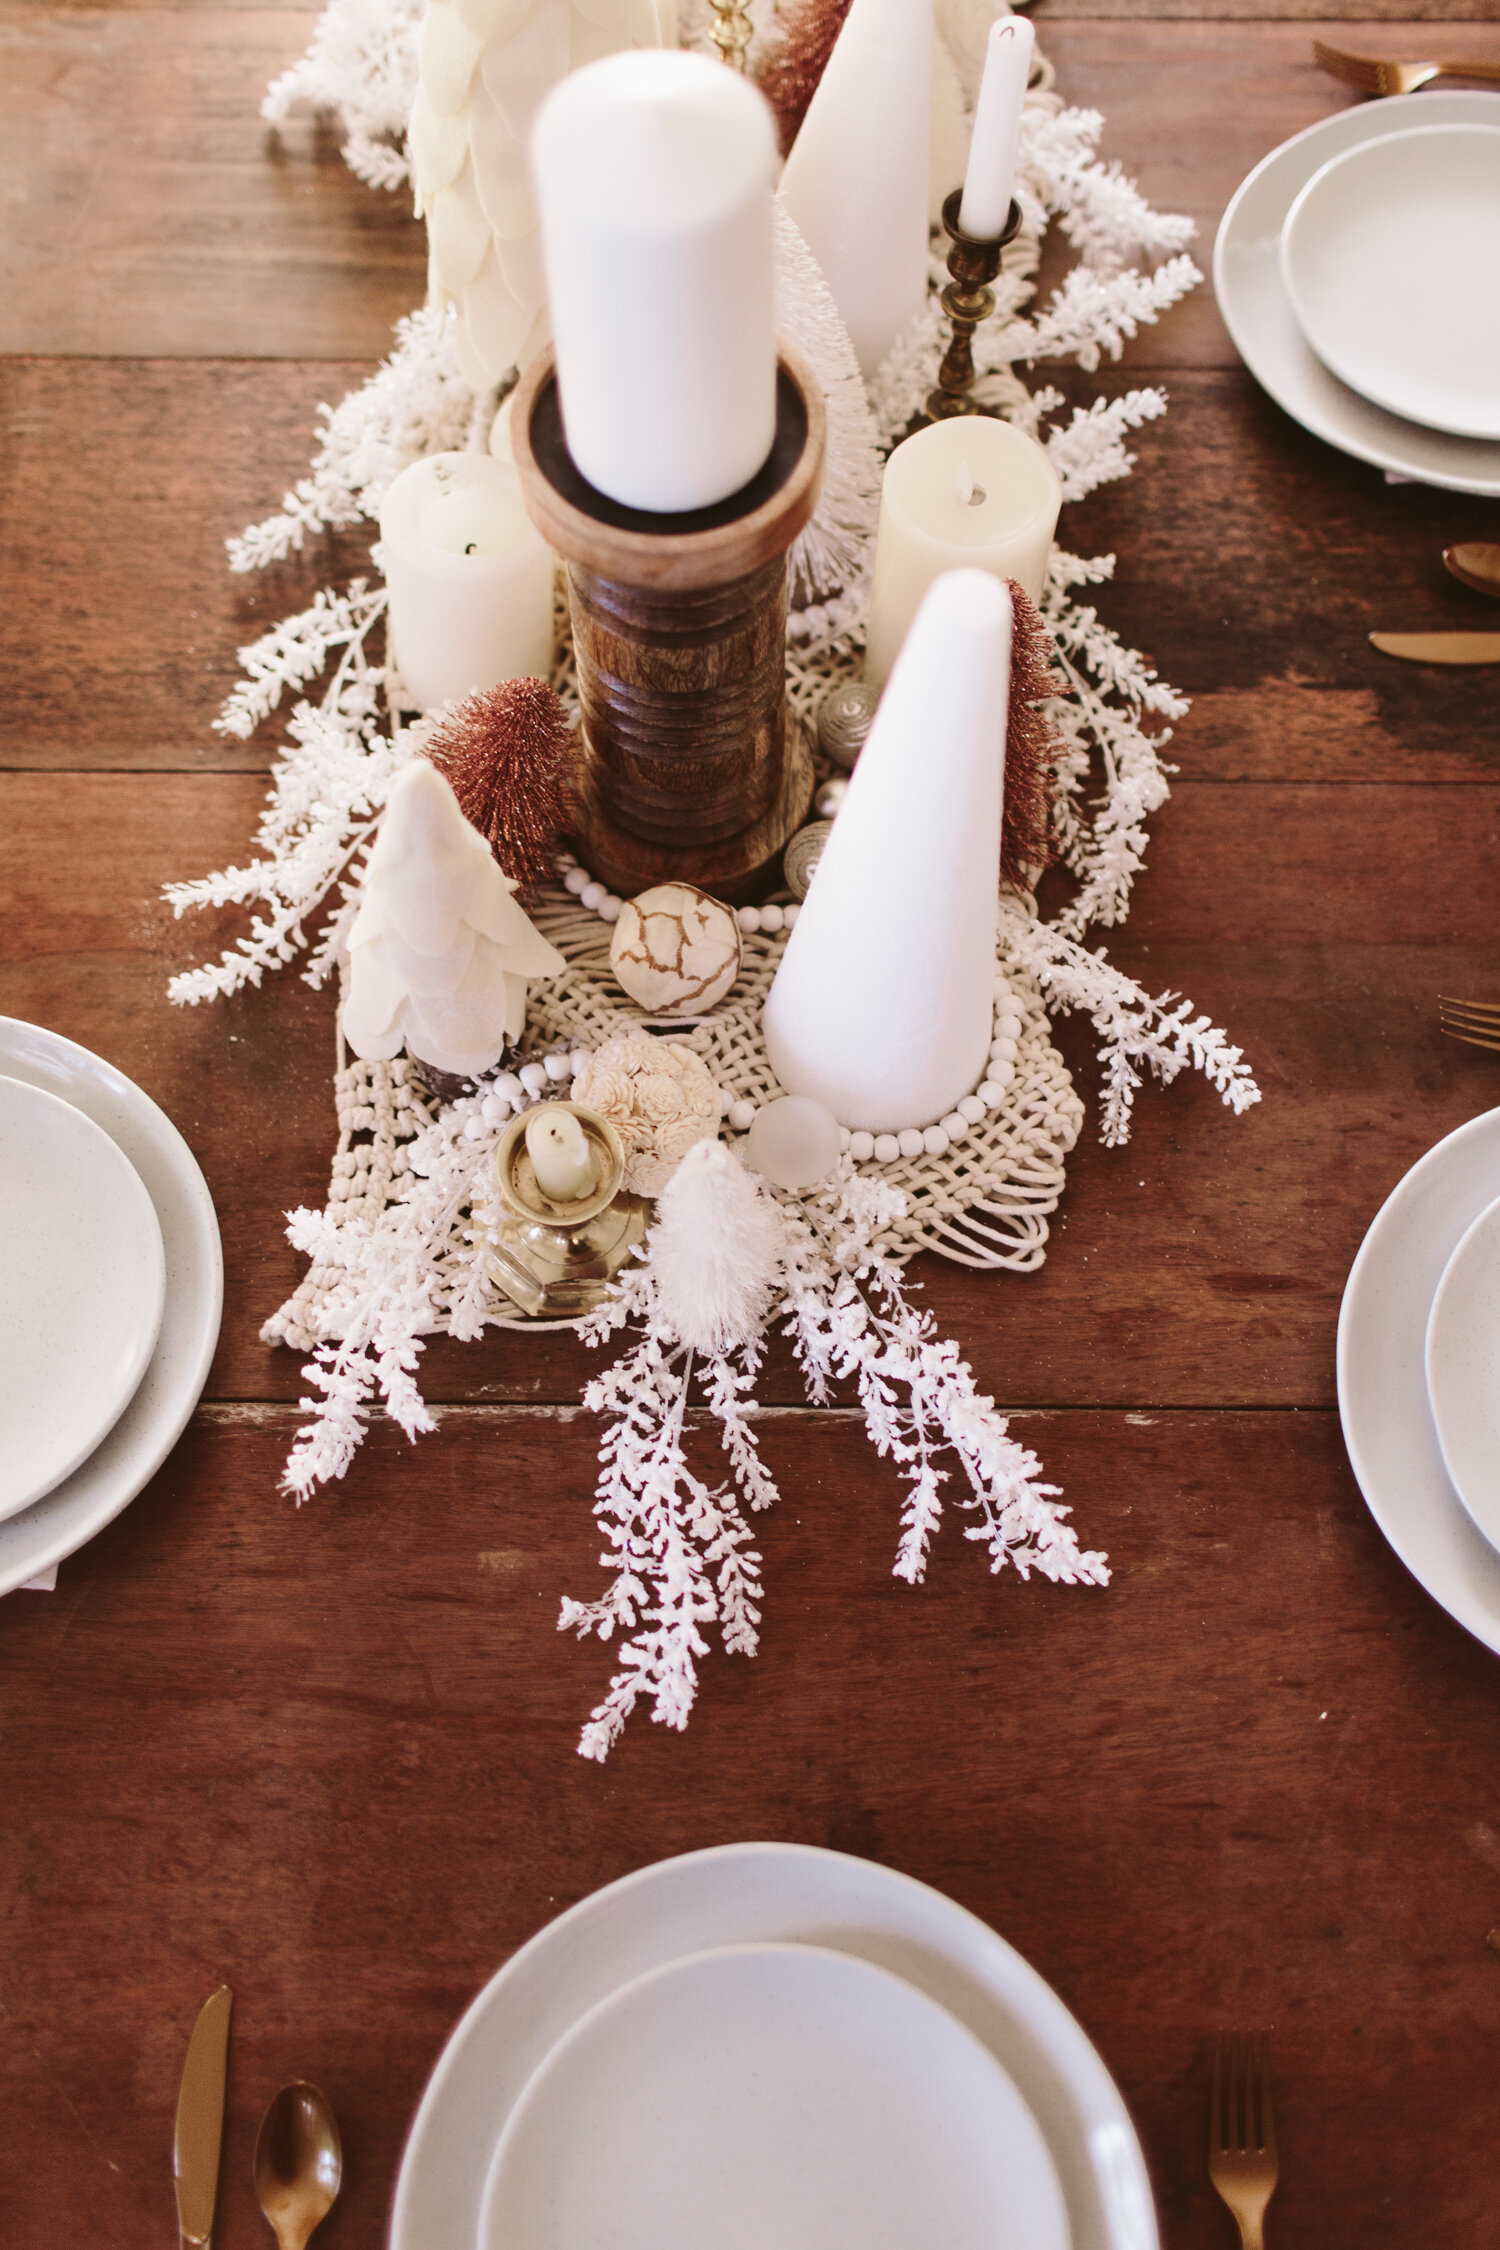
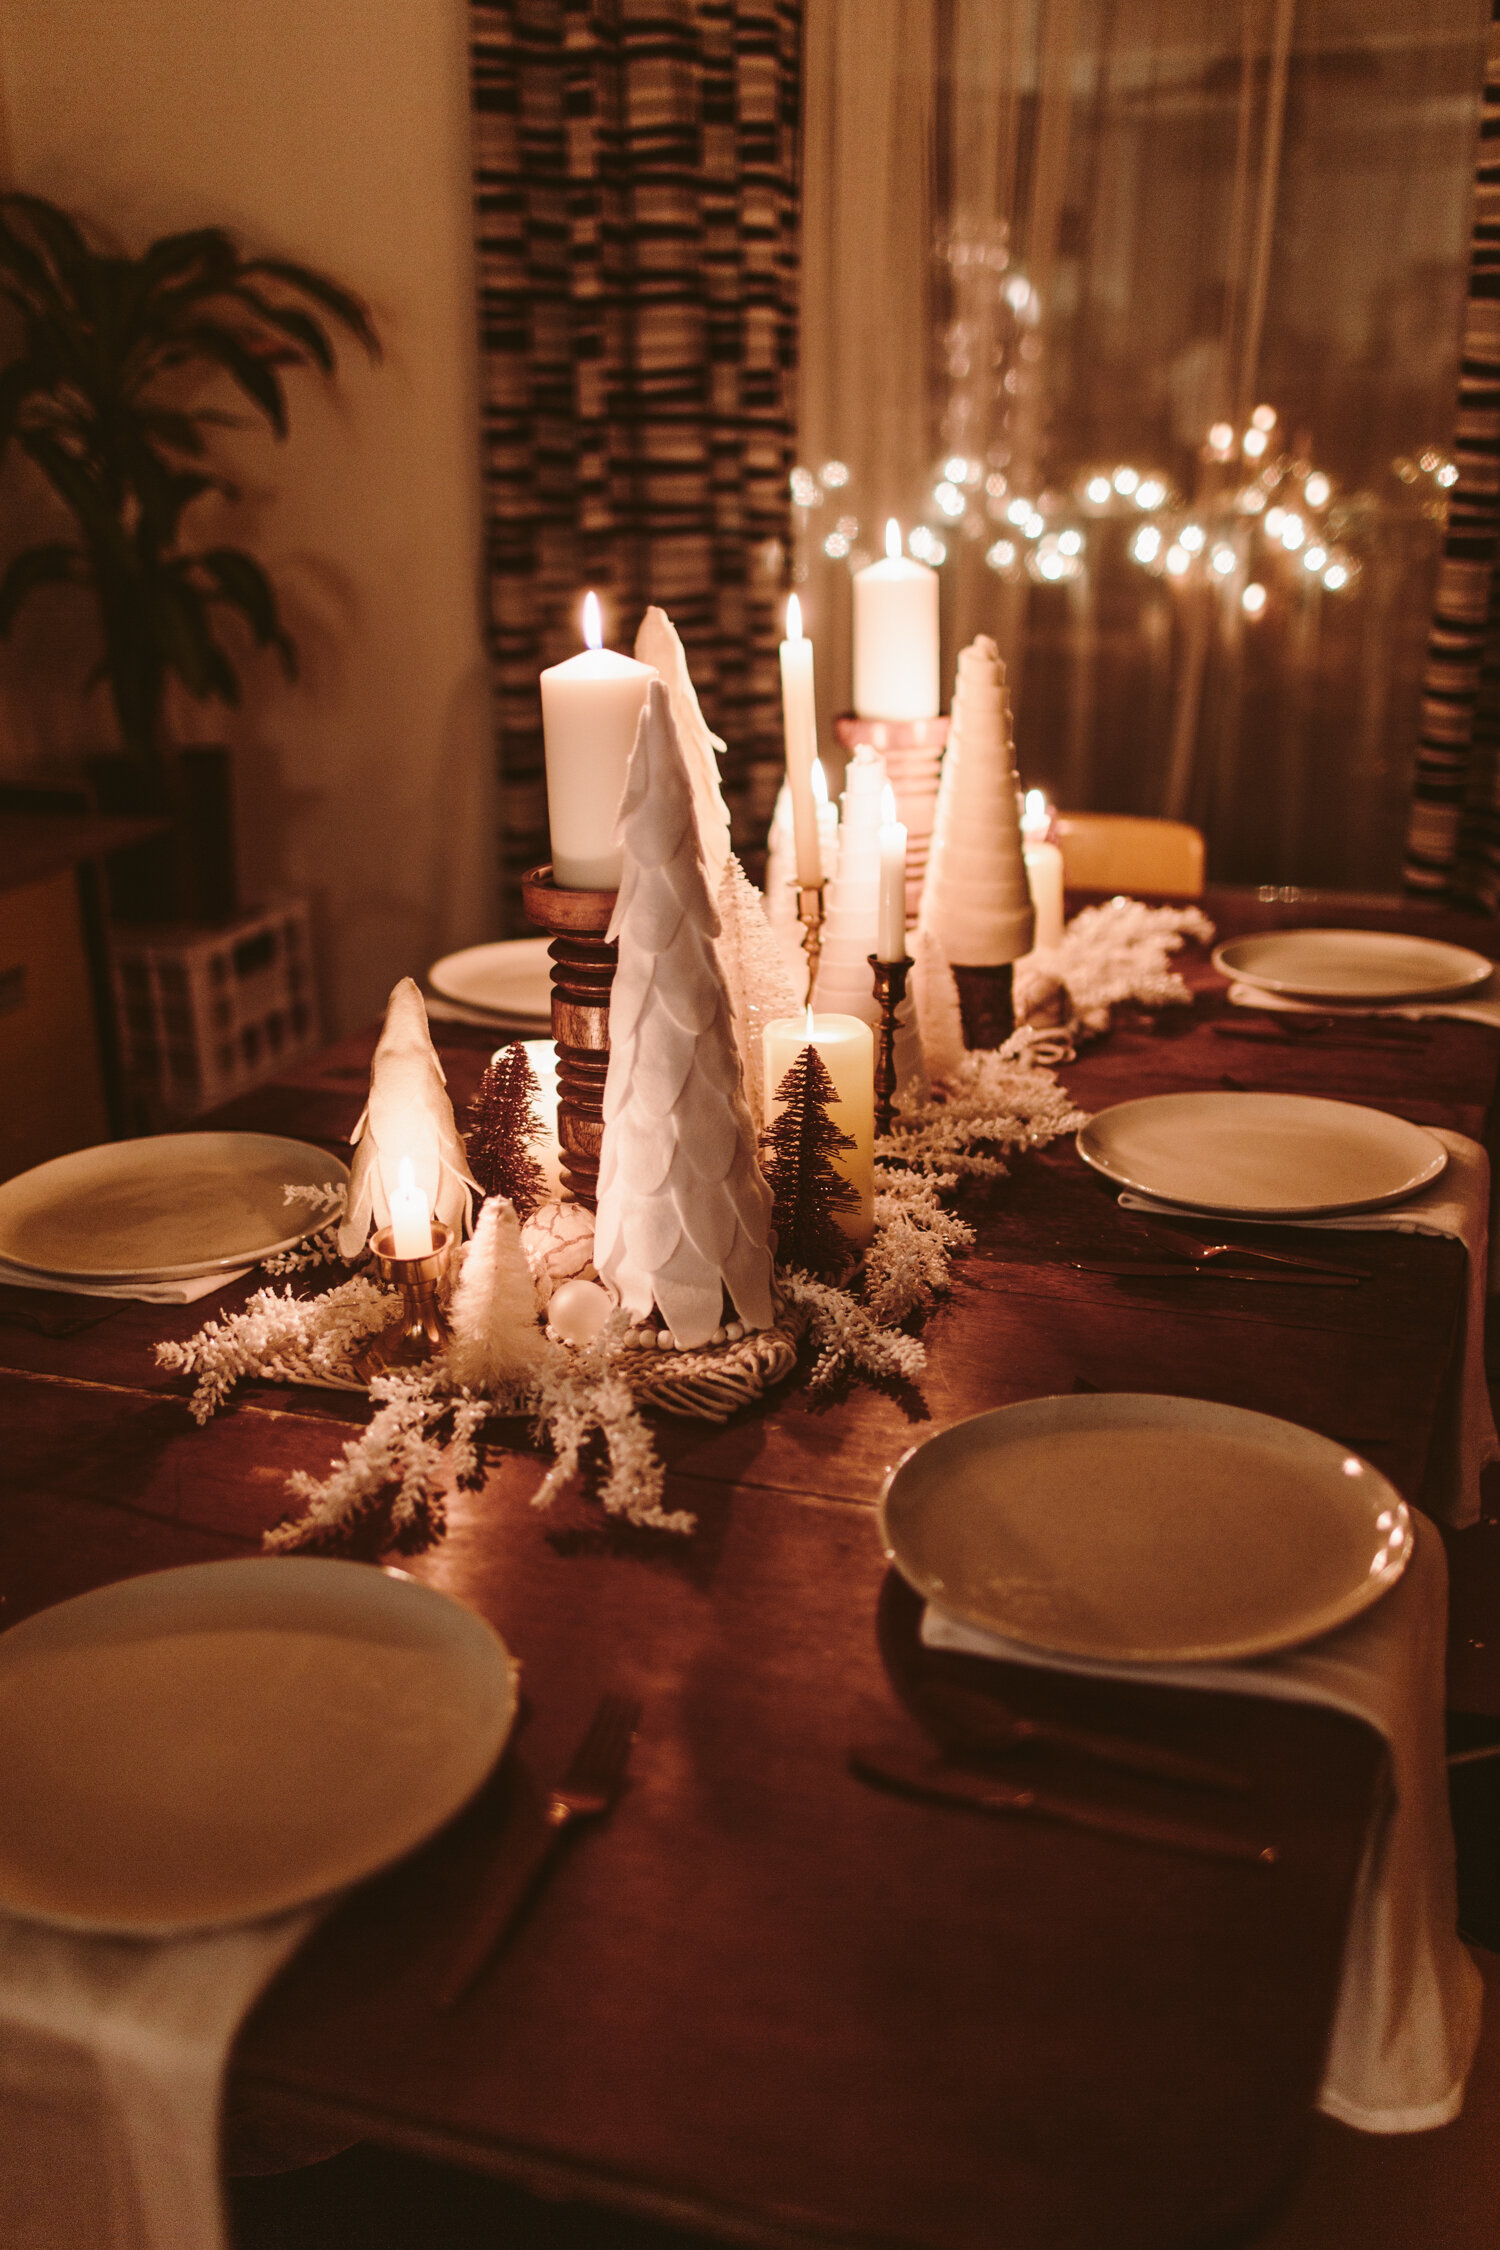
Bottle brush tree holiday tablescape

I love creating fun tablescapes and the holidays are a perfect time to bring together a bit of creativity and joy for entertaining. One of the best parts of this tablescape is that everything can be reused as regular Christmas decor, which I definitely did after hosting my annual Friendsgiving.
Another awesome thing is that I already had most of the elements and just brought them together! The base is actually a macrame wall hanging that I just folded up, I had thrifted all the candlesticks previously, I had most of the bottle brush trees from last year (and bought a few more from the Target dollar spot to fill it out), and the felt trees were a DIY craft project I did last Christmas season!
A few tips for putting together a stunning tablescape:
Don’t skimp on the candles, they bring such a warm glow and instantly create atmosphere. I always have lots of candles when I’m entertaining.
Vary heights and create levels. When you vary the heights of items in your tablescape, it allows the eye to keep moving. I made sure to spread out the different sizes of trees so there were different levels throughout the vignette.
Add texture! While the macrame base was mostly hidden, it still added a lot of texture and warmth. The felt trees have a wonderfully cozy texture, and the bottle brush trees had their own unique texture and sparkle that complimented the other softer textile elements.
Greenery! Okay so this table doesn’t technically have greenery like most of my designs, but I grabbed some sparkly white faux branches from Michaels to bring in that natural plant-based element. Even though they’re totally obviously fake, they still read as a plant element. A super easy way to add real plants without breaking the bank or having to learn floral styling? Buy a bundle of eucalyptus branches and lay them in the middle of the table, interspersed with your other decor elements. It fills the space beautifully, adds a lovely touch of green, and bonus: you can dry it and keep it as year-round decor!

The pink ... panther?

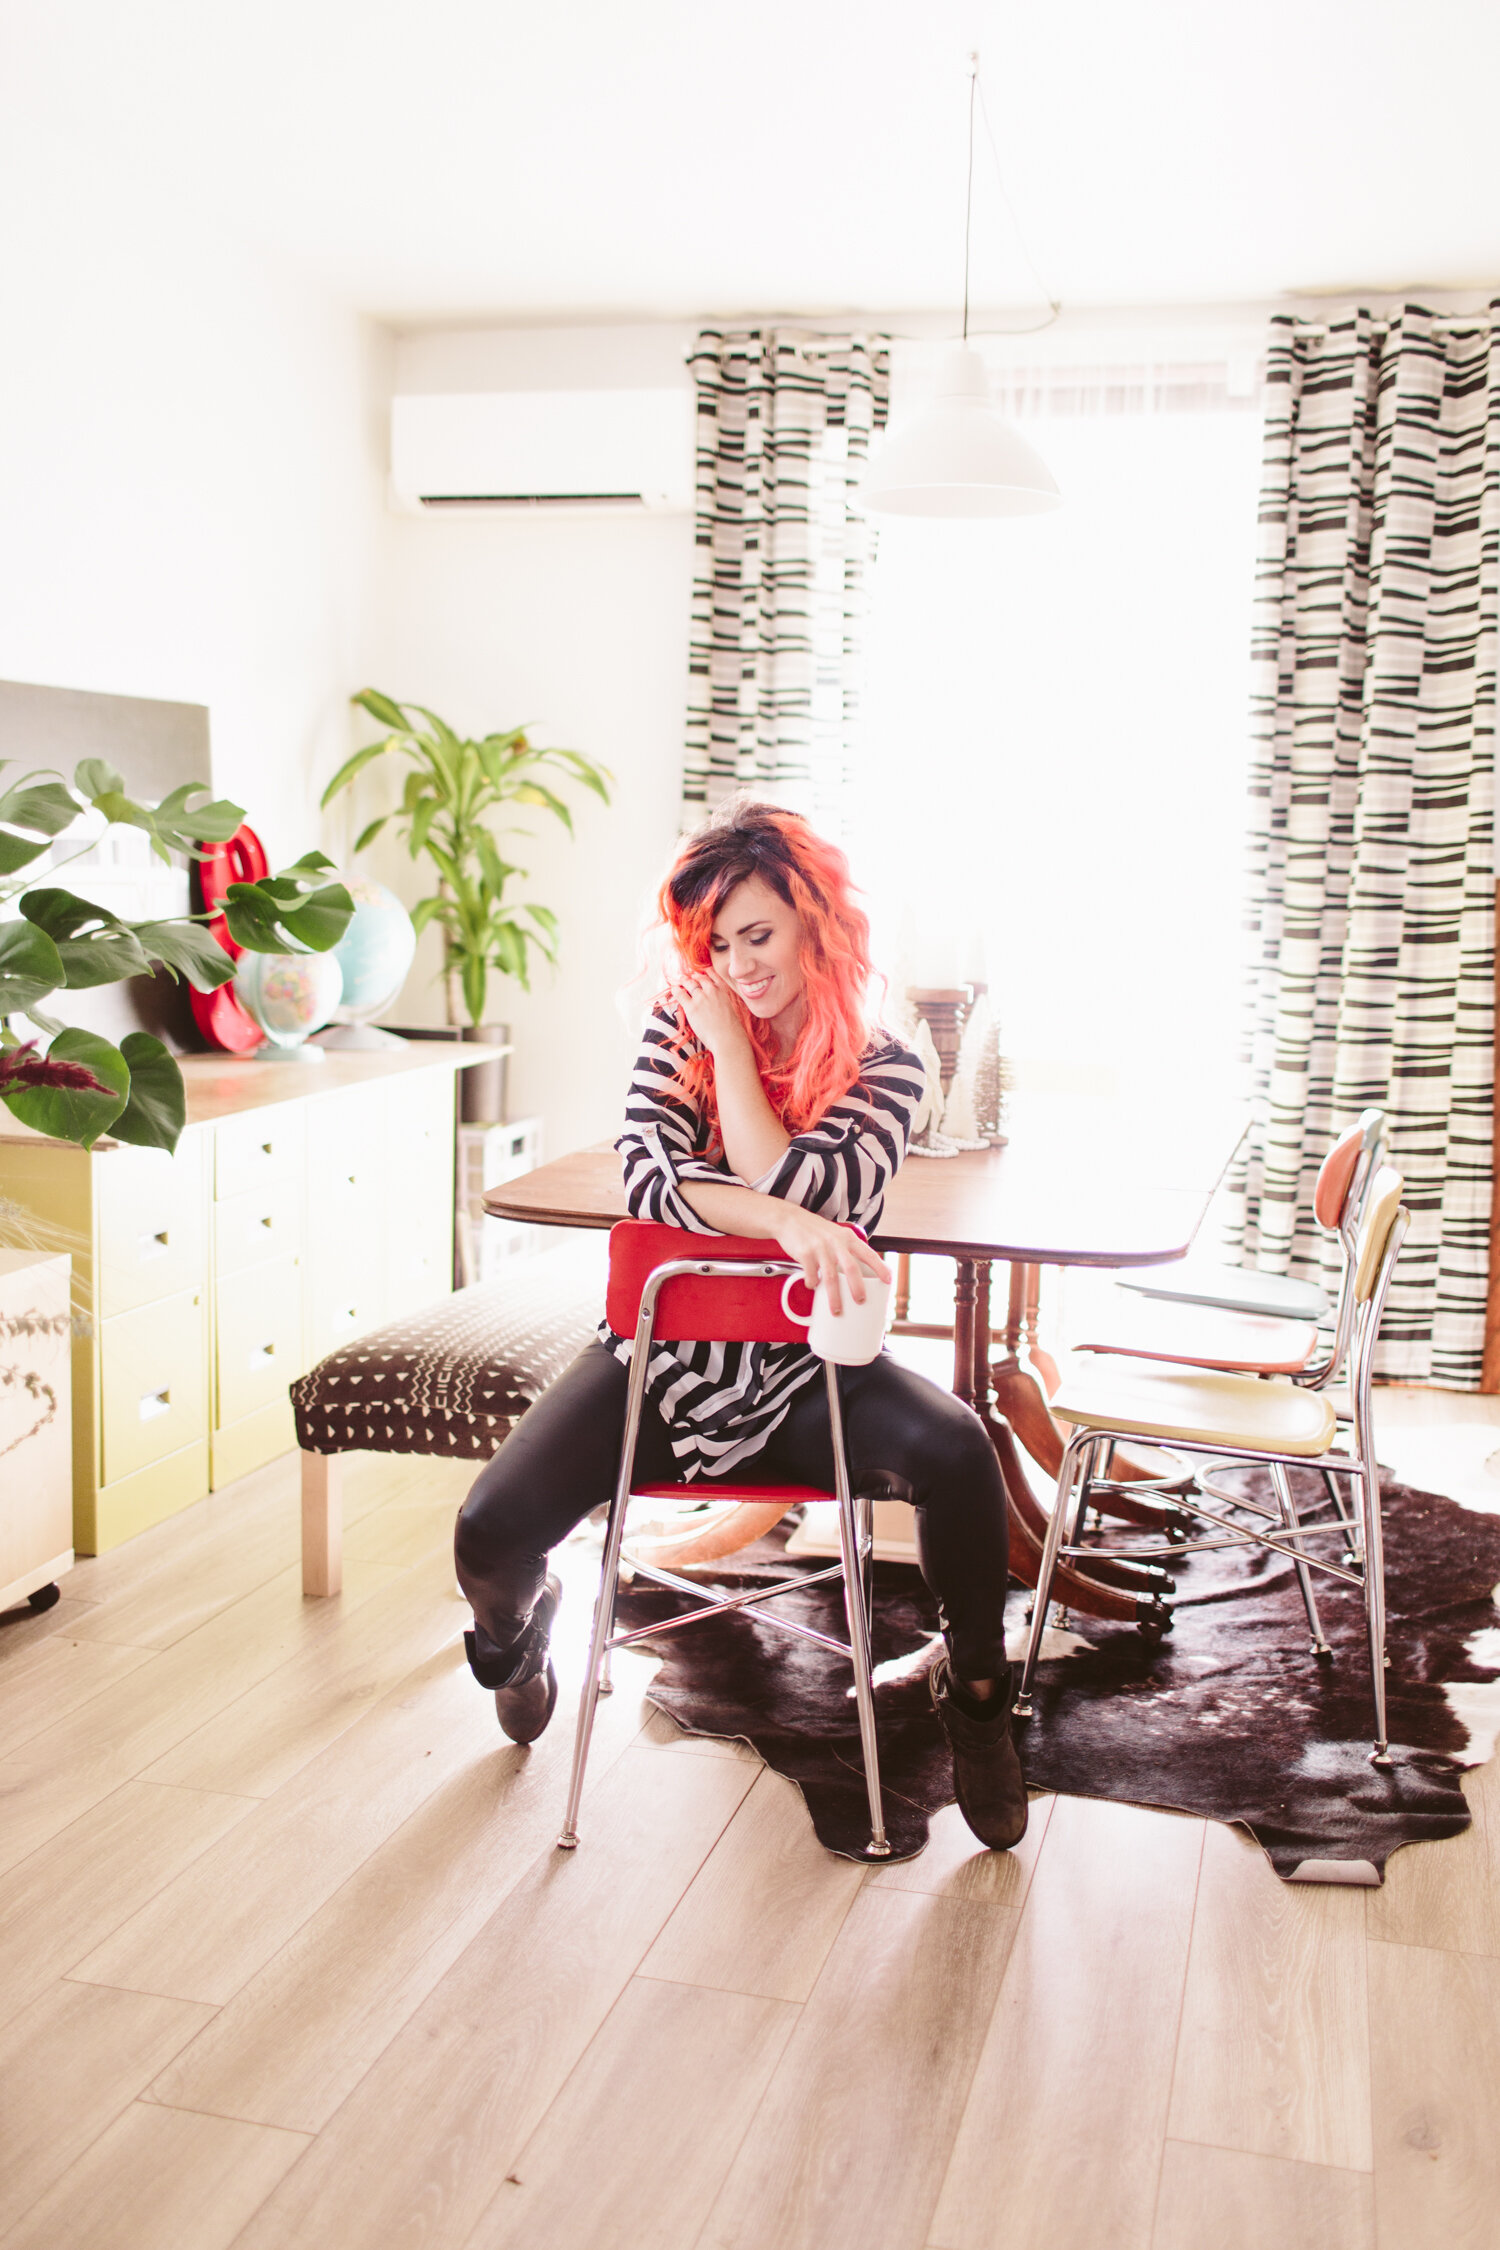
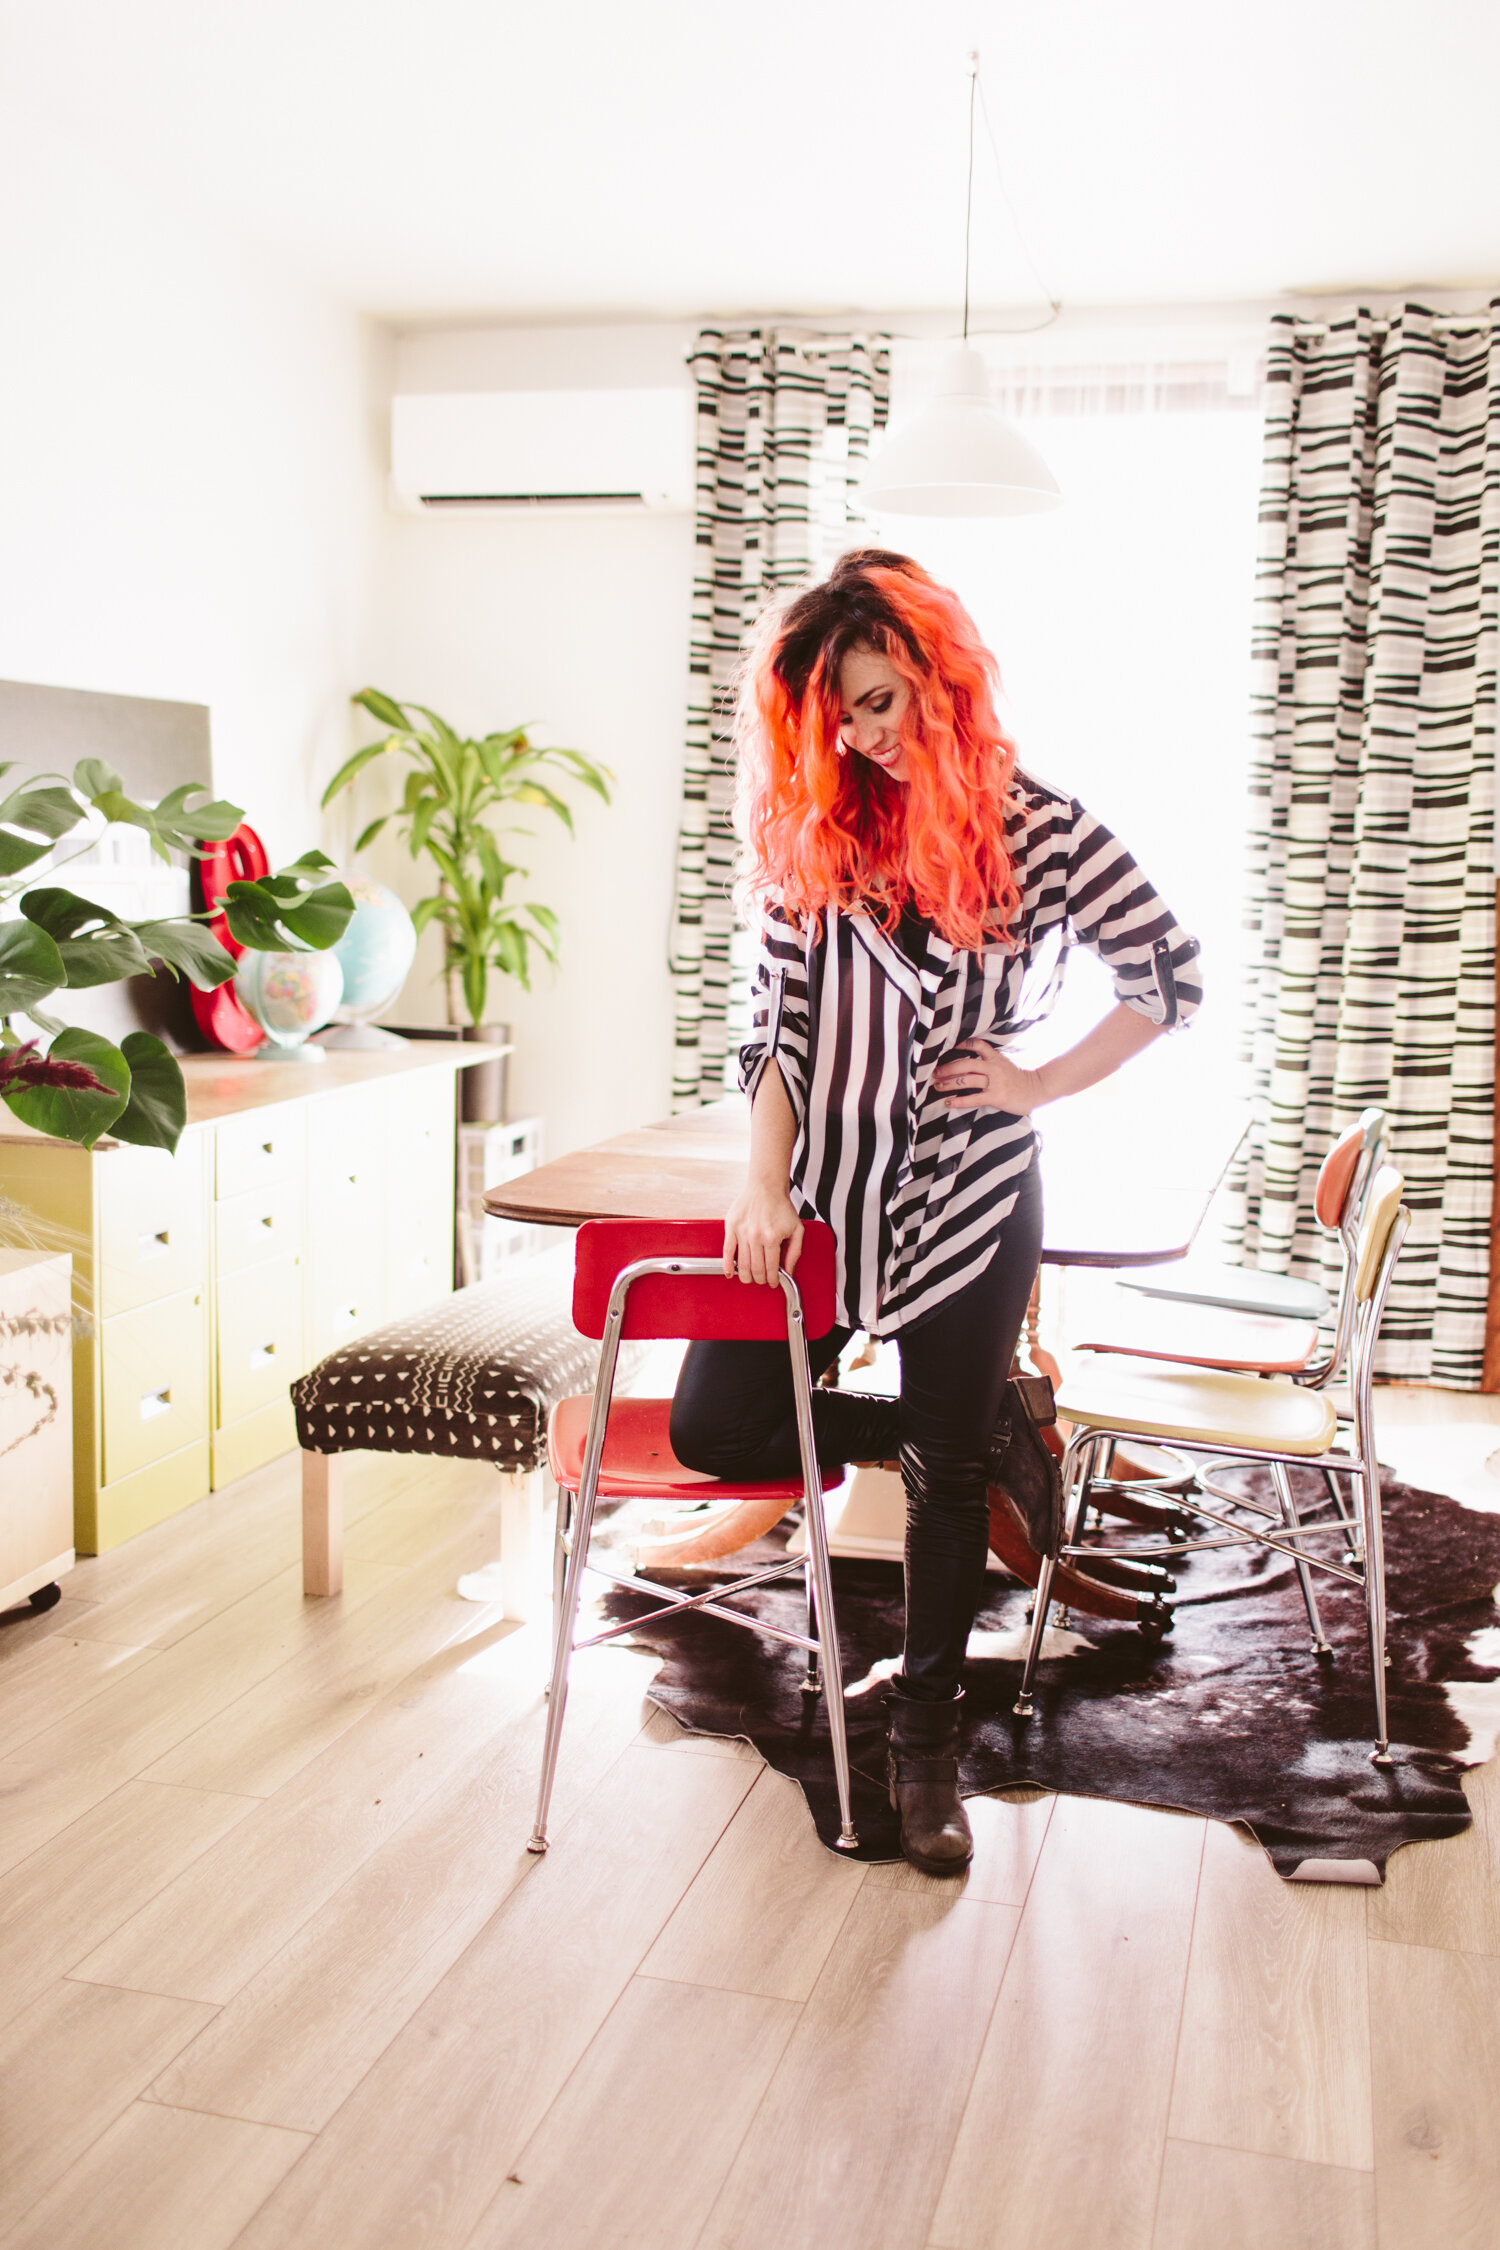
Guess who finally said goodbye to bright yellow hair?! Probably the only person you know with bright yellow hair: me. I dunno guys! I was just feeling the winds of change and I actually made a snap decision to go pink after I’d been planning to go purple/grey for a while.
I used Arctic Fox hair color again, this time in Electric Paradise. The yellow was Cosmic Sunshine and it was a great color, very fade proof (almost … too fade proof? I was hoping I could get it to wash out so I could go silver/grey but alas, the dye is TOO good, lol). I’m excited to see how this one fades. I really like a faded pastel pink, so we’ll see how it looks after a month or two!


Paradise found

Back in the PNW after an amazing week in Maui and I’m on the strugglebus getting back to our regular routine (and the rain). Maui is one of my favorite spots to vacation, mostly because it feels truly like a vacation. Growing up we went to Maui several times (nonstop flights from Anchorage make it a very popular spot for Alaskans to vacation during the frigid, dark winters), so by now I’ve done most of the touristy things that Maui has to offer and I don’t feel like I’m missing out on anything by spending literally all day every day just relaxing at the beach. I love an adventuresome trip, but now that we have a toddler, having a true vacation where we can just chill and recharge is so refreshing. Mega bonus: we were there with my parents so we were able to go out on a couple dates to celebrate our eighth anniversary!
I brought my big camera but only decided to bring it out one evening. I talked my mom into taking a few shots of us together for a Christmas card pic, so maybe I can actually get those out in time for Christmas this year, eh?


Hi, I’m Liz
I'm an artist, writer, designer, DIY renovator, and … well basically I like to do all the things. If it’s creative I’m probably doing it. I’ve spent over 30 years voraciously pursuing a life steeped in creativity and I wholeheartedly believe creativity and joy are inextricably linked.
Read more…


Explore The Archive
- July 2025
- May 2025
- January 2025
- December 2024
- August 2024
- July 2024
- May 2024
- April 2024
- January 2024
- December 2023
- October 2023
- September 2023
- July 2023
- June 2023
- May 2023
- April 2023
- March 2023
- February 2023
- January 2023
- December 2022
- November 2022
- October 2022
- August 2022
- June 2022
- May 2022
- April 2022
- March 2022
- November 2021
- October 2021
- August 2021
- July 2021
- May 2021
- January 2021
- November 2020
- October 2020
- September 2020
- August 2020
- July 2020
- June 2020
- May 2020
- April 2020
- February 2020
- January 2020
- November 2019
- October 2019
- August 2019
- July 2019
- June 2019
- May 2019
- April 2019
- February 2019
- January 2019
- December 2018
- November 2018
- October 2018
- September 2018
- August 2018
- July 2018
- June 2018
- May 2018
- April 2018
- February 2018
- January 2018
- November 2017
- September 2017
- August 2017
- July 2017
- June 2017
- May 2017
- April 2017
- March 2017
- February 2017
- January 2017
- December 2016
- November 2016
- October 2016
- September 2016
- August 2016
- June 2016
- May 2016
- April 2016
- March 2016
- February 2016
- January 2016
- December 2015
- November 2015
- October 2015
- September 2015
- August 2015
- July 2015
- June 2015
- May 2015
- April 2015
- March 2015
- February 2015
- January 2015
- December 2014
- November 2014
- October 2014
- September 2014
- August 2014
- July 2014
- June 2014
- May 2014
- April 2014
- March 2014
- February 2014
- January 2014
- December 2013
- November 2013
- October 2013
- September 2013
- August 2013
- July 2013
- June 2013
- May 2013
- April 2013
- March 2013
- February 2013
- January 2013
- December 2012
- November 2012
- October 2012
- September 2012
- August 2012
- July 2012
- June 2012
- May 2012
- April 2012
- March 2012
- February 2012
- January 2012
- December 2011
- November 2011
- October 2011
- September 2011
- August 2011
- July 2011
- June 2011
- May 2011
- April 2011
- March 2011
- February 2011
- January 2011
- December 2010
- November 2010
- October 2010
- September 2010
- August 2010
- July 2010
- June 2010
- May 2010
- April 2010
- March 2010
- February 2010
- January 2010
- December 2009
- November 2009
- October 2009
- September 2009
- August 2009
- July 2009
- June 2009
- May 2009
- April 2009
- March 2009
- February 2009
- January 2009
- December 2008
- November 2008
- October 2008
- September 2008
- August 2008
- July 2008

VISIT THE SHOP


PRIVACY POLICY & DISCLOSURE
We are a participant in the Amazon Services LLC Associates Program, an affiliate advertising program designed to provide a means for us to earn fees by linking to Amazon.com and affiliated sites.