
studded pocket diy


his is
I did many years ago, as I mentioned in yesterday's outfit post. When I lived in Anchorage I frequently went to an amazing leather, bead and stone shop that had tons of amazing findings and pieces for DIY projects, including studs, so I was always doing a DIY with studs, making jewelry, or other little accessories. I haven't yet found a good local resource for studs here in Tacoma, but nowadays there are lots of online shops where you can buy studs, so I grabbed mine from etsy.
from
were the perfect base for adding studs. I've wanted a pair of shredded jeans for a while, but I never found quite the right pair, but I'm loving these ones!
What you'll need:
(appx 50-60)
Seam ripper or xacto knife
or Jean shorts


First, take half the pocket off. You could remove the whole pocket and stud the entire pocket area, but I like how the studs sort of "peek-a-boo" out from the pocket flap. Remove the outside vertical seam of the pocket using a seam ripper or an exacto knife. I had a rivet at the top corner of my jeans that I had to remove also, so you might need a pair of needle nose pliers to get that out if you have one. If you want to leave the flap loose you can leave it, or you can iron the fold to keep it laying flat, or you can throw a stitch in the loose corner to keep it down, which is what I did.


Then, start placing your studs! You might want to lay some out to measure how many columns/rows you'll fit in before installing them. Depending on how big/small your pocket is, you may need more or less studs than I used. The prongs on my studs were easy to push through the denim, so you probably won't need to pre-cut the holes for the prongs to go through, but if you do, just use your xacto knife. Press the stud prongs through the denim and flip to the inside to press the prongs down. My prongs were pretty stiff so I needed to use a flathead screwdriver to push the prongs down, but in the past I've had studs that were easier to bend and I could just do it with my fingers.
Keep adding studs, installing one at a time, to your rows and columns until you've filled the triangle. I put my studs a little under the fold of the pocket, so they come out from under the pocket fold.
I've seen a similar DIY done with
(minus removing half the pocket), which is also cute!

There you go! It shouldn't take too long, maybe 45 minutes to an hour, hour and a half. It took a little longer than I anticipated, just because my stud prongs were stiff and harder to push down than I thought they'd be. My fingers were a little sore by the end! But I'm stoked with how they turned out! Maybe I'll have to do a pair of shorts for the summertime too!

#FLASHBACKFRIDAY // red velvet if you please

Red Velvet If You Please // November 11, 2010
Yesterday I got to go to Red Velvet in Springfield, MO and hang out with Elsie and her sister Emma for the day! After seeing her posts on the shop grand opening, I thought to myself, "I wonder where she's located and if I can go visit!" Turns out, she wasn't that far away at all (I was in Arizona at the time), so I booked it across NM, TX, and OK to get to Red Velvet. It was worth the long days of driving, and I had the best time hanging out at the shop, seeing a bit of Springfield, getting smoothies with Elsie and pizza with Emma, and trying on adorable vintage dresses.


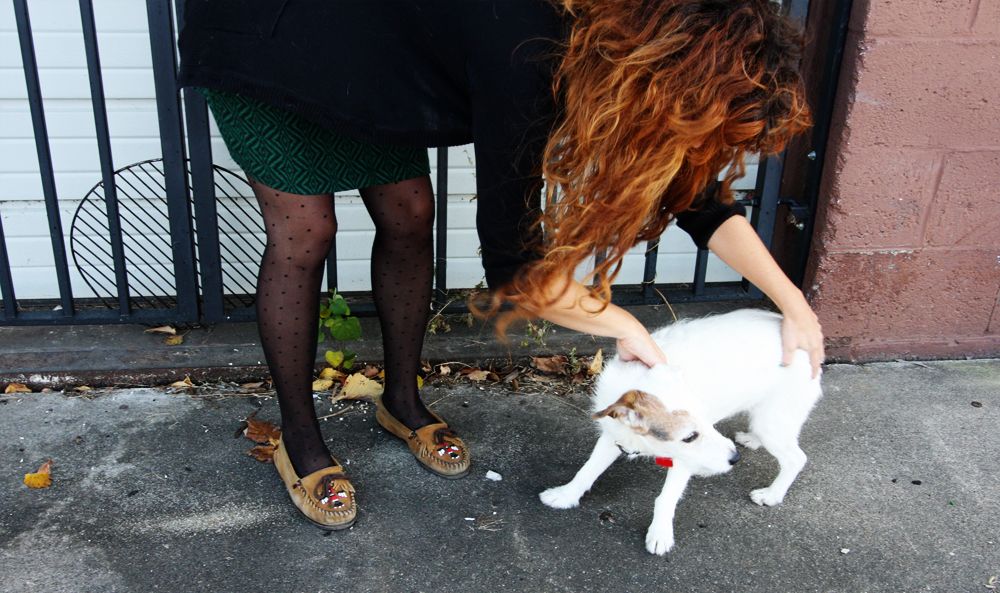
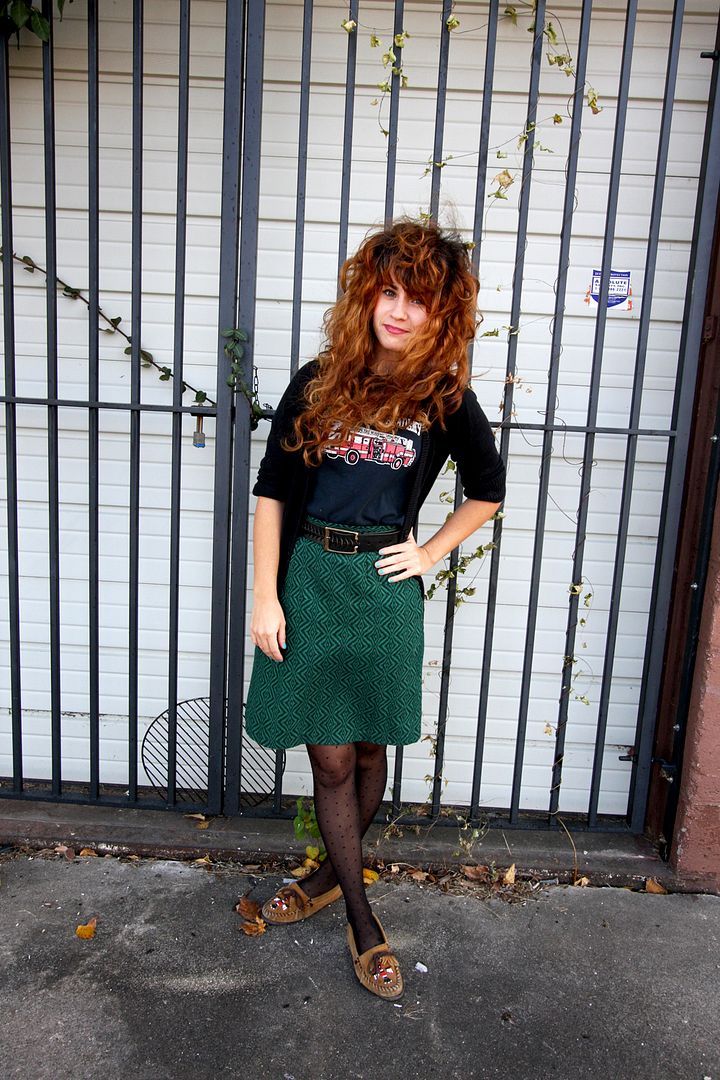
shredded + studded


rosemary thyme dubliner soda bread + bread pudding
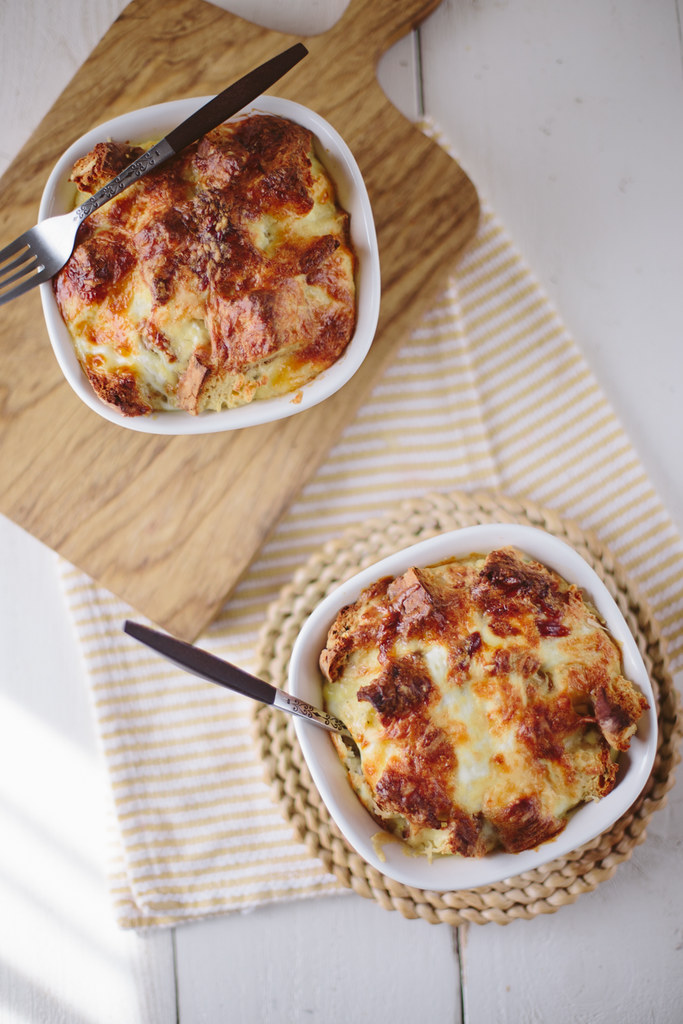


Bread Pudding Ingredients:
1 1/4 cup grated Kerrygold Skellig sweet cheddar cheese
1/4 cup grated Kerrygold Dubliner cheese
4 large eggs
2 1/2 cups whole milk
Loaf of Irish Soda Bread
To make bread pudding:
Preheat oven to 350°F with rack in middle. Butter ramekins or baking dish.
Cut enough bread into 1-inch cubes to measure 3 3/4 cups. Divide bread among ramekins (or spread in larger baking dish).
Whisk together eggs, milk, 1/2 teaspoon salt, and 1/4 teaspoon pepper. Stir in cheese and spoon over bread in ramekins or baking dish. Let stand 10 minutes.
Put ramekins or baking dish in a larger baking pan and add enough hot water to come halfway up sides of ramekins or dish.
Bake until just set and a knife inserted in center comes out clean, about 35 minutes.
Transfer ramekins or dish from hot water bath to a rack and cool 10 minutes before serving.
toms waxed canvas bag giveaway!


a Rafflecopter giveaway


Hi, I’m Liz
I'm an artist, writer, designer, DIY renovator, and … well basically I like to do all the things. If it’s creative I’m probably doing it. I’ve spent over 30 years voraciously pursuing a life steeped in creativity and I wholeheartedly believe creativity and joy are inextricably linked.
Read more…


Explore The Archive
- January 2026
- July 2025
- May 2025
- January 2025
- December 2024
- August 2024
- July 2024
- May 2024
- April 2024
- January 2024
- December 2023
- October 2023
- September 2023
- July 2023
- June 2023
- May 2023
- April 2023
- March 2023
- February 2023
- January 2023
- December 2022
- November 2022
- October 2022
- August 2022
- June 2022
- May 2022
- April 2022
- March 2022
- November 2021
- October 2021
- August 2021
- July 2021
- May 2021
- January 2021
- November 2020
- October 2020
- September 2020
- August 2020
- July 2020
- June 2020
- May 2020
- April 2020
- February 2020
- January 2020
- November 2019
- October 2019
- August 2019
- July 2019
- June 2019
- May 2019
- April 2019
- February 2019
- January 2019
- December 2018
- November 2018
- October 2018
- September 2018
- August 2018
- July 2018
- June 2018
- May 2018
- April 2018
- February 2018
- January 2018
- November 2017
- September 2017
- August 2017
- July 2017
- June 2017
- May 2017
- April 2017
- March 2017
- February 2017
- January 2017
- December 2016
- November 2016
- October 2016
- September 2016
- August 2016
- June 2016
- May 2016
- April 2016
- March 2016
- February 2016
- January 2016
- December 2015
- November 2015
- October 2015
- September 2015
- August 2015
- July 2015
- June 2015
- May 2015
- April 2015
- March 2015
- February 2015
- January 2015
- December 2014
- November 2014
- October 2014
- September 2014
- August 2014
- July 2014
- June 2014
- May 2014
- April 2014
- March 2014
- February 2014
- January 2014
- December 2013
- November 2013
- October 2013
- September 2013
- August 2013
- July 2013
- June 2013
- May 2013
- April 2013
- March 2013
- February 2013
- January 2013
- December 2012
- November 2012
- October 2012
- September 2012
- August 2012
- July 2012
- June 2012
- May 2012
- April 2012
- March 2012
- February 2012
- January 2012
- December 2011
- November 2011
- October 2011
- September 2011
- August 2011
- July 2011
- June 2011
- May 2011
- April 2011
- March 2011
- February 2011
- January 2011
- December 2010
- November 2010
- October 2010
- September 2010
- August 2010
- July 2010
- June 2010
- May 2010
- April 2010
- March 2010
- February 2010
- January 2010
- December 2009
- November 2009
- October 2009
- September 2009
- August 2009
- July 2009
- June 2009
- May 2009
- April 2009
- March 2009
- February 2009
- January 2009
- December 2008
- November 2008
- October 2008
- September 2008
- August 2008
- July 2008

VISIT THE SHOP


PRIVACY POLICY & DISCLOSURE
We are a participant in the Amazon Services LLC Associates Program, an affiliate advertising program designed to provide a means for us to earn fees by linking to Amazon.com and affiliated sites.