

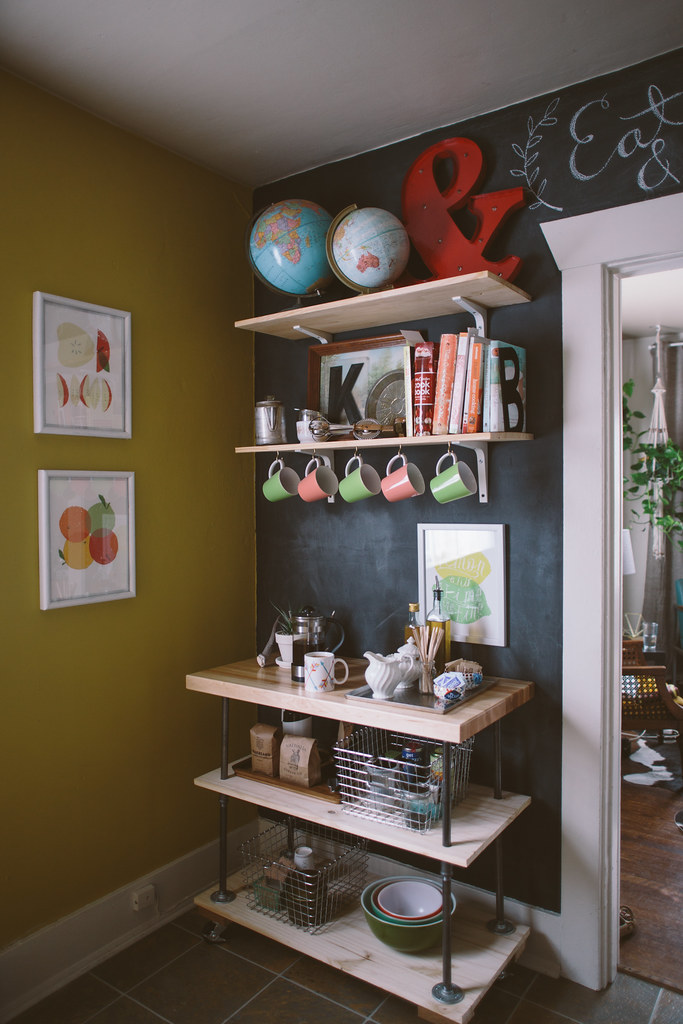
DIY rolling island
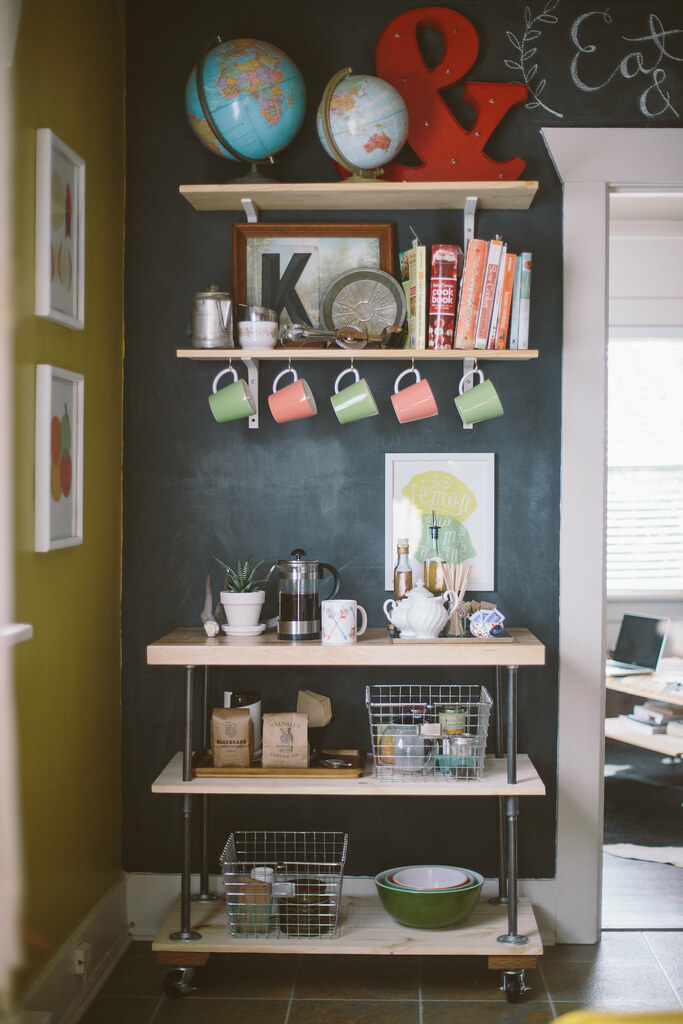

he kitchen is probably my favorite room in the house. No matter how nice the living room is, it always seems like people congregate in the kitchen. Compared to our last house we’ve got a palatial kitchen, but we still find that we’d like a bit more counter space for cooking and entertaining. I figured a rolling island would be the perfect solution and decided that instead of going out and buying one, I’d like to make one myself! I had made our living-room coffee table using pipe and wood, so I wanted to match that aesthetic, plus I was familiar with the process of building that way. I absolutely love the way it turned out, and it’s the perfect space for storing our coffee and tea accoutrements. Whenever we need to use it for extra counter space, we just roll it to where we’re working and it’s ready to go. I got caster wheels with locks so we can keep the island from rolling away when we’re chopping veggies and doing other work.
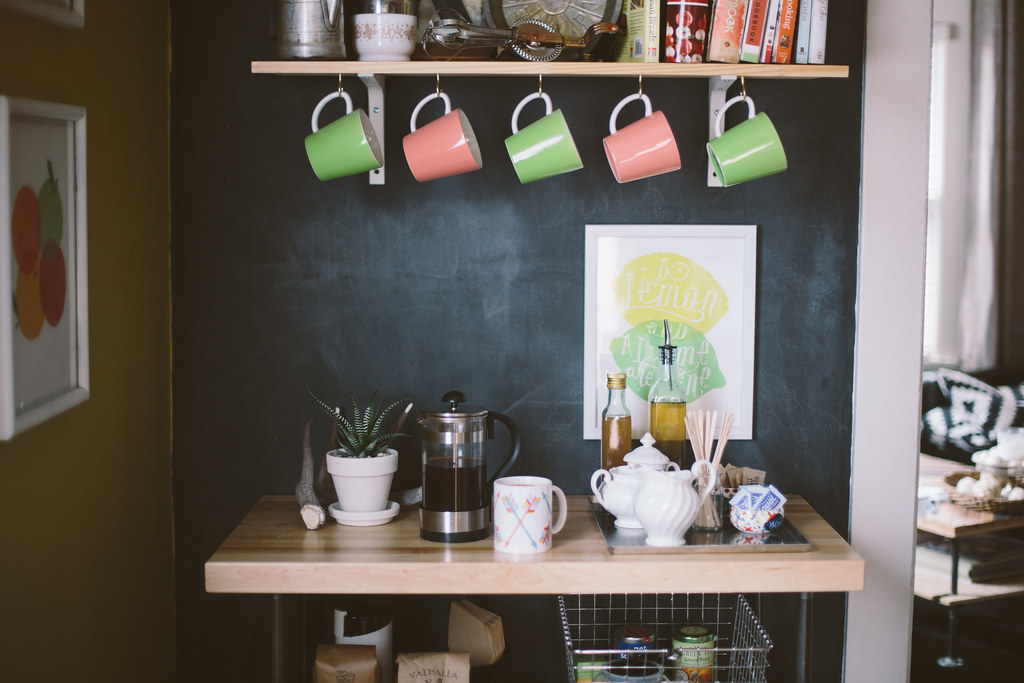
All of our coffee-making things — grinder, French press, pour over and filters — are included on the first shelf to keep the top shelf from getting too cluttered. There aren’t enough of us in my household to justify a drip coffee maker, but there’s plenty of room to store a coffee maker as well. We’ve also started getting into drinking tea, so I made a basket of our tea bags, loose leaf and tea pots as well.
This DIY came to around $350, but I was on a time crunch and Ikea was all sold out of their butcher block so I had to spend about $100 more on the butcher block top by buying it elsewhere, but Ikea's Numerar Beech countertop is much cheaper. I ended up getting the countertop I wanted for this DIY later on when I was redoing the Winne's kitchen and Ikea is definitely one of the most inexpensive places to get a butcher block countertop. They're about $130, and I like it because it's wood and therefore really easy to cut to size, depending on your size needs. I was also thinking of getting the Ikea Sanfrid stainless steel table top and using that as the top, and it's even cheaper, at $99. It also has an industrial look, so it'd go well with this DIY too.

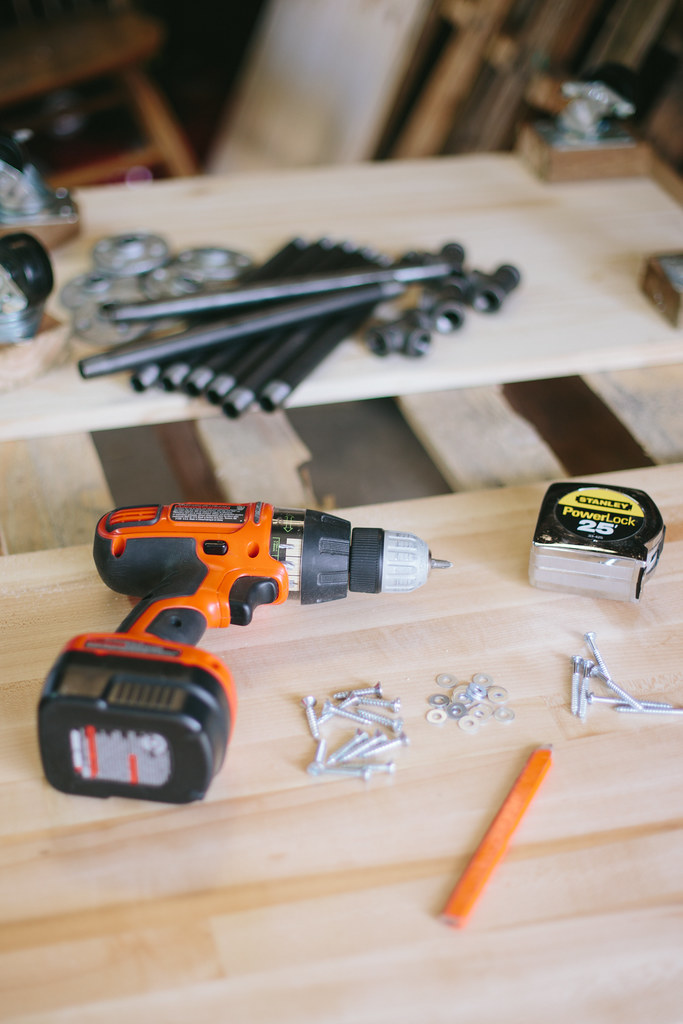
What you’ll need:
8 12-inch-long, ½-inch diameter black pipe nipples
8 1/2 inch floor flanges
4 1/2 inch Ts
32 1 1/4 inch #12 flathead screws
16 2 inch #10 roundhead screws
16 #10 flat washers
4 caster wheels (if you want to keep your cart from rolling, get ones with wheel locks)
4 2×4 blocks (4 inches long)
1 73-inch x 18 inch pine board (cut in half to create two 36-inch long pieces)
1 36-inch x 19 inch butcher block (mine is 1 1/2 inches thick; you can
find inexpensive butcher block countertop IKEA)
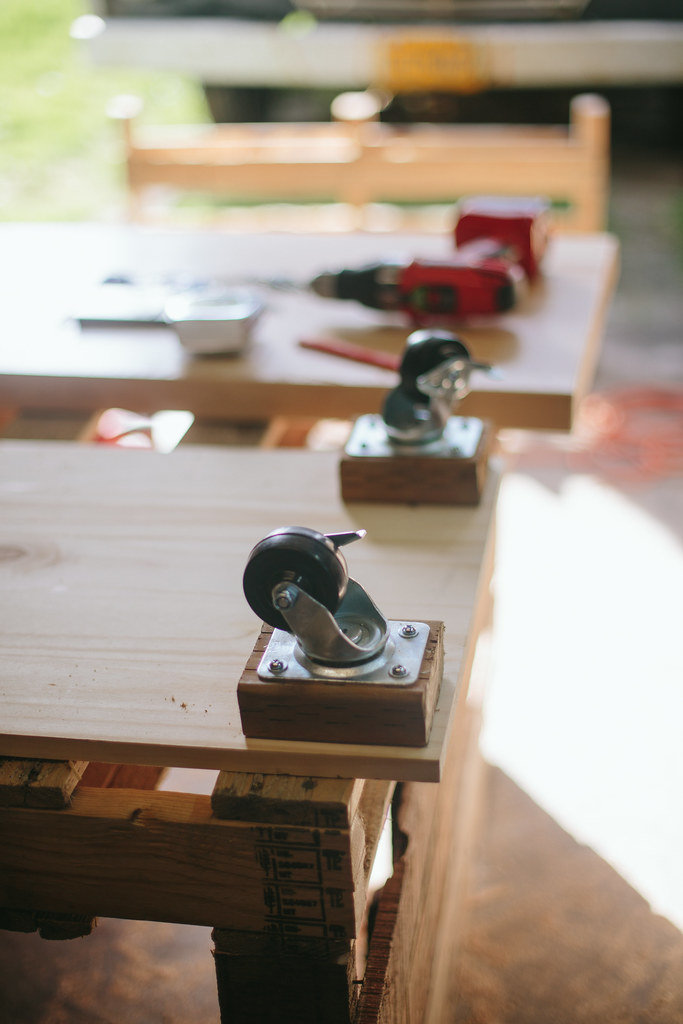
1. First put the caster wheels on the bottom of the bottom shelf. Pre-drill holes in the 4 inch 2×4 blocks. Make sure the holes for the screws are 1 1/4 inches from the edges of the pine board, so place the blocks on your bottom shelf to measure from the edges. The screws will be long enough to attach the 2x4s to the bottom shelf. Once all your holes are drilled, position the 2×4 blocks on the pine board bottom shelf and place the caster wheels lined up with your pre-drilled holes. Put the #10 washers on and screw the wheels on using the #10 roundhead screws.
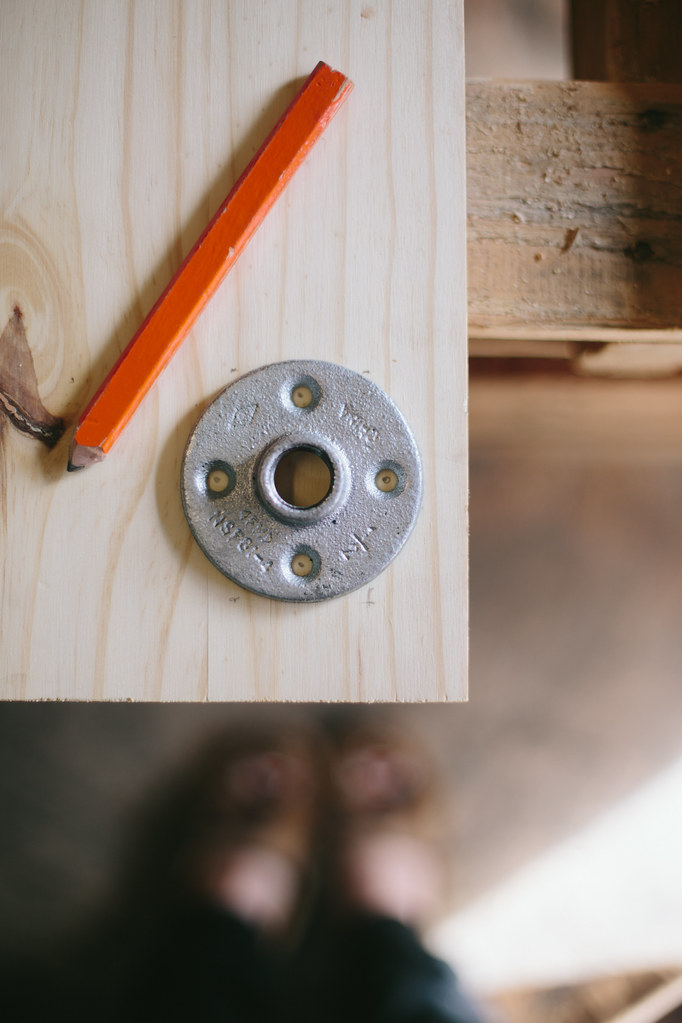

2. Now, flip the bottom shelf so the wheels are facing down. Place your four floor flanges on the bottom shelf directly over the 2×4 blocks and rotate the flange so its 4 holes aren’t directly over the screws you just put in for the wheels. Mark where the holes are with a pencil and drill holes for the screws. These screws will also go through the board and into the 2×4 to further secure the 2×4. Screw the flanges on with the #12 flathead screws.
3. Take your first four 12 inch nipples and screw them into the floor flanges. Screw the Ts on to the top of the nipples and then put the last four 12-inch nipples on top of the Ts.
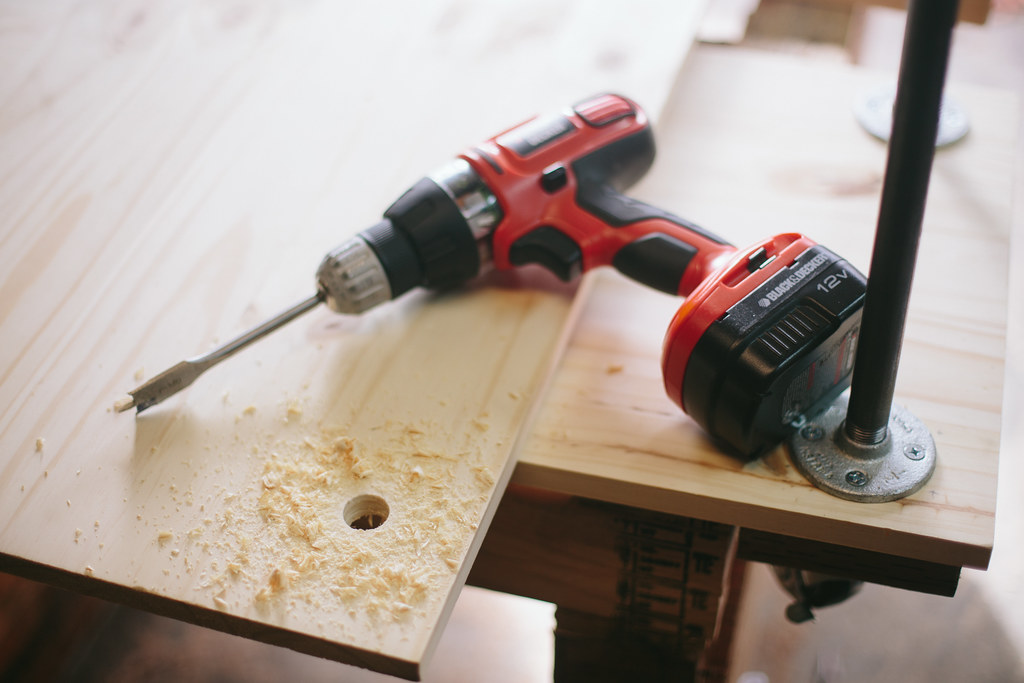
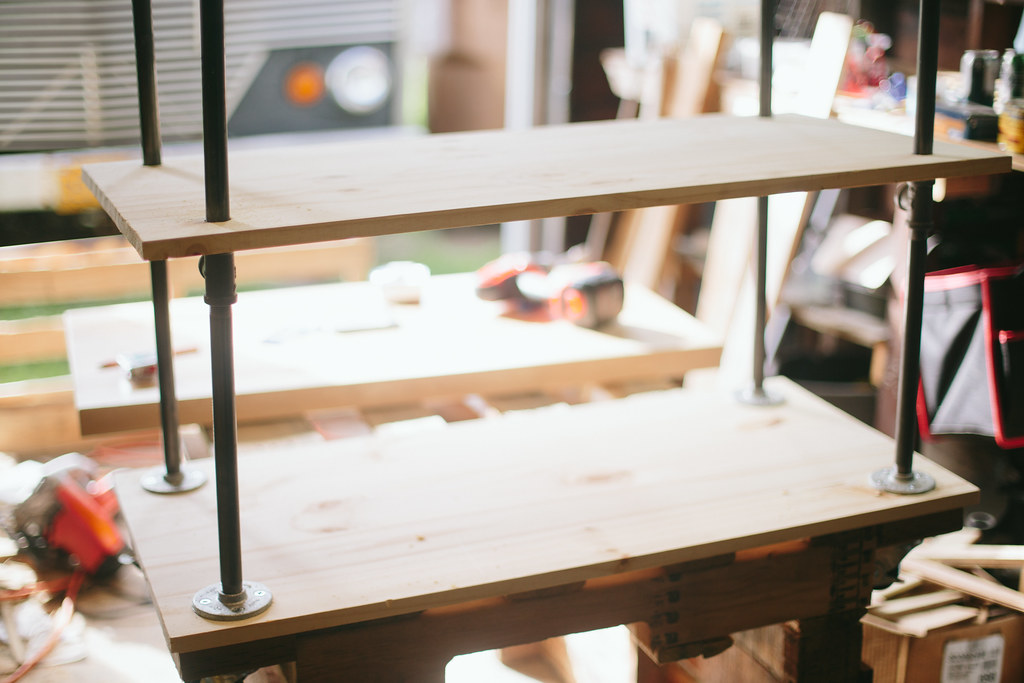

4. Grab the second pine board shelf and place it on top the 12-inch nipples. Position it so it’s directly over the bottom shelf (if you want to measure where the center of the pipe hits on the bottom shelf to get the top shelf exactly matched, you can do that, or you can eyeball it). Draw a circle around the edge of the pipe on the bottom of the board, so you know where to drill the hole so it can slide down to rest on the T. Once you have your circles drawn, take a 7/8ths spade drill bit and drill the holes you just drew. Now you can slide the second shelf onto the 12-inch nipples and they’ll slide down to rest on the Ts.
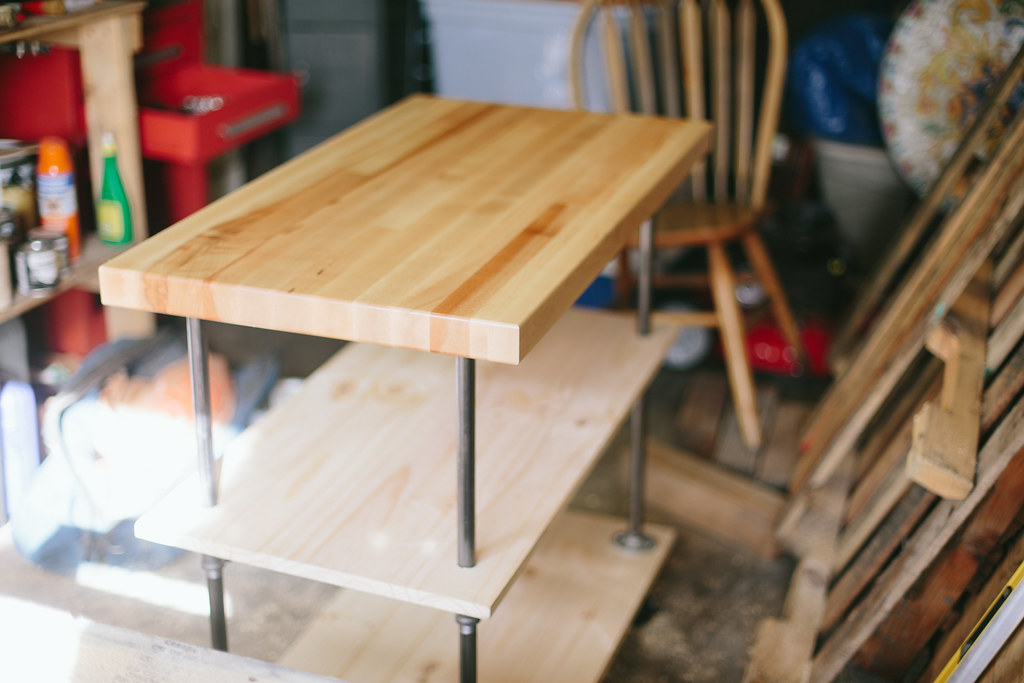
5. Put the last four floor flanges onto the top of the nipples; make sure they’re tight. Put your butcher block on top of them, and again you can measure everything to make sure it’s centered, or you can eyeball it. Mark with a pencil where the floor flange holes are, pre-drill holes and then screw the top on with the #12 flat head screws. You’re done!

geometry lesson


fancy savory popcorn 3 ways


3 tbsp butter (or peanut, grape seed, canola oil)
1/3 cup popcorn kernels
1. Heat the butter in a large 3-quart saucepan on medium high heat.
2. Put 3 or 4 popcorn kernels into the butter and cover the pan.
3 When those kernels pop, add the rest of the 1/3 cup of popcorn kernels in an even layer. Cover the pot and remove from heat for 30 seconds.
4. Return the pan to the heat and the popcorn should begin popping. Once the popping is consistent, gently shake the pan, moving it back and forth over the burner. Keep the lid slightly ajar to let the steam from the popcorn release, which will make your popcorn drier and crisper. Once the popping slows to several seconds between pops, remove the pan from the heat and dump the popcorn immediately into a large bowl or paper bag.


2 quarts of popped popcorn
1/4 cup butter, melted
1 1/2 teaspoons freshly squeezed lime juice
1/2 teaspoon lime zest
1/2 small jalapeno, seeds removed, minced
1 teaspoons salt
1/2 teaspoon red pepper flakes
1/4 c Cotija cheese, crumbled
In a medium bowl whisk together the butter, lime juice and zest. Add the minced jalapeno. In a small bowl combine the black pepper, salt, red pepper, and cumin. If you want less spiciness you can omit the jalapeno and red pepper flakes, or just reduce the amount you use.
Drizzle half of the butter/lime/jalapeno mixture over the popcorn, and mix until the popcorn is coated and moist. Taste. Add more of the butter mixture to taste, and mix it up again. Take the small bowl of your seasonings and sprinkle most of the mixture over the popcorn, shake and mix to coat the popcorn. Taste, and if you'd like more flavor add the rest of it. Sprinkle the crumbled Cotija over the popcorn.

2 quarts of popped popcorn
4 slices bacon
4 tbsp butter
½ cup finely grated parmesan cheese
Melt the butter and pour over popcorn, then sprinkle with smoked salt to taste. Mix to combine. Then add parmesan cheese and toss to coat.

2 quarts of popped popcorn
4 tbsp butter
4 to 6 garlic cloves, finely minced
1/2 c finely grated parmesan cheese
2 tbsp fresh thyme leaves, chopped
smoked salt
In a sauce pan, melt the butter then add the minced garlic and 1 tablespoon of fresh thyme leaves.
Drizzle the garlic and thyme butter over all of the popcorn and mix well. Next, add the parmesan cheese and mix again. Add salt to taste and then sprinkle the remaining thyme leaves over the popcorn.

salmon with peach salsa


1 med tomato, diced
1 jalapenos, seeded and finely diced
1/2 medium red onion, finely diced
1 1/2 lbs peaches, diced
1/4 bunch cilantro, chopped
2 Tbsp lime juice
1 tsp salt, or to taste
freshly ground black pepper or to taste
Ingredients for Salmon
1-2 tbsp butter, in thin slices
1-2 tbsp brown sugar
1 large or 2 small salmon fillet(s)
1 tbsp lime juice
a few slice red onion rings
Preheat the oven to 325ºF for a small fillet or up to 375º for a larger fillet.
Combine the peach salsa ingredients and set aside in the fridge.
Line a cookie sheet with tin foil. Set the salmon fillet on the foil and put the thin slices of butter on the filet. Sprinkle the brown sugar and squeeze the lime juice on the fillet. Place onion slices on the fillet and pop it in the oven. For a smaller fillet 20-30 minutes will do, but for a larger filet do 40+ minutes. If you aren't sure if it's done, use a fork to flake apart the fillet at the thickest part to see if it's cooked through.

learning = sucking


What if we all stopped saying, "oh I can't do that" or "I'm bad at that", "I'm no good at it," as if we were blaming some force in the ether keeping us from doing stuff we want to do, and decided to start trying the things we want to do or be good at? What if we stopped being afraid of looking dumb or being bad at stuff? What are we so afraid of anyway? Are we afraid of looking stupid in front of other people? Because if someone is going to make you feel bad for trying something new and not being a pro at it your first 20 times, you probably shouldn't care about them anyway. The only way to stop being bad at something is to do it until you're not bad at it anymore. Terrible cook? Stop eating out all the time and start cooking every day. Look up youtube tutorials. Buy cookbooks. We live in an age when you can find tutorials for almost everything online. It's crazy! The people who do know how to do stuff are actively sharing how-to articles and videos with the world online so that other people can also learn how to do stuff. It's kind of amazing.


Hi, I’m Liz
I'm an artist, writer, designer, DIY renovator, and … well basically I like to do all the things. If it’s creative I’m probably doing it. I’ve spent over 30 years voraciously pursuing a life steeped in creativity and I wholeheartedly believe creativity and joy are inextricably linked.
Read more…


Explore The Archive
- July 2025
- May 2025
- January 2025
- December 2024
- August 2024
- July 2024
- May 2024
- April 2024
- January 2024
- December 2023
- October 2023
- September 2023
- July 2023
- June 2023
- May 2023
- April 2023
- March 2023
- February 2023
- January 2023
- December 2022
- November 2022
- October 2022
- August 2022
- June 2022
- May 2022
- April 2022
- March 2022
- November 2021
- October 2021
- August 2021
- July 2021
- May 2021
- January 2021
- November 2020
- October 2020
- September 2020
- August 2020
- July 2020
- June 2020
- May 2020
- April 2020
- February 2020
- January 2020
- November 2019
- October 2019
- August 2019
- July 2019
- June 2019
- May 2019
- April 2019
- February 2019
- January 2019
- December 2018
- November 2018
- October 2018
- September 2018
- August 2018
- July 2018
- June 2018
- May 2018
- April 2018
- February 2018
- January 2018
- November 2017
- September 2017
- August 2017
- July 2017
- June 2017
- May 2017
- April 2017
- March 2017
- February 2017
- January 2017
- December 2016
- November 2016
- October 2016
- September 2016
- August 2016
- June 2016
- May 2016
- April 2016
- March 2016
- February 2016
- January 2016
- December 2015
- November 2015
- October 2015
- September 2015
- August 2015
- July 2015
- June 2015
- May 2015
- April 2015
- March 2015
- February 2015
- January 2015
- December 2014
- November 2014
- October 2014
- September 2014
- August 2014
- July 2014
- June 2014
- May 2014
- April 2014
- March 2014
- February 2014
- January 2014
- December 2013
- November 2013
- October 2013
- September 2013
- August 2013
- July 2013
- June 2013
- May 2013
- April 2013
- March 2013
- February 2013
- January 2013
- December 2012
- November 2012
- October 2012
- September 2012
- August 2012
- July 2012
- June 2012
- May 2012
- April 2012
- March 2012
- February 2012
- January 2012
- December 2011
- November 2011
- October 2011
- September 2011
- August 2011
- July 2011
- June 2011
- May 2011
- April 2011
- March 2011
- February 2011
- January 2011
- December 2010
- November 2010
- October 2010
- September 2010
- August 2010
- July 2010
- June 2010
- May 2010
- April 2010
- March 2010
- February 2010
- January 2010
- December 2009
- November 2009
- October 2009
- September 2009
- August 2009
- July 2009
- June 2009
- May 2009
- April 2009
- March 2009
- February 2009
- January 2009
- December 2008
- November 2008
- October 2008
- September 2008
- August 2008
- July 2008

VISIT THE SHOP


PRIVACY POLICY & DISCLOSURE
We are a participant in the Amazon Services LLC Associates Program, an affiliate advertising program designed to provide a means for us to earn fees by linking to Amazon.com and affiliated sites.