
the art professor


the simple life


tis the season!

One of my favorite things about the holidays is all the excuses to wear fun party dresses! Holiday parties are like the homecoming dances of adulthood, except now it's totally legal to spike the punch. For those of you looking for a holiday dress to look smashing in this holiday season, whether you're impressing your to-be mother-in-law at Thanksgiving, or wanting to look like a bombshell at your new years eve party, you're in luck! ModCloth has a party dress sale going on today through Wednesday! Get 20% off any dress in ModCloth's party dress category! I can never decide what kind of look I want to go with when it comes to getting fancy, so I chose a few of my favorite dresses in different styles. What's your favorite holiday dress style? Stick with the tried and true holiday hues? Glimmer in gold and silver? Or do you like getting a little dark and dramatic with your holiday frocks? Of this group, I think my absolute favorite is #4! I'm not usually a gold dress kind of girl, but that one is just all kinds of amazing.


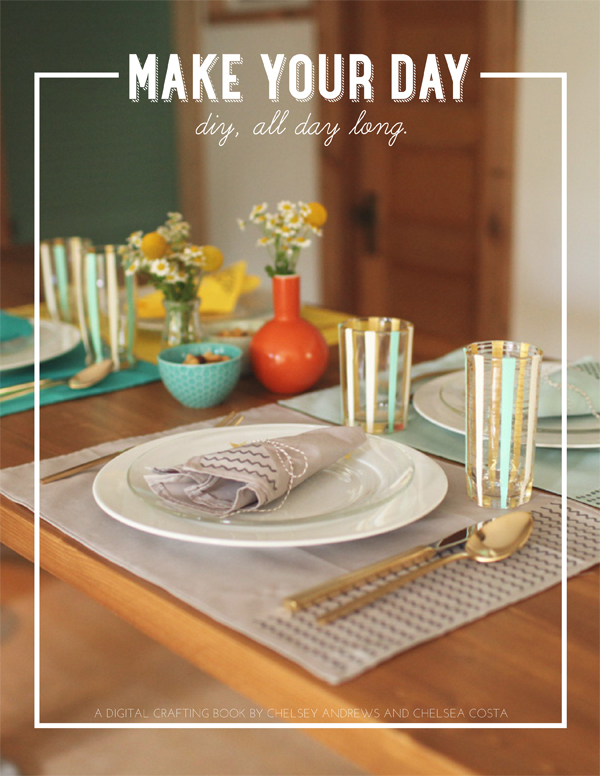
make your day diy


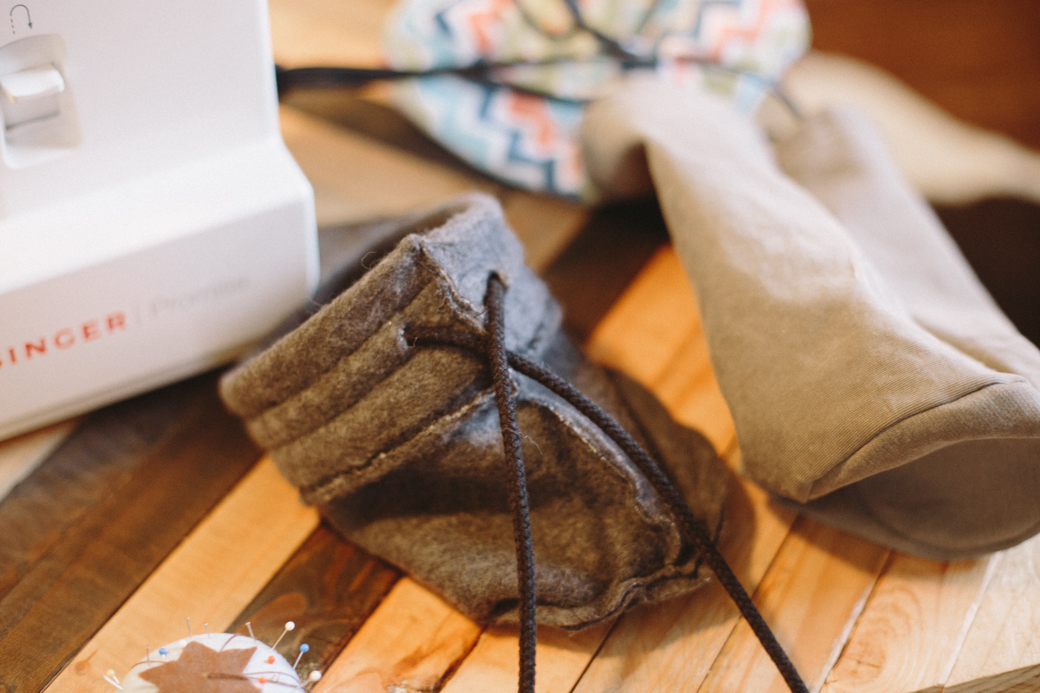
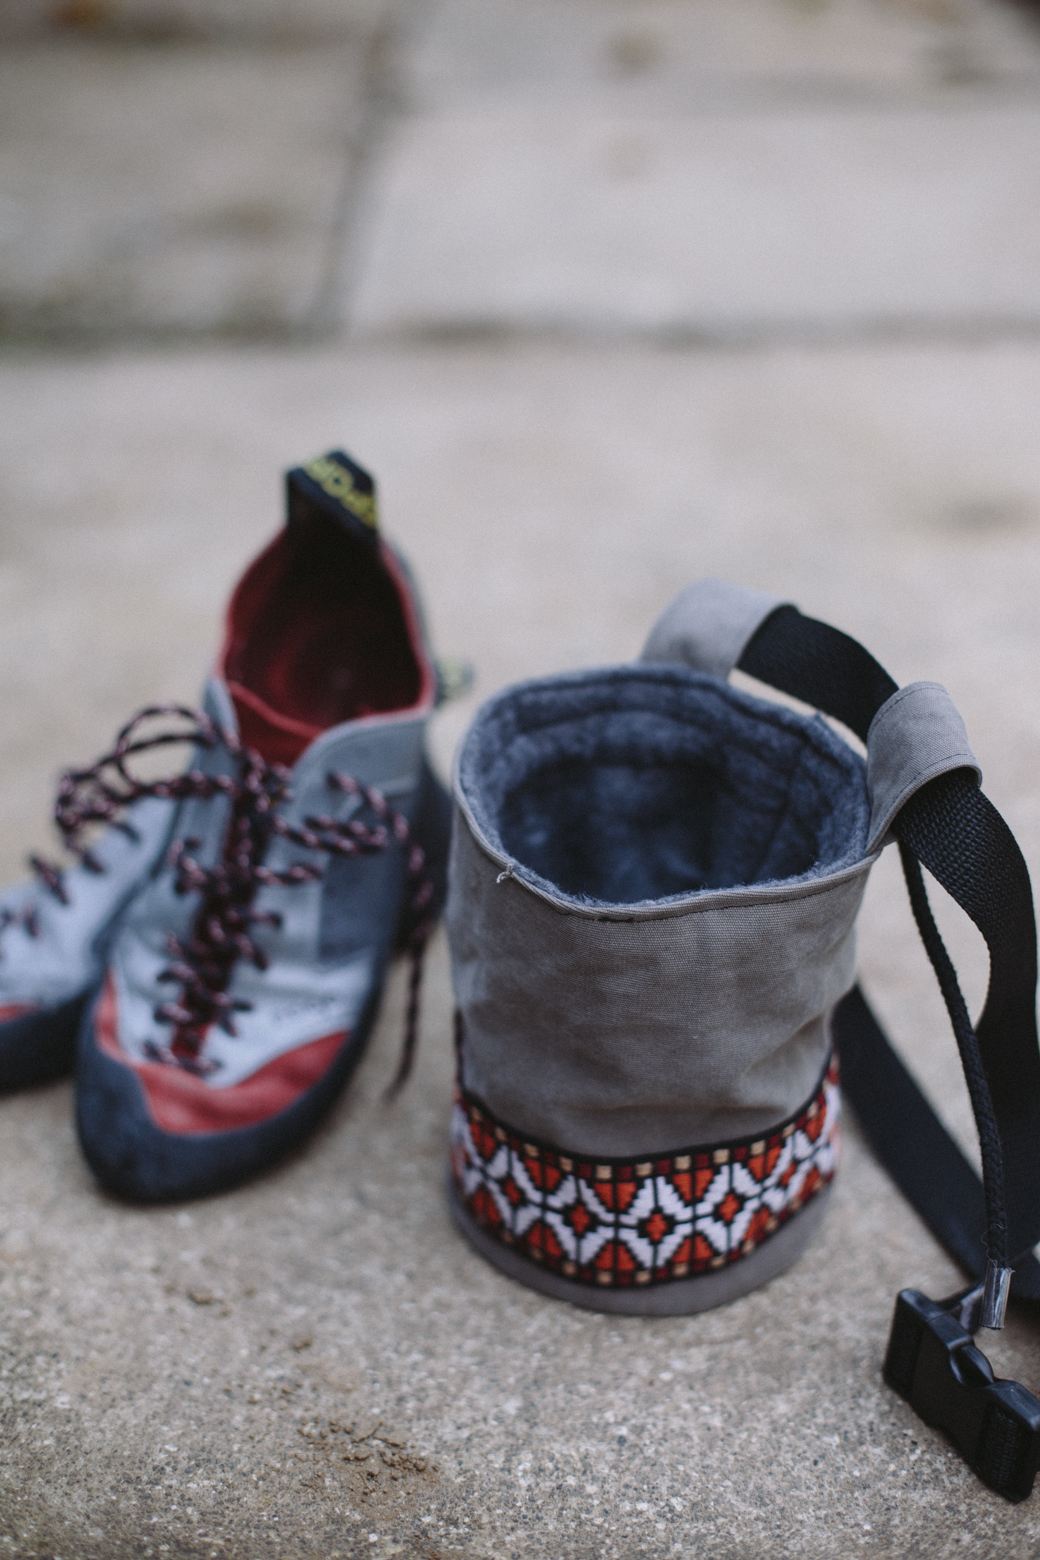
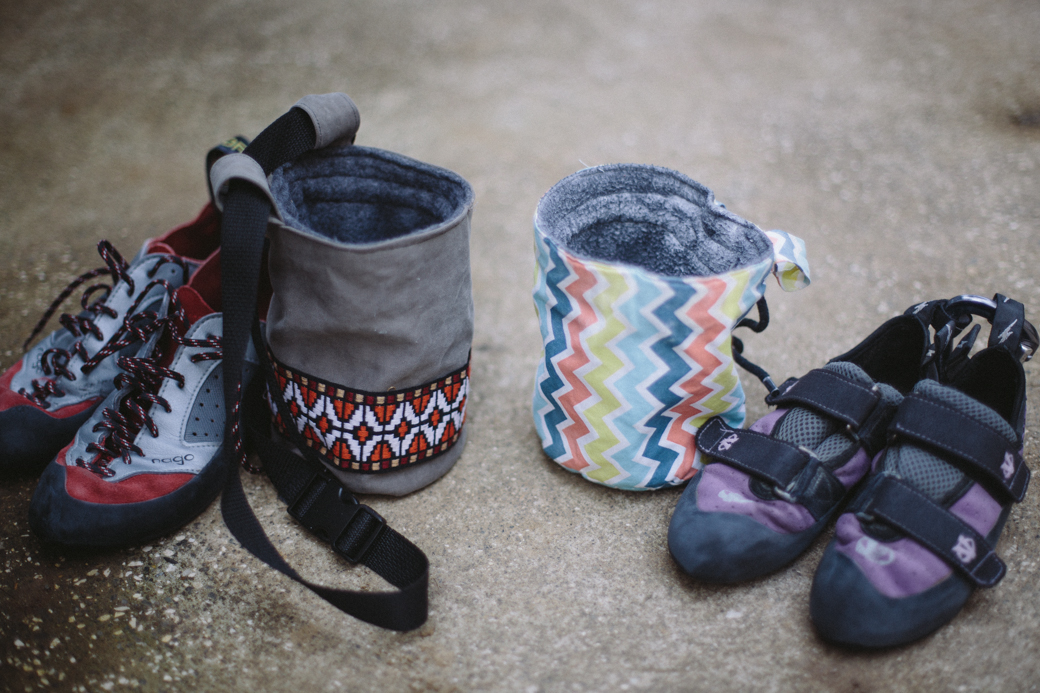
diy chalk bag
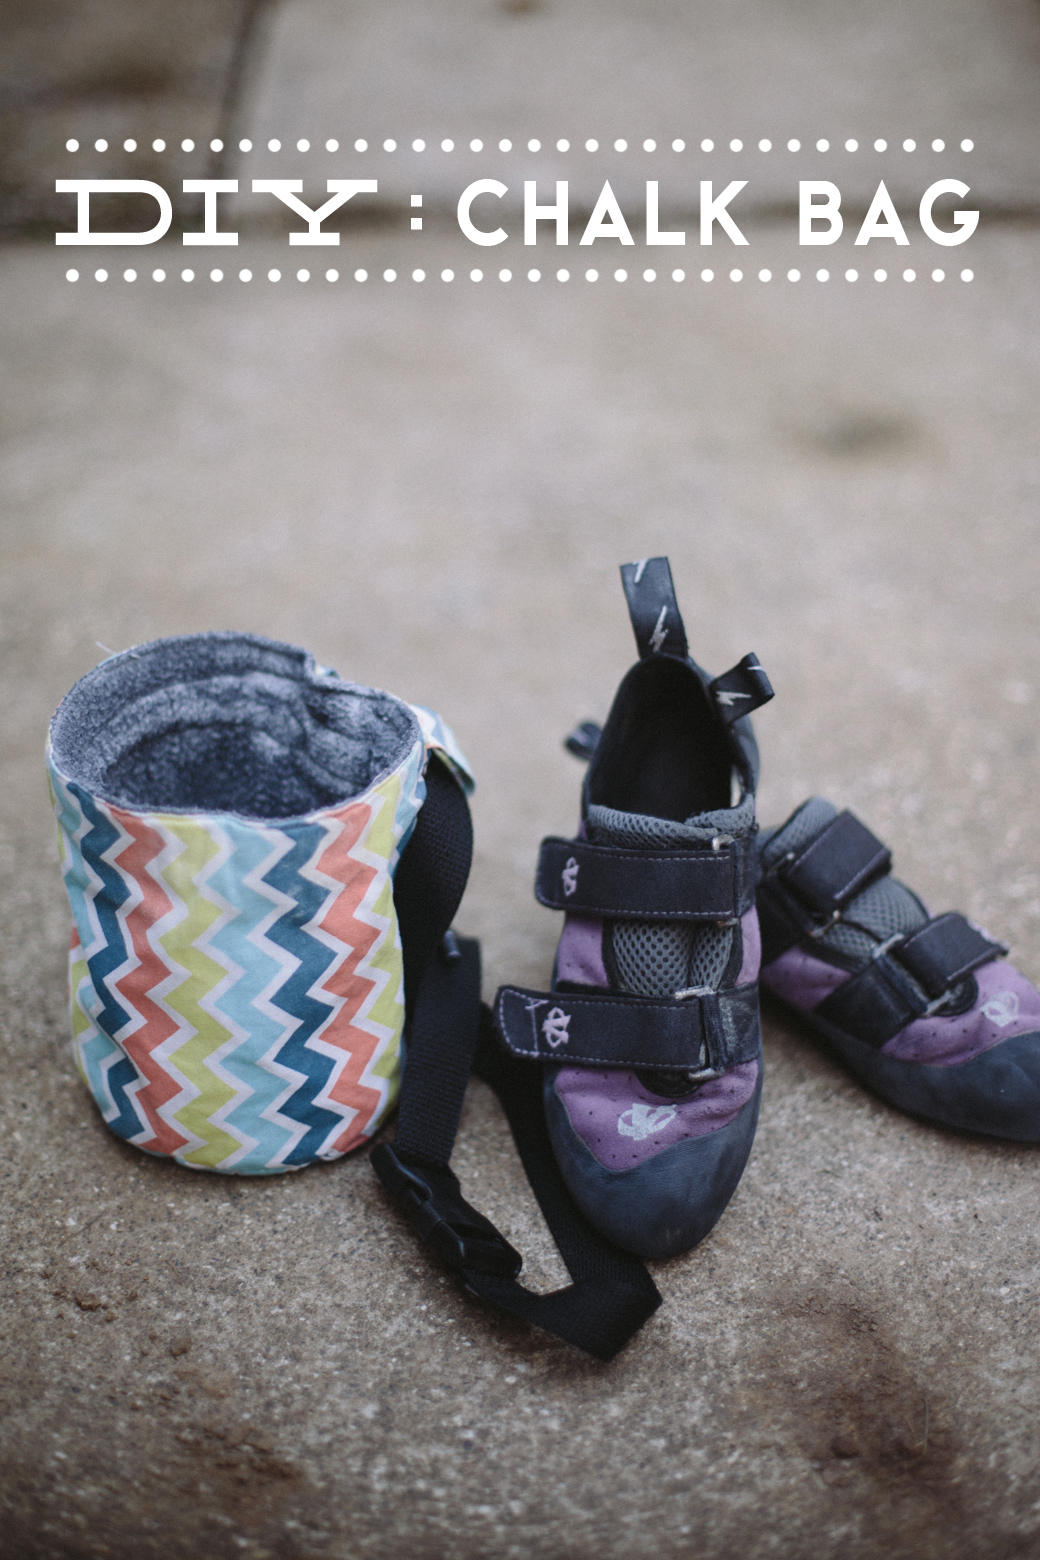
So, this DIY probably won't appeal to most of you, but I wanted to share this project for my climbing readers out there! Back when we first started climbing we were renting gear, but as we realized that we were wanting to start climbing consistently, renting all the time didn't make financial sense. We invested in our own climbing shoes, but chalk bags seemed like an easy DIY, especially since they range from $15- $35... and I'm cheap. I went to Joanne's Fabric, got everything I needed to make one for Dan and one for me and then I whipped one up. And then I didn't make the second one until last Thursday. Since the first one was made without thinking about doing a DIY post I didn't have any photos or anything, but this time I made sure to grab some images while I was working.
This DIY does require a sewing machine, but it's pretty simple sewing. You'll need:
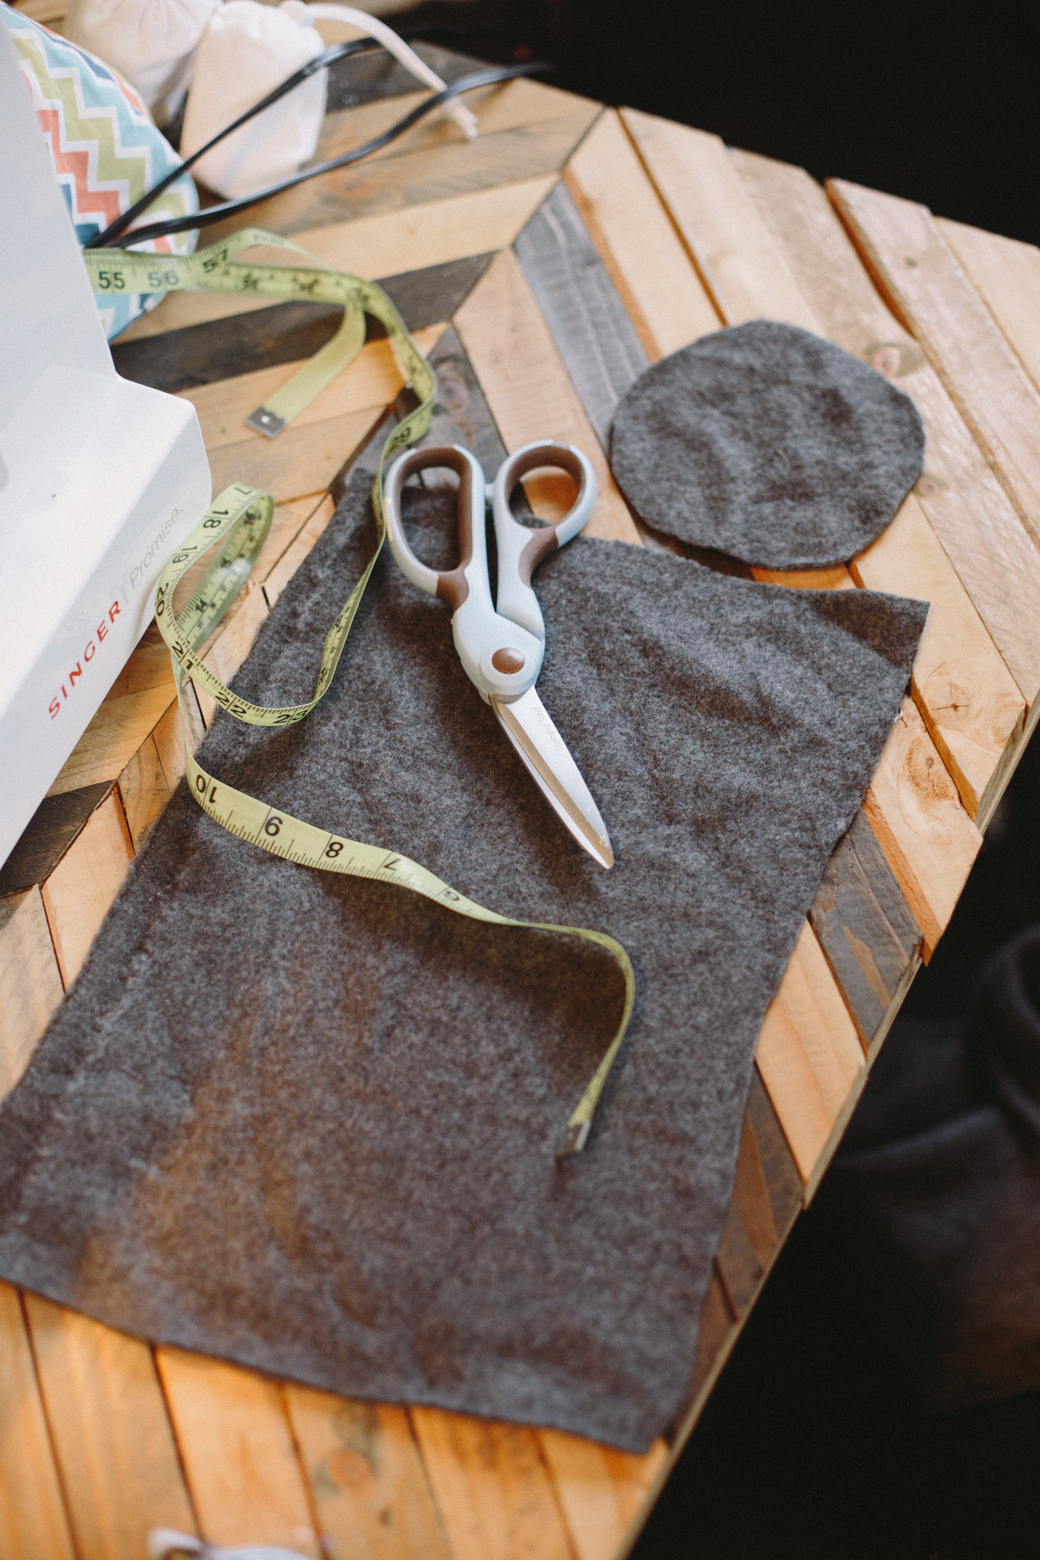
Fabric for the exterior (I used leftover canvas from some of Dan's old pants for his bag and the sturdier fabric stands up better than my regular fabric, but my bag has lasted 2 years just fine, so any fabric should do. You probably don't want fabric that is
too
thick, though, because it might get hard to sew.)
Fabric for the interior. I used polar fleece.
Thread
Cord, for the cinch (this is optional)
Large Eyelets, for the cinch (also, optional)
You can use a pre-made belt, or make your own with nylon tape and a snap

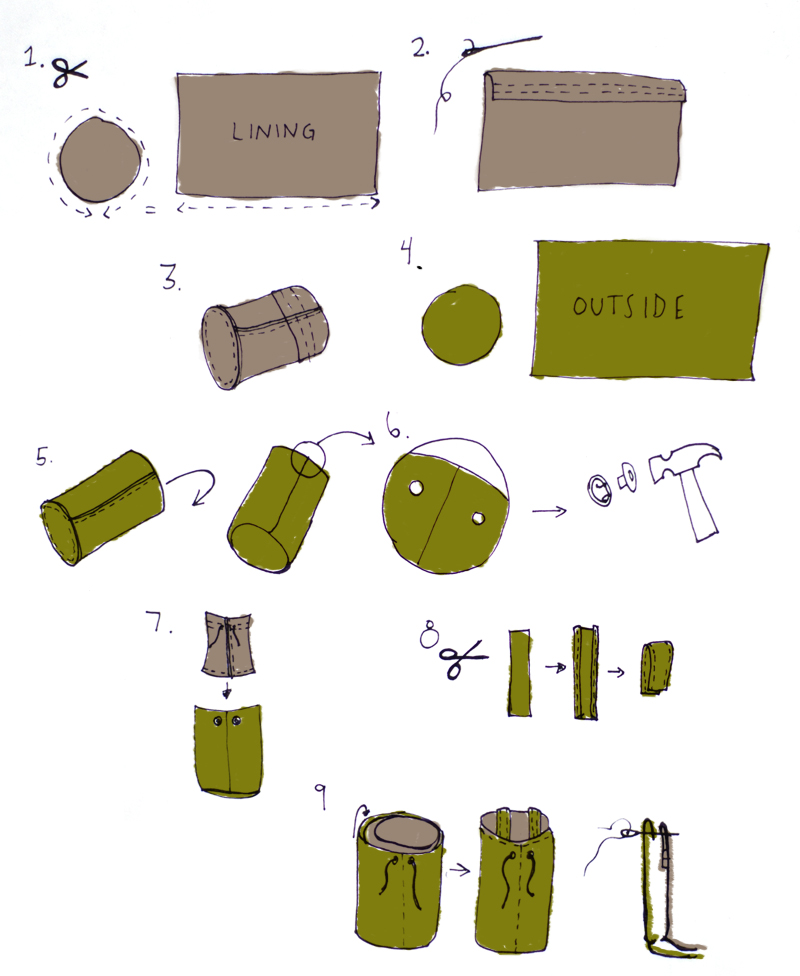
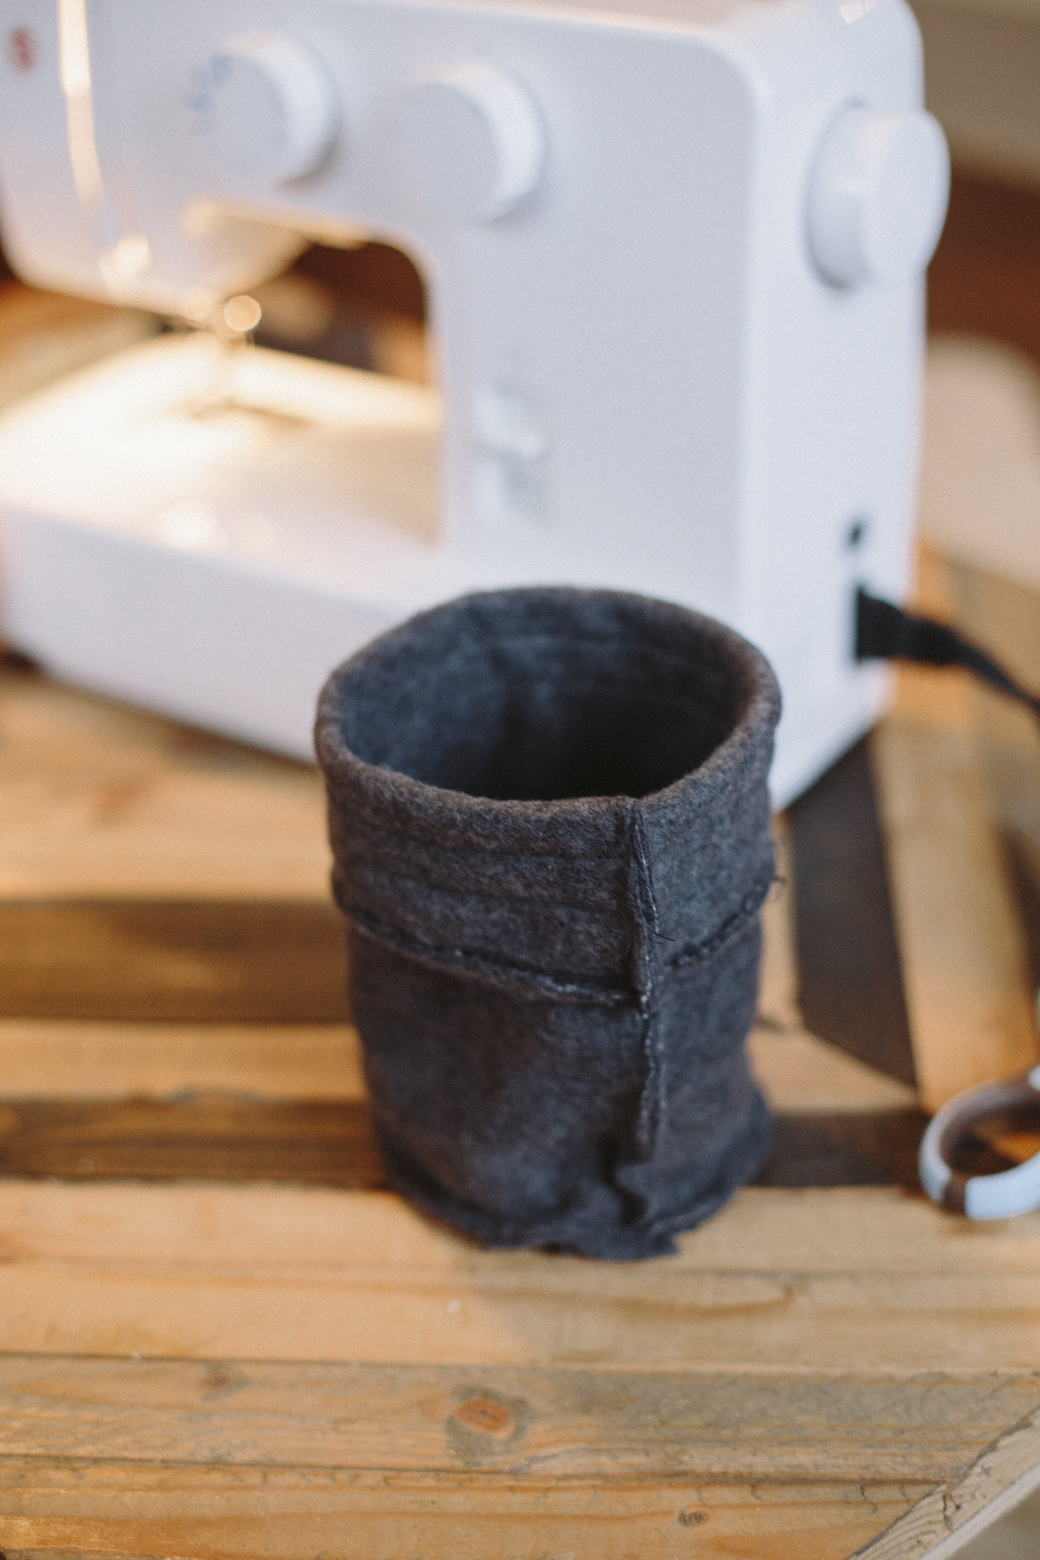
1. Cut a circle for the bottom of the bag lining. Mine was about 5 inches in diameter. Cut a rectangle for the sides of the lining. Make sure it is a bit longer than the circumference of the circle you cut, and about 10 inches tall.
2. Fold over about 1.5-2 inches and sew two stitches to create a tunnel for the cinch cord.
3. Sew the bottom on to the sides to create a cylinder, making sure that the inside of the cylinder is the finished side (this is the side you'll see).
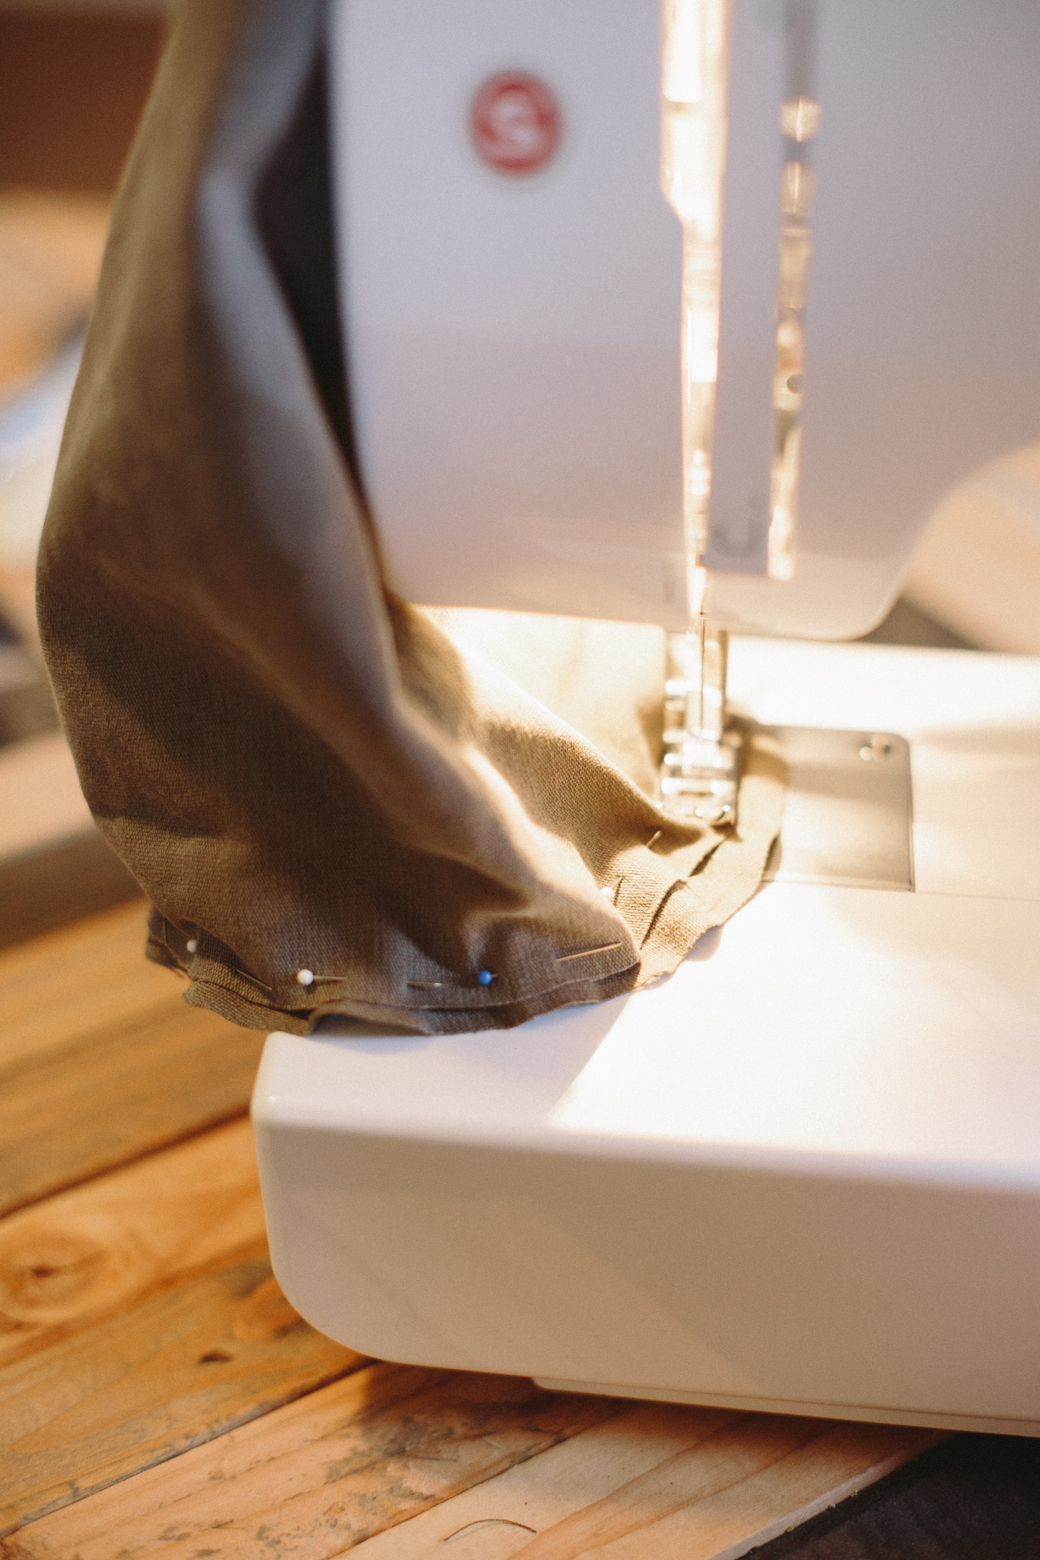
4. Repeat step 1, this time with the exterior fabric.
5. Sew the sides of your cylinder on to the bottom, like you did for the lining. Make sure that your finished side has the right side of your fabric showing. Turn the cylinder inside out.
6. If you're putting a cinch cord in, cut two small holes by the seam in both your lining (in the path you made for the cord) and your exterior, on either side of the seam. Place your eyelets in the holes in the exterior.
7. Put the cord in the lining, through the path you sewed, and then put the lining inside the exterior, making sure they're both fit together tightly in the bottom. Pull the cinch cords out of the eyelets in the exterior.
8. To make the loops for your belt to go through, cut two long rectangles and then fold the edges over and stitch the edges down to make them look finished and nice. The length depends on how wide your belt is, but make it a bit longer than you need, to allow for them to be sewed in.
9. Almost done! To finish everything up fold the top edge of the exterior fabric in between the lining and exterior and pin down. Make sure to place your belt loops on either side of the vertical seam. Sew the top seam and you're done!
You Might Also Like


Hi, I’m Liz
I'm an artist, writer, designer, DIY renovator, and … well basically I like to do all the things. If it’s creative I’m probably doing it. I’ve spent over 30 years voraciously pursuing a life steeped in creativity and I wholeheartedly believe creativity and joy are inextricably linked.
Read more…


Explore The Archive
- July 2025
- May 2025
- January 2025
- December 2024
- August 2024
- July 2024
- May 2024
- April 2024
- January 2024
- December 2023
- October 2023
- September 2023
- July 2023
- June 2023
- May 2023
- April 2023
- March 2023
- February 2023
- January 2023
- December 2022
- November 2022
- October 2022
- August 2022
- June 2022
- May 2022
- April 2022
- March 2022
- November 2021
- October 2021
- August 2021
- July 2021
- May 2021
- January 2021
- November 2020
- October 2020
- September 2020
- August 2020
- July 2020
- June 2020
- May 2020
- April 2020
- February 2020
- January 2020
- November 2019
- October 2019
- August 2019
- July 2019
- June 2019
- May 2019
- April 2019
- February 2019
- January 2019
- December 2018
- November 2018
- October 2018
- September 2018
- August 2018
- July 2018
- June 2018
- May 2018
- April 2018
- February 2018
- January 2018
- November 2017
- September 2017
- August 2017
- July 2017
- June 2017
- May 2017
- April 2017
- March 2017
- February 2017
- January 2017
- December 2016
- November 2016
- October 2016
- September 2016
- August 2016
- June 2016
- May 2016
- April 2016
- March 2016
- February 2016
- January 2016
- December 2015
- November 2015
- October 2015
- September 2015
- August 2015
- July 2015
- June 2015
- May 2015
- April 2015
- March 2015
- February 2015
- January 2015
- December 2014
- November 2014
- October 2014
- September 2014
- August 2014
- July 2014
- June 2014
- May 2014
- April 2014
- March 2014
- February 2014
- January 2014
- December 2013
- November 2013
- October 2013
- September 2013
- August 2013
- July 2013
- June 2013
- May 2013
- April 2013
- March 2013
- February 2013
- January 2013
- December 2012
- November 2012
- October 2012
- September 2012
- August 2012
- July 2012
- June 2012
- May 2012
- April 2012
- March 2012
- February 2012
- January 2012
- December 2011
- November 2011
- October 2011
- September 2011
- August 2011
- July 2011
- June 2011
- May 2011
- April 2011
- March 2011
- February 2011
- January 2011
- December 2010
- November 2010
- October 2010
- September 2010
- August 2010
- July 2010
- June 2010
- May 2010
- April 2010
- March 2010
- February 2010
- January 2010
- December 2009
- November 2009
- October 2009
- September 2009
- August 2009
- July 2009
- June 2009
- May 2009
- April 2009
- March 2009
- February 2009
- January 2009
- December 2008
- November 2008
- October 2008
- September 2008
- August 2008
- July 2008

VISIT THE SHOP


PRIVACY POLICY & DISCLOSURE
We are a participant in the Amazon Services LLC Associates Program, an affiliate advertising program designed to provide a means for us to earn fees by linking to Amazon.com and affiliated sites.